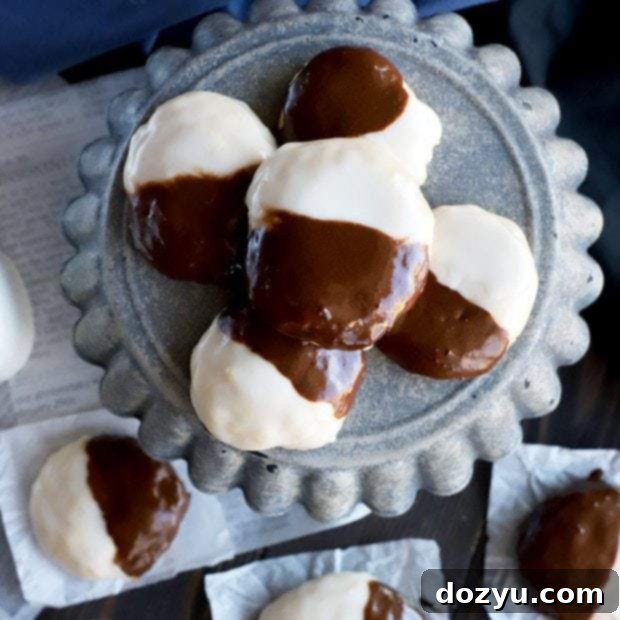
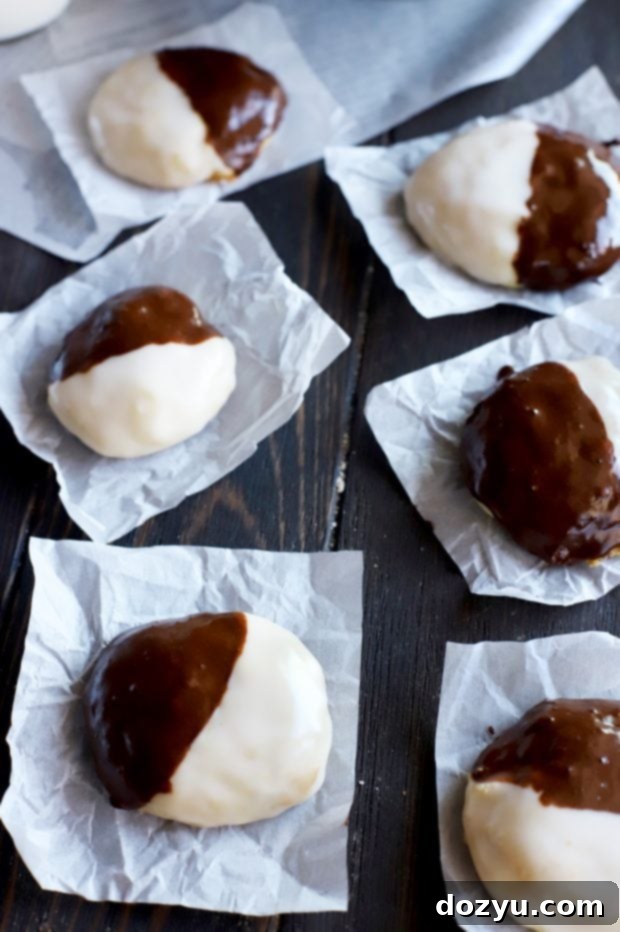
The Best Black and White Cookies: Easy Homemade Recipe for a New York Classic
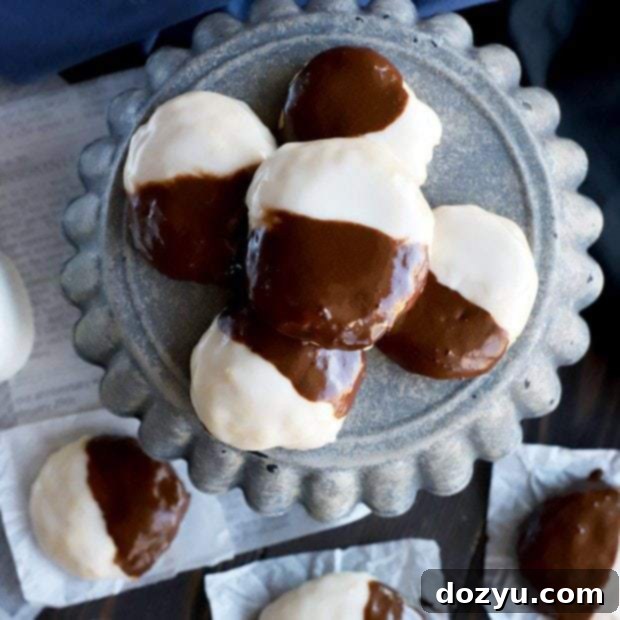
Discover the secret to incredibly soft, melt-in-your-mouth Black and White Cookies that capture the authentic taste of the iconic New York deli treat. You don’t have to be intimidated by these chic, flavorful delights any longer. This recipe is ridiculously easy, and you’ll be savoring these beautiful, dual-toned cookies in less than 30 minutes! Get ready to impress yourself and your loved ones with this beloved classic.
Please note that some of the links below are affiliate links. If you make a purchase through one of these links, I will receive a small commission, at no extra cost to you.
Embracing the Timeless Charm of Black and White Cookies
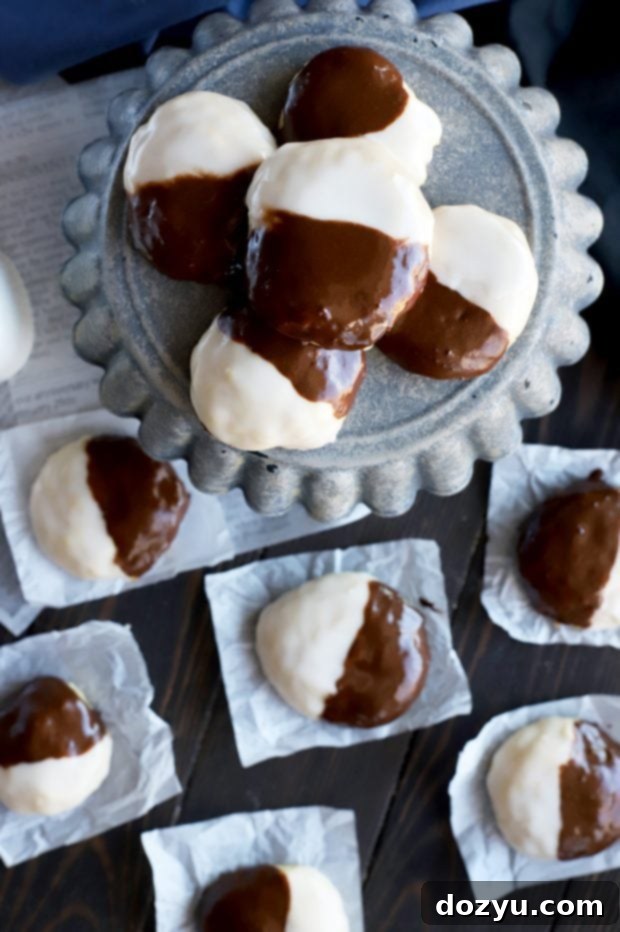
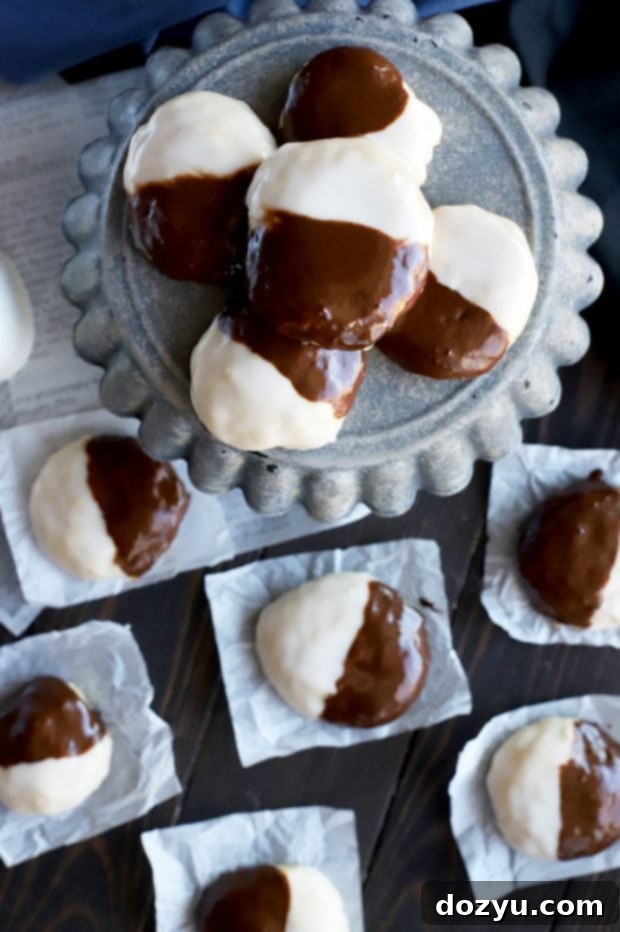
Ah, the black and white cookie! It holds a special place in the hearts of many, instantly recognizable with its signature half-vanilla, half-chocolate icing. It’s more than just a cookie; it’s a nostalgic symbol, particularly famous in New York City bakeries and delis. Often regarded as the sophisticated cousin to the everyday chocolate chip cookie, it exudes an effortless elegance, always appearing polished and perfect. This classic treat has a way of evoking cherished memories and bringing a smile with its unique blend of flavors and textures.

For many home bakers, the black and white cookie can seem a bit daunting to tackle from scratch. The perception is often that achieving that smooth, perfectly divided icing and that distinct cake-like cookie base requires a level of skill beyond the average kitchen enthusiast. However, this recipe is here to dismantle those misconceptions. We’ll guide you through each step, making the process so straightforward that you’ll wonder why you didn’t try it sooner. Prepare to master this iconic dessert and enjoy the incredible satisfaction of making truly exceptional black and white cookies at home.
The Quest for Unforgettable Black and White Cookies

In the world of cookies, there’s a vast spectrum of quality. With a husband who absolutely adores black and white cookies, I’ve had the pleasure (and sometimes, the disappointment) of sampling dozens from various bakeries and shops over the years. Some are truly transcendent – delicate, moist, and wonderfully flavorful. These are the ones that dissolve in your mouth, leaving a lingering taste of pure joy. Then there are those unfortunate encounters: cookies that are hard, dry, or utterly bland, leaving you with a sense of regret rather than delight.

It’s truly a letdown to bite into a cookie that’s simply not up to par, isn’t it? You crave that perfect bite of heaven, only to be met with something lackluster. That’s why my culinary philosophy has a simple, unwavering mantra: “NO EXCUSE FOR CRAPPY COOKIES!” This recipe embodies that spirit. It’s, by far, the best black and white cookie recipe I’ve discovered for homemade versions. These cookies are consistently soft, wonderfully supple, and unbelievably flavorful. They boast a lovely fluffy texture and are perfectly sized – not overwhelmingly giant, but substantial enough that you can indulge in one (or perhaps two!) with absolute pleasure.
The Secret to This Recipe’s Superiority

While many traditional black and white cookie recipes often call for lemon juice directly in the cookie dough, this particular recipe takes a delightful detour that truly sets it apart. Instead of lemon in the dough, we infuse the cookie base with a harmonious blend of **vanilla and almond extracts**. This combination provides a beautiful depth of flavor that is both warm and subtly complex, creating a truly irresistible foundation. The almond extract adds a nuanced, sophisticated note that elevates the classic vanilla, making each bite incredibly aromatic and memorable.
The magic continues with the icing – the iconic dual-colored topping. Both the vanilla and rich chocolate icings are carefully crafted with a delicate **hint of fresh lemon juice**. This touch of citrus is absolutely key; it brightens the entire flavor profile, preventing the cookies from being overly sweet and adding that quintessential tangy finish that distinguishes a truly great black and white cookie. The interplay between the extracts in the soft cookie and the bright lemon in the smooth, glossy icings creates a perfectly balanced taste experience that will transport you straight to your favorite bakery.

A Brief History of the Iconic Black and White Cookie
The black and white cookie is more than just a dessert; it’s a beloved culinary institution, particularly synonymous with New York City. Often referred to as “half-moon cookies” in parts of upstate New York, its origins are somewhat debated but generally trace back to German bakeries in the late 19th or early 20th century. Unlike a typical crunchy cookie, the base of a black and white is a soft, cake-like drop cookie, almost like a miniature cake or a soft scone, which makes it distinctively different. The classic half-and-half icing – typically vanilla and chocolate – represents a perfect culinary yin and yang, offering two delightful flavor experiences in a single, elegantly designed treat. It has become a staple in Jewish delis, Italian-American bakeries, and coffee shops, cementing its status as a cultural touchstone deeply woven into the fabric of American comfort food.
Expand Your Baking Repertoire: More Cookie Favorites
If you find as much joy in baking as I do, then you know one amazing cookie recipe is just the beginning! The culinary world is full of delightful treats waiting to be explored. Once you’ve mastered these fabulous Black and White Cookies and savored their classic perfection, why not venture into some other equally rewarding baking projects? Here are a few more of my absolute favorite cookie recipes that are sure to become cherished additions to your baking rotation:
- Olive Oil Salted Caramel Brownie Cookies: A luxurious twist on two favorites, combining rich brownie goodness with sophisticated caramel.
- Vanilla Bean Cardamom Sugar Cookies: An aromatic and elegant take on the classic sugar cookie, perfect for special occasions.
- Soft Batch Mini M&M Cookies: A fun, colorful, and irresistibly chewy cookie that kids and adults alike will adore.
- Grandma’s Lavender Cookies: A unique and fragrant cookie that’s both comforting and surprisingly delightful.
And seriously, you absolutely cannot forget the best soft and chewy gingerbread cookies! Their warm, spicy notes and wonderfully tender texture make them a year-round favorite for me. I could honestly eat these all twelve months of the year. YUM!
Table of Contents
Toggle
Essential Tools for Baking Perfection
Having the right kitchen equipment can truly elevate your baking experience and help you achieve flawless results, especially when making classic treats like these Black and White Cookies. These are some of my most trusted tools that ensure consistent success in my kitchen:
- **A Robust Stand Mixer:** My KitchenAid 7-Quart Pro Line Stand Mixer is an absolute powerhouse and an indispensable part of my baking arsenal. When I first considered upgrading from my standard mixer, I questioned if the difference would be substantial, but I was proven wrong almost immediately. This professional-grade mixer effortlessly handles everything from delicate batters to dense doughs. Its large capacity means I can easily prepare regular recipes, and double or even triple batches for larger gatherings or when I simply want more cookies! If you’re contemplating getting your first stand mixer or looking for a significant upgrade, this model comes with my highest recommendation for its exceptional performance and durability.
- **High-Quality Bakeware:** For me, USA PAN bakeware is unparalleled. Their products are renowned for their heavy-duty construction and excellent non-stick properties, which ensure even heat distribution and consistently baked goods. The USA Pan Bakeware Half Sheet Pan and the USA Pan Bakeware Cookie Sheet are staples that I use almost daily. They’re perfect not just for baking cookies to golden perfection, but also for roasting vegetables, preparing sheet pan meals, and a myriad of other kitchen tasks. Their reliability makes them a worthy investment for any passionate baker.
Pin this Ultimate Black and White Cookie Recipe for Later!
Don’t let this fantastic recipe for the best homemade Black and White Cookies get lost! Make sure to save it to your favorite Pinterest board. Pin the image below to your dessert, baking, or “must-try recipes” collection so you can easily access it whenever you’re ready to whip up a batch of these iconic treats. It’s the perfect way to keep this crowd-pleasing classic at your fingertips!

The Best Black And White Cookies Recipe
Equipment
-
USA Pan Bakeware Cookie Sheet
-
USA Pan Bakeware Half Sheet Pan
-
KitchenAid 7-Quart Pro Line Stand Mixer
Ingredients
- 1 1/4 cups all-purpose flour
- 1/2 tsp baking soda
- 1/4 tsp salt
- 1/3 cup buttermilk
- 1/2 tsp vanilla extract
- 1/2 tsp almond extract
- 6 Tbsp unsalted butter, softened
- 1/2 cup granulated sugar
- 1 large egg
- 1 1/2 cups confectioner’s sugar
- 1 Tbsp light corn syrup
- 1 tsp fresh lemon juice
- 1 tsp vanilla extract
- 2 Tbsp water, plus more as needed
- 2 tsp espresso powder
- 6 Tbsp unsweetened cocoa powder
Instructions
-
**Step 1: Preheat Oven & Prepare Baking Sheets.** Preheat your oven to 350°F (175°C). Line two rimmed baking sheets with parchment paper to prevent sticking and ensure even baking.
-
**Step 2: Combine Dry Ingredients.** In a medium bowl, thoroughly whisk together the all-purpose flour, baking soda, and salt. Set this dry mixture aside for later use.
-
**Step 3: Cream Butter and Sugar.** In the bowl of a stand mixer (or using a hand mixer) fitted with the paddle attachment, beat the softened unsalted butter and granulated sugar on medium-high speed until the mixture is light, fluffy, and creamy, typically about 2-3 minutes. Scrape down the sides of the bowl as needed. Beat in the vanilla extract, almond extract, and large egg until all ingredients are well combined and smooth.
-
**Step 4: Incorporate Wet and Dry Ingredients.** Gradually add the flour mixture and buttermilk to the butter mixture, alternating between the two and dividing each into three additions. Begin and end with the flour mixture. Mix on low speed until just combined after each addition, being careful not to overmix the dough. Overmixing can lead to a tougher cookie texture.
-
**Step 5: Bake the Cookies.** Drop tablespoonfuls of the cookie dough onto the prepared baking sheets, spacing them about 1 inch apart. They will spread slightly during baking. Bake for 6 to 8 minutes, or until the edges are lightly golden, the cookies are puffy, and the centers feel springy when gently touched. Do not overbake to ensure the cookies remain wonderfully soft and cake-like. Let the cookies cool on the baking sheets for a few minutes before carefully transferring them to wire racks to cool completely.
-
**Step 6: Prepare the Icings.** While the cookies are cooling, prepare both icings. In a large bowl, whisk together the confectioner’s sugar, light corn syrup, fresh lemon juice, vanilla extract, and 2 tablespoons of water until a smooth, thin (but not runny) white icing forms. Take out half of this white icing mixture and place it into a separate bowl. To the remaining half (the second bowl), add the espresso powder and unsweetened cocoa powder. Whisk thoroughly until a smooth chocolate icing forms. The chocolate frosting might thicken slightly; if so, add additional water, 1 teaspoon at a time, until it reaches a similar thin, spreadable consistency as the vanilla icing.
-
**Step 7: Ice the Cookies.** Once the cookies are completely cool, gently spread the vanilla icing over one half of each cookie. Immediately after, spread the chocolate icing over the other half, carefully meeting the vanilla icing in the middle to create the signature half-and-half look. For best results and to prevent smudging, allow the icings to set at room temperature for at least 30 minutes, or until they are firm to the touch, before serving.
-
**Step 8: Storage.** Store the finished Black and White Cookies in an airtight container at room temperature for about 2 to 3 days to maintain their optimal freshness and soft texture.
Tips for Baking the Best Homemade Black and White Cookies
Creating those perfect bakery-style black and white cookies at home is absolutely achievable with a few essential tips. These insights will help ensure your cookies turn out beautifully soft, flavorful, and perfectly iced every time:
- **Use Room Temperature Ingredients:** This is a golden rule for many baking recipes, and it’s crucial here. Ensure your butter, egg, and buttermilk are at room temperature. This allows them to emulsify properly, creating a smooth batter that incorporates air effectively, leading to a lighter, more tender, and fluffier cookie texture.
- **Avoid Overmixing the Dough:** Once you begin adding the flour mixture to the wet ingredients, mix only until the dry ingredients are just combined. Overmixing develops the gluten in the flour, which can result in a dense, tough, and less desirable cookie texture. A gentle hand and minimal mixing are key to a tender, cake-like crumb.
- **Precise Baking Time is Essential:** Black and white cookies are designed to be soft and fluffy, not crisp. Watch them closely in the oven. They should look puffy and lightly set around the edges, but the centers should still appear pale and feel slightly springy to the touch. Baking for 6 to 8 minutes is typically sufficient; trust your eyes and don’t be tempted to overbake them, as this will dry them out.
- **Cool Cookies Completely Before Icing:** This step is non-negotiable. Attempting to apply icing to warm or even slightly warm cookies will result in melted, runny, and messy icing that won’t set properly. Always allow your cookies to cool fully on a wire rack before you even think about preparing the icings.
- **Achieve the Right Icing Consistency:** The consistency of your icings is paramount for a professional finish. Both the vanilla and chocolate icings should be thin enough to spread smoothly and effortlessly, but thick enough to stay put on the cookie without dripping off. If your vanilla icing is too thick, add water in very small increments (1/2 teaspoon at a time) until it’s perfect. For the chocolate icing, adjust with water as needed to match the consistency of the vanilla icing.
- **Mastering the Half-and-Half Look:** For those signature clean lines, an offset spatula or the back of a spoon works wonders for spreading the icing. A popular technique is to ice all the vanilla halves first, allow that side to set slightly, and then proceed with the chocolate icing. Alternatively, some bakers prefer to ice one half, let it fully set, and then ice the other. Remember, a slight overlap or a charmingly rustic edge is part of the homemade appeal!
How to Store Black and White Cookies for Maximum Freshness
To ensure your homemade Black and White Cookies remain as fresh and delicious as possible, proper storage is crucial. They are truly at their best within the first day or two, but can certainly be enjoyed for a bit longer with these tips:
- **Room Temperature Storage:** The ideal way to store Black and White Cookies is in an airtight container at room temperature. They will maintain their soft texture and delicious flavor for up to 3 days. To prevent the icings from sticking together, especially if they are still slightly soft, you can stack the cookies carefully with a piece of parchment paper between layers.
- **Refrigeration (Generally Not Recommended):** While you technically *can* refrigerate these cookies, it’s generally not advised. The cooler temperatures can often cause the cookies to dry out and the glossy icing to become somewhat sticky or tacky, diminishing their delightful texture.
- **Freezing for Longer Storage:** For longer-term storage, you have a couple of options.
- **Un-iced Cookies:** You can freeze the plain cookie bases for up to 1 month. Once baked and completely cooled, arrange them in a single layer on a baking sheet and freeze until solid. Then, transfer them to an airtight freezer-safe bag or container. When ready to enjoy, thaw them at room temperature and then proceed with preparing and applying the icing.
- **Iced Cookies:** If you need to freeze iced cookies, wrap each one individually in plastic wrap to protect the icing, then place them in an airtight freezer bag or container. Thaw them unwrapped at room temperature before serving. This method helps prevent condensation from forming on the icing and affecting its texture.
Frequently Asked Questions About Black and White Cookies
Got questions about baking these classic black and white beauties? Here are answers to some commonly asked questions to help you master this recipe:
Q: Can I substitute regular milk for buttermilk in the cookie dough?
A: Buttermilk is a key ingredient that contributes significantly to the cookies’ signature soft, slightly tangy, and cake-like texture. If you don’t have buttermilk on hand, you can easily create a substitute: simply add 1 teaspoon of fresh lemon juice or white vinegar to a liquid measuring cup, then fill it with regular milk (dairy or even a non-dairy alternative like almond or soy milk works) until it reaches 1/3 cup. Let this mixture sit for 5-10 minutes until it appears slightly curdled before incorporating it into your dough. This quick hack mimics the acidity of buttermilk and will yield good results.
Q: Why are my cookies spreading too much during baking?
A: Excessive spreading can be due to several factors. Your butter might have been too warm (melted butter causes more spread), your oven temperature could be inaccurate (an oven thermometer is a great investment!), or you might have used slightly too much leavening agent like baking soda. Ensure your butter is softened but still cool to the touch, and your ingredients are measured precisely. Chilling the prepared cookie dough for 15-30 minutes before baking can also help solidify the butter and reduce spreading.
Q: Is it possible to make these black and white cookies gluten-free?
A: While this recipe is developed using all-purpose flour, many bakers have successfully adapted it to be gluten-free. Your best bet is to use a high-quality 1:1 gluten-free baking flour blend that specifically contains xanthan gum. Keep in mind that the texture might vary slightly from the original, but you can still achieve wonderfully soft and delicious gluten-free black and white cookies.
Q: How can I achieve a perfectly neat black and white line for the icing?
A: The trick to a clean division lies in having both icings at the right consistency – spreadable but not runny. Using an offset spatula or the back of a small spoon allows for smooth, controlled application. For truly sharp lines, some advanced bakers use a small, thin piece of food-grade painter’s tape or a straight edge as a guide while icing one half. Let that side set, then remove the guide and ice the other. However, a slight overlap or a charmingly rustic, handmade line is often part of their appeal!
Q: What if I’m not a fan of lemon? Can I omit it from the icing?
A: The subtle hint of lemon in the icing is a traditional element that beautifully balances the sweetness and adds brightness to these cookies. However, if lemon is not to your taste, you can absolutely omit the lemon juice from the icing. Simply replace it with an equal amount of water or milk to maintain the correct consistency. The vanilla and almond extracts in the cookie dough will still provide plenty of delightful flavor, ensuring a delicious cookie even without the citrus note.
Final Thoughts on Baking Your Own Homemade Black and White Cookies
Embarking on the journey to bake these Black and White Cookies at home is a truly rewarding experience, connecting you to a cherished culinary tradition. From the initial mixing of the dough to the satisfying moment you apply the dual-toned icing, every step is designed to be enjoyable and achievable. You’ll create a soft, tender, cake-like base, perfectly infused with the comforting notes of vanilla and almond, all complemented by the bright, balanced sweetness of the lemon-kissed icings.
This recipe is more than just instructions; it’s an invitation to bring a piece of classic New York bakery charm directly into your kitchen and share it with those you love. The joy of presenting a tray of these iconic, picture-perfect cookies, knowing you made them from scratch, is unparalleled. So, gather your ingredients, preheat your oven, and prepare for the immense satisfaction of biting into a homemade Black and White Cookie that truly is the best you’ve ever tasted. Happy baking, and enjoy every delicious moment!
