Flaky & Buttery Pumpkin Sage Biscuits: The Ultimate Homemade Recipe for Fall & Thanksgiving
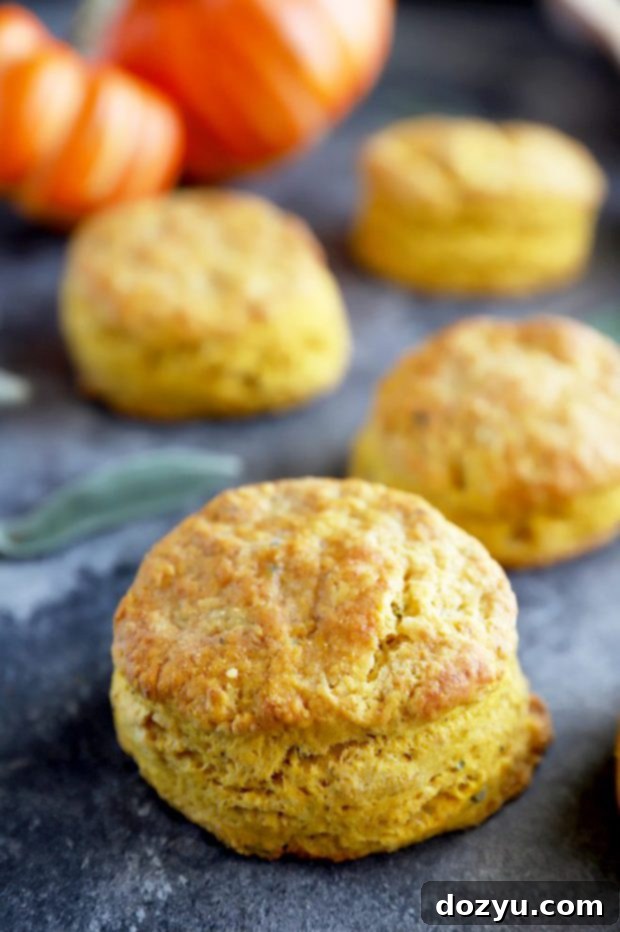
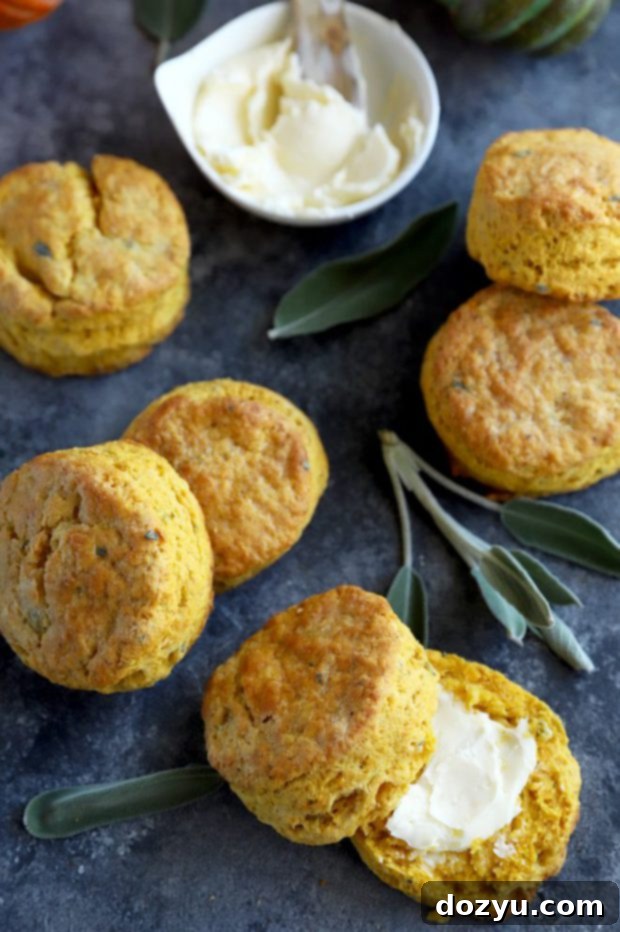
Pumpkin Sage Biscuits are a flaky, buttery treat that are sure to become a new family favorite. These easy homemade buttermilk biscuits are made from scratch, and they go with everything!
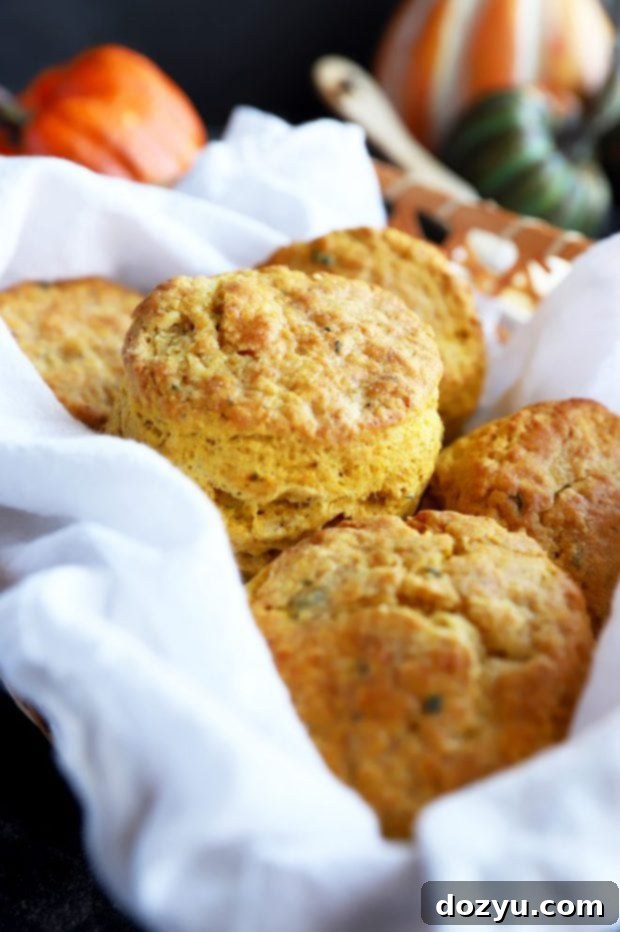
The changing leaves, the crisp autumn air, and the anticipation of cozy gatherings – these are the hallmarks of fall. And what better way to embrace the season than with a batch of warm, homemade biscuits? But not just any biscuits! These Pumpkin Sage Biscuits are a revelation, combining the subtle sweetness of pumpkin with the earthy, aromatic punch of fresh sage. Every bite delivers a buttery, flaky texture that’s utterly irresistible, making them a perfect addition to any meal, especially during the holidays.
Seriously, how can you resist a perfectly baked biscuit with your dinner? For many, including myself, no Thanksgiving, Christmas, or holiday spread is truly complete without some form of freshly baked bread. These homemade buttermilk biscuits aren’t just an option; they’re an essential. Imagine sweeping your plate clean of every last drop of rich gravy, a dollop of tangy cranberry sauce, or any other delicious remnants with a tender, buttery biscuit. It’s the most satisfying way to conclude a festive meal, leaving you feeling perfectly content.

These are precisely the kind of biscuits designed for such moments. They are generously infused with butter, enriched with creamy pumpkin puree, and brightened by finely chopped fresh sage. Plus, they are surprisingly easy to whip up, making them an ideal last-minute addition to your holiday baking plans. The dough comes together in just a few minutes and is remarkably simple to work with. The true magic happens the instant they emerge from the oven, golden brown and beautifully risen. A quick brush with melted butter transforms them into pure perfection, making them ready to serve and savor immediately. I’m already eagerly anticipating baking another batch this week!
Here’s a fantastic bonus tip: if you happen to have any of these flavorful homemade pumpkin sage biscuits leftover, they make an absolutely incredible bread for crafting gourmet sandwiches with your Thanksgiving leftovers the very next day! Elevate your turkey and cranberry sandwich game like never before.
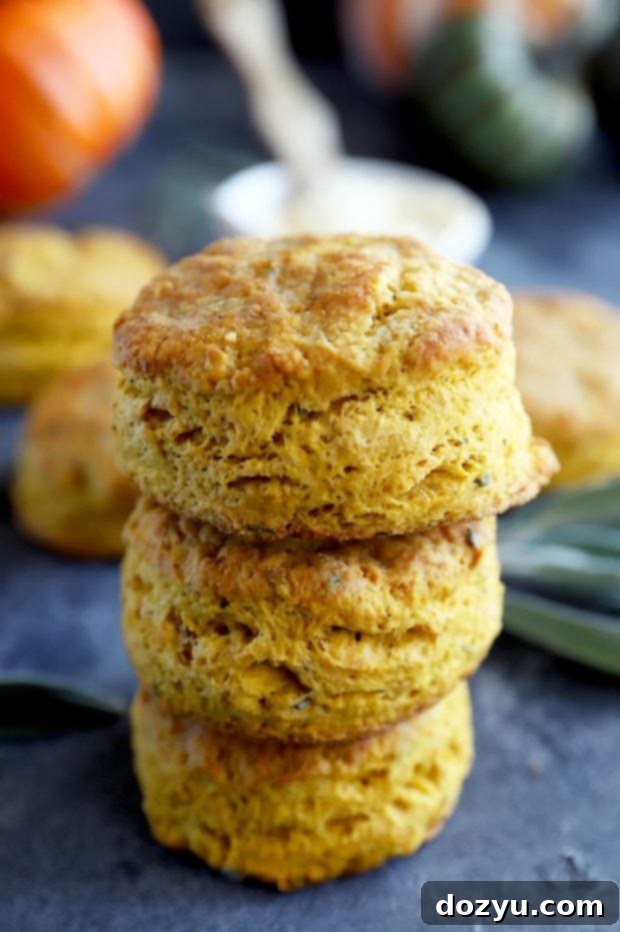
The Perfect Fall Biscuit: A Blend of Comfort and Flavor
When the autumn season officially kicks off, ushering in cooler temperatures and a palette of warm, earthy colors, our culinary cravings often shift towards hearty and comforting dishes. Pumpkin, a true icon of fall, is a incredibly versatile ingredient. While it often stars in sweet pies and lattes, its subtle earthiness and creamy texture make it an exceptional partner for savory applications. Coupled with fresh sage, known for its slightly peppery, pine-like aroma, these ingredients create a sophisticated and deeply satisfying flavor profile that elevates these homemade biscuits far beyond any ordinary bread roll. These Pumpkin Sage Biscuits aren’t just a simple dish; they are a culinary celebration of the season, a warm embrace that perfectly captures the essence of fall gatherings and holiday feasts.
Why You’ll Love These Pumpkin Sage Biscuits
There are countless reasons why these incredible pumpkin sage biscuits are destined to become a cherished and frequently requested recipe in your kitchen:
- Unbeatable Flavor Combination: The natural sweetness and rich earthiness of pumpkin puree create a fantastic base, which is then brilliantly complemented by the fragrant and slightly peppery notes of fresh sage. A subtle hint of brown sugar adds balance, while a touch of garlic powder and black pepper introduces a savory depth, making each bite complex, comforting, and utterly delicious.
- Flaky & Buttery Texture: The hallmark of a truly great biscuit is its texture, and these deliver in spades. The secret lies in using very cold butter and employing a gentle mixing technique, which results in beautifully tender, airy layers that practically dissolve in your mouth. The final touch of brushing them with melted butter straight from the oven enhances their richness, taking them to an even higher level of buttery perfection.
- Incredibly Versatile Pairing: While these biscuits are an absolute showstopper for Thanksgiving and other festive holiday meals, their balanced savory-sweet profile makes them incredibly adaptable. Serve them alongside a hearty bowl of butternut squash soup, a comforting beef stew, roasted chicken, or even for a special breakfast with eggs and bacon. They truly complement a wide array of dishes.
- Surprisingly Easy to Make: Don’t let the “from scratch” label intimidate you. This recipe for homemade buttermilk biscuits is designed to be straightforward and quick, making it accessible for bakers of all skill levels. The dough effortlessly comes together in a single bowl with minimal fuss, making it perfect for both seasoned pros and those new to the joys of home baking.
- An Elevated Holiday Essential: Move beyond standard dinner rolls and impress your guests with these unique and flavorful homemade biscuits. They provide a wonderful, gourmet alternative or a delightful addition to your traditional holiday bread basket, adding a touch of sophisticated fall flair to your festive spread.
Essential Equipment for Homemade Biscuits
Equipping your kitchen with the right tools can significantly enhance your baking experience and ensure fantastic results. For crafting these delicious pumpkin sage biscuits, you’ll find these kitchen staples invaluable:
- Large Mixing Bowl: A spacious bowl is crucial for comfortably combining all your dry and wet ingredients without spills or messes. The extra room is particularly helpful when you’re cutting in cold butter.
- Pastry Board or Clean Countertop: A smooth, clean, and ideally cool surface is essential for rolling out your biscuit dough. Many experienced bakers prefer a marble pastry board because its naturally cool temperature helps keep the butter in the dough from warming up too quickly, which is a key factor in achieving those desirable flaky layers.
- Rolling Pin: Whether you choose a classic wooden rolling pin or a more modern marble rolling pin, this tool is necessary for rolling your dough evenly to the specified thickness, ensuring consistent baking and rise.
- Biscuit Cutters: For perfectly uniform, round biscuits that look professionally made, a set of biscuit cutters is ideal. If you don’t own a set, don’t worry! You can improvise by using a sharp knife to cut square biscuits, or even the rim of a water glass (just remember to dip the rim in flour between cuts to prevent sticking).
- Half Sheet Baking Pan: A sturdy and reliable half sheet baking pan provides ample space for a full batch of biscuits, allowing them to bake evenly and achieve a perfect golden crust.
- Silicone Baking Mat or Parchment Paper: To prevent your precious biscuits from sticking to the pan and to ensure easy cleanup, always line your baking sheet with a silicone baking mat or a sheet of parchment paper.

How To Make Flaky Pumpkin Sage Biscuits
Crafting these delectable Pumpkin Sage Biscuits is a surprisingly straightforward process that consistently yields impressive, bakery-quality results. Follow these detailed steps for guaranteed flaky, tender, and flavorful biscuits every single time.
Mastering the Dough for Flaky Perfection
The foundation of any truly great biscuit lies in its dough, and this particular recipe makes it beautifully simple to achieve perfection in just one bowl. The ultimate secret to those coveted flaky layers is the strategic use of very cold butter and a gentle, minimal handling approach to the dough.
- Combine Dry Ingredients Thoroughly: In your large mixing bowl, meticulously whisk together the all-purpose flour, packed light brown sugar, baking powder, salt, black pepper, garlic powder, baking soda, and the finely chopped fresh sage leaves. This initial step is crucial for ensuring that all the dry ingredients are uniformly distributed, preventing pockets of unmixed leavening agents or spices.
- Cut in the Cold Butter: Add the pre-cubed 1/2 cup of very cold butter directly to the dry mixture. You have a few options for cutting it in: a dedicated pastry cutter, two knives used in a cross-hatch motion, or working quickly with your fingertips. The objective here is to break down the butter into small pieces that resemble coarse crumbs, with some pea-sized pieces of butter still distinctly visible. These tiny pockets of cold butter are the magic behind flaky biscuits; as they melt in the hot oven, they release steam, pushing apart the layers of dough to create that signature flakiness.
- Incorporate Wet Ingredients Gently: Pour in the canned pumpkin puree and the cold buttermilk. Stir these wet ingredients into the dry mixture until they are just barely moistened and combined. It’s incredibly important not to overmix the dough at this stage! Overmixing is the enemy of tender biscuits, as it develops the gluten in the flour, leading to a tough and chewy texture rather than a light and tender one. The dough should still appear a bit shaggy and unrefined, but it should hold together when gently pressed.
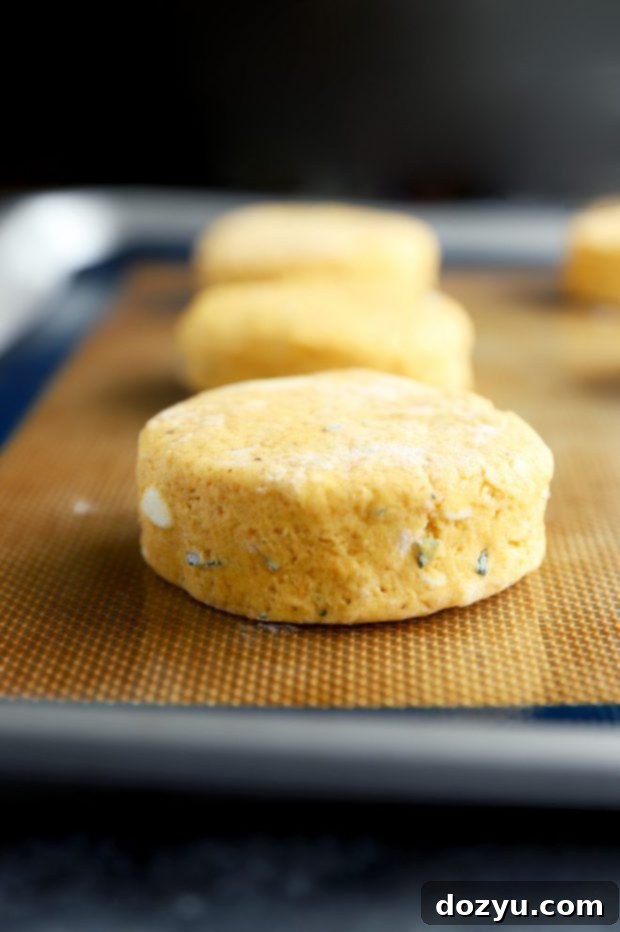
Perfectly Cutting Your Biscuits for Optimal Rise
Once your beautifully prepared dough is ready, the next critical step is shaping your biscuits. Employing the correct cutting technique here is absolutely vital for achieving an excellent rise and ensuring those much-desired, distinct flaky layers.
- Prepare Your Work Surface: Begin by lightly dusting a clean, flat surface – whether it’s your dedicated pastry board or a clean section of your countertop – with a small amount of flour. This prevents the dough from sticking.
- Knead Lightly and Briefly: Turn the shaggy biscuit dough out onto your floured surface. Knead the dough very gently, just 8 to 10 times. This brief and tender kneading helps to bring the dough fully together and contributes to creating more layers within the biscuit structure. However, it’s crucial to reiterate: avoid aggressive or prolonged kneading, as this will develop too much gluten and result in tough biscuits.
- Roll to the Ideal Thickness: Using your rolling pin, carefully roll out the dough until it achieves an approximate thickness of 1 inch. This specific thickness is absolutely critical for ensuring that your biscuits have ample height and a wonderfully substantial, fluffy interior after baking. Rolling the dough any thinner will inevitably lead to flatter, denser biscuits that lack the desired airy quality.
- Precision Cutting for Shape: With your biscuit cutters in hand, press them straight down into the rolled dough. The golden rule here is to absolutely avoid twisting the cutter. Twisting seals the edges of the biscuit dough, which will effectively prevent it from rising properly and hinder the development of those beautiful, flaky layers. For efficiency, arrange your cuts as closely as possible to minimize the amount of dough scraps.
- Handle Scraps Thoughtfully: Gather any leftover dough scraps. Gently press them together to reform a cohesive mass (again, without vigorous kneading). You can then re-roll this combined dough once more to cut out additional biscuits. Be aware that these re-rolled biscuits might not achieve quite the same level of flakiness or rise as the initial batch, as the butter has been worked more.
- Arrange on Baking Sheet: Carefully transfer your perfectly cut biscuits to your prepared baking sheet (which should be lined with parchment paper or a silicone mat). Arrange them so that they are about 1 inch apart. This spacing allows for proper air circulation, ensuring even baking and browning.
Baking to Golden Perfection & The Final Buttery Touch
Now comes the most exciting part – watching your carefully prepared biscuits transform into golden, fluffy, aromatic delights in the heat of your oven! This final stage brings all your efforts to delicious fruition.
- Preheat Oven to High Heat: Before placing your biscuits in, ensure your oven is fully preheated to a hot 425˚F (220˚C). A high initial oven temperature is crucial for biscuits because it helps them rise quickly and dramatically, creating that characteristic light texture and a beautiful, crisp golden crust.
- Bake Until Golden Brown: Place the baking sheet with your biscuits into the preheated oven. Bake them for approximately 18 to 22 minutes. Keep a close eye on them during the final minutes; you’re looking for them to have risen significantly and developed a gorgeous, deep golden brown color on their tops and edges. Remember that oven temperatures can vary, so adjust baking time as needed for your specific appliance.
- The Essential Buttery Brush: The moment you remove the perfectly baked biscuits from the oven, immediately take the remaining 1 1/2 teaspoons of melted butter and generously brush it over the warm tops of each biscuit. This step is not just for appearance; it adds an extra layer of rich, savory flavor and a delightful sheen that makes them even more enticing.
- Serve Warm and Savor: These homemade pumpkin sage biscuits are absolutely at their peak when served warm and fresh from the oven. Their flaky texture and aromatic flavors are best enjoyed right away. They’re wonderful on their own, with an extra pat of butter, or for a truly special treat, pair them with a dollop of homemade cranberry jam!
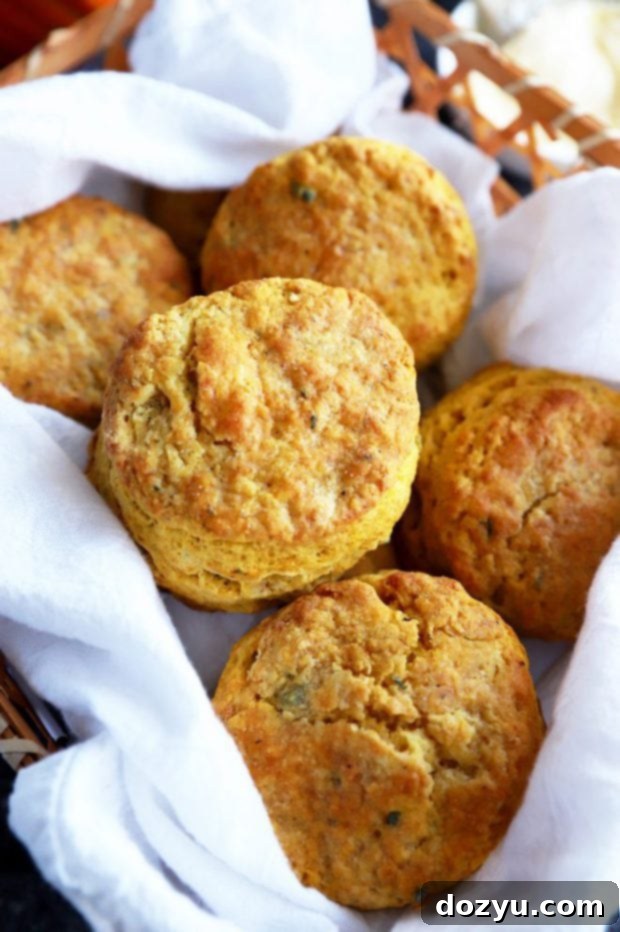
Tips for the Best Pumpkin Sage Biscuits Every Time
Achieving bakery-quality, flaky, and tender biscuits at home is much simpler than you might imagine, especially with these tried-and-true tips:
- Always Keep Your Ingredients Cold: This is arguably the most paramount tip for perfectly flaky biscuits. Ensure both your butter and buttermilk are as cold as possible before you begin mixing. Cold butter creates crucial steam pockets in the oven as it melts, which are responsible for pushing apart the layers of dough and creating that desirable flakiness. If your kitchen is warm, you can even chill your dry ingredients for 10-15 minutes before adding the butter.
- Do Not Overmix the Dough: Resist the urge to keep stirring or kneading once the wet and dry ingredients are just combined. Overmixing rapidly develops the gluten in the flour, which will inevitably lead to tough, chewy biscuits rather than the light and tender ones you desire. A slightly shaggy, somewhat unfinished-looking dough is a sign of a perfectly happy dough.
- Handle the Dough with a Gentle Touch: The less you work or handle the dough, the more tender and delicate your finished biscuits will be. Quick, light movements are your best friend when forming and cutting.
- Cut Biscuits Straight Down – No Twisting: When you use your biscuit cutter, press it straight down into the dough without any twisting motion. Twisting the cutter can seal the edges of the biscuit dough, effectively preventing it from rising properly and inhibiting the development of those beautiful, flaky layers.
- Consider Your Biscuit Spacing: Some bakers prefer to place biscuits almost touching on the baking sheet. This encourages them to rise higher as they support each other. Others prefer a slight gap to allow for crispier edges all around. For this recipe, placing them about 1 inch apart is a good starting point to achieve a balance of rise and texture. Experiment to discover your personal preference!
- A Hot Oven is Absolutely Key: Baking biscuits in a high-temperature oven (425°F/220°C) is essential. The intense heat causes the butter to melt and create steam quickly, which contributes significantly to the rapid rise and the formation of a beautiful, golden brown crust.
- Don’t Skip the Final Butter Brush: That final, generous brush of melted butter immediately after the biscuits come out of the oven is more than just an aesthetic touch. It adds another layer of incredible richness and flavor, making your homemade Pumpkin Sage Biscuits truly irresistible.
Creative Serving Suggestions for Pumpkin Sage Biscuits
These incredibly versatile Pumpkin Sage Biscuits are perfect for far more than just your holiday table. Their unique savory-sweet profile makes them an excellent accompaniment for a wide array of meals and occasions:
- The Star of Your Holiday Feast: They are a quintessential must-have for Thanksgiving, Christmas, or Easter, serving as a delightful complement to roasted turkey, glazed ham, succulent prime rib, or any festive main course.
- Perfect with Savory Soups and Stews: Their robust flavor and tender texture make them an outstanding pairing for hearty fall and winter dishes. Imagine dipping them into a creamy butternut squash soup, a spicy chili, or a rich, slow-cooked beef stew.
- An Elevated Breakfast or Brunch Treat: Move beyond toast and serve these biscuits with your morning meal. They are fantastic with fluffy scrambled eggs, crispy bacon, or simply split and spread with a dollop of cream cheese and fresh chives for a decadent and flavorful start to your day.
- Incredible Leftover Sandwiches: As previously highlighted, these biscuits are phenomenal for transforming your holiday leftovers. Use them as the base for gourmet turkey and cranberry sandwiches, making the day-after meal as exciting as the feast itself!
- A Unique Addition to Cheese Boards: For a sophisticated appetizer, offer these biscuits on a cheese and charcuterie board. They pair wonderfully with sharp cheddar, creamy goat cheese, or a tangy blue cheese, adding an unexpected and delightful savory-sweet element.
- With Roasted Vegetables: Complement a platter of roasted root vegetables or a pan of caramelized Brussels sprouts with these flavorful biscuits. Their rich taste will enhance the natural sweetness of the vegetables.
Can These Biscuits Be Frozen?
The answer is both yes and no, depending on the stage of preparation. If your goal is to make these delicious pumpkin sage biscuits ahead of time for future enjoyment, I strongly recommend preparing the dough and freezing the biscuits before they are baked. This specific method is crucial for preserving their signature flaky, tender, and buttery texture.
To successfully freeze unbaked pumpkin sage biscuits, follow these simple steps:
- Prepare and Cut the Dough: Follow the recipe instructions to make the biscuit dough, and then cut out the individual biscuit shapes using your preferred cutter.
- Initial Freeze on a Baking Sheet: Place the unbaked biscuits onto a baking sheet that has been lined with parchment paper. Ensure that there is a little space between each biscuit so they don’t freeze together.
- Flash Freeze: Cover the entire baking sheet tightly with plastic wrap to prevent freezer burn and odors. Transfer the baking sheet to your freezer and allow the biscuits to freeze completely solid. This usually takes a few hours, depending on their size and your freezer’s temperature.
- Transfer for Long-Term Storage: Once the biscuits are frozen solid, remove them from the baking sheet. Transfer them to a heavy-duty resealable freezer bag or an airtight freezer-safe container. Label the bag or container with the date.
- Storage Duration: These unbaked frozen biscuits can be safely stored in the freezer for up to 3 months without a significant loss in quality.
I do not recommend freezing already baked biscuits. The delicate flaky, buttery texture that makes these biscuits so special is highly susceptible to damage during the freezing and thawing process. Reheating baked frozen biscuits often results in a dry, crumbly, and less appealing texture that simply doesn’t live up to their fresh-baked glory.
How Do I Reheat Frozen Biscuits?
Baking frozen unbaked biscuits is an incredibly convenient way to enjoy freshly made biscuits on demand, with results almost indistinguishable from those made with fresh dough! Here’s how to bake your frozen pumpkin sage biscuits:
- Preheat Oven: Start by preheating your oven to a hot 425˚F (220˚C). A high temperature is crucial for a good rise.
- Arrange on Baking Sheet: Take your frozen biscuits directly from the freezer and arrange them on a baking sheet lined with parchment paper. There’s no need to thaw them beforehand – they go straight from frozen to the oven!
- Bake Until Golden: Bake the biscuits for approximately 20 to 30 minutes. The baking time might be slightly longer than for fresh dough, as the biscuits need to thaw and then cook. Look for them to become beautifully golden brown on top and fully cooked through.
- Brush and Serve: Once removed from the oven, and for an added touch of deliciousness, immediately brush the warm biscuits with a little extra melted butter. Serve them warm and enjoy the wonderful aroma and taste of your freshly baked homemade biscuits.
Pumpkin Sage Biscuits Recipe Card
Flaky, buttery homemade biscuits are given a delightful upgrade for the Thanksgiving and fall season with the comforting flavors of pumpkin, fresh sage, and a hint of warm spices!

Prep Time: 10 minutes
Cook Time: 18-22 minutes
Total Time: Approximately 30-35 minutes
Rating: 5 out of 5 stars (based on 55 reviews)
Print Recipe |
Pin Recipe
Equipment
- Large Mixing Bowls
- Half Sheet Baking Pan
- Silicone Baking Mat or Parchment Paper
- Pastry Cutter or Two Knives (for cutting butter, optional)
- Biscuit Cutters (2 to 2 1/2-inch diameter)
- Rolling Pin
Ingredients
- 1 3/4 cups all-purpose flour
- 1/4 cup packed light brown sugar
- 2 1/2 tsp baking powder
- 1/2 tsp salt
- 1/4 tsp black pepper
- 1/2 tsp garlic powder
- 1/4 tsp baking soda
- 2 1/2 tsp finely chopped fresh sage leaves
- 1/2 cup (1 stick) cold unsalted butter, cut into small cubes, plus 1 1/2 teaspoons melted butter (divided, for brushing)
- 3/4 cup canned pumpkin puree (ensure it’s not pumpkin pie filling)
- 1/3 cup cold buttermilk
Instructions
- Preheat your oven to 425˚F (220˚C). Line a large baking sheet with a silicone mat or parchment paper.
- In a spacious mixing bowl, combine the all-purpose flour, packed light brown sugar, baking powder, salt, black pepper, garlic powder, baking soda, and the finely chopped fresh sage leaves. Whisk thoroughly to ensure all dry ingredients are evenly distributed.
- Add the 1/2 cup of very cold, cubed butter to the dry mixture. Use a pastry cutter, two knives, or your fingertips (working quickly to keep the butter cold) to cut the butter into the flour until the mixture resembles coarse crumbs with some pea-sized pieces of butter remaining visible.
- Pour in the canned pumpkin puree and the cold buttermilk. Stir gently until the ingredients are just moistened and the dough mostly comes together. Be careful not to overmix; the dough should still look a bit shaggy.
- Turn the dough out onto a lightly floured surface. Knead the dough gently 8 to 10 times to bring it together and create layers.
- Using a rolling pin, roll out the dough until it is about 1-inch thick. Using a 2 to 2 1/2-inch biscuit cutter, press straight down into the dough to cut out circles. Avoid twisting the cutter.
- Place the cut biscuits about 1 inch apart on your prepared baking sheet.
- Bake for 18 to 22 minutes, or until the biscuits have risen significantly and are beautifully golden brown on top.
- Immediately upon removing the biscuits from the oven, generously brush them with the remaining 1 1/2 teaspoons of melted butter.
- Serve your warm, homemade Pumpkin Sage Biscuits and enjoy!
Cuisine: Thanksgiving, American
Category: Bread, Side Dish, Fall Recipe
More Delicious Biscuit Recipes to Explore
If these Pumpkin Sage Biscuits have ignited your passion for homemade baking, there’s an exciting world of biscuit flavors awaiting your discovery! Here are a few more fantastic biscuit recipes to expand your baking repertoire, perfect for any meal, snack, or special occasion:
- Green Chile Cheddar Whole Wheat Biscuits: For those who love a bit of a kick, these savory biscuits combine the wholesome goodness of whole wheat with the zing of green chiles and the comforting melt of cheddar cheese. They’re an excellent companion for Southwestern-inspired meals or a hearty breakfast.
- Black Pepper Goat Cheese Biscuits: A truly elegant and sophisticated choice, these biscuits feature the tangy creaminess of goat cheese beautifully contrasted with a subtle, zesty bite of freshly ground black pepper. They are superb with fresh salads, charcuterie boards, or as a refined appetizer.
- Mini Maple Bacon Biscuits: Prepare for a delightful dance of sweet and savory flavors in miniature form. These charming biscuits are infused with maple syrup and crispy bacon, making them an ideal choice for brunch gatherings, a charming party bite, or a unique dessert.
Whether you’re gearing up for a festive holiday celebration, hosting a delightful brunch, or simply aiming to elevate a weeknight dinner with something special, these Pumpkin Sage Biscuits are a versatile recipe you’ll undoubtedly find yourself returning to again and again. Their unique, complex flavor profile, coupled with their easy preparation and irresistibly flaky texture, makes them a true kitchen gem. Happy baking, and enjoy every delicious bite!
