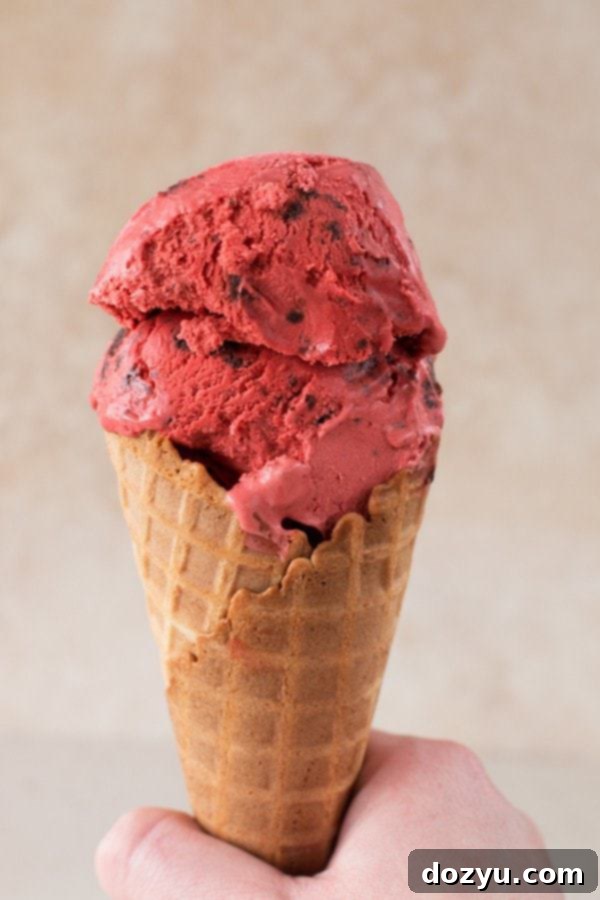
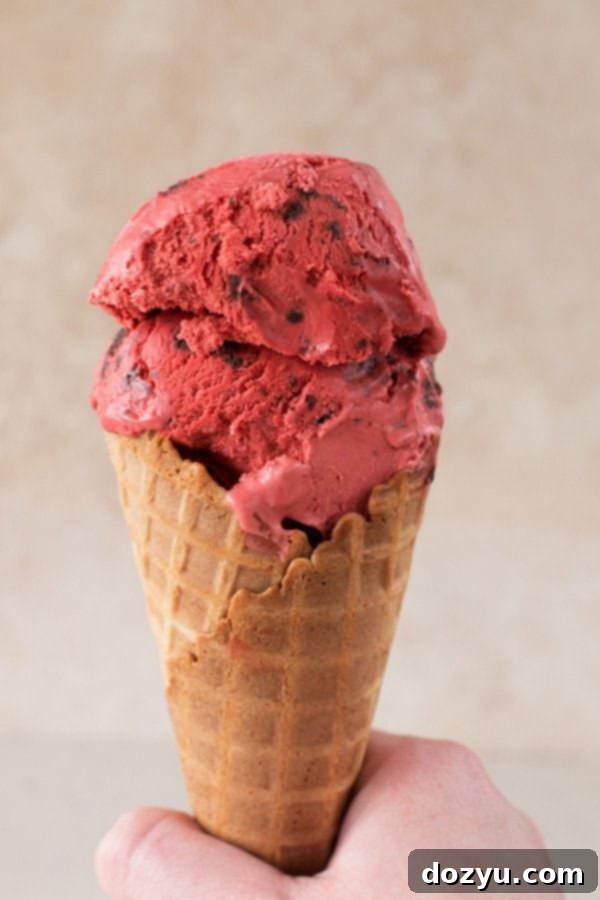
Decadent Red Velvet Ice Cream with Fudgy Brownie Chunks: Your Ultimate Homemade Indulgence
Prepare to be utterly captivated by this extraordinary Red Velvet Ice Cream with Brownie Chunks. It’s not just an ice cream; it’s a luxurious dessert experience that brings all the beloved flavors of a classic red velvet cake to a creamy, frozen delight. What truly sets this recipe apart is the subtle, irresistible tang from the buttermilk, which brilliantly mimics the distinctive taste of cream cheese frosting – making you believe there’s a hidden layer of that iconic topping in every spoonful. This isn’t just a dessert; it’s a celebration of flavor and texture that you’ll be obsessed with from the first lick.
Let’s be honest: with the holiday season fast approaching, the idea of “dieting” often takes a backseat to indulgence. And truly, I’m not sorry for sharing a recipe that might derail your pre-holiday healthy eating plans. In fact, I’m proudly presenting a dessert so utterly irresistible, it demands your full attention and appreciation. Forget the resolutions for a moment, because this isn’t just a treat; it’s a rich, creamy, and gloriously red declaration of no dieting! Imagine a cone piled high with this luscious red velvet and brownie-studded creation – it’s a testament to the sheer joy of living and savoring every sweet moment.
Please note that some of the links below are affiliate links. If you make a purchase through one of these links, I will receive a small commission.
The Irresistible Allure of Red Velvet in Frozen Form
Red velvet cake holds a special place in my heart, especially when the holidays roll around. That iconic combination of vibrant red cake and decadent cream cheese frosting is simply too festive and delicious to pass up. While I might not be as fanatical as my brother, who would likely declare, “Red velvet cake forever, nothing else comes close, end of discussion!” – I certainly can’t resist it in any iteration. Transforming this beloved cake into an ice cream format takes all the familiar comforting notes and elevates them to a new, exciting level. The rich cocoa, the delicate vanilla, and that signature tang combine in a symphony of flavors that is truly unforgettable.
The Secret to That “Cream Cheese Frosting” Tang
What makes this particular red velvet ice cream so incredibly special and, dare I say, addictive, is its uncanny ability to conjure the taste of cream cheese frosting without actually containing any. The magic lies in the subtle addition of buttermilk to the ice cream base. Buttermilk, with its slightly acidic and tangy profile, beautifully replicates the characteristic sour cream notes found in classic cream cheese frosting. This creates an experience that’s just like biting into a moist slice of red velvet cake generously slathered with frosting, but with the added bonus of being smooth, cool, and exquisitely refreshing. It delivers a level of satisfaction that a mere slice of cake could rarely achieve, making it a truly unique and delightful dessert.
Elevating Indulgence with Brownie Chunks
As if red velvet ice cream wasn’t indulgent enough, we’re taking things up a notch by folding in generous chunks of fudgy brownies. Because, let’s be real, there’s no such thing as “too much chocolate” – and anyone who says otherwise is simply mistaken! The brownies add a delightful textural contrast, introducing chewy, intensely chocolatey pockets amidst the creamy, velvety ice cream. These little morsels transform the dessert from simply delicious to absolutely divine, adding depth, richness, and an extra layer of decadence that makes every scoop an adventure. Whether you prefer super fudgy, slightly chewy, or even cakey brownies, any type will create an irresistible addition to this already magnificent frozen treat.
Why Homemade Ice Cream is Always Best
Making ice cream at home is an incredibly rewarding experience. Not only do you get to control the quality and freshness of your ingredients, but you can also customize flavors and add-ins to your heart’s content. This Red Velvet Ice Cream recipe is a perfect example of how a few simple, high-quality ingredients can come together to create something truly magical. The process, while requiring a bit of patience for chilling, is straightforward and surprisingly fun. There’s a certain pride that comes with serving a homemade dessert, especially one as impressive and delicious as this. Plus, the fresh taste of homemade ice cream simply can’t be beaten by store-bought varieties.
Tips for Crafting Your Perfect Red Velvet Ice Cream
To ensure your homemade red velvet ice cream turns out perfectly rich and creamy, here are a few key tips:
- Chill Thoroughly: The most crucial step for any homemade ice cream is chilling your base completely before churning. This ensures a smoother, creamier texture and prevents ice crystals from forming. Don’t rush this step!
- Quality Ingredients: Use good quality heavy cream and fresh buttermilk for the best flavor. The cocoa powder adds that subtle chocolate note characteristic of red velvet, so pick one you love.
- Red Food Coloring: For that signature vibrant red hue, don’t be shy with the food coloring. Gel food coloring often provides a more intense color with less liquid.
- Temper the Egg Yolks: When combining the warm cream mixture with the egg yolks, always temper the yolks by slowly whisking in a small amount of the warm liquid first. This prevents the eggs from scrambling and ensures a smooth custard base.
- Don’t Overcook the Custard: Cook the base until it’s thick enough to coat the back of a spoon, but be careful not to overcook it, as this can lead to a grainy texture.
- Brownie Integration: Add the brownie chunks during the last few minutes of churning. This allows them to be evenly distributed without getting completely broken down.
Recipe Must-Haves for the Avid Home Ice Cream Maker
This Recipe’s Must Haves
- KitchenAid Pro 500 Series 10-Speed 5-Quart Stand Mixer
- KitchenAid Ice Cream Maker Attachment
- Zyliss Ice Cream Scoop
Pin this Red Velvet Ice Cream with Brownie Chunks recipe for later!


Red Velvet Ice Cream with Brownie Chunks
All the flavors you love about classic red velvet cake bundled into a luscious ice cream with fudgy brownie chunks. A truly decadent homemade dessert.
Prep Time: 15 mins
Cook Time: 15 mins
Total Time: 30 mins (plus chilling and freezing)
Yields: Approximately 4-6 servings
Average Rating: 4.2 out of 5 stars from 10 votes
★★★★☆
Print Recipe
Pin Recipe
Ingredients
- 1 1/2 cups heavy cream
- 1 cup buttermilk
- 1/2 cup sugar, divided
- 1 1/2 Tbsp cocoa powder
- 3 tsp red food coloring (adjust for desired vibrancy)
- 1 tsp vanilla extract
- Pinch of salt
- 5 egg yolks
- 1 cup small chunks of brownie (pre-baked and cooled)
Instructions
- In a medium saucepan, combine the heavy cream, buttermilk, 1/4 cup of the sugar, cocoa powder, red food coloring, vanilla extract, and a pinch of salt. Bring this mixture to a gentle simmer over medium heat, stirring constantly to ensure the sugar fully dissolves. Once the sugar has dissolved and the mixture is warm, remove it from the heat.
- In a separate medium bowl, whisk together the egg yolks and the remaining 1/4 cup sugar until well combined and slightly pale. Slowly temper the egg yolks by gradually adding about 1/2 cup of the warm cream mixture to the egg yolk mixture, whisking continuously as you pour. This step is crucial to prevent the eggs from scrambling.
- Once tempered, pour the egg yolk and cream mixture back into the saucepan with the remaining cream base. Return the saucepan to medium heat and cook for 2 to 3 minutes, stirring constantly with a spatula or wooden spoon. Continue cooking until the mixture thickens slightly and is able to coat the back of your spoon. Do not boil.
- Immediately strain the warm custard mixture through a fine-mesh sieve into a clean bowl. This removes any small lumps and ensures a perfectly smooth ice cream base. Cool the mixture completely. For a quicker cool, you can place the bowl in an ice bath or transfer it to your freezer for about 30-60 minutes, stirring occasionally, until thoroughly chilled.
- Once the ice cream base is completely cooled, pour it into your ice cream machine and churn according to the manufacturer’s instructions. This usually takes about 20-30 minutes.
- During the very last second of churning, add in the small brownie chunks. Allow the machine to churn for just a minute or two more, until the brownies are evenly incorporated throughout the ice cream.
- Transfer the freshly churned ice cream to an airtight container. Freeze for at least 5 to 6 hours (or preferably overnight) to allow it to firm up to a scoopable consistency before serving.
Category: Brownies, Ice Cream, Dessert, Holiday
Now, if you’ll excuse me, I’m going to indulge in a generous serving of this glorious red velvety goodness. Seriously, it’s that good. If you happen to stop by, I might even be convinced to share a scoop (or two)… but no promises!
Maybe…
