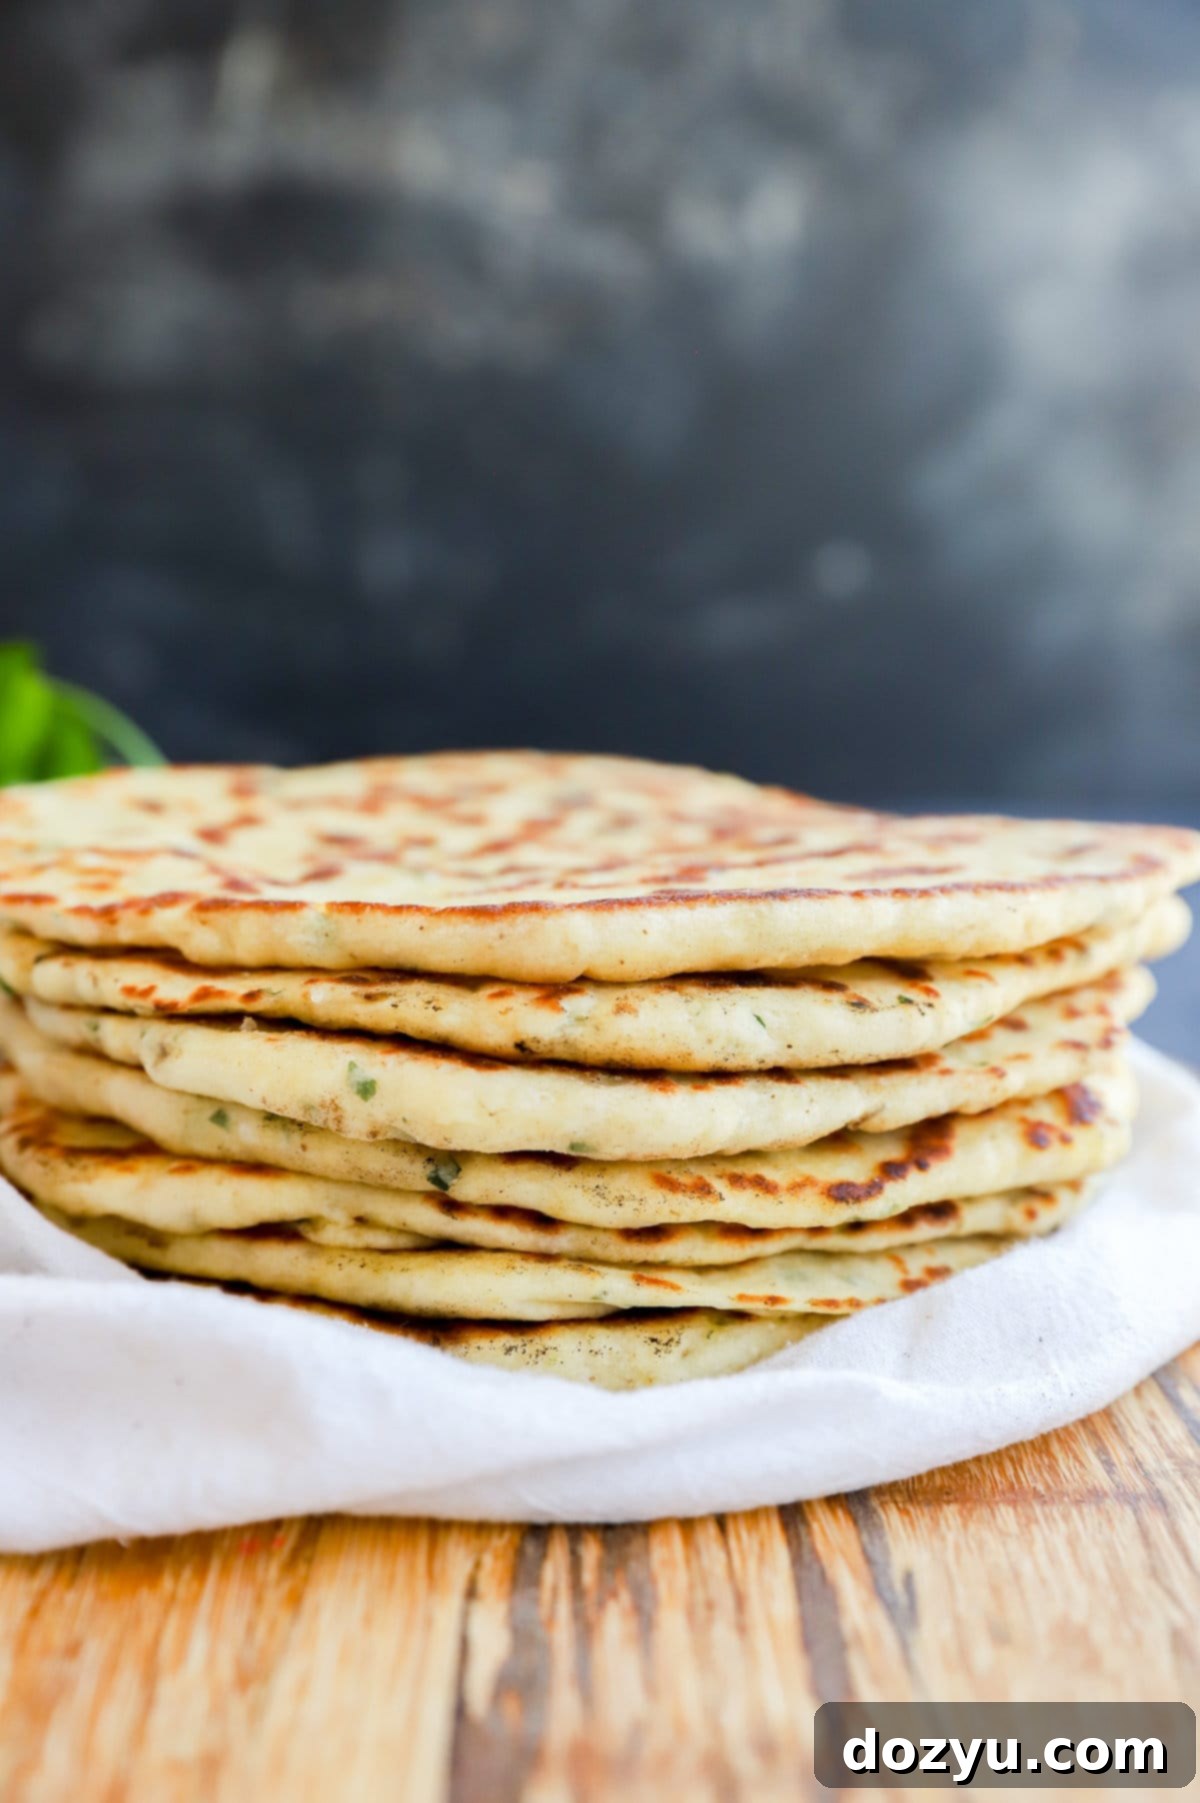
Homemade Turkish Bread (Bazlama) Recipe: Fluffy, Flavorful Flatbread from Scratch
There’s nothing quite like the aroma of freshly baked bread filling your home, and this homemade Turkish Bread, traditionally known as Bazlama, is no exception. This incredibly fluffy, soft, and flavorful flatbread is a culinary delight that transcends borders. Forget complicated mixers or extensive equipment; this rustic recipe comes together effortlessly in just one bowl, making it accessible for even novice bakers. Its tender texture and rich taste make it an ideal companion for a myriad of dishes, from creamy hummus and vibrant tabouli to versatile wraps and hearty stews. Get ready to embark on a delightful baking journey that promises delicious rewards with every bite!

Table of Contents
About This Turkish Bread (Bazlama) Recipe
Making homemade Turkish bread, specifically Bazlama, is an incredibly rewarding experience that is truly worth every moment of effort. The process itself is wonderfully tactile, inviting you to roll up your sleeves and engage directly with the ingredients. But the true magic lies in the unparalleled taste and texture of the finished product. Store-bought flatbreads simply cannot compare to the fresh, soft, and slightly chewy warmth of a piece of homemade Bazlama, enhanced by the subtle notes of fresh herbs and savory za’atar. Each bite melts in your mouth, delivering a comfort and flavor that is deeply satisfying.
Beyond the exquisite taste, there are numerous practical benefits to baking your own Turkish flatbread. Firstly, you gain the luxury of enjoying it fresh and warm whenever the craving strikes – a simple pleasure that elevates any meal or snack. Secondly, it’s a wonderfully cost-effective alternative to pre-packaged options from the grocery store, allowing you to enjoy gourmet quality bread without the premium price tag. The ingredients are simple and readily available, making it an economical choice for regular enjoyment. Lastly, the act of preparing such a delicious bread from scratch is a fantastic way to impress both your family and friends, showcasing your culinary skills with a flatbread that is sure to become a household favorite. This recipe offers a delightful combination of ease, flavor, and satisfaction, making it a must-try for any bread enthusiast.
The Essential Ingredients
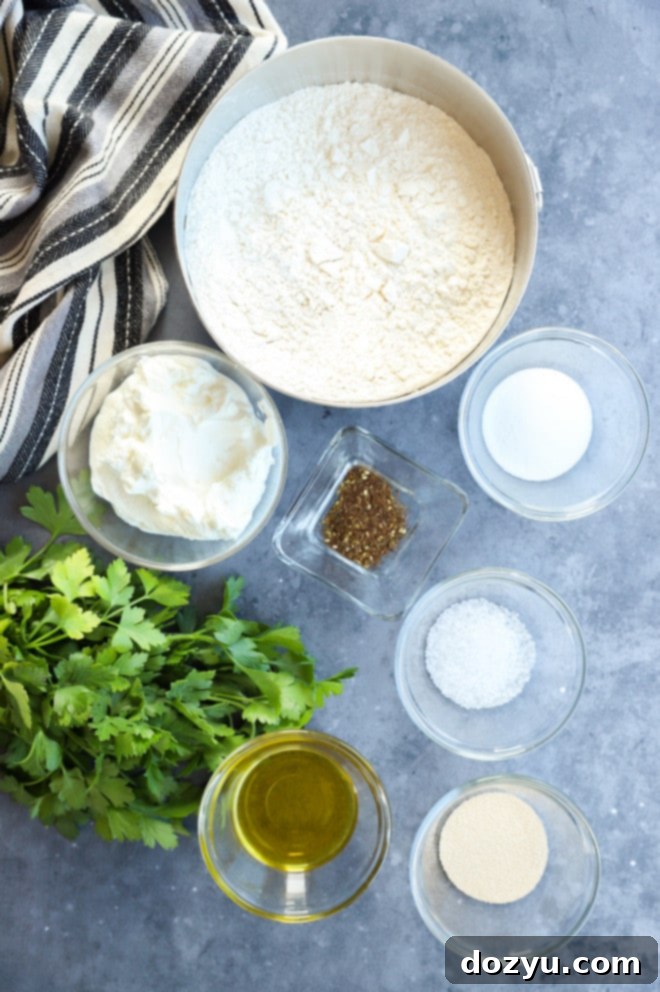
Crafting the perfect Turkish bread begins with selecting high-quality ingredients. Each component plays a crucial role in achieving the desired texture and flavor profile of our Bazlama.
- Warm Water: The foundation of our dough, warm water is absolutely critical for activating the yeast. Ensure the water temperature is precisely between 105˚F and 110˚F (40˚C-43˚C). Using a kitchen thermometer is highly recommended here, as water that’s too hot will kill the yeast, while water that’s too cold won’t activate it properly, leading to a flat, dense bread.
- Active Dried Yeast: This living organism is responsible for the bread’s characteristic fluffiness and rise. Always check the expiration date on your yeast packet; old yeast will not activate, and your bread won’t rise. A fresh packet ensures a vibrant, bubbly mixture.
- Granulated Sugar: A small amount of sugar acts as food for the yeast, helping it to activate and multiply efficiently. It also contributes to the bread’s golden color during cooking and a subtle sweetness that balances the savory notes.
- Greek Plain Yogurt: This ingredient is the secret to Bazlama’s incredibly soft and tender crumb. The acidity in the yogurt reacts with the flour, and its fat content adds richness and moisture. Full-fat Greek yogurt is recommended for the best flavor and texture, but a low-fat version can be used if preferred.
- Extra Virgin Olive Oil: Beyond its role in greasing the pan, olive oil is incorporated into the dough to add a rich, nuanced flavor and contributes to the bread’s supple texture. Use a good quality extra virgin olive oil for the best results, as its taste will shine through. You’ll also need a little extra for brushing the flatbreads before cooking, which helps achieve that beautiful golden crust.
- Fine Kosher Salt: Salt is essential for flavor and also plays a role in regulating yeast activity and strengthening the gluten structure in the dough. Fine kosher salt dissolves easily and distributes evenly throughout the dough.
- All-Purpose Flour: The primary structural component of our bread. All-purpose flour provides the necessary gluten to create a chewy, yet soft, texture. Sifting the flour beforehand can help ensure a lighter dough, but it’s not strictly necessary.
- Fresh Parsley: Freshly chopped parsley adds a vibrant color and a burst of herbaceous freshness to the bread. It complements the other flavors beautifully. Remember to save a little extra to sprinkle on top of the cooked flatbreads for an appealing garnish.
- Za’atar Seasoning: This traditional Middle Eastern spice blend is a game-changer for Turkish bread. Typically a mix of dried thyme, oregano, marjoram, sumac, and sesame seeds, za’atar imparts a unique, aromatic, and slightly tangy flavor that is truly distinctive. While you *could* technically omit it, adding za’atar elevates the bread’s authenticity and flavor profile considerably. It’s a key ingredient for that authentic taste experience.
Must-Have Kitchen Equipment
This recipe is designed to be straightforward and accessible, requiring minimal specialized equipment. Here’s what you’ll need to prepare your delicious Turkish bread:
- Medium-Large Mixing Bowl: A sturdy bowl is essential for combining your ingredients and allowing the dough to come together. Choose one large enough to accommodate the rising dough comfortably.
- Measuring Spoons and Measuring Cups: Accurate measurements are crucial in baking, especially when working with yeast. These tools ensure you get the exact quantities of each ingredient for optimal results.
- Whisk: Perfect for blending the wet ingredients and ensuring the yeast, sugar, and water are well combined and foamy.
- Wooden Spoon: A versatile tool for initially stirring the flour and other dry ingredients into the wet mixture, helping the dough start to form.
- Your Hands: The best tools for kneading the dough! Getting hands-on ensures you can feel the dough’s consistency and achieve that perfectly smooth, elastic texture.
- Rolling Pin: A rolling pin is necessary to flatten the dough balls into uniform rounds. A marble rolling pin is often preferred as its weight helps with even rolling and it stays cool, preventing the dough from sticking.
- Nonstick Skillet or Cast Iron Skillet: The star of the cooking process! A good quality nonstick skillet or a well-seasoned cast iron skillet is crucial for cooking the flatbreads evenly and achieving that beautiful golden-brown crust without sticking.
- Kitchen Thermometer: While not strictly a “must-have” if you’re experienced, a thermometer is highly recommended for accurately checking the water temperature for yeast activation, ensuring your bread rises perfectly.
How to Make Turkish Bread: Step-by-Step
Activating the Yeast Properly
The success of your Turkish bread largely hinges on properly activating the yeast. Begin by combining the active dry yeast, granulated sugar, and warm water in your medium-large mixing bowl. Stir the mixture gently but thoroughly until the sugar dissolves and the yeast is evenly dispersed. The warm water and sugar provide the ideal environment for the yeast to “wake up.”
Once combined, set the bowl aside in a warm spot in your kitchen for approximately 5 to 10 minutes. During this time, the yeast will begin to feast on the sugar, producing carbon dioxide. You’ll know the yeast is properly activated when the mixture becomes notably foamy and bubbly on the surface. If you don’t see this activity, your yeast might be old or the water temperature was incorrect, and it’s best to start this step over to ensure a good rise.
After the yeast is foamy, whisk in the Greek yogurt, extra virgin olive oil, and kosher salt. Continue whisking until these ingredients are fully incorporated into the yeast mixture, creating a smooth, cohesive liquid base for your dough.
Mixing and Kneading the Dough
Now it’s time to build your dough. Add the all-purpose flour, freshly chopped parsley, and za’atar seasoning to the wet ingredients in the bowl. Start by stirring the mixture with a sturdy wooden spoon. As the ingredients begin to come together, you’ll notice the dough forming a shaggy mass. At this point, set aside your spoon and use your hands to continue mixing. This allows you to truly feel the dough and ensure all the flour is incorporated.
Once a cohesive dough forms, transfer it from the bowl to a lightly floured surface, such as a clean countertop or a large wooden board. Knead the dough for about 3 to 4 minutes. The goal here is to develop the gluten, which gives the bread its structure and elasticity. As you knead, the dough will transform from a slightly sticky, rough mass into a smooth, supple, and elastic ball that is no longer sticky to the touch. This short kneading time is part of what makes this recipe so approachable and quick.
Dividing and Resting the Dough
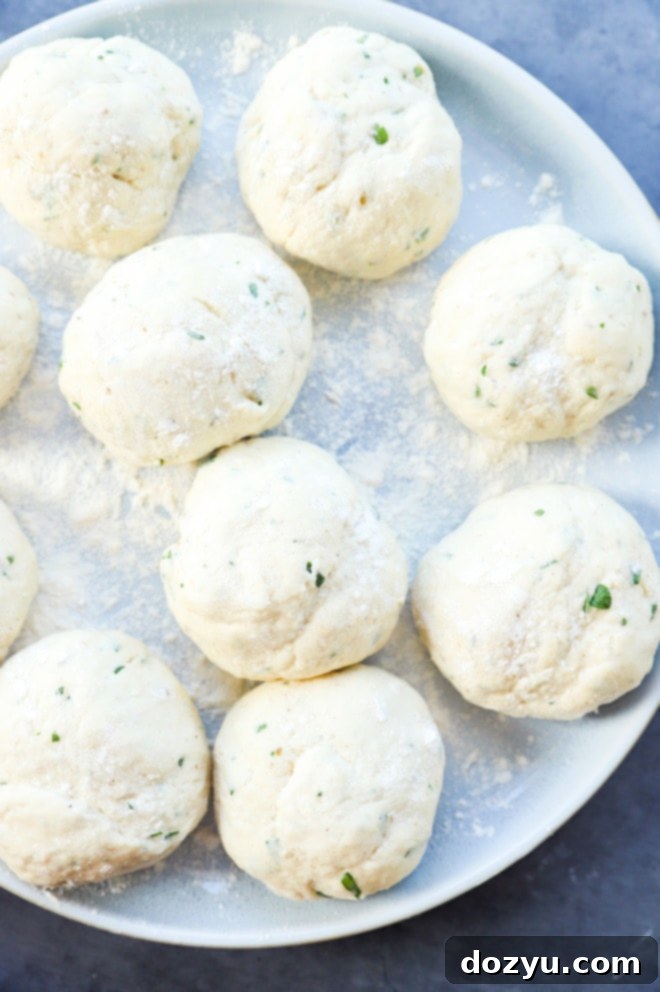
After kneading, it’s time to divide your dough. Gently shape the smooth dough into a log and then divide it into 10 equal pieces. Aim for consistency in size, as this will help ensure even cooking. You can use a kitchen scale for precision if you wish, but eyeballing it is usually sufficient.
Lightly dust a clean plate or baking sheet with a sprinkle of flour. Place the dough balls onto the floured surface, making sure they have a little space between them. Lightly sprinkle the tops of the dough balls with a bit more flour. This prevents them from sticking to the cover and keeps the surface from drying out. Cover the plate loosely with a clean kitchen towel and let the dough balls rest for 15 minutes. This resting period, often called a “bench rest,” allows the gluten to relax, making the dough much easier to roll out in the next step.
Rolling Out Your Bazlama
While your dough balls are resting, place a medium nonstick skillet or a well-seasoned cast iron pan over medium-low heat. Allow the pan to heat up thoroughly; a properly preheated pan is essential for achieving a good crust and even cooking. While the pan is heating, take one of the rested dough balls. On a lightly floured surface, use your rolling pin to roll it out into a round shape, aiming for a diameter of about 6 to 7 inches and a thickness similar to naan or pita bread. The exact thickness is up to your preference – thinner for crispier bread, thicker for a softer, chewier texture.
Once rolled, lightly brush one side of the dough round with extra virgin olive oil. This oil will come into contact with the hot pan first, contributing to a beautiful golden color and preventing sticking.
Cooking the Perfect Flatbread
Once your skillet is hot and your first dough round is rolled and oiled on one side, carefully place the dough into the hot pan, oil-side down. Immediately after placing it in the pan, lightly brush the top (the side now facing up) with oil. Allow the bread to cook for approximately 1 to 1 ½ minutes on the first side. During this time, you should observe bubbles forming on the top surface of the bread, and the bottom should develop a lovely golden-brown color around the edges and in various spots across the center.
Using a spatula, flip the flatbread over and cook for another 1 to 1 ½ minutes on the second side, until it also achieves a golden-brown finish. The cooked Bazlama will be puffy and slightly charred in places, indicating its readiness. Remove the cooked flatbread from the pan and immediately place it on a clean plate or wrapped in a clean kitchen towel to keep warm while you cook the remaining dough.
Repeat the rolling, brushing with oil, and cooking process with each of the remaining dough balls. Serve your freshly cooked Bazlama warm to enjoy its optimal texture and flavor!
Expert Tips and Creative Ideas
Mastering Turkish bread is simple with a few key tips and ideas to enhance your baking experience and results:
- Adjust Thickness to Your Liking: You have complete control over the final thickness of your Bazlama! For a bread closer to the texture of a traditional naan, aim for a diameter of about 6 to 7 inches. If you prefer a thicker, chewier bread (more akin to a classic, pillowy Bazlama), roll it out to a smaller diameter. For a thinner, crispier version, roll it out larger. Remember that thicker bread will require slightly more cooking time, while thinner bread will cook faster, so adjust accordingly.
- Precision with Water Temperature: Do not guess the water temperature for yeast activation. It is arguably the most crucial step for a successful rise. Always use a kitchen thermometer to ensure your water is accurately between 105°F and 110°F (40°C-43°C). Water that is too hot will kill the yeast, preventing your bread from rising. Water that is too cold will inhibit yeast activity, resulting in a dense, heavy flatbread. Precision here makes all the difference!
- Troubleshooting Sticky Dough: If your dough remains overly sticky after kneading for the recommended time, resist the urge to add too much extra flour. Instead, lightly flour your hands and the kneading surface, and continue to knead. Sometimes, a minute or two more of kneading can help develop the gluten sufficiently to make the dough less sticky. Only add a tiny bit of flour at a time if absolutely necessary.
- Tough Bread Fix: If your Bazlama turns out tough, it could be due to over-kneading (which overdevelops gluten) or insufficient resting time (gluten hasn’t relaxed). Ensure you stick to the recommended kneading time and allow the dough balls to rest for the full 15 minutes before rolling.
- Flavor Variations: Don’t be afraid to customize! While parsley and za’atar are classic, you can experiment with other herbs like dill, mint, or oregano. A pinch of red pepper flakes can add a subtle kick, or try different spice blends to match your meal.
- Make Ahead Option: You can prepare the dough in advance. After the initial rise and dividing into balls, instead of resting for 15 minutes at room temperature, place the floured dough balls in an airtight container or cover them tightly with plastic wrap and refrigerate for up to 24 hours. Let them come to room temperature for about 30 minutes before rolling and cooking.
- Optimal Pan Heat: Ensure your skillet is consistently heated to medium-low. Too high heat will burn the outside before the inside cooks, while too low heat will dry out the bread. A quick test: sprinkle a tiny bit of flour; it should sizzle gently, not immediately smoke.
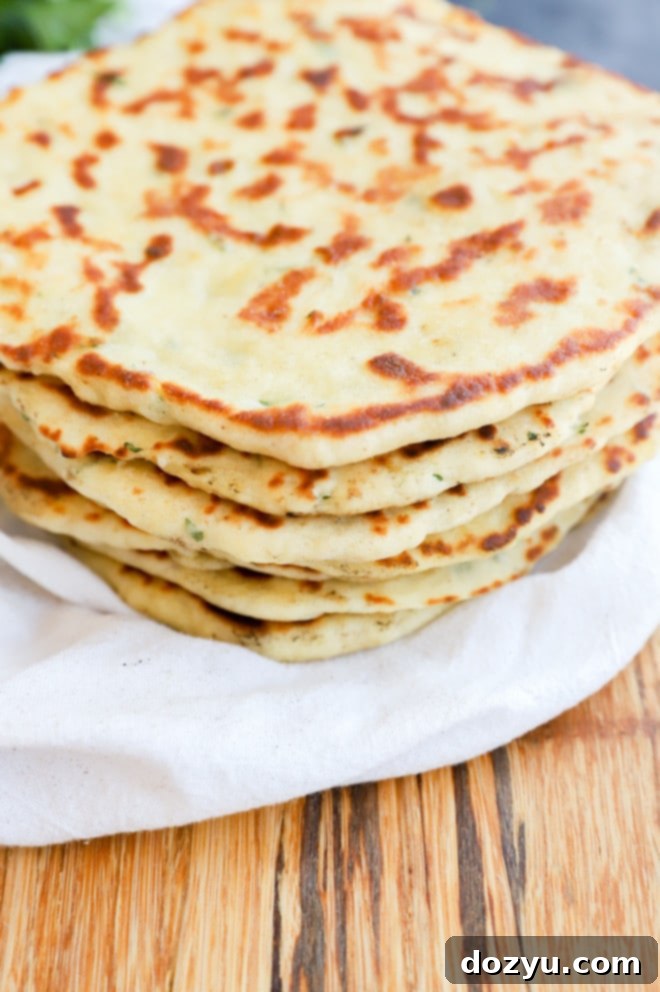
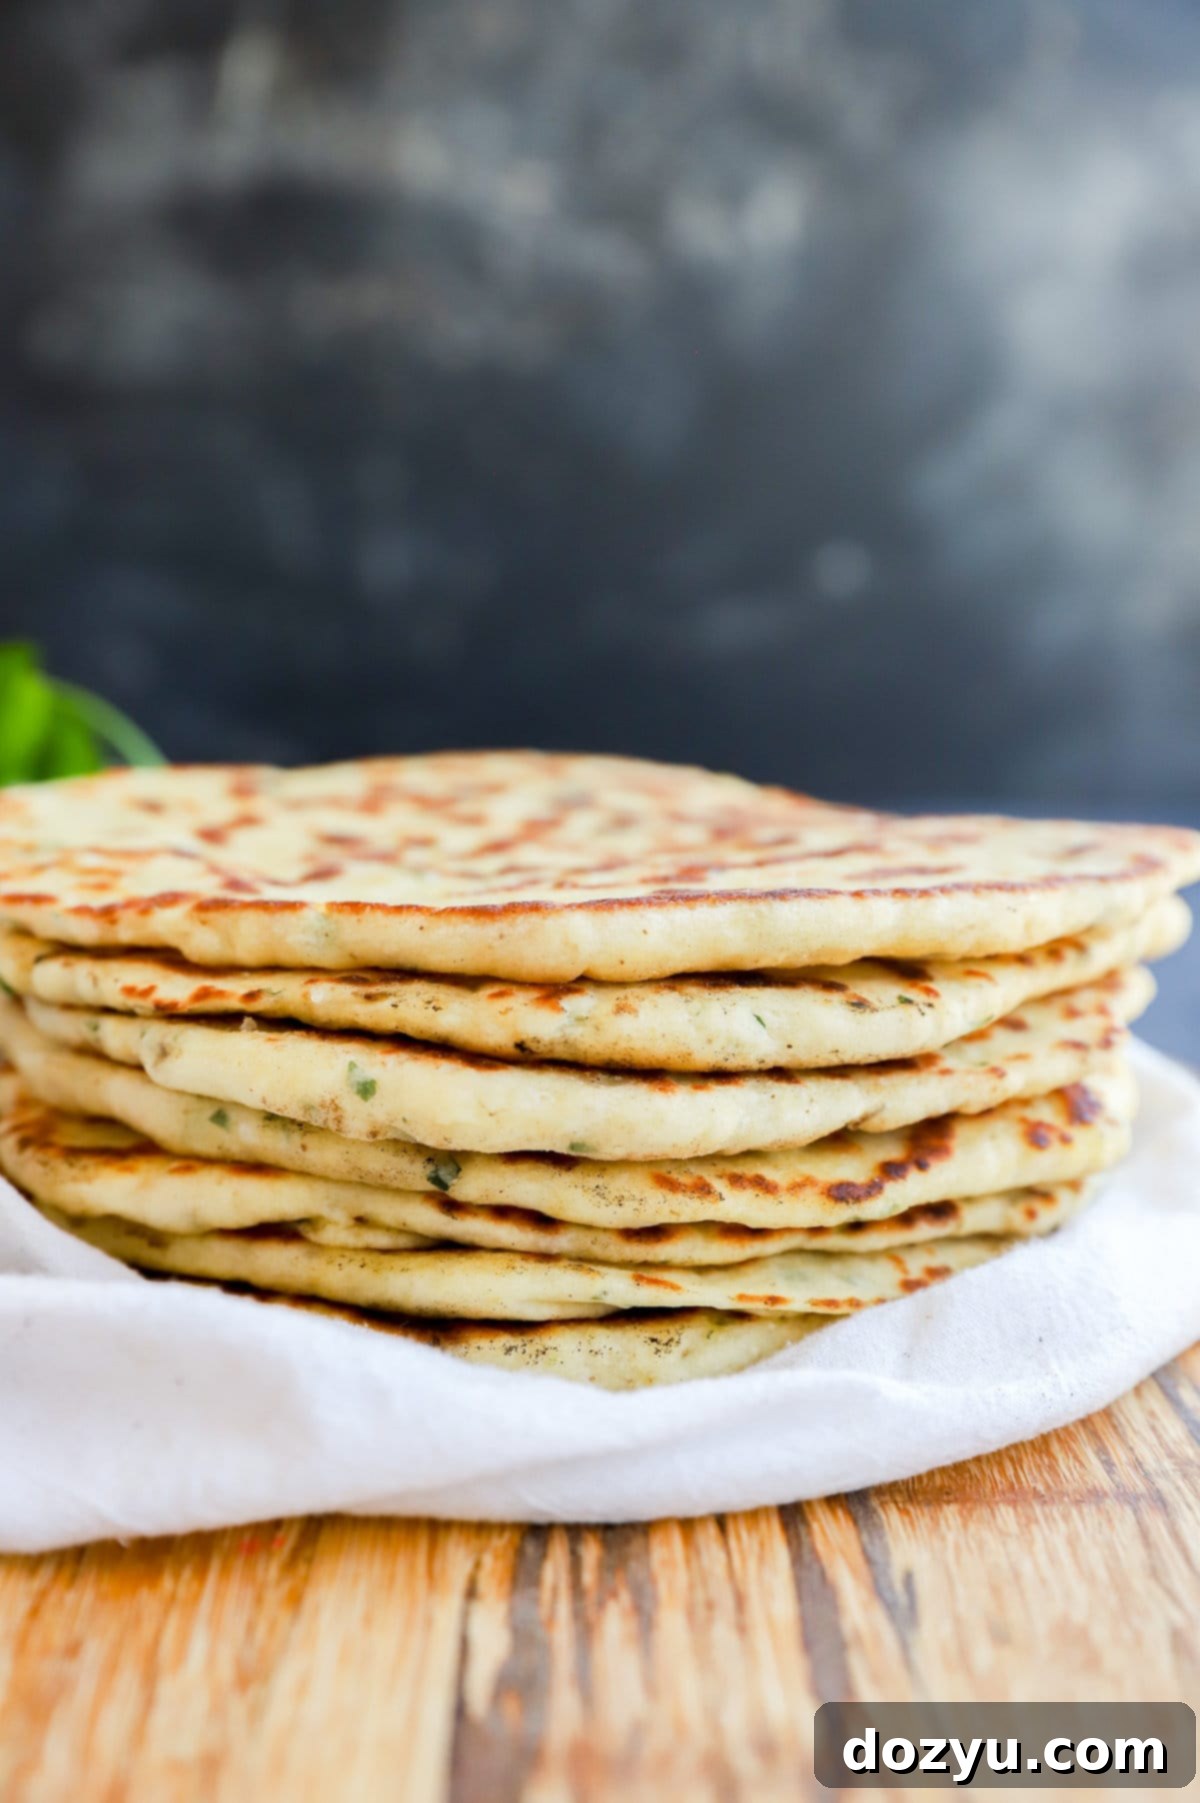
- Keeping Cooked Bread Warm: As you cook multiple flatbreads, stack the finished ones wrapped in a clean kitchen towel. This helps to keep them warm and soft until all are ready to serve.
More tasty bread recipes to try: Harvest Pumpkin Seed Bread | No Yeast White Bread | Overnight No Knead Bread | Bacon Parmesan Quick Bread
What is Turkish Bread Called? Unpacking the Names
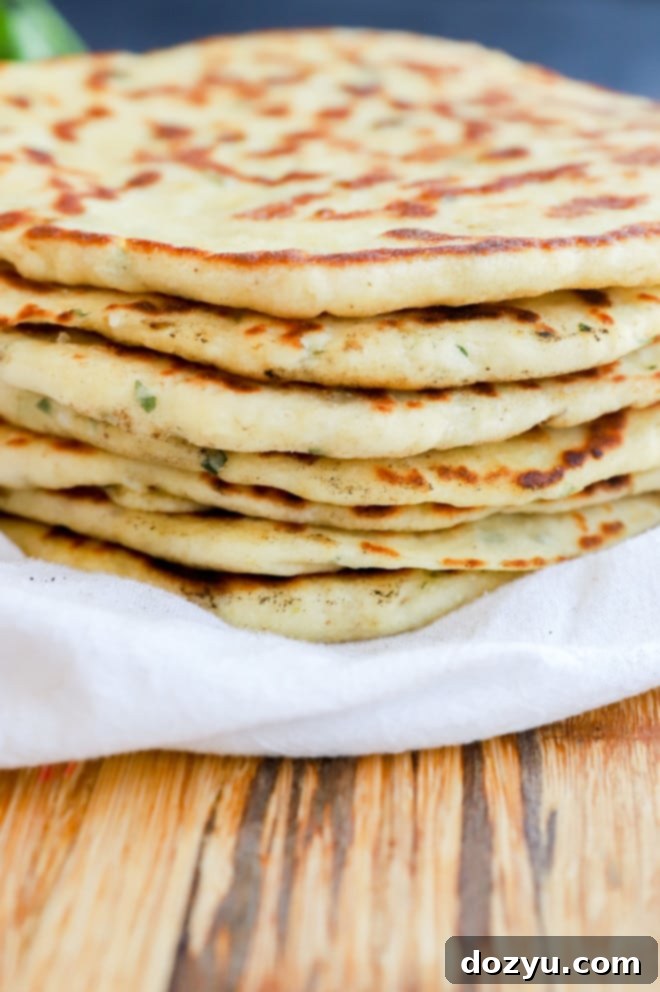
The term “Turkish bread” is a broad umbrella that encompasses a rich variety of flatbreads and loaves. While many might use it generally, there are specific names for different types, each with its unique characteristics. The recipe featured here is most closely related to Bazlama.
Bazlama is a traditional Turkish flatbread, typically round, thick, and wonderfully fluffy. It’s often cooked on a flat top griddle or a large pan (like our skillet method), which gives it a soft, slightly chewy interior and a golden exterior. Its texture is incredibly tender, making it perfect for soaking up sauces or serving alongside various dishes. This particular recipe provides a variation that, when rolled thinner, achieves a thickness closer to that of naan or pita, offering versatility.
Another popular Turkish bread is Pide. Pide is distinct from Bazlama in several ways. While it is also a flatbread, it’s often recognized by its boat-like or oval shape. Pide is typically baked in an oven and commonly served topped with various ingredients, transforming it into savory “bread boats” or pizzas. Common toppings include minced meat (kıymalı pide), cheese (peynirli pide), or eggs (yumurtalı pide). So, while both are delicious Turkish flatbreads, they differ significantly in form, cooking method, and typical serving styles.
Understanding these distinctions allows for a deeper appreciation of the diverse and delicious world of Turkish baking!
Does Turkish Bread Contain Gluten?
Yes, traditional Turkish bread, including this Bazlama recipe, contains gluten. The primary ingredient in this recipe is all-purpose flour, which is derived from wheat. Wheat flour naturally contains gluten, a complex protein responsible for giving bread its characteristic structure, elasticity, and chewy texture.
Gluten plays a vital role in baking yeast breads. When water is added to flour and kneaded, the gluten proteins form a network that traps the carbon dioxide produced by the yeast. This trapping of gas is what causes the dough to rise and gives the final bread its airy, fluffy consistency. Without gluten, it would be extremely challenging to achieve the desired soft and pliable texture of Bazlama. Therefore, for those with gluten sensitivities or celiac disease, this specific recipe would not be suitable. However, there are many excellent gluten-free flatbread recipes available that use alternative flours if you need a gluten-free option.
Turkish Bread vs. Pita Bread: What’s the Difference?
While both Turkish bread (like Bazlama) and pita bread are popular flatbreads found in Mediterranean and Middle Eastern cuisines, they possess distinct characteristics that set them apart. Both are often served as accompaniments to meals, but their preparation, texture, and typical uses differ.
- Pita Bread: Originating from the Middle East, pita bread is famous for its distinctive “pocket.” This pocket forms when the bread bakes at a high temperature, causing the moisture in the dough to rapidly turn into steam, which then puffs up the dough. Once cooled, the pocket collapses slightly, creating an ideal cavity for stuffing with fillings like falafel, gyros, or fresh salads. Pita bread typically has a firmer, drier texture than Bazlama and is often made with a simpler dough.
- Turkish Bread (Bazlama): As discussed, Bazlama is known for its incredibly soft, fluffy, and slightly thicker texture compared to pita. It doesn’t typically form a pocket, though it may puff up during cooking. Instead, Bazlama is prized for its tender crumb and ability to absorb flavors, making it perfect for dipping into rich sauces, hummus, or used as a soft base for wraps where a pocket isn’t desired. The addition of yogurt in many Bazlama recipes contributes to its unique softness and richness, distinguishing it from the leaner dough of pita bread.
In essence, while both are round flatbreads, pita’s defining characteristic is its pocket for stuffing, whereas Bazlama shines with its soft, absorbent texture ideal for dipping and complementing savory dishes.
Troubleshooting: My Bread is Greasy!
If you find that your beautiful Turkish bread turns out greasy, it’s almost always due to one common culprit: excessive oil. The recipe calls for brushing the flatbread dough lightly with olive oil before and during cooking. This light coating helps with browning, adds flavor, and prevents sticking to the pan.
However, it’s important to use a very light hand. A thin sheen is all you need. If you apply too much oil, the dough will absorb it during cooking, resulting in a flatbread that feels heavy, tastes overly oily, and may even appear translucent or soggy in places. To avoid this, use a pastry brush and apply just enough oil to cover the surface without it pooling. You want to see a slight glisten, not a heavy coat. If you accidentally apply too much, you can gently dab off the excess with a paper towel before placing it in the hot pan.
Need more inspiration for appetizers? Check out my appetizer recipes page!
What to Serve with Turkish Bazlama
The versatility of Turkish bread (Bazlama) is truly one of its greatest assets. Its soft, fluffy, and slightly chewy texture makes it an incredible canvas for a wide array of flavors and dishes. Here are some fantastic ways to enjoy your homemade Bazlama:
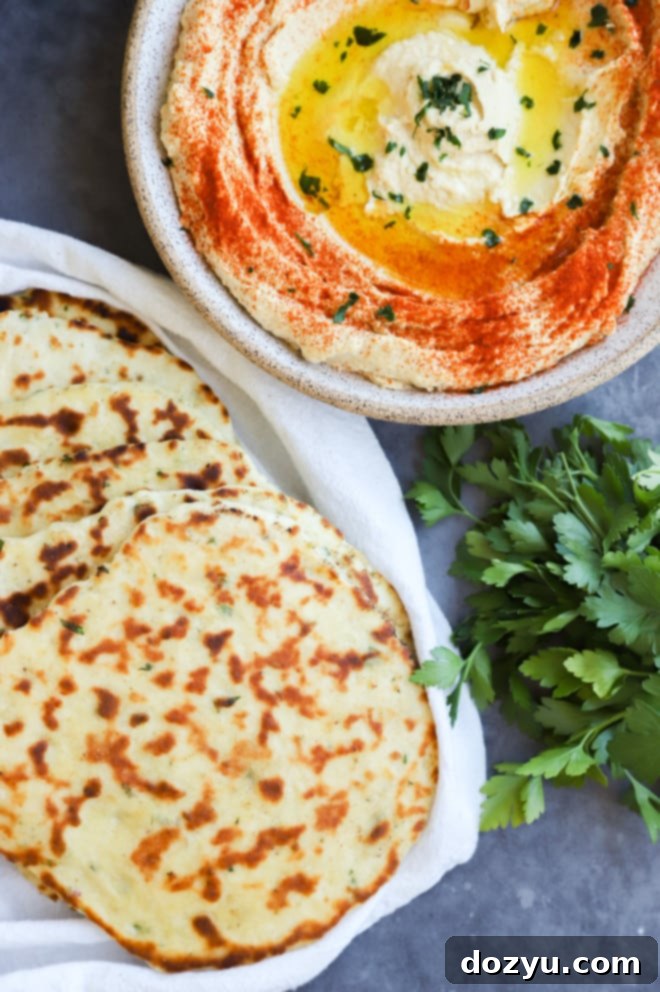
- Dips and Spreads: My absolute favorite way to enjoy Bazlama is with a generous bowl of creamy Greek hummus. The fluffy bread is the ideal vehicle for dipping and scooping up thick, flavorful hummus. It also pairs beautifully with other Mediterranean dips like baba ganoush (roasted eggplant dip), muhammara (walnut and red pepper dip), or a simple olive tapenade.
- Savory Wraps and Sandwiches: Use Bazlama as a delightful alternative to traditional pita or tortillas for wraps and sandwiches. Its tender texture holds fillings well. Try it for Greek beef pitas (even without the pocket, it’s delicious!), Greek gyro lamb wraps, or classic shawarma and kebab sandwiches filled with succulent grilled meats, fresh vegetables, and your favorite sauces like tzatziki or tahini.
- Breakfast Delight: Transform your Bazlama into a hearty breakfast wrap! Fill it with scrambled eggs, crispy bacon or sausage, and melted cheese for a satisfying start to your day. You can also simply spread it with a dollop of butter and a sprinkle of za’atar for a quick, flavorful morning bite.
- Flatbread Pizzas: Get creative with flatbread pizzas! Lightly toast a piece of Bazlama, then top it with tomato sauce, your favorite cheeses, and any toppings you desire. Bake for about 5-7 minutes at 450°F (230°C) until the cheese is bubbly and melted.
- Meze Platter Staple: Elevate your Mediterranean meze platter by including soft Bazlama. It’s a fantastic accompaniment to an assortment of small dishes like tabbouleh, falafel, stuffed grape leaves (dolmas), olives, and feta cheese. The bread’s texture provides a lovely contrast to these vibrant dishes.
- Soup Companion: Don’t underestimate its role with soup! The slightly chewy texture of Bazlama is fantastic for soaking up flavorful broths and stews. It’s a comforting addition to lentil soup, Turkish red lentil soup (Mercimek Çorbası), or any other hearty soup.
- Sweet Treat: For a simple dessert or snack, spread a warm piece of Bazlama with peanut butter, almond butter, or even Nutella, and drizzle with honey. The combination of sweet and savory is surprisingly delicious and a hit with kids and adults alike.
How to Store and Reheat Turkish Bread
Proper storage ensures your homemade Turkish bread remains fresh and delicious for as long as possible. Here’s how to manage leftovers and keep them ready for future enjoyment:
- Storing at Room Temperature: Once your Bazlama has cooled completely to room temperature, transfer the flatbreads to a resealable plastic bag or an airtight container. Stored this way, they will stay fresh and soft at room temperature for up to 3 to 4 days. You can enjoy them as is, or reheat them for a warm, soft texture.
- Reheating for Freshness:
- Microwave Method: For a quick reheat, wrap individual flatbreads in a damp paper towel. Microwave for about 15 seconds, or until they are warm and pliable. The damp towel helps prevent them from drying out.
- Stovetop Method: To achieve a slightly crispier exterior, heat a skillet over medium heat with a tiny bit of olive oil. Place the flatbread in the skillet and heat for about 30 seconds to 1 minute per side, until warmed through and slightly toasted.
- Freezing for Longer Storage: If you’ve made a large batch or want to prepare ahead, Bazlama freezes beautifully.
- Preparation for Freezing: First, cook the flatbreads according to the instructions and allow them to cool completely to room temperature. This is crucial to prevent ice crystals from forming.
- Packaging: To prevent sticking, layer the cooled flatbreads between sheets of parchment paper. Then, place the stack into a heavy-duty airtight freezer bag or an airtight container designed for freezing. Remove as much air as possible before sealing.
- Freezer Life: Your Turkish bread can be stored in the freezer for up to 3 months without significant loss of quality.
- Thawing Frozen Bread:
- Refrigerator Thawing: For best results, thaw frozen flatbreads overnight in the refrigerator.
- Room Temperature Thawing: If you’re short on time, you can also thaw them at room temperature for a couple of hours.
- Reheating After Thawing: Once thawed, reheat them using either the microwave or stovetop methods described above to restore their fresh-baked warmth and softness.
Explore More Delicious Global Recipes
If you enjoyed making this Turkish bread, we invite you to explore more delightful recipes from around the world. Expand your culinary horizons with these flavorful dishes:
- Korean Ground Turkey Lettuce Wraps are a fantastic option for a simple, light, and incredibly tasty lunch or appetizer, packed with savory flavors.
- Ready in just 25 minutes, these Greek Beef Pitas offer all the deliciousness of a classic gyro but with a unique and exciting twist.
- For the ultimate comfort food experience, try this Spicy Instant Pot Ramen with crispy pork, delivering rich, savory, and spicy notes in every slurp.
Finally, if you make this wonderful Turkish bread recipe, please be sure to give this recipe a rating and/or leave a comment below! Your feedback is incredibly valuable, and I genuinely love to hear about your experiences in the kitchen. I make sure to take the time to respond to every single comment.
Feel free to drop any questions you might have in the comments section below, and I’ll do my best to help!
Oh, and don’t forget to tag me on Instagram if you share your creations! Seeing these recipes come to life in your homes is truly my favorite thing, and it means the world to me!
Turkish Bread (Bazlama)
15 minutes
25 minutes
25 minutes
1 hour
5 minutes
10
flatbreads
prevent your screen from going dark
Equipment
-
Measuring Spoons
-
Measuring Cups
-
Mixing Bowls
-
Nonstick 12-Inch Skillet
-
Kitchen Thermometer (optional but recommended for yeast activation)
-
Wooden Spoon
-
Whisk
-
Rolling Pin (Marble preferred)
Ingredients
- 2 1/4 tsp active dried yeast (1 packet)
- 1 Tbsp granulated sugar
- 1 1/4 cups warm water (between 105˚F and 110˚F / 40˚C-43˚C)
- 3/4 cup Greek plain yogurt (full-fat recommended)
- 2 Tbsp extra virgin olive oil (plus more for brushing)
- 2 tsp kosher salt
- 3 3/4 cups all purpose flour
- 1/4 cup freshly chopped parsley (plus more for garnish)
- 1/2 tsp za’atar seasoning
Instructions
-
Activate Yeast: In a medium-large bowl, combine the active dried yeast, granulated sugar, and warm water (ensure temperature is 105˚F-110˚F / 40˚C-43˚C). Stir well to combine all ingredients. Set the bowl aside in a warm place for 5 to 10 minutes, until the mixture becomes foamy and bubbly, indicating the yeast is active.
-
Prepare Dough: Whisk in the Greek yogurt, 2 Tbsp olive oil, and kosher salt into the activated yeast mixture until well combined. Add the all-purpose flour, freshly chopped parsley, and za’atar seasoning. Stir with a wooden spoon until the dough starts to come together into a shaggy mass.
-
Knead and Rest: Turn the dough out onto a lightly floured surface. Knead for about 3 to 4 minutes using your hands, until the dough is smooth, elastic, and no longer sticky. Divide the smooth dough into 10 equal pieces. Shape each piece into a ball. Place the dough balls on a plate lightly dusted with flour, sprinkle the tops with a little more flour, and cover with a clean kitchen towel. Let rest for 15 minutes.
-
Preheat Skillet: While the dough rests, place a medium nonstick skillet or cast iron pan over medium-low heat and allow it to preheat thoroughly.
-
Roll and Brush: Take one dough ball and, on a lightly floured surface, roll it out into a 6 to 7-inch circle using a rolling pin. Lightly brush one side of the rolled dough with extra virgin olive oil.
-
Cook Flatbreads: Once the pan is hot, carefully place the rolled out dough into the skillet, oil-side down. Immediately brush the top (the side now facing up) lightly with oil. Cook for about 1 to 1 ½ minutes, until bubbles form on the top and the bottom is golden brown around the edges and in spots across the center. Flip the flatbread and cook for another 1 to 1 ½ minutes, until the second side is also golden brown.
-
Repeat and Serve: Remove the cooked flatbread from the pan and either serve immediately or place it in a towel to keep warm. Continue rolling, brushing with oil, and cooking the remaining dough balls.
-
Sprinkle with additional freshly chopped parsley before serving. Enjoy warm!
-
Storage: Once cooled to room temperature, store in a resealable bag at room temperature for up to 3-4 days.
Video
Notes
Reheat. Wrap flatbreads in damp paper towels and heat in the microwave for about 15 seconds, or until warm. You can also reheat them on the stove in a skillet with a little bit of oil over medium heat.
Freeze. Cook the flatbreads as instructed. Cool to room temperature and layer between sheets of parchment paper in an airtight container or resealable bag. Freeze for up to 3 months.
Thaw. Thaw overnight in the refrigerator or at room temperature. Reheat or bring to room temperature.
Nutrition
Calories:
216
kcal
|
Carbohydrates:
38
g
|
Protein:
7
g
|
Fat:
4
g
|
Saturated Fat:
1
g
|
Polyunsaturated Fat:
0.5
g
|
Monounsaturated Fat:
2
g
|
Cholesterol:
1
mg
|
Sodium:
476
mg
|
Potassium:
66
mg
|
Fiber:
2
g
|
Sugar:
2
g
|
Vitamin A:
138
IU
|
Vitamin C:
2
mg
|
Calcium:
31
mg
|
Iron:
2
mg
216
kcal
Turkish
Bread
