Achieve Grilling Perfection: Your Guide to Juicy Spatchcock Whole Chicken with Crispy Skin
Prepare to master the art of grilling a whole chicken that is incredibly juicy on the inside and boasts a gloriously crispy skin on the outside. This foolproof method utilizes the spatchcocking technique, allowing the chicken to cook faster and more evenly at higher temperatures, saving you precious time without compromising on flavor or succulence. It’s a surprisingly easy process that yields spectacular results, perfect for any weeknight meal or weekend gathering.
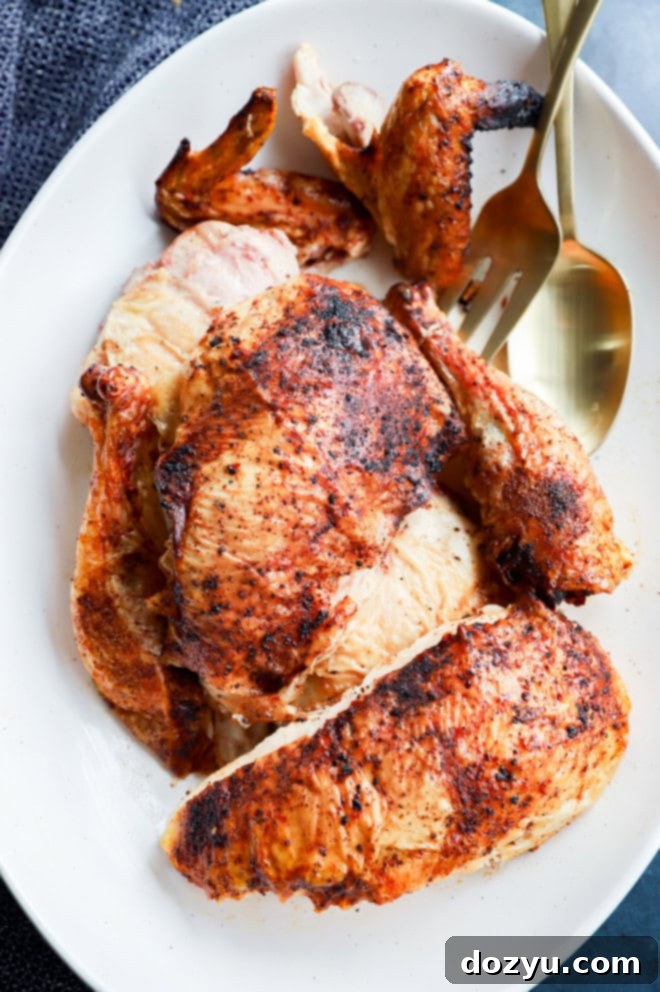
Table of Contents
About This Grilled Whole Chicken
There’s an undeniable magic to a perfectly grilled whole chicken. It’s a dish that, despite its humble origins, transforms into something extraordinary with the right technique. The captivating crispy skin, the succulent, juicy meat, and that distinctive smoky aroma from the grill elevate a simple chicken into a truly memorable culinary experience. For many, grilling a whole chicken can seem daunting, conjuring images of unevenly cooked meat or dry, tough pieces. However, with our foolproof spatchcocking method, those concerns become a thing of the past.
Growing up, roasted chicken wasn’t a frequent meal in my household. As I ventured into cooking as an adult, I initially steered clear of preparing a whole chicken, perceiving it as a laborious task reserved for special occasions. But my perspective completely shifted when I discovered the wonders of grilling it. Not only did it drastically cut down the cooking time, but it also imparted a flavor profile that roasting simply couldn’t match. This grilled chicken recipe quickly became my go-to weekly meal. It’s incredibly flavorful, surprisingly juicy, and remarkably good for you. Plus, its versatility makes it an ideal centerpiece for any meal, pairing beautifully with a wide array of side dishes, from crisp, fresh salads to hearty roasted vegetables.
Beyond being a fantastic main course, this grilled chicken is a game-changer for meal prep. Once cooked, the tender meat can be shredded or diced and incorporated into salads, pasta dishes, tacos, comforting soups, and stews, making your weekly planning effortless. This recipe is designed to be straightforward and quick to prepare, making it perfect for both grilling novices and seasoned barbecue enthusiasts. Once you experience the ease and deliciousness of this method, I’m confident it will become a cherished family favorite throughout the year.
Why Spatchcocking is a Game-Changer
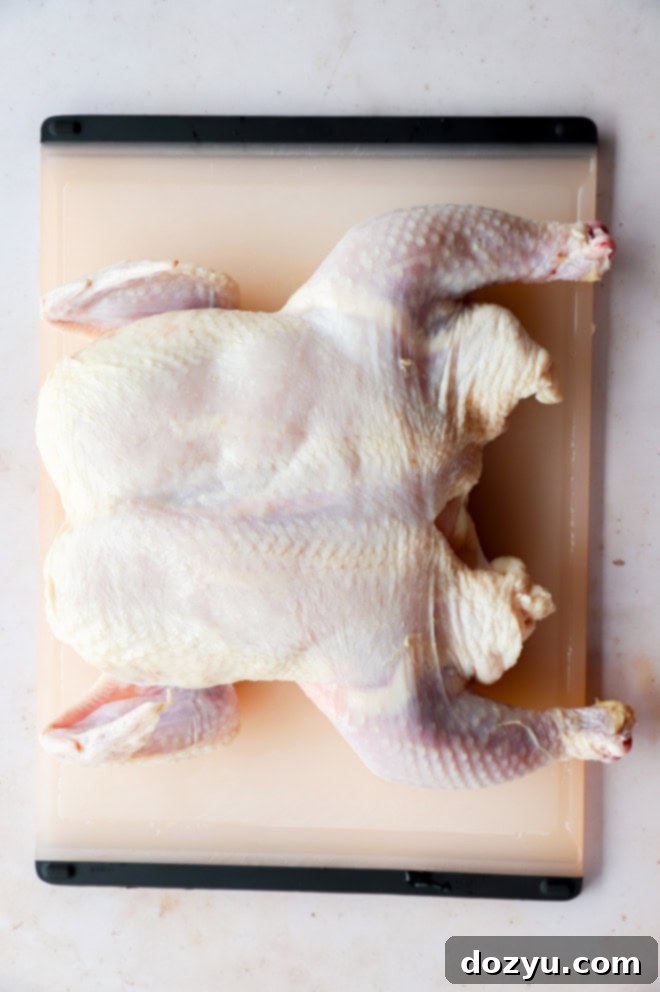
The secret to this recipe’s success lies in a simple yet revolutionary technique: spatchcocking. Also known as butterflying, this method involves removing the chicken’s backbone and flattening the bird. This seemingly small alteration has a profound impact on the cooking process and the final outcome. By allowing the chicken to lie flat, every part of the bird is exposed to even heat, ensuring that both the breast meat and the dark meat cook at a similar rate. This eliminates the common problem of dry breast meat while waiting for the thighs to reach temperature. Additionally, a flattened chicken has more surface area exposed to the grill, promoting incredibly crispy skin and significantly reducing cooking time. It’s the ultimate hack for achieving a perfectly cooked whole chicken with minimal fuss and maximum flavor.
Essential Ingredients for Grilled Chicken
Achieving a mouthwatering grilled chicken doesn’t require a long list of exotic ingredients. In fact, simple, high-quality components are all you need to bring out the best in your bird. Here’s a closer look at what you’ll need:
- Oil: A good quality oil is crucial for preparing your grill grates. We highly recommend using avocado oil due to its exceptionally high smoke point, which prevents it from breaking down and causing unwanted flavors at grilling temperatures. Alternatively, grapeseed oil or even a light olive oil (not extra virgin, which has a lower smoke point) can be used. Oiling the grates creates a non-stick surface, ensuring your chicken skin stays intact and crispy, not stuck to the grill.
- Rub: The flavor of your grilled chicken largely hinges on the rub you choose. While a simple seasoning of salt and freshly ground black pepper is always a classic, we find that a good BBQ chicken rub takes it to the next level. Look for blends with paprika, garlic powder, onion powder, and a touch of brown sugar for that perfect balance of smoky, sweet, and savory. Feel free to experiment with your favorite store-bought spice mix, or create your own with fresh herbs like finely chopped rosemary, thyme, or oregano for an aromatic twist.
- Chicken: For this recipe, a whole chicken is essential. When you unwrap it, always remember to remove any giblets or neck parts stored inside the cavity. These can be saved to make a flavorful chicken stock later. Aim for a chicken in the 3 1/2 to 5-pound range for optimal cooking time and manageability on the grill. Opting for a fresh, high-quality chicken will also significantly impact the final taste and texture.
- Marinade (Optional but Highly Recommended): If you have the luxury of time, marinating your chicken is a step that truly pays off in terms of juiciness and depth of flavor. A good marinade penetrates the meat, tenderizing it and infusing it with additional moisture and taste. You’ll need to plan ahead, as the chicken should marinate for at least 4 hours, or ideally, up to overnight in the refrigerator. Consider options like a honey-soy blend for a sweet and savory profile, a Mexican-inspired marinade with citrus and chili, or a Greek yogurt-based marinade for tender results. Remember to pat the chicken thoroughly dry after marinating and before grilling to ensure a crispy skin.
Must-Have Tools for Perfect Grilling
While grilling a whole chicken might seem like a simple process, having the right tools on hand can make all the difference in achieving outstanding results with ease and safety. Here are the essential items you’ll want in your kitchen and at your grill:
- High-Quality Kitchen Shears: These are indispensable for the spatchcocking technique. A sturdy pair of kitchen shears with sharp blades will allow you to effortlessly cut through the chicken’s backbone, making the spatchcocking process quick and clean.
- Plastic Cutting Board: When working with raw poultry, a dedicated plastic cutting board is a must for food safety. It helps prevent cross-contamination with other foods and is easy to sanitize thoroughly after use.
- Reliable Grill: The heart of this recipe is, of course, the grill. We’re partial to our Traeger grill, as the wood pellets infuse the chicken with an incredible smoky flavor that truly permeates every bite. Plus, its dual functionality as a smoker offers even more culinary possibilities. However, a gas grill for convenience or a charcoal grill for that classic char and intense smoky flavor will also work beautifully for this recipe. Ensure your grill is clean and ready for action.
- Instant-Read Meat Thermometer: This is arguably the most critical tool for grilling any poultry. An (example link for instant-read thermometer) instant-read thermometer ensures your chicken is cooked to a safe internal temperature of 165°F without overcooking and drying out. It takes the guesswork out of grilling and guarantees perfectly juicy results every time.
How to Master Grilled Whole Chicken: Step-by-Step
Grilling a whole chicken to perfection might sound complex, but by following these simple, detailed steps, you’ll achieve succulent meat and crispy skin every single time. The key is in the preparation and understanding your grill.
Spatchcocking the Chicken: The First Step
The journey to an evenly cooked, juicy grilled chicken begins with spatchcocking. This technique, also known as butterflying, involves removing the backbone and flattening the chicken. This allows for superior heat distribution, ensuring both white and dark meat cook uniformly and quickly.
- Start by placing the whole chicken breast-side down on a clean plastic cutting board. Locate the backbone, which runs down the center of the chicken’s back.
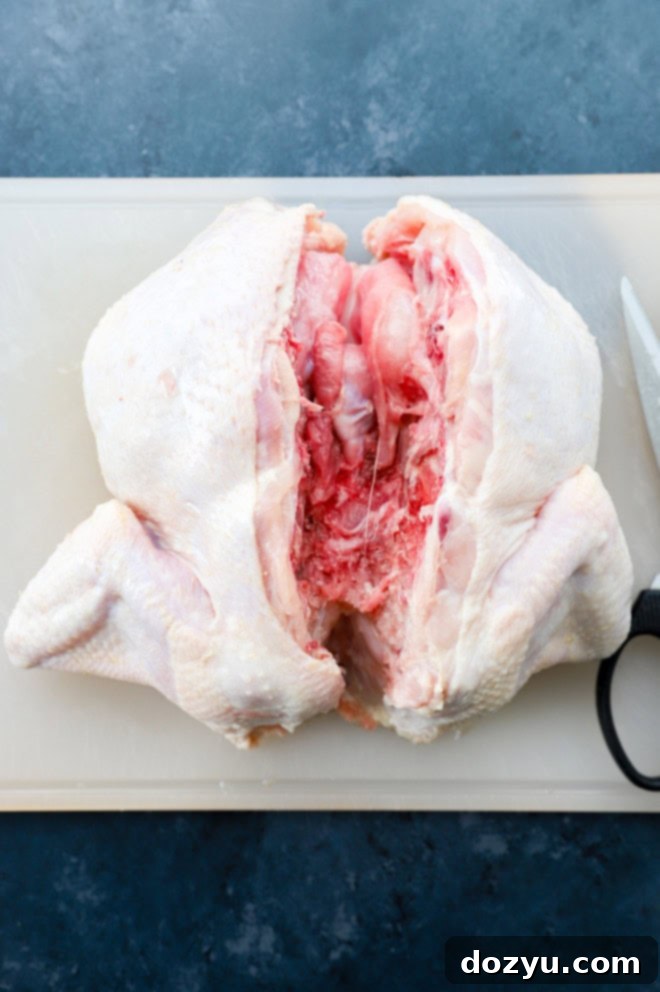
- Using a sturdy pair of kitchen shears, cut down one side of the backbone, working from the tail end towards the neck. You’ll need to apply firm pressure, but the shears should cut through the rib bones with relative ease.
- Repeat this process on the other side of the backbone, carefully cutting it free. Once removed, you can discard the spine or, even better, save it for making a rich and flavorful chicken stock.
- Flip the chicken over so it’s breast-side up. Now, firmly press down on the breastbone with the heels of your hands until you hear a crack. This action flattens the chicken completely, ensuring it lies flat on the grill and cooks evenly.
Seasoning for Maximum Flavor
Once your chicken is spatchcocked, it’s time to infuse it with incredible flavor. This step is where you can truly customize the taste profile to your preference.
- Begin by patting the chicken completely dry with paper towels. This crucial step is key to achieving that desired crispy skin. Excess moisture on the skin will steam rather than crisp.
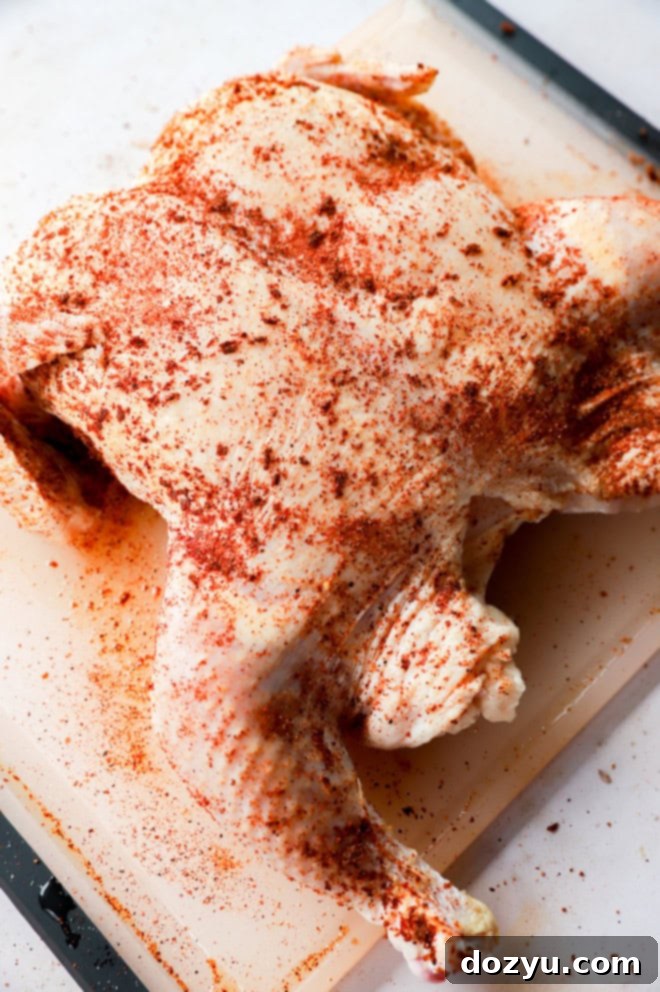
- Generously season the chicken all over with your chosen BBQ chicken rub, or a simple mixture of salt and black pepper. Don’t forget to get some seasoning under the skin as well, especially over the breast meat, for deeper flavor penetration.
- Optional Marinade: As mentioned, for an extra boost of juiciness and flavor, you can marinate the seasoned chicken. Place it in a large bag or dish, ensuring it’s evenly coated with your chosen marinade. Refrigerate for a minimum of 4 hours, or ideally, overnight. Before grilling, remove it from the marinade and pat it thoroughly dry again to ensure crispy skin.
Grilling to Perfection
Now for the main event: grilling! Proper grill setup and temperature management are vital for a beautifully cooked whole chicken.
- Preheat Your Grill: Set your grill to preheat to 400˚F (200°C). Whether you’re using a gas grill, a pellet grill (like a Traeger), or a charcoal grill, maintaining a consistent temperature is key. For charcoal grills, aim for a medium-high indirect heat setup.
- Oil the Grates: Once the grill is hot, carefully oil the grates using a paper towel dipped in high-smoke-point oil (like avocado or grapeseed oil) held with tongs. This prevents the chicken from sticking and helps create those desirable grill marks.
- Position the Chicken: Place the spatchcocked chicken, breast-side up, directly on the grilling grate over indirect heat. Indirect heat means the chicken is not directly over the heat source, allowing it to cook gently and evenly without burning the skin. If using a gas grill, turn off the burner directly beneath the chicken and use adjacent burners for heat. On a charcoal grill, push coals to one side.
- Cook Covered: Close the grill lid and cook for approximately 45 minutes to 1 hour. The cooking time will vary depending on the size of your chicken and the consistency of your grill’s temperature.
- Check Internal Temperature: The most reliable way to know your chicken is done is by using an instant-read thermometer. Insert it into the thickest part of the thigh (without touching the bone). The chicken is ready when it reaches an internal temperature of 165˚F (74°C). For best results, we recommend removing the chicken when it hits 162-163°F, as it will continue to cook as it rests.
- Rest the Chicken: This step is non-negotiable for juicy chicken! Once removed from the grill, let the grilled whole chicken rest, loosely tented with foil, for at least 10 minutes before carving and serving. This allows the juices to redistribute throughout the meat, ensuring every bite is moist and flavorful.
- Serve: Carve your perfectly grilled chicken into pieces and serve it as is, or with your favorite barbecue sauce on the side for an extra layer of flavor.
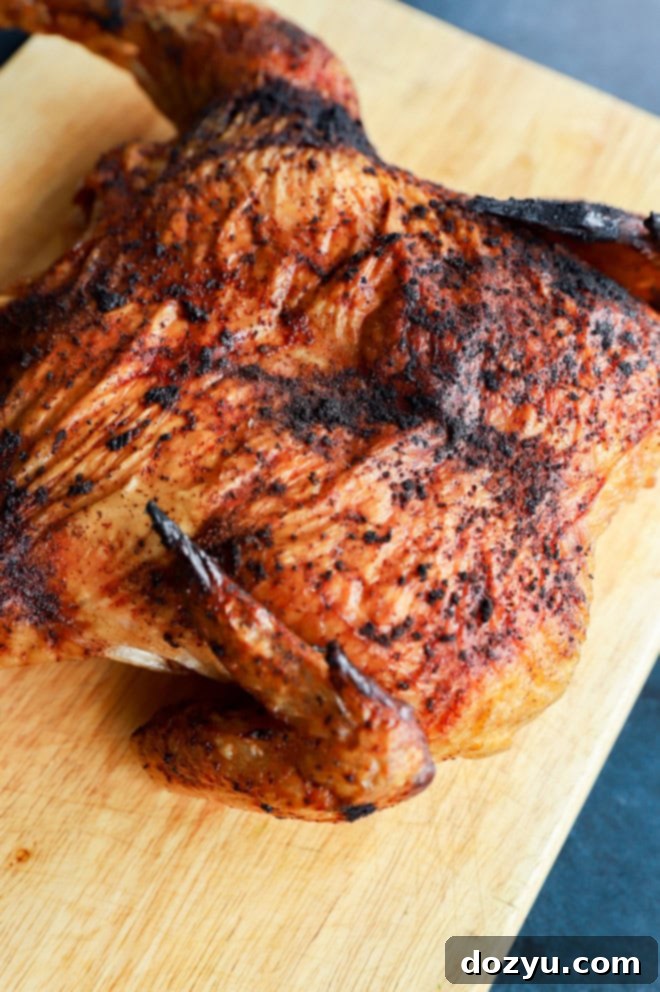
Expert Tips and Tricks for Grilling Chicken
Elevate your grilled whole chicken from good to spectacular with these tried-and-true tips and tricks:
- Embrace a Flavorful Spice Mix: While salt and pepper are foundational, a well-crafted spice mix can dramatically transform your chicken. Our go-to bbq chicken rub delivers a fantastic balance of smoky and savory notes. Don’t hesitate to experiment with different flavor profiles—think Italian herbs, Cajun seasoning, or a zesty lemon-herb blend. Apply the rub generously, even gently lifting the skin to season the breast meat directly for maximum flavor.
- Your Best Friend: A Meat Thermometer: This tool is non-negotiable. An instant-read meat thermometer will be your most reliable guide to ensuring your chicken is perfectly cooked, reaching a safe internal temperature of 165˚F (74°C) without venturing into the dreaded dry zone. Always insert it into the thickest part of the thigh, away from the bone, for an accurate reading.
- Never Skip the Rest: As tempting as it is to dive right in, letting your chicken rest for at least 10-15 minutes after grilling is crucial. This allows the muscle fibers to relax and the juices to redistribute throughout the meat, resulting in a significantly more tender and moist chicken. Carving too soon will cause all those delicious juices to run out onto your cutting board instead of staying in the meat.
- Pat It Dry for Crispy Skin: For truly crispy skin, moisture is the enemy. After rinsing or marinating, ensure you thoroughly pat the chicken dry with paper towels. A dry surface allows the skin to crisp up beautifully through the Maillard reaction, rather than steam and remain rubbery.
- Consider a Brine for Ultimate Juiciness: If time allows, brining your chicken (submerging it in a saltwater solution) for a few hours before seasoning can significantly boost its moisture content and tenderness. It helps the chicken retain moisture during high-heat grilling, making it incredibly juicy.
- Master Two-Zone Grilling: For even cooking and to prevent burning, utilize two-zone grilling. This means having one area of the grill set to high or medium-high heat (direct heat) and another area set to low or no heat (indirect heat). You’ll start the chicken over indirect heat to cook it through gently, and if desired, finish it over direct heat for a quick sear to enhance crispiness.
- Prevent Flare-Ups: Fat dripping onto hot coals or burners can cause flare-ups, which might char your chicken’s skin. Keep a spray bottle of water handy to spritz any flames that erupt, or simply move the chicken to a cooler part of the grill until the flare-up subsides.
- Check Temperature in Multiple Spots: For absolute certainty, check the internal temperature in a couple of different places on the thigh to ensure consistent doneness throughout the bird.
More tasty grilled chicken recipes to try out: Grilled Chipotle BBQ Chicken Skewers | Smoked Chicken | Spicy Korean Chicken Bowls | Grilled Avocado Caprese Chicken
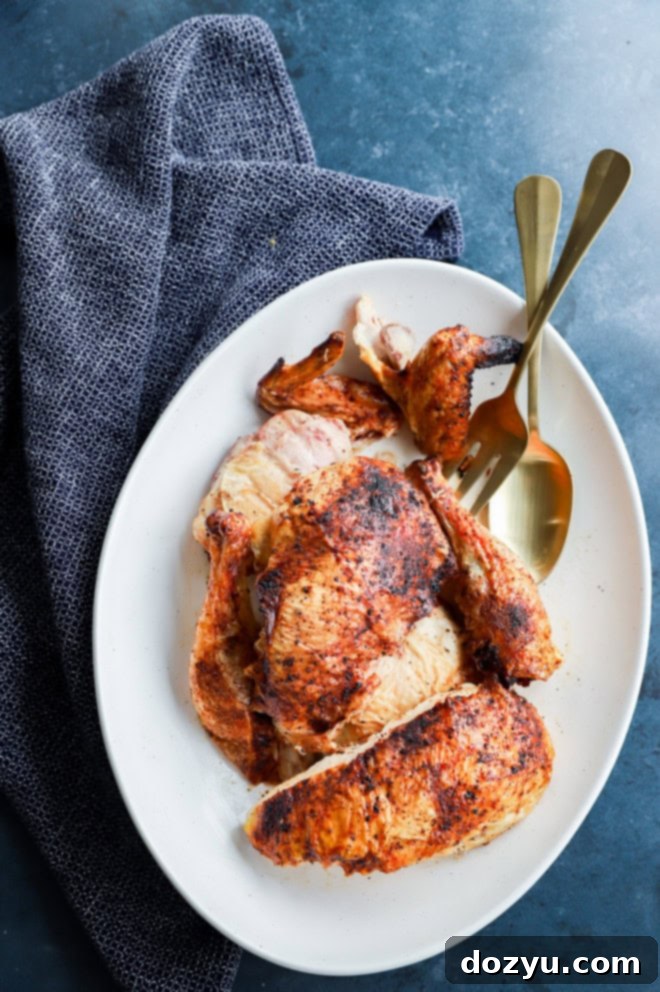
Frequently Asked Questions About Grilling Chicken
How Long to Grill a Whole Chicken?
A spatchcocked whole chicken typically takes about 45 minutes to 1 hour to cook through when grilled at 400°F (200°C) over indirect heat. For our 3 1/2-pound chicken in this recipe, it usually takes about 45 to 50 minutes. However, the exact cooking time can vary significantly based on several factors, including the precise size and thickness of your chicken, the type of grill you are using (gas, charcoal, or pellet), and even ambient air temperature. Always rely on an instant-read meat thermometer to confirm doneness rather than strictly adhering to a time guideline.
Ideal Grilling Temperature for Chicken
We consistently recommend grilling a whole chicken at 400˚F (200°C). This temperature provides the perfect balance: it’s hot enough to ensure the chicken cooks through efficiently and the skin gets wonderfully crispy, but not so hot that the exterior burns before the interior is fully cooked. Using indirect heat at this temperature ensures a gentle, even cook, preventing the chicken from drying out while still achieving that desirable grilled char and flavor.
Knowing When Your Grilled Chicken is Done?
The definitive indicator that your grilled chicken is ready to enjoy is when its internal temperature reaches 165˚F (74°C). To measure this accurately, insert an instant-read thermometer into the thickest part of the thigh, making sure not to touch the bone, as bone can give a false reading. A useful trick is to remove the chicken from the grill when it hits about 162-163˚F (72-73°C). The residual heat, known as “carry-over cooking,” will continue to raise the temperature by a few degrees as the chicken rests, bringing it to the perfect 165°F and ensuring maximum juiciness.
How Do I Prevent the Chicken from Drying Out?
Achieving a moist and tender grilled chicken every time is easily attainable by focusing on three key elements:
- Use a Marinade: This is one of the best defenses against dry chicken. Marinades, especially those containing acidic components (like citrus or vinegar) or dairy (like yogurt), help to tenderize the meat and infuse it with moisture and flavor. Some fantastic options include a savory honey soy marinade, a zesty Mexican chicken marinade, a tenderizing Greek yogurt chicken marinade, or a versatile all-purpose marinade that works wonders on various meats.
- Do Not Overcook: Overcooking is the primary culprit behind dry chicken. This is precisely why an instant-read meat thermometer is indispensable. As soon as the thickest part of the thigh reaches 162-163˚F internally, remove it from the heat. Don’t wait for 165˚F on the grill; the carry-over cooking will bring it to the perfect temperature during resting.
- Rest the Chicken Properly: Once off the grill, allow the chicken to rest, loosely tented with foil, for at least 10 to 15 minutes before you even think about carving it. This resting period is critical because it gives the muscle fibers time to relax and reabsorb the flavorful juices that have been pushed to the center during cooking. Slicing the chicken too soon will cause these precious juices to escape, leaving you with dry meat. Patience here is truly a virtue, directly translating to a more succulent and enjoyable chicken.
Need some inspiration for grilling? Check out my grilling recipes page!
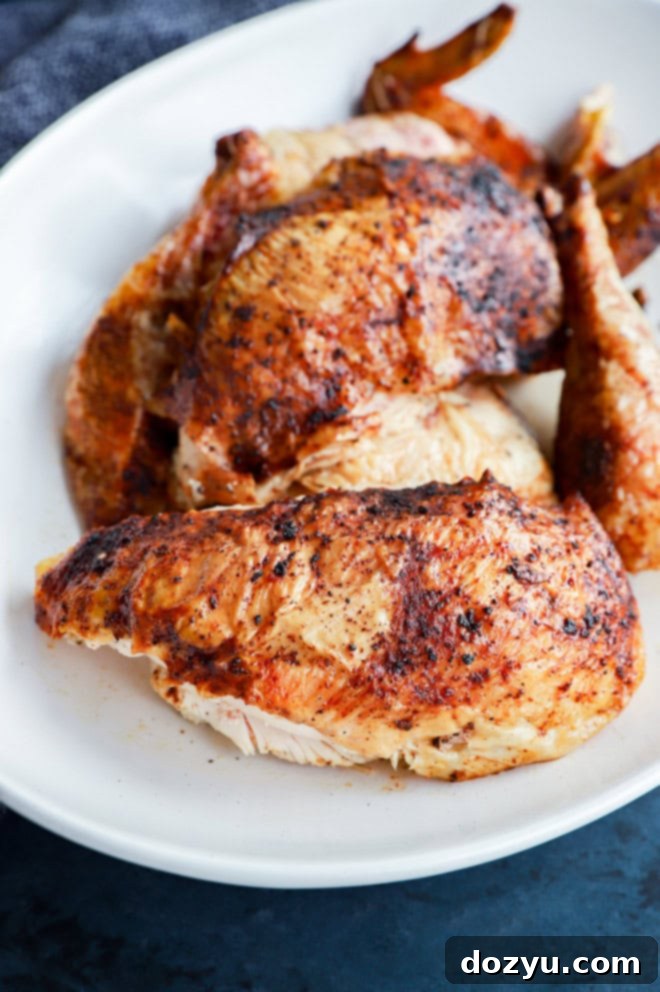
What to Serve with Your Grilled Chicken
A perfectly grilled whole chicken is a versatile dish that pairs wonderfully with an extensive range of side dishes. When it comes to the best side dishes for grilled chicken, the possibilities are truly endless, allowing you to tailor your meal to any season or craving. For us, we often gravitate towards keeping things simple yet incredibly satisfying. Here are some of our favorite side dishes that complement the smoky flavors of grilled chicken:
- Creamy Classic Mac and Cheese: A rich and creamy four cheese mac and cheese is always a guaranteed hit with all ages. Its comforting texture and cheesy goodness offer a delightful contrast to the savory chicken.
- Smoky Charred Corn: Bring more grill flavor to your plate with smoky charred corn. This can even be tossed onto the grill alongside the chicken during its final cooking stages for maximum efficiency and flavor.
- Refreshing Pasta Salad: A bright and cooling summery lemon pasta salad is perfect for lightening up the meal. Bursting with fresh tomatoes, basil, and a zesty dressing, it adds a vibrant, herbaceous note.
- Simple Tomato Onion Salad: For something truly fresh and minimal effort, a simple tomato onion salad dressed with a straightforward 3-ingredient vinaigrette provides a crisp and tangy counterpoint.
- Easy Air Fryer Delicata Squash: Quick, convenient, and universally loved, air fryer delicata squash offers a slightly sweet and tender side that’s surprisingly effortless.
- Crispy Oven-Fried Potatoes and Onions: Indulgently crispy oven fried potatoes and onions deliver all the satisfying flavor and texture of fried potatoes without the fuss of deep-frying. They’re utterly addictive!
- Flavorful Sautéed Zucchini: During the peak of summer, sautéed zucchini is a wonderfully simple and flavorful option, making the most of seasonal produce.
- Tangy Key Lime Pie Crush Cocktail: To complement the savory main course with a refreshing beverage, a key lime pie crush cocktail offers a delightful tangy and tart pairing.
- Sweet Dessert Finale: Cap off your meal with something sweet but easy. Explore one of our favorite 3-ingredient dessert recipes for a perfect ending.
Storage and Reheating Grilled Chicken Leftovers
Cooked whole grilled chicken is fantastic for meal prep and makes for delicious leftovers. Proper storage and reheating ensure you can enjoy its flavors for days to come.
- Storing Leftovers: Always allow any leftover chicken to cool down to room temperature completely (within two hours) before storing. Once cooled, transfer the chicken pieces to an airtight container. It will keep well in the refrigerator for up to 3 to 4 days. This prevents bacterial growth and maintains freshness.
- Reheating: For quick reheating, place individual portions on a microwave-safe plate and warm them through in the microwave until heated evenly. For best results, especially if you want to maintain some crispiness, you can reheat in a preheated oven at 300°F (150°C) for about 15-20 minutes, or until warmed through. You can enjoy the meat as is, or creatively incorporate it into new meals like chicken tacos, sandwiches, wraps, salads, pasta dishes, or even soups and stews.
- Freezing: If you have a larger quantity of leftovers or want to extend the chicken’s shelf life, cooked grilled chicken freezes beautifully. Once cooled, shred or chop the meat and place it in freezer-safe bags or airtight containers. It can be stored in the freezer for up to 4 months. Label with the date for easy tracking.
- Thawing: To thaw frozen grilled chicken, transfer it to the refrigerator and let it defrost overnight. Once thawed, it can be reheated using the methods described above. Ensure it reaches an internal temperature of 165°F (74°C) before consuming.
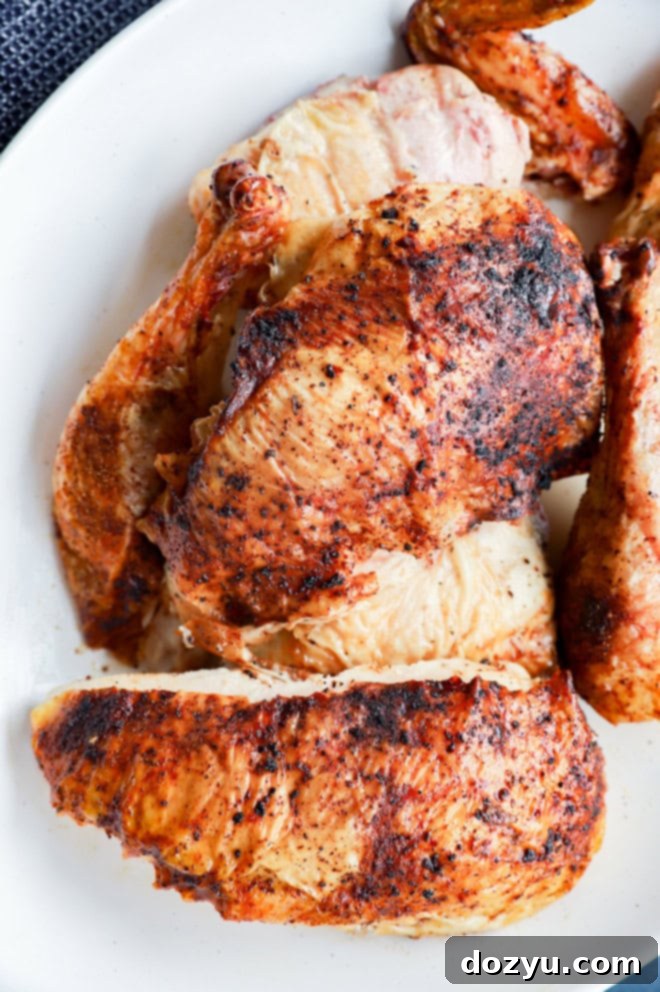
Explore More Grilled Main Dishes
If you’ve enjoyed mastering this grilled whole chicken, you’re likely eager to explore more delicious possibilities on the grill. The open flame and smoky flavors can elevate so many dishes, making them perfect for outdoor dining and entertaining. Here are a few more fantastic grilled main dishes to add to your repertoire:
- For the steak lovers, this grilled New York strip steak recipe offers a foolproof method for achieving a perfectly seared exterior and a tender, juicy interior every time. It’s a classic for a reason!
- If your grill doubles as a smoker, or if you have a dedicated smoker, you simply must try this incredibly juicy smoked pork loin. The slow smoking process imbues the pork with an unbeatable depth of flavor and tenderness.
- Nothing beats pizza night, especially when it’s made on the grill! Fire up your grill to create this savory and cheesy grilled burrata pizza. The crispy crust and melted burrata make it an ideal choice for laid-back summer pizza nights at home.
Finally, if you make this grilled whole chicken recipe, please be sure to give it a star recipe rating on the recipe card below and/or leave a comment! Your feedback is invaluable, and I genuinely love hearing about your culinary successes. I make it a point to respond to every single comment.
Feel free to drop any questions below too – I’m always happy to help!
Oh, and be sure to tag me on Instagram, Facebook, or Pinterest if you whip up this delicious recipe! Seeing these recipes come to life in your homes is my absolute favorite thing, and it truly means the world to me!
Want to stay in the loop for new recipes and the latest culinary news? Sign up for my newsletter and get fresh ideas delivered right to your inbox!
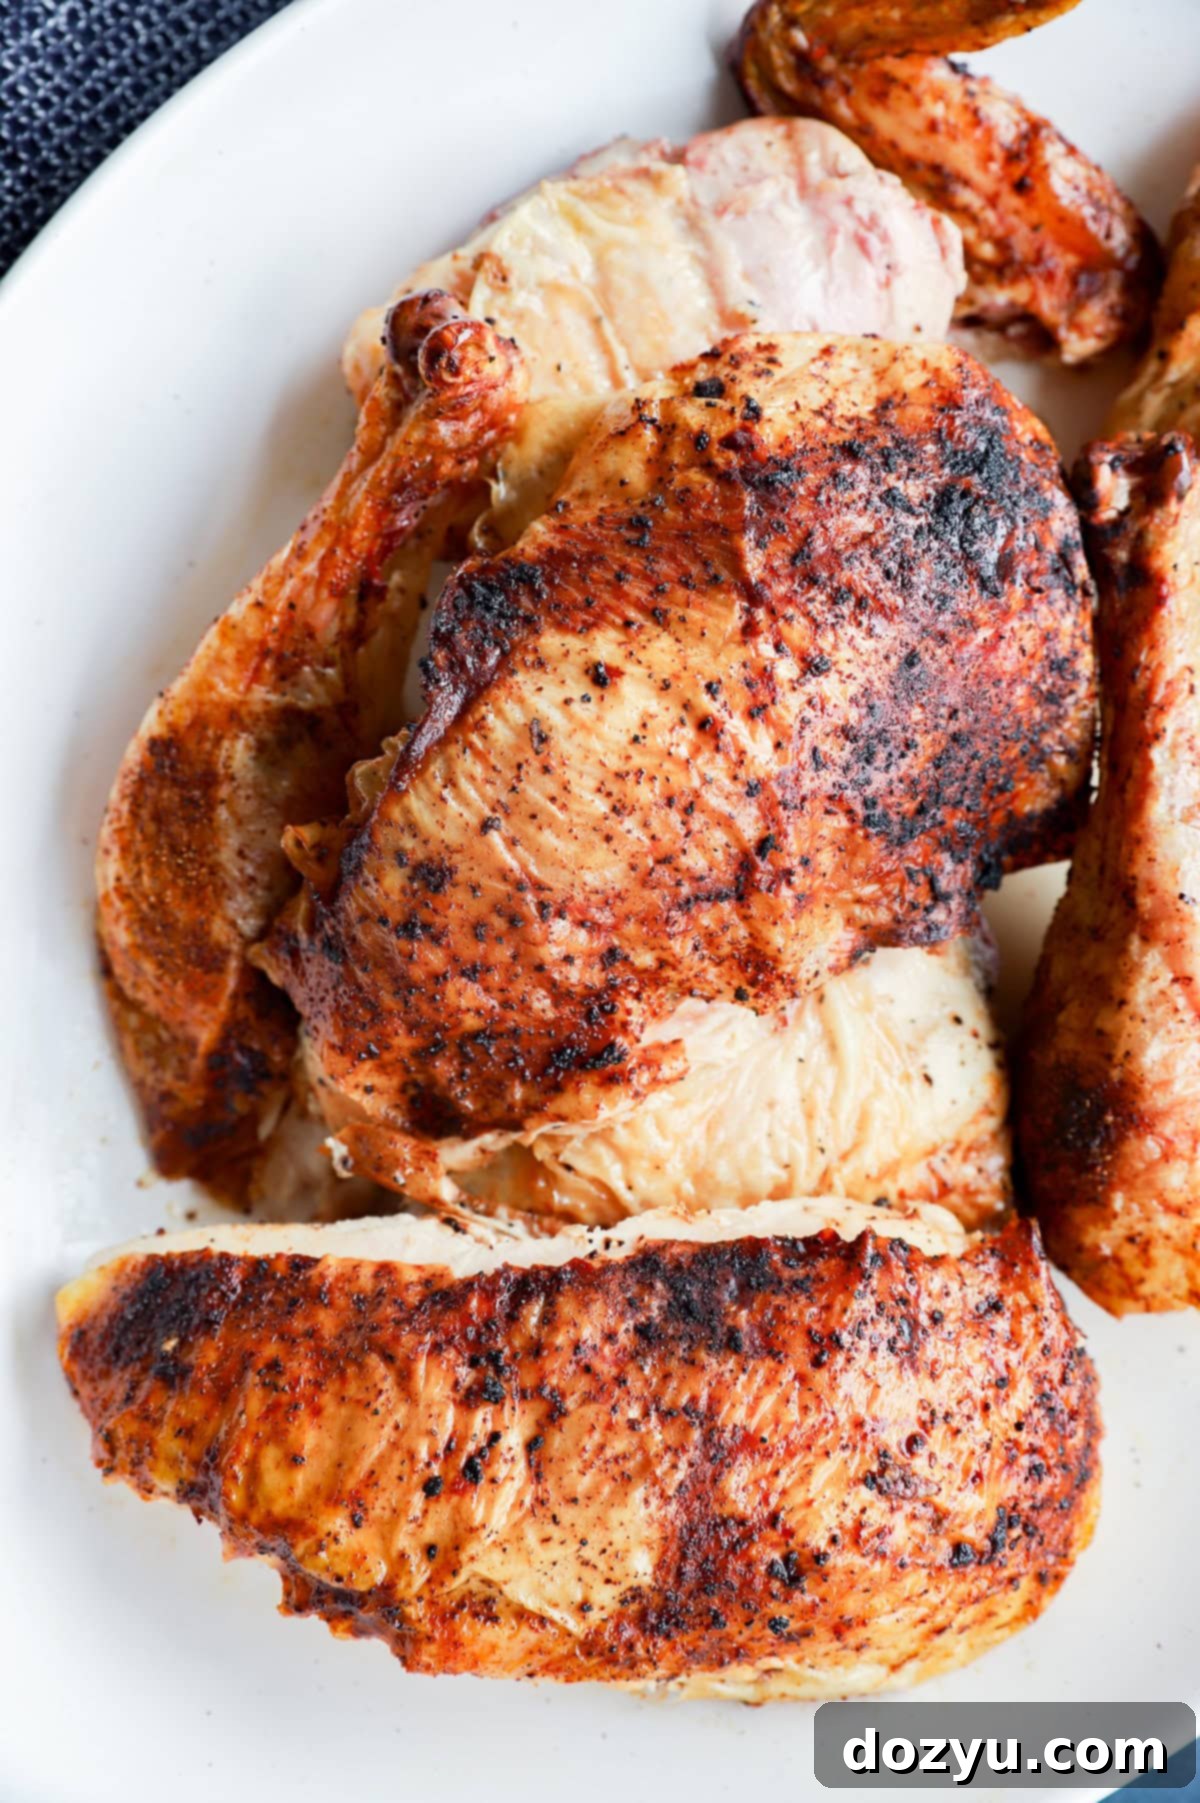
Grilled Whole Chicken
equipment
-
Shun DM7300 Multi-Purpose Shears, Black/Silver
-
Utility Cutting Board
-
Traeger Lil Tex Elite 34 Pellet Grill
-
signature wood pellets
ingredients
- Oil for the grates
- 3 tsp BBQ chicken rub
- 1 3 1/2 to 5 lbs whole chicken
instructions
-
Preheat the grill to 400˚F (200°C).
-
Remove the chicken from its packaging and retrieve any giblets from the cavity. Rinse the chicken under cold water and pat it thoroughly dry with paper towels to ensure crispy skin.
-
Place the bird breast-side down on a plastic cutting board. Using sturdy kitchen shears, carefully cut down both sides of the backbone to remove it completely. Flip the chicken breast-side up and press firmly on the breastbone to flatten it.
-
Season the chicken generously all over with your favorite BBQ chicken rub, or simply salt and pepper. If desired, you can marinate the chicken for at least 4 hours or up to overnight in the refrigerator; remember to pat dry before grilling.
-
Carefully oil the grates of the preheated grill to prevent the chicken from sticking.
-
Place the spatchcocked chicken, breast-side up, on the grill over indirect heat. Close the lid and cook for 45 minutes to 1 hour, or until an instant-read thermometer inserted into the thickest part of the thigh reads 165˚F (74°C).
-
Once cooked, remove the chicken from the grill and let it rest, loosely tented with foil, for at least 10 minutes before carving and serving.
