Ultimate Instant Pot Chili: Quick, Flavorful & Easy Weeknight Recipe
Discover the ultimate Instant Pot Chili recipe, packed with tender beef, hearty beans, rich tomatoes, and an aromatic blend of spices. This incredibly easy and flavorful recipe delivers that cherished slow-simmered taste in just 30 minutes, all thanks to the magic of your pressure cooker. Perfect for busy weeknights, game day, or any time you crave a comforting, robust meal, this chili is simple to customize and guaranteed to be a crowd-pleaser.

Table of Contents
Toggle
About This Instant Pot Chili
This Instant Pot chili recipe is your ultimate solution for quick, delicious weeknight dinners and effortless entertaining. Gone are the days of spending hours stirring a pot on the stove to achieve that perfect, deep chili flavor. With the magic of your electric pressure cooker, you can create a rich, hearty, and unbelievably flavorful chili in just 30 minutes – it truly tastes like it’s been simmering all day long!
We all love a classic chili, and this recipe captures all the traditional essence with a modern, time-saving twist. It’s loaded with a harmonious blend of lean ground beef, three types of wholesome beans, robust tomatoes, and a secret ingredient that elevates its depth. Whether you’re preparing for a game day feast, looking for an easy meal prep option, or simply feeding a hungry family, this one-pot wonder makes cleanup a breeze, leaving you with more time to enjoy your meal.
The secret to its incredible flavor profile lies in carefully layering ingredients. Starting with sautéing fresh onions and garlic directly in the Instant Pot builds a foundational aroma. Adding a touch of unsweetened cocoa powder might seem unconventional, but it enhances the savory notes and provides an unmatched depth, making the chili taste incredibly complex without being sweet. The result is a thick, velvety chili with perfectly tender beans and succulent meat that will have everyone asking for seconds.
Not only is this chili fantastic on the day it’s made, but like all great chilis, it tastes even better the next day as the flavors continue to meld. Plus, it’s incredibly freezer-friendly, allowing you to easily portion it for future busy nights when cooking feels like a chore. Serve it however you like – piled high with shredded cheese, a dollop of sour cream, or any of your favorite chili fixings. There’s truly no wrong way to enjoy this comforting bowl of goodness.
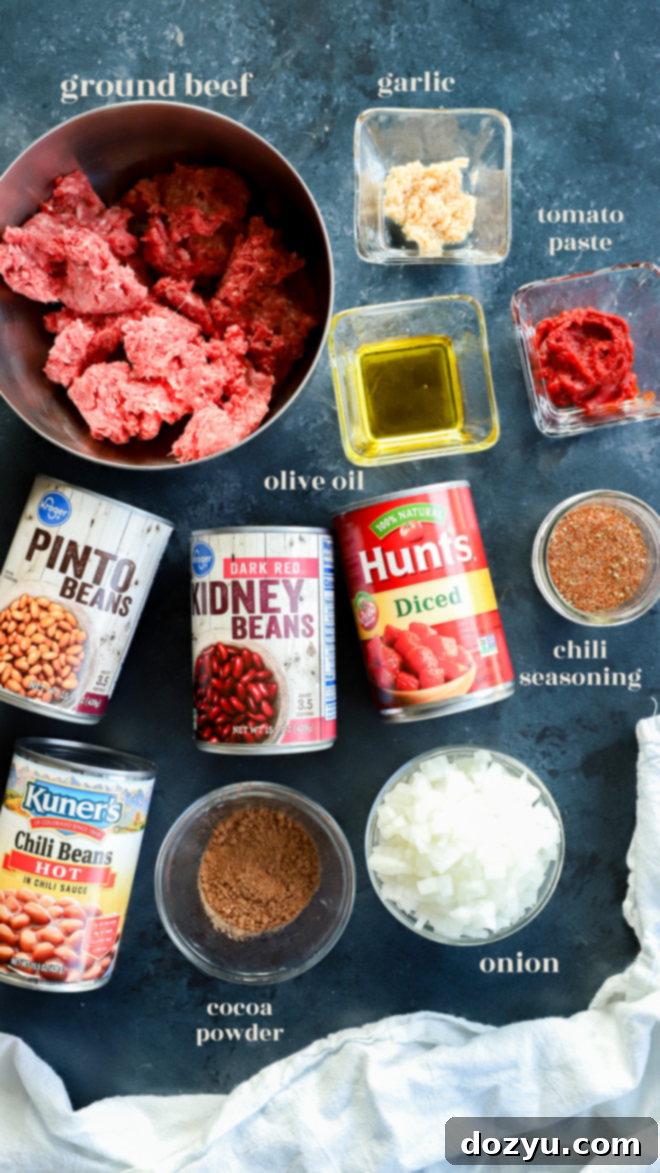
Ingredients You’ll Need
Crafting the perfect Instant Pot chili starts with selecting quality ingredients. Here’s a breakdown of what you’ll need and why each component is important:
- Oil: We typically use extra virgin olive oil for its mild flavor, but feel free to substitute with another neutral oil such as avocado oil or grapeseed oil. These oils have a higher smoke point and won’t overpower the chili’s flavors.
- Onion: A staple in chili, onion adds a foundational layer of sweetness and aroma. Both white and yellow onions work wonderfully here, though we lean towards yellow onions for their slightly milder, sweeter profile when cooked. Ensure it’s finely diced for even distribution.
- Garlic: Essential for aromatic depth. While mincing fresh garlic cloves provides the most pungent flavor, using a jar of pre-minced garlic is a convenient shortcut for busy cooks. Aim for about 3 cloves worth of minced garlic to infuse that irresistible savory note.
- Beef: For a hearty and less greasy chili, we recommend using lean ground beef, ideally 90% lean. This ensures a rich meatiness without excessive fat. For alternative options, refer to our FAQ section below on using different meats.
- Tomatoes: Canned diced tomatoes form the liquid base and provide tangy sweetness. Fire-roasted diced tomatoes are highly recommended as they impart a smoky, richer flavor that truly elevates the chili compared to regular diced tomatoes. Ensure you include the liquid from the can.
- Tomato Paste: This concentrated ingredient is a powerhouse of umami. Just a small amount adds significant richness and helps to thicken the chili, giving it a more robust body.
- Beans: A mix of beans adds texture, substance, and diverse flavor. This recipe calls for a combination of hot chili beans (or original if you prefer less heat), pinto beans, and kidney beans. Remember to drain and rinse all canned beans before adding them to remove excess sodium and improve texture.
- Chili Seasoning: The heart of any great chili! Our homemade chili seasoning is a perfectly balanced blend of spices you likely already have: chili powder, cumin, salt, paprika, oregano, black pepper, garlic powder, onion powder, and a hint of cayenne for just the right kick. Using homemade seasoning allows you to control the freshness and exact spice levels.
- Cocoa Powder: This is our secret weapon for adding an incredible depth of flavor. Unsweetened Dutch-processed cocoa powder rounds out the savory notes and enhances the richness without making the chili taste like chocolate. It’s a subtle addition that makes a huge difference.
Essential Equipment for This Recipe
Making chili in an Instant Pot streamlines the cooking process, but having the right tools makes it even smoother:
- Instant Pot: The star of this recipe! You’ll need an electric pressure cooker to achieve that slow-simmered flavor in a fraction of the time. We’ve successfully used various models like the Instant Pot Duo, Instant Pot Pro, and Instant Pot Ultra – all perform fantastically. For maximum versatility, we particularly love the Instant Pot Duo Crisp Ultimate Lid, which combines an air fryer and electric pressure cooker into one convenient appliance. Any 6-quart or larger Instant Pot will work perfectly for this recipe.
- Wooden Spoon Scraper: This simple tool is surprisingly crucial, especially for avoiding the dreaded “burn notice.” Its flat edge allows you to effectively scrape up any browned bits from the bottom of the Instant Pot inner pot after sautéing, ensuring a smooth pressure cooking cycle. A sturdy spatula can also work, but a wooden spoon is ideal.
- Cutting Board and Chef’s Knife: For prepping your onion and garlic.
- Measuring Spoons and Cups: To accurately measure your spices, oil, and other ingredients.
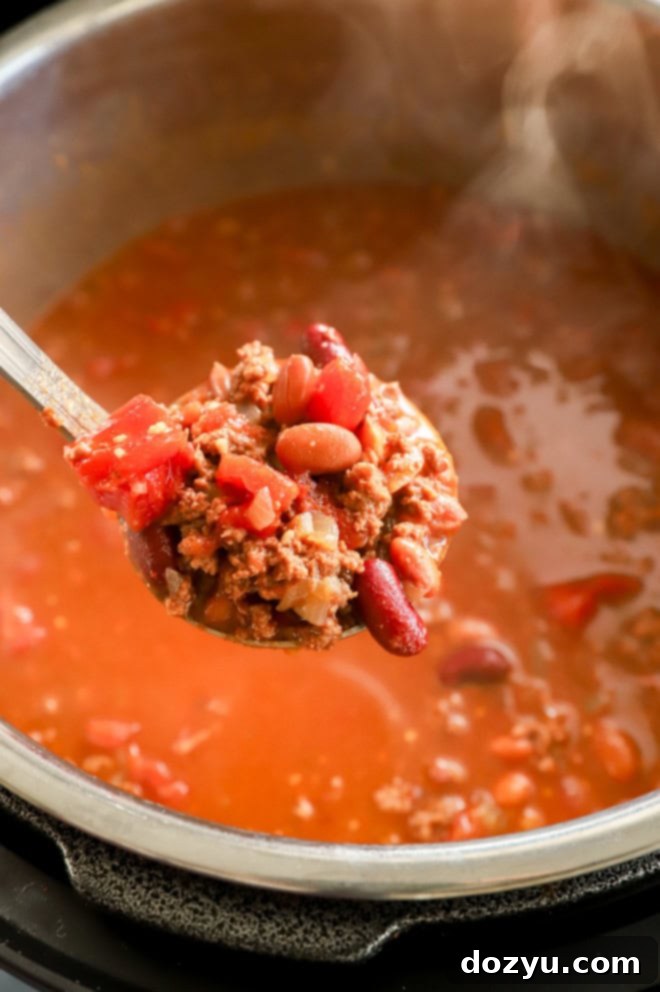
How to Make This Instant Pot Chili
Making this hearty Instant Pot chili is straightforward, broken down into a few key steps that maximize flavor and ensure a perfect cook every time. Follow these instructions for a deliciously rich result:
Sauté Your Aromatics & Beef
Begin by setting your Instant Pot to the “Sauté” function (on Normal or Medium heat). Add the olive oil to the inner pot and allow it to heat up until it’s shimmering. This usually takes a minute or two. Once hot, add your lean ground beef. Break up the beef with your wooden spoon as it cooks, browning it evenly. Browning the meat is crucial for developing deep, savory flavors that form the base of your chili.
Once the ground beef is fully browned and no longer pink, drain any excess fat if necessary. Then, stir in the diced onion and minced garlic. Continue to cook for approximately 3 more minutes, stirring occasionally. You want the onion to soften and become translucent, and the garlic to become fragrant, releasing its aromatic goodness into the pot. Be careful not to burn the garlic.
Deglaze and Scrape the Pot
This is a critical step to prevent the dreaded “burn notice” on your Instant Pot. Pour in the can of diced tomatoes, including all their liquid. Immediately use a sturdy wooden spoon or flat-edged spatula to thoroughly scrape the bottom of the Instant Pot’s inner pot. You must remove every single browned bit of meat or onion that might be stuck to the bottom. These stuck-on bits can easily trigger the burn notice during pressure cooking. Ensure the bottom is completely clean and smooth before proceeding.
Pressure Cook to Perfection
Now it’s time to add the remaining ingredients: tomato paste, all three types of beans (chili beans, pinto beans, and kidney beans), your homemade chili seasoning, and the unsweetened cocoa powder. Stir all these ingredients gently to combine them well. Avoid stirring too vigorously once the beans and tomatoes are in, as you want to minimize disturbing the scraped bottom.
Secure the lid on your Instant Pot and ensure the sealing valve is in the “Sealing” position. Select the “Manual” or “Pressure Cook” setting and set it to High pressure for 12 minutes. The Instant Pot will take some time to come to pressure before the cooking countdown begins.
Once the cooking cycle is complete, you have two options for releasing pressure: You can manually release the pressure by carefully moving the sealing valve to the “Venting” position (known as Quick Release) or allow the pressure to naturally release (Natural Pressure Release). For chili, a natural release for 5-10 minutes followed by a quick release can yield a slightly thicker chili and prevent scorching. However, a full manual release right after cooking is perfectly fine too. Always be cautious of hot steam when releasing pressure.
Once the pressure is fully released and the float valve drops, carefully open the lid. Give the chili a good stir and serve it warm with your favorite assorted toppings!
Expert Tips and Tricks
Achieving the perfect Instant Pot chili is easy with a few insider tips:
- Thicken It: If you prefer an extra thick chili, don’t worry! After the pressure cooking cycle is complete, you can simply switch your Instant Pot back to the “Sauté” function (on Low heat). Let the chili simmer uncovered for an additional 5-10 minutes, stirring occasionally. This gentle simmer will help some of the liquid evaporate and thicken the consistency to your liking. Keep in mind that chili also naturally thickens further as it cools. For a rapid thickening, you can mix a tablespoon of cornstarch with a tablespoon of cold water to create a slurry, then stir it into the simmering chili until thickened.
- Don’t Use the Chili Setting: Many Instant Pot models come with a dedicated “Chili” pre-set button. While it might seem convenient, we find that cooking this recipe on the “High Pressure” setting for the specified time yields more consistent and flavorful results. The “Chili” setting often uses a lower pressure or different timings that may not fully develop the flavors as intended for this particular recipe.
- Layering Matters: When adding ingredients after sautéing, avoid stirring in the acidic ingredients (like tomatoes) immediately after scraping the pot. Instead, add beans, spices, and tomato paste, and then gently stir. This helps prevent any fine particles from settling at the bottom and contributing to a potential burn notice.
- Rinse Your Beans: Always drain and rinse canned beans thoroughly under cold water before adding them to your chili. This removes excess sodium and any starchy liquid, resulting in a cleaner, fresher taste and better texture.
- Taste and Adjust: Once your chili is cooked, taste it! This is your opportunity to adjust seasonings. Need more salt? A pinch of sugar to balance acidity? More cayenne for heat? Don’t be afraid to tweak it to your preference.
More tasty soups and stews to enjoy: Curry Tomato Tortellini Soup | Thai Shrimp Noodle Soup | Instant Pot Tortilla Soup | Tuscan White Bean Soup

Help! I’m Getting a Burn Notice on My Instant Pot. What Do I Do?
The “burn notice” is a safety feature on the Instant Pot, indicating that there’s something stuck to the bottom of the inner pot that could scorch. It often happens when food particles adhere to the heating element. To prevent it, the most crucial step is thoroughly scraping the bottom of the insert after you add the tomatoes and their liquid. Use a flat-edged wooden spoon or a sturdy spatula to ensure *all* browned bits from sautéing are dislodged and incorporated into the liquid. Even a small, stubborn piece can trigger the sensor.
If you *do* get a burn notice during cooking, immediately turn off the Instant Pot and quick-release the pressure. Carefully remove the inner pot and check the bottom. If there are burnt bits, gently scrape them off. You might need to transfer the chili to another pot, clean the Instant Pot liner, and then return the chili. Add a little more liquid (water or broth) and ensure the bottom is perfectly clean before attempting to pressure cook again for a reduced time.
Can I Use Different Meat for This Recipe?
Absolutely! While lean ground beef is traditional and highly recommended for its rich flavor, this Instant Pot chili recipe is versatile enough to accommodate other ground meats. You can easily substitute ground beef with:
- Ground Chicken: A leaner option that results in a lighter chili. Ensure you brown it thoroughly for flavor.
- Ground Turkey: Similar to ground chicken, ground turkey is a fantastic lean alternative. Opt for 93% lean or higher to prevent the chili from becoming too dry.
- Combination: Feel free to use a mix of ground beef and another meat for a unique flavor profile.
No matter which meat you choose, the key is to brown it well during the sauté phase to build a strong flavor base.
Can I Make This Recipe Vegetarian?
Yes, this chili can be easily adapted for a delicious vegetarian version! Simply omit the ground beef from the recipe. To maintain a hearty and satisfying texture, we recommend adding an extra can of drained and rinsed black beans, lentils, or even some finely diced mushrooms when you would normally add the beef. Sauté the onions, garlic, and mushrooms (if using) in the olive oil until tender before proceeding with the tomatoes and other ingredients. The spices and beans will still create a wonderfully flavorful vegetarian chili.
How Can I Make This Chili Spicier?
If you love a chili with a fiery kick, there are several ways to boost the heat in this Instant Pot recipe:
- Cayenne Pepper: The easiest way to add heat. Increase the amount of cayenne pepper in your homemade chili seasoning. Start with an additional 1/2 teaspoon for a noticeable kick, and add more to taste.
- Crushed Red Pepper Flakes: Add 1/2 to 1 teaspoon of crushed red pepper flakes along with your other spices. They’ll infuse a slow, lingering heat throughout the chili.
- Fresh or Canned Chiles: Incorporate diced jalapeños, serrano peppers, or even a habanero (for extreme heat) during the sauté stage with the onion and garlic. For a milder, smoky heat, add a can of diced green chiles or a teaspoon of chipotle powder with the other spices.
- Hot Sauce: Serve with your favorite hot sauce on the side, allowing each person to customize their spice level.
- Spicy Beans: Ensure you are using “hot chili beans” or similar spicy varieties for an extra layer of heat from the beginning.
Can I Double This Recipe?
Yes, you can absolutely double this Instant Pot chili recipe, which is fantastic for feeding a larger crowd or for extensive meal prepping! However, it’s crucial to ensure your Instant Pot has sufficient capacity. This recipe, when doubled, requires a minimum of an 8-quart Instant Pot to prevent overfilling. A 6-quart model will not be large enough for a doubled batch.
When doubling, increase all ingredient quantities proportionately. The cooking time under high pressure (12 minutes) typically remains the same, as pressure cooking time is determined by the density of the food, not necessarily the volume. However, the time it takes for the Instant Pot to come to pressure will be longer with more ingredients. Always ensure you do not fill the Instant Pot past its ‘max fill’ line, usually indicated on the inside of the inner pot.
Need some inspiration for cooking with the Instant Pot? Check out my Instant Pot recipes page!

What to Serve With This Instant Pot Chili
A bowl of hot, hearty chili is a meal in itself, but it truly shines with the right accompaniments and toppings! Here are some fantastic ideas to elevate your Instant Pot chili experience:
- Classic Toppings:
- Shredded Cheese: Cheddar, Monterey Jack, or a Mexican blend are always winners, melting beautifully into the warm chili.
- Sour Cream or Greek Yogurt: A cooling dollop adds a creamy tang that balances the richness of the chili.
- Fresh Herbs: Chopped fresh cilantro or green onions (scallions) provide a burst of freshness and color.
- Avocado: Diced or sliced avocado adds a creamy, healthy fat element and a lovely texture contrast.
- Jalapeño Slices: Fresh or pickled jalapeños offer a vibrant, spicy kick.
- Crunchy Elements: Fritos corn chips, tortilla chips, or oyster crackers add a satisfying crunch.
- Sides to Serve With:
- Cornbread: A warm slice of cornbread (sweet or savory) is the quintessential chili side, perfect for soaking up every last bit.
- Crusty Bread: A good loaf of sourdough or a baguette is excellent for dipping.
- Simple Salad: A fresh green salad with a light vinaigrette provides a refreshing contrast.
- Creative Uses for Leftovers:
- Chili Cheese Fries: Pour warm chili over crispy French fries and top with plenty of melted cheese.
- Chili Dogs: Spoon chili over grilled hot dogs in buns for a classic, comforting meal.
- Loaded Baked Potatoes: Fill fluffy baked potatoes with chili, cheese, and your favorite toppings.
- Chili Nachos: Layer tortilla chips with chili, cheese, and other nacho fixings for a crowd-pleasing appetizer or meal.
- Chili Mac: Mix with cooked macaroni and cheese for a hearty, cheesy dish.
Don’t be afraid to mix and match to create your perfect chili bowl!
How to Store, Reheat, and Freeze Your Chili
This Instant Pot chili is fantastic for meal prep, storing beautifully for later enjoyment. Here’s how to handle your leftovers:
Storing Leftovers
Allow any leftover chili to cool completely to room temperature before storing. Transfer it to an airtight container and refrigerate promptly. Properly stored, it will last for up to 5 days, with flavors often improving on the second day!
Reheating Chili
- Microwave: For individual portions, transfer the desired amount of chili to a microwave-safe bowl. Heat on high for 1-2 minutes, stirring halfway through, until warmed through.
- Stovetop: For larger amounts or if you prefer stovetop reheating, place the chili in a saucepan over medium-low heat. Stir occasionally until it reaches your desired temperature. Add a splash of water or broth if it seems too thick.
Freezing Chili
Chili freezes exceptionally well, making it a perfect candidate for batch cooking and meal prepping:
- Preparation: Ensure the chili has cooled completely to room temperature before freezing. This prevents ice crystals from forming and helps maintain quality.
- Packaging:
- Freezer-Safe Bags: For flat storage and quick thawing, spoon cooled chili into resealable freezer-safe bags (like Ziploc). Press out as much air as possible before sealing. You can freeze individual servings for easy thaw-and-eat meals, or larger portions for family dinners.
- Containers: Alternatively, use airtight freezer-safe containers. Leave about an inch of headspace at the top to allow for expansion during freezing.
- Duration: Frozen chili will maintain its best quality for up to 3 months. While safe to eat beyond this, the texture and flavor might start to degrade.
Thawing Frozen Chili
- Refrigerator: The safest method is to transfer frozen chili from the freezer to the refrigerator and let it thaw overnight. This can take 12-24 hours depending on the portion size.
- Quick Thaw: For faster thawing, you can place a sealed freezer bag of chili in a bowl of cold water. Change the water every 30 minutes until thawed.
- Reheat from Frozen: Small portions can sometimes be reheated directly from frozen in the microwave using a defrost setting or low power. Larger blocks are best thawed first.

More Flavorful Chili Recipes to Try
If you’re a chili enthusiast, don’t stop here! There’s a whole world of delicious chili recipes to explore, each with its own unique twist:
- This Chipotle Chili offers a wonderfully smoky and simple meal, adaptable for the stovetop, Crockpot, or even your Instant Pot.
- For taco lovers, our Slow Cooker Spicy Taco Chili delivers the perfect fusion of classic taco flavors in a hearty bowl of chili, ideal for set-it-and-forget-it convenience.
- Embrace the flavors of autumn with Pumpkin Turkey Chili, a comforting and warming bowl featuring seasonal spices and pumpkin puree that’s perfect for any fall gathering.
Finally, if you make this Instant Pot chili recipe, please be sure to give this recipe a star rating on the recipe card and/or leave a comment below! I truly love hearing when you all make recipes and take the time to respond to every single comment. Your feedback helps others discover and enjoy these recipes too.
Feel free to drop any questions you have in the comments section – I’m always happy to help!
Oh, and be sure to tag me on Instagram, Facebook, or Pinterest if you make the recipe! It brings me so much joy to see these recipes come to life in your homes – looking through those photos is one of my favorite things. It genuinely means the world to me!
Want to be the first to know when I release a new recipe or share the latest news? Sign up for my newsletter and never miss an update!

Instant Pot Chili Recipe Card
Equipment
-
Instant Pot DUO (6-quart or larger)
-
Wooden Spoon & Scraper
Ingredients
- 2 tsp olive oil or other neutral oil like avocado oil
- 1 yellow onion diced (white onion also works)
- 3 cloves garlic minced (fresh or jarred)
- 1 lbs lean ground beef (90% lean recommended)
- 1 16 oz can fire roasted diced tomatoes with liquid
- 1 1/2 Tbsp tomato paste
- 1 16 oz can hot chili beans drained and rinsed (or original if preferred)
- 1 16 oz can pinto beans drained and rinsed
- 1 16 oz can kidney beans drained and rinsed
- 2 1/2 Tbsp homemade chili seasoning
- 2 tsp unsweetened cocoa powder (Dutch processed recommended for depth)
Instructions
-
Set your Instant Pot to Sauté (Normal or Medium). Heat olive oil until shimmering, then add the ground beef. Cook until browned, breaking up the beef as it cooks. Drain any excess fat if necessary.
-
Once the meat is browned, stir in the diced onion and minced garlic. Cook for about 3 more minutes, stirring occasionally, until the onion is softened and translucent.
-
Pour in the can of diced tomatoes with all their liquid. Immediately use a wooden spoon with a flat edge to vigorously scrape up all the browned bits stuck to the bottom of the pot. It’s crucial to remove them all to prevent a “burn notice.”
-
Add in the tomato paste, drained and rinsed chili beans, pinto beans, kidney beans, chili seasoning, and cocoa powder. Stir gently to combine all ingredients without disturbing the bottom of the pot too much.
-
Close the lid and set the sealing valve to “Sealing.” Select the “Manual” or “Pressure Cook” setting and cook on High pressure for 12 minutes. After cooking, you can perform a manual quick release of pressure, or allow it to naturally release for 5-10 minutes before quick releasing any remaining pressure.
-
Once pressure is fully released, open the lid, give the chili a good stir, and serve warm with your favorite assorted toppings. Enjoy!
Video
Nutrition
