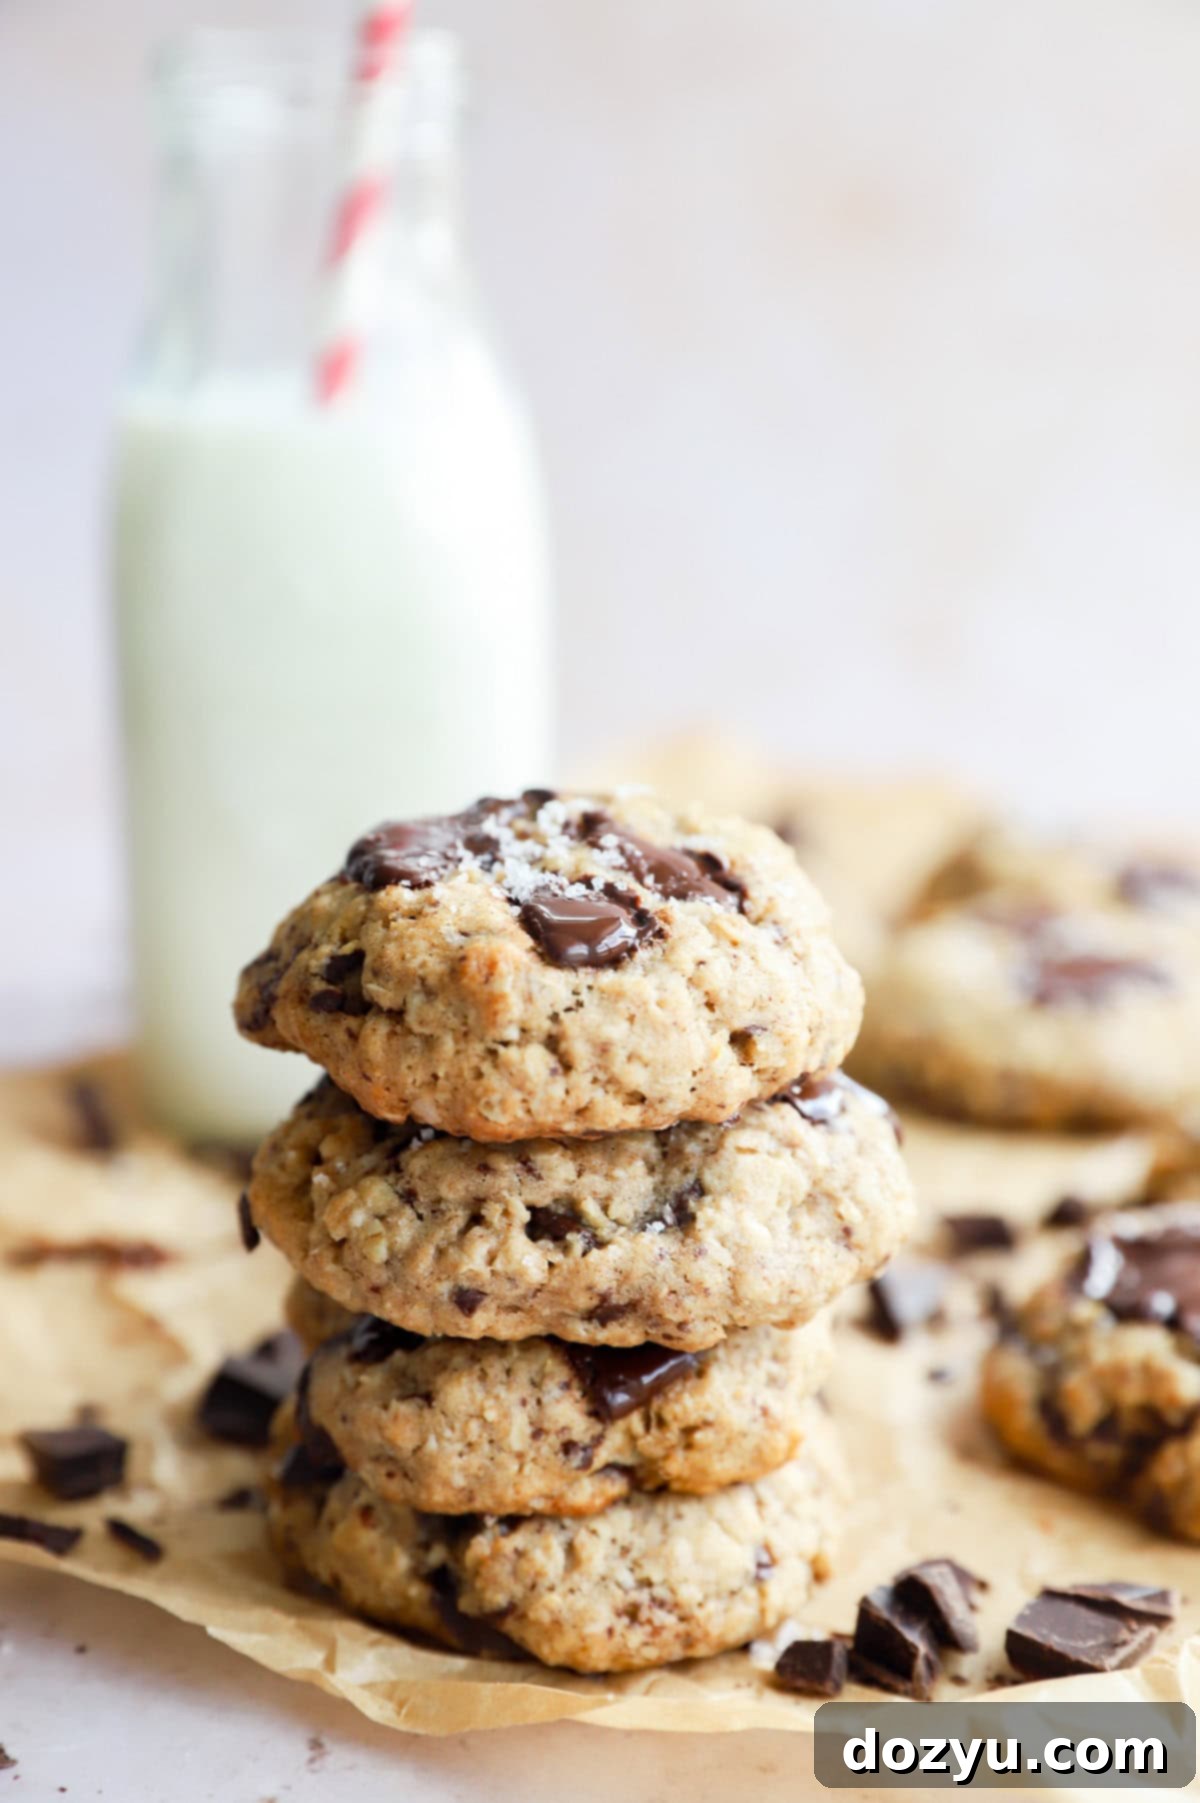
The Ultimate Chewy Oatmeal Chocolate Chunk Cookies: A Perfect Recipe
Welcome to the definitive recipe for the most delightful oatmeal chocolate chunk cookies you’ll ever bake! Imagine a cookie that’s perfectly soft and delightfully chewy in the center, with edges that are wonderfully golden and just crisp enough. Each bite is a symphony of warm, comforting flavors, generously studded with gooey, melt-in-your-mouth pools of rich chocolate. This isn’t just another cookie recipe; it’s an experience designed to utterly satisfy your sweet tooth and leave you craving more. Get ready to discover your new favorite homemade treat.
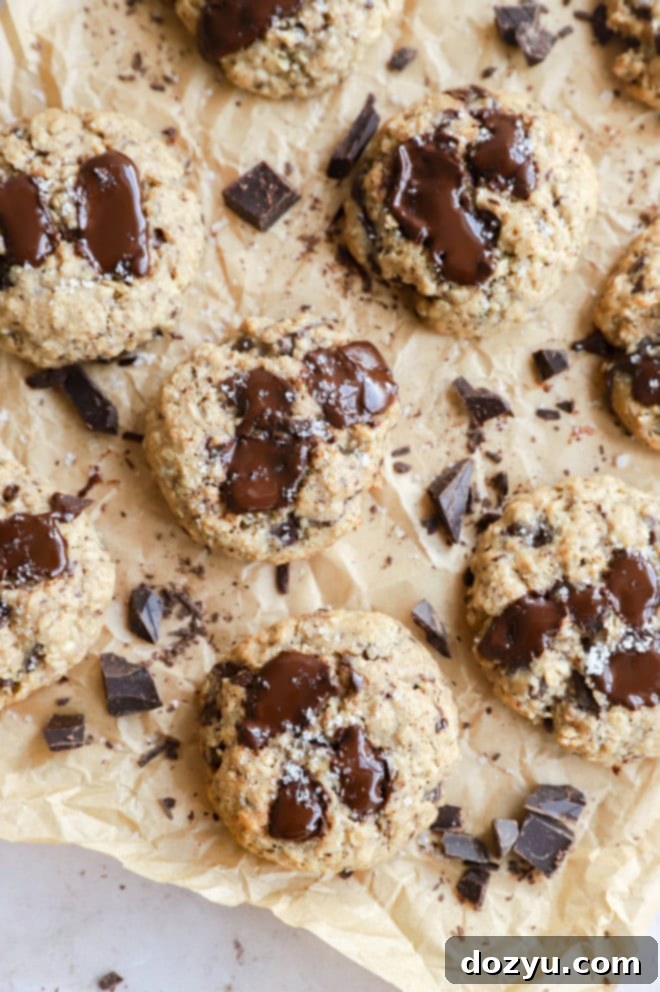
Table of Contents
Toggle
About These Oatmeal Chocolate Chunk Cookies
There’s something truly magical about a well-made oatmeal chocolate chunk cookie, and this recipe delivers that magic in spades. These cookies are not just another sweet treat; they are an experience. From the moment the aroma of baking oats and melting chocolate fills your kitchen, you know you’re in for something special. Each cookie is crafted to be wonderfully thick and satisfyingly chewy, boasting those coveted golden, slightly crisp edges that perfectly frame a soft, tender interior. What sets these apart is the generous inclusion of rich, melty chocolate chunks that create decadent pockets of bliss throughout every single bite.
Unlike their more common cousin, the chocolate chip cookie, these oatmeal chocolate chunk cookies offer a unique depth of flavor and texture. The hearty old-fashioned oats contribute an incredible chewiness that’s both comforting and substantial, while the hand-chopped chocolate creates irregular, intensely gooey puddles of chocolate goodness. This contrast between the wholesome chew of the oats and the luxurious melt of the chocolate is what makes these cookies utterly irresistible. They evoke a feeling of warmth and home, making them perfect for any occasion, whether it’s an everyday snack, a thoughtful gift, or a festive addition to your holiday dessert table.
The secret lies in the balance: the oats toast beautifully, enhancing their nutty flavor and providing that signature texture, while the robust chocolate chunks ensure a rich, consistent chocolate distribution that chips simply can’t replicate. It’s this attention to detail that elevates these from good to truly phenomenal. Expect praises and requests for the recipe every time you share them!
Ingredients for Perfection
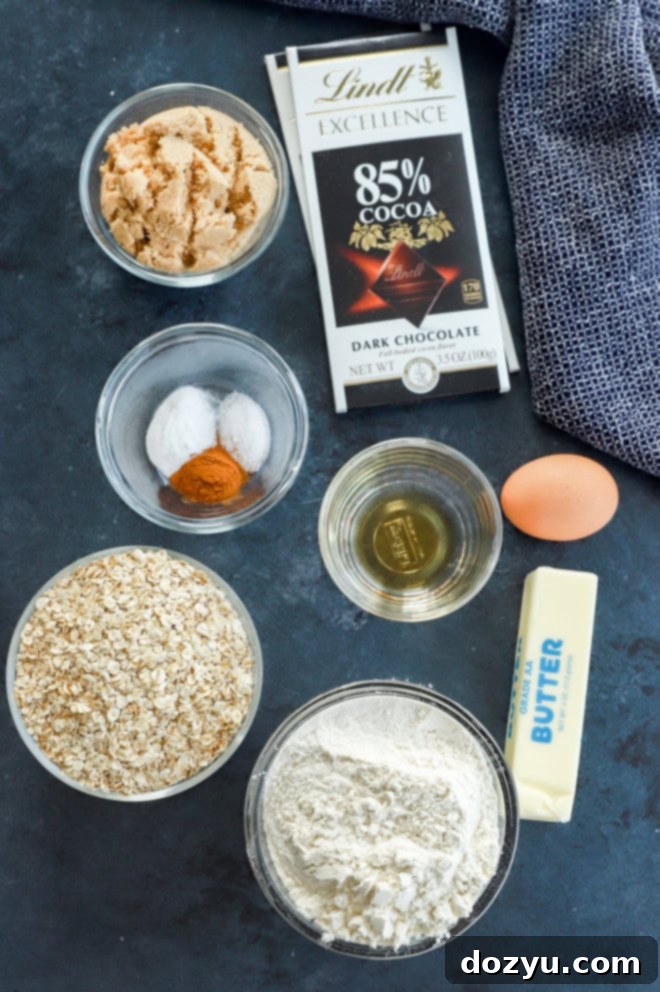
Crafting the perfect oatmeal chocolate chunk cookie starts with selecting high-quality ingredients. Each component plays a crucial role in achieving that coveted texture and rich flavor profile. Here’s a detailed look at what you’ll need and why:
All-purpose flour: This forms the structural base of your cookies. While standard all-purpose flour works beautifully, ensure you measure it correctly (using the spoon-and-level method, not scooping directly from the bag) to prevent dense or dry cookies. For those with dietary restrictions, a 1:1 gluten-free flour blend can often be substituted successfully.
Ground cinnamon: A touch of ground cinnamon is essential. It doesn’t overpower the chocolate or oat flavors but instead adds a subtle, warm spice that elevates the overall profile, making these cookies feel even more comforting and inviting. You might even consider a pinch of nutmeg or cardamom for an extra layer of warmth, though cinnamon is key.
Baking soda: This leavening agent is critical for giving your cookies a soft, chewy texture and helping them spread just enough. Always check the expiration date on your baking soda – an expired product can lead to flat, hard cookies. Freshness truly matters here!
Salt: You’ll be using two types of salt for maximum flavor impact. Fine kosher salt is incorporated into the dough to balance the sweetness and enhance all the other flavors. Flaky sea salt, sprinkled on top just before baking, provides a delightful textural contrast and a pop of savory goodness that beautifully complements the chocolate.
Old-fashioned rolled oats: The star of these oatmeal cookies! Old-fashioned oats provide the characteristic chewy texture and wholesome flavor. It’s crucial to use old-fashioned or rolled oats and avoid quick or instant oats, as these will break down too much during baking and result in a mushy texture rather than a hearty chew.
Unsalted butter: Butter is key for richness and tenderness. Using unsalted butter allows you to control the exact amount of salt in the recipe. Make sure your butter is at room temperature – this ensures it creams properly with the sugar, creating a light and airy base for your dough. If you only have salted butter, omit the fine kosher salt called for in the dough.
Brown sugar (light or dark): Brown sugar is essential for both flavor and texture. Its molasses content contributes to the cookies’ moistness and chewiness. Light brown sugar offers a milder molasses flavor, while dark brown sugar will give your cookies a richer, deeper caramel-like taste. Both work wonderfully, so choose based on your preference.
Large egg: One large egg binds the ingredients together, adds moisture, and contributes to the cookies’ structure and richness. Like the butter, ensure your egg is at room temperature for optimal emulsification with the other wet ingredients.
Pure vanilla extract: Vanilla is a flavor enhancer that brings all the ingredients together. We prefer making our own homemade vanilla extract for its depth, but a high-quality store-bought option like Madagascar Bourbon Pure Vanilla Extract will also yield fantastic results. Don’t skimp on good vanilla!
High-quality chocolate bars: This is where these cookies truly shine. Forget chocolate chips that hold their shape; we’re using chopped chocolate bars to create glorious, molten pools of chocolate in every bite. Dark chocolate is our favorite for its rich, complex flavor that balances the sweetness of the dough, but semi-sweet or bittersweet options are also excellent. See the FAQs section below for specific brand recommendations and why chopping your own chocolate makes all the difference.
Essential Equipment for Baking
Having the right tools can make all the difference in your baking experience, transforming it from a chore into a joy. For these oatmeal chocolate chunk cookies, a few key pieces of equipment will ensure consistent, professional-quality results:
- Stand mixer or handheld electric mixer with a large mixing bowl: While you can mix these by hand, a stand mixer with a paddle attachment or a powerful handheld electric mixer will make creaming the butter and sugar much easier and more efficient, ensuring a light and fluffy base for your cookie dough. The large bowl prevents spills and allows for thorough mixing.
- Cookie dough scoop: This is a game-changer for uniform cookies. A 1 ½ tablespoon cookie scoop ensures that each cookie is the same size, which means they’ll bake evenly and look consistently beautiful. No more guessing or uneven baking!
- Half sheet baking pans: Sturdy baking sheets are essential for even heat distribution. Investing in good quality half sheet pans will prevent hot spots and ensure your cookies bake to a perfect golden brown without burning.
- Silicone baking mats or parchment paper: Lining your baking pans with either silicone baking mats or parchment paper is crucial for preventing sticking and allowing for easy cleanup. Silicone mats offer an eco-friendly, reusable option that promotes even baking, while parchment paper is convenient for one-time use. Both will ensure your cookies slide right off the pan.
- Silicone Spatula: Perfect for scraping down the sides of your mixing bowl, ensuring all ingredients are thoroughly incorporated into the dough.
Everyday Seasonal Cookbook
Enhance your culinary skills with our Everyday Seasonal Cookbook. Packed with inspiring seasonal produce guides, delicious recipes, and invaluable cooking tips, this cookbook is your ultimate companion for creating delightful, seasonal meals for every occasion. Discover fresh ideas and make the most of nature’s bounty all year round!

Here’s How to Make These Oatmeal Chocolate Chunk Cookies
Baking these incredible oatmeal chocolate chunk cookies is a straightforward process that yields truly spectacular results. Follow these simple steps for cookie perfection:
Preparing the Dough
First, in a medium-sized bowl, whisk together all your dry ingredients: the all-purpose flour, ground cinnamon, baking soda, fine kosher salt, and old-fashioned rolled oats. Whisk thoroughly to ensure these are well combined and evenly distributed. Set this bowl aside for a moment.
Next, in the bowl of your stand mixer (or a large bowl if using a handheld mixer), add the room-temperature unsalted butter and brown sugar. Beat these together on medium-high speed for about 2 to 3 minutes, until the mixture is light, fluffy, and pale in color. This creaming process incorporates air, which is crucial for a soft, chewy cookie. Then, add the large room-temperature egg and pure vanilla extract, beating until they are just combined. Make sure to stop the mixer and scrape down the sides of the bowl with a silicone spatula as needed, ensuring all ingredients are thoroughly incorporated and no streaks of butter or sugar remain.
With the wet ingredients perfectly creamed, gradually add the dry ingredients to the mixer bowl. Mix on low speed until they are *just* combined. Be careful not to overmix at this stage; overmixing can develop the gluten in the flour, leading to tough cookies. As soon as you see no more streaks of flour, stop the mixer. Finally, gently fold in 1 ¼ cups of your chopped chocolate chunks. Remember to reserve the remaining ¼ cup of chocolate chunks – these will be pressed into the tops of the cookie dough balls just before baking to create those irresistible, gooey chocolate puddles on the finished cookies.
The Importance of Chilling
Once your dough is mixed, cover the bowl tightly with plastic wrap and chill it in the refrigerator for at least 30 minutes to 1 hour. While it might seem like an extra step, chilling the dough is absolutely key to achieving the best possible texture and flavor for your oatmeal chocolate chunk cookies. Chilling allows the flour to fully hydrate, preventing your cookies from spreading too much in the oven. It also solidifies the butter, which results in a thicker, chewier cookie, and gives the flavors (especially the oats and cinnamon) more time to meld and deepen. This step is a secret weapon for truly exceptional cookies!
After chilling, preheat your oven to 350˚F (175˚C) and line two large baking sheets with silicone mats or parchment paper. Using your cookie dough scoop (we recommend a 1 ½ Tbsp scoop), portion out the dough into uniform balls. Place these dough balls on your prepared baking sheets, ensuring they are spaced about 2 inches apart to allow for proper spreading during baking. This prevents them from melding together.
Now, take your reserved ¼ cup of chocolate chunks and gently press a few pieces into the tops of each cookie dough ball. This simple trick ensures that you’ll have beautiful, visible pools of melted chocolate on top of your baked cookies. Finish by sprinkling each dough ball with a pinch of flaky sea salt – this enhances the chocolate flavor and adds a wonderful textural contrast.
Baking to Golden Perfection
Carefully transfer your baking sheets to the preheated oven. Bake the cookies for approximately 10 to 13 minutes. Keep a close eye on them; you’ll know they’re done when the edges are set and have just begun to turn a delicate golden brown. The centers might still look slightly soft and underbaked, but don’t worry – this is exactly what you want for that perfect chewy texture. Overbaking is the enemy of a soft, chewy cookie!
Once baked, remove the cookie sheets from the oven and let the cookies cool on the hot pan for an additional 5 to 10 minutes. This crucial resting period allows the cookies to continue cooking slightly from the residual heat, setting their shape and firming up without becoming dry. After this initial cooling on the pan, carefully transfer the cookies to a wire rack or cooling rack to cool completely. Enjoy them warm, with melted chocolate, or let them cool entirely for a firmer, yet still perfectly chewy, texture.
Baking Success: Tips and Tricks
Achieving bakery-quality oatmeal chocolate chunk cookies at home is entirely possible with a few expert tips and tricks:
- Measure flour correctly: This is arguably one of the most important baking tips. Incorrect flour measurement can dramatically alter the texture of your cookies, making them tough or crumbly. Always “fluff” the flour in its container with a spoon, then gently spoon it into your measuring cup. Level it off with the straight edge of a knife or a flat spatula. Never scoop directly into the flour container with your measuring cup, as this compacts the flour and results in using too much.
- Don’t overmix the dough: Once you add the dry ingredients to the wet, mix only until just combined. Overmixing develops the gluten in the flour, which can lead to a tougher, less tender cookie texture. As soon as you see no more streaks of flour, stop mixing.
- Add nuts for an extra crunch: If you love a little extra texture and flavor, consider adding about ½ to ¾ cup of chopped toasted walnuts or pecans to your cookie dough. Toasting the nuts before adding them really brings out their earthy flavors and adds a delightful crunch that complements the oats and chocolate beautifully.
- Not a chocolate fan? Try raisins: While these are oatmeal chocolate chunk cookies, the base recipe is wonderfully versatile. If you’re not in the mood for chocolate or simply prefer a classic, swap out the chocolate chunks for an equal amount of plump raisins. You’ll get a delightful oatmeal raisin cookie with a hint of warm spice.
- The golden rule: don’t overbake the cookies! This cannot be stressed enough for chewy cookies. Your oatmeal chocolate chunk cookies are perfectly baked when their edges are set and just barely golden brown. The centers will still appear quite soft, even a little gooey – this is exactly what you want! The cookies will continue to cook and set as they cool on the hot baking sheet from residual heat. Pulling them out when they look slightly underdone ensures a soft, tender, and perfectly chewy interior.
- Room temperature ingredients: Ensure your butter and egg are at room temperature. This allows them to emulsify properly, creating a smoother, more uniform dough and contributing to the overall texture and rise of your cookies.
- Use a good quality baking sheet: A heavy-gauge, light-colored baking sheet will conduct heat more evenly than dark, thin ones, preventing the bottoms of your cookies from burning before the tops are done.
More tasty cookie recipes to enjoy: Mini Chocolate Chip Cookies | Dark Chocolate Coffee Cookies | Sea Salt Pistachio Dark Chocolate Cookies | Salted Caramel Butterscotch Cookies

Choosing the Best Chocolate for Your Cookies
The type of chocolate you use can truly elevate these oatmeal chocolate chunk cookies from good to extraordinary. This is not the time to reach for standard chocolate chips if you want those luscious, gooey puddles. Here’s why and what to look for:
Chocolate Chunks vs. Chips: The secret lies in using high-quality chocolate bars and chopping them yourself into irregular chunks. Unlike chocolate chips, which are designed to hold their shape during baking due to stabilizers, baking chocolate bars melt beautifully and spread into glorious, molten pockets throughout the cookie. These irregular chunks also provide a varied texture, with some smaller pieces dissolving into the dough for overall chocolate flavor and larger pieces creating distinct, soft pools.
Recommended Chocolate Types:
- Dark Chocolate: Our top recommendation. Its rich, slightly bitter notes perfectly balance the sweetness of the cookie dough and the oats, creating a sophisticated and deeply satisfying flavor profile. Look for chocolate with 60-75% cacao content.
- Semi-Sweet Chocolate: A classic choice that offers a balanced sweetness with a hint of bitterness. It’s a safe and delicious option that most people enjoy.
- Bittersweet Chocolate: For those who prefer a less sweet, more intense chocolate experience, bittersweet chocolate (typically 70% cacao or higher) will add a profound depth of flavor.
- Milk Chocolate or White Chocolate: If you have a sweeter palate or are baking for kids, milk chocolate chunks can create a wonderfully creamy and sweet cookie. White chocolate offers a different flavor dimension – sweet, milky, and often with vanilla notes – which pairs surprisingly well with the hearty oats. You could even do a mix of different chocolates!
Favorite Brands: We highly recommend using reputable brands for baking chocolate, such as Ghirardelli, Lindt, Baker’s, or high-quality European brands. These typically have a higher cocoa butter content, which contributes to a superior melt and flavor. Avoid inexpensive chocolate chips if you’re aiming for that signature gooey puddle effect.
How to Chop: When chopping your chocolate bars, aim for pieces that are roughly the size of standard chocolate chips, or even slightly larger. Don’t worry about perfect uniformity; the varied sizes will contribute to the cookie’s rustic charm and ensure different levels of chocolate intensity in each bite.
How Long Do Homemade Oatmeal Cookies Last?
Freshly baked oatmeal chocolate chunk cookies are best enjoyed within a few days of baking, but they can certainly last longer if stored properly. To maintain their delicious flavor and soft, chewy texture, place cooled cookies in an airtight container or a resealable freezer bag. When stored at room temperature, away from direct sunlight and heat, these cookies will stay wonderfully fresh for up to 1 week. For even longer storage, consider freezing them, which we’ll discuss in more detail below!
Storing Cookie Dough for Future Baking
One of the great advantages of this oatmeal chocolate chunk cookie recipe is its versatility for make-ahead convenience. You can easily prepare the dough in advance and store it for later baking, ensuring you always have fresh cookies just minutes away!
- In the refrigerator: After mixing, cover the cookie dough tightly with plastic wrap or transfer it to an airtight container. It can be safely stored in the refrigerator for up to 1 week. Chilling the dough for longer periods (up to a week) can actually enhance the flavors, allowing the ingredients to meld beautifully. When you’re ready to bake, simply scoop and bake as instructed – no need to adjust the baking time.
- In the freezer (as dough balls): This is arguably the best method for future convenience. Scoop the cookie dough into individual balls (using your cookie scoop) and place them on a parchment-lined baking sheet. Flash freeze them for 2 to 3 hours, or until solid. Once frozen, transfer the solid dough balls to a resealable freezer bag or an airtight container. They will keep perfectly in the freezer for up to 3 months.
Baking from frozen dough: When baking frozen cookie dough balls, there’s no need to thaw them first! Simply place them on your prepared baking sheet and add a few extra minutes (typically 2-4 minutes) to the total baking time. Keep an eye on them for the golden edges mentioned in the instructions. This method allows you to bake just a few cookies at a time, ensuring a warm, fresh batch whenever the craving strikes.
Is Chilling the Dough Really Necessary?
While you *can* technically bake these oatmeal chocolate chunk cookies without chilling the dough, we strongly advise against skipping this step if you’re aiming for truly exceptional results. Chilling the dough is a crucial step that significantly impacts the final texture, flavor, and appearance of your cookies. Here’s why it’s so important:
- Prevents spreading: Cold butter melts slower in the oven, which prevents the cookies from spreading too much and becoming thin and crispy. This ensures you get those wonderfully thick, chewy cookies this recipe is famous for.
- Enhances flavor: As the dough chills, the flour has more time to fully hydrate, and the sugars have more time to absorb moisture. This process deepens the flavors, especially of the oats and cinnamon, resulting in a more complex and satisfying cookie.
- Improves texture: Chilling allows the gluten in the flour to relax, which contributes to a more tender and chewy cookie. It also gives the oats time to soften slightly, ensuring they integrate perfectly into the dough without being too dry.
So, while it adds a little waiting time, the 30 minutes to 1 hour of chilling is a small investment for a significantly superior cookie experience. Don’t skip it!
How to Tell When Oatmeal Cookies Are Perfectly Baked
Knowing exactly when to pull your oatmeal chocolate chunk cookies from the oven is key to achieving that ideal soft and chewy texture. Overbaked cookies can quickly turn dry and crumbly, while underbaked ones might fall apart. Here’s what to look for:
- Golden Edges: The most reliable indicator is when the edges of the cookies are set and have just started to turn a light golden brown. They should look slightly firm around the perimeter.
- Soft Centers: Crucially, the centers of the cookies should still appear soft, gooey, and possibly even a little raw. This is perfectly normal and desired! They will continue to cook and set from the residual heat once removed from the oven.
- No Dark Browning: Avoid letting the entire cookie turn deeply golden brown. If the tops are uniformly browned, they are likely overbaked.
- Gentle Press Test: After their initial 5-minute rest on the baking sheet, you can gently press the center of a cookie. It should feel soft but not completely liquid or unbaked.
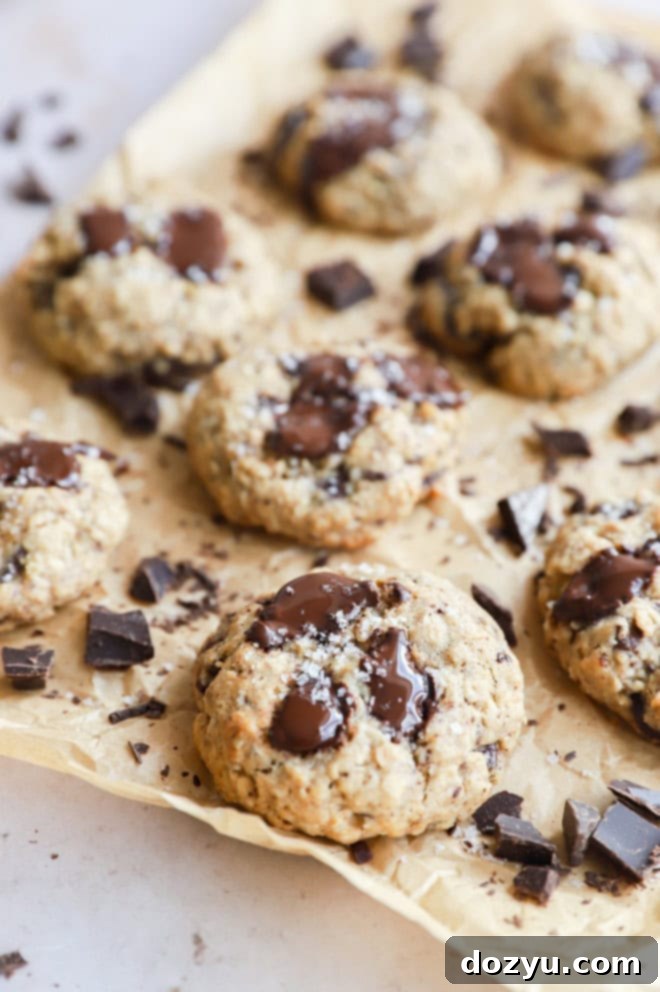
The Resting Period: Don’t rush to remove them from the baking sheet immediately! Allow your cookies to cool on the hot baking sheet for 5 to 10 minutes. This vital step allows the cookies to finish cooking gently and firm up enough to be transferred without breaking. After this, move them to a wire rack to cool completely. This process results in cookies with that coveted soft, chewy interior, beautiful melted chocolate chunks, and perfectly golden-brown exteriors.
Remember, it’s always better to slightly underbake than overbake. An underbaked cookie will firm up as it cools, but an overbaked cookie cannot be rescued!
Freezing Oatmeal Chocolate Chunk Cookies
Yes, absolutely! These oatmeal chocolate chunk cookies are excellent candidates for freezing, whether baked or as raw dough. Freezing is a fantastic way to enjoy homemade cookies anytime, with minimal effort. We’ve detailed the full instructions for both methods in the “How to Store & Reheat” section below the main recipe card, ensuring you have all the information you need to keep your cookie stash fresh for weeks or even months!
Need some inspiration for cookies? Check out my cookie recipes page!
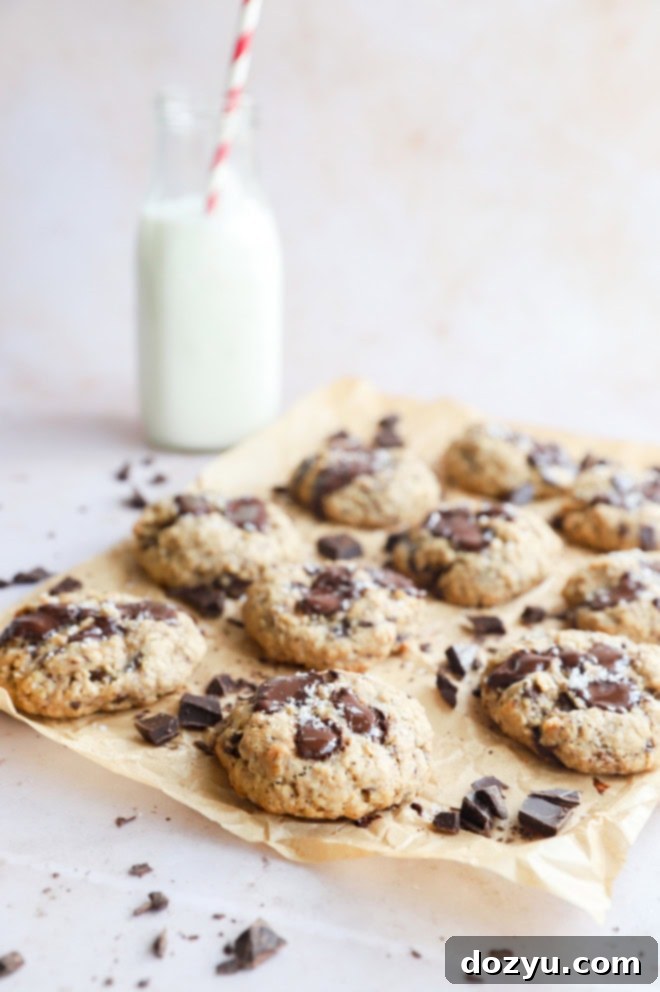
Serving Suggestions for Your Oatmeal Chocolate Chunk Cookies
These oatmeal chocolate chunk cookies are delicious on their own, but they also pair beautifully with a variety of beverages and desserts. Here are some ideas to enhance your cookie experience:
- Classic Milk Pairing: There’s nothing quite like a warm, freshly baked cookie with a cold glass of milk. The creaminess of the milk perfectly complements the rich chocolate and chewy oats.
- Coffee or Tea Companion: For a more sophisticated treat, enjoy these cookies with your favorite hot beverage. A robust cup of coffee or a comforting mug of tea (chai tea is an especially delightful pairing!) brings out the warm spices in the cookies.
- Ice Cream Sandwiches: Take these cookies to an indulgent new level by turning them into ice cream sandwiches. While the cookies are still slightly warm (but firm enough to handle), sandwich a scoop of vanilla bean ice cream (or your favorite flavor) between two cookies. The soft cookies and melting ice cream create an absolutely heavenly dessert.
- Dessert Platter: Serve them as part of a larger dessert platter with fresh fruit, other small pastries, or a selection of cheeses for a delightful spread.
- Dunking Delight: Their sturdy yet tender texture makes them perfect for dunking! Try them in a mug of hot cocoa, a cup of warm apple cider, or even a glass of cold brew coffee.
Storage and Reheating Guidelines
To ensure your delicious oatmeal chocolate chunk cookies remain fresh and enjoyable for as long as possible, follow these comprehensive storage and reheating instructions:
- Storing Baked Cookies: Once completely cooled, place your baked cookies in an airtight container or a resealable bag. Store them at room temperature for up to 1 week. To maintain their chewy texture, you can even place a slice of bread in the container with the cookies; the cookies will absorb moisture from the bread, keeping them soft.
- Reheating for Freshness: Want that just-baked warmth and gooey chocolate? Reheat individual cookies in the microwave for 10-15 seconds, or until warmed through and the chocolate is melty. For a slightly crispier edge, you can warm them in a preheated oven (or toaster oven) at 300°F (150°C) for 3-5 minutes.
- Freezing Baked Cookies: Once cooled completely, arrange baked cookies in a single layer on a baking sheet and flash freeze for about 1-2 hours until solid. This prevents them from sticking together. Then, transfer the frozen cookies to a freezer-safe airtight container or heavy-duty freezer bag. They will keep well for up to 3 months.
- Freezing Unbaked Cookie Dough: Form the cookie dough into individual balls using a scoop. Place them on a parchment-lined baking sheet and flash freeze for 2-3 hours until solid. Once frozen, transfer the dough balls to a freezer-safe bag or container. They can be stored in the freezer for up to 3 months.
- Thawing and Baking from Frozen:
- Baked Cookies: Thaw frozen baked cookies at room temperature for a few hours, or overnight in the refrigerator. You can then reheat them in the microwave or oven as described above for a warm treat.
- Unbaked Cookie Dough: There’s no need to thaw frozen cookie dough balls before baking! Simply place them on a prepared baking sheet and bake as instructed, adding an additional 2-4 minutes to the total baking time. Keep an eye on the edges for that golden brown cue.
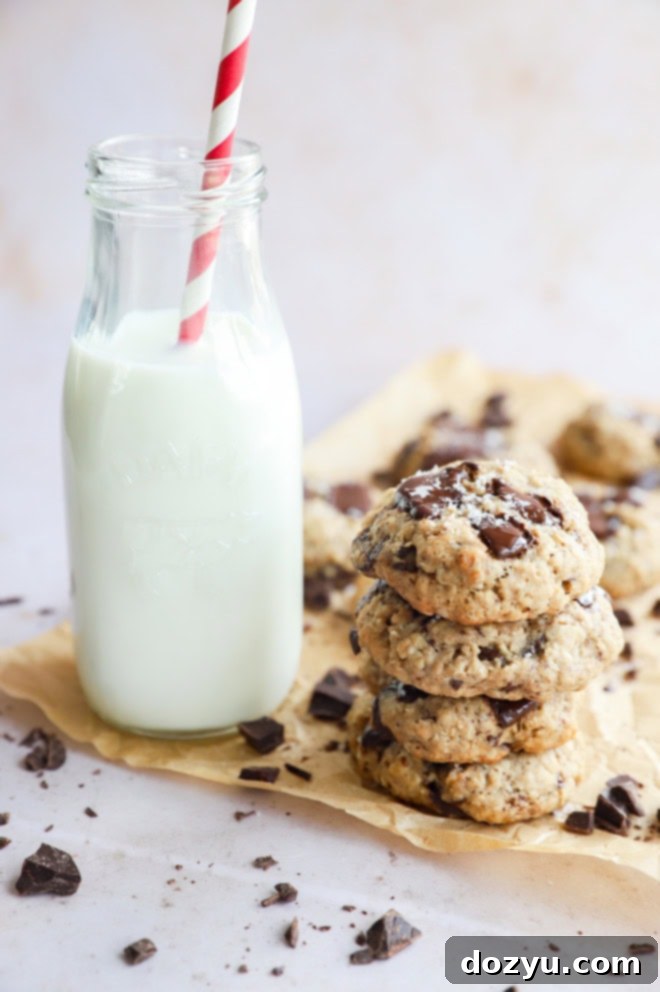
Explore More Delicious Oatmeal Cookie Recipes
If you’ve fallen in love with these oatmeal chocolate chunk cookies, you’ll be thrilled to discover other wonderful variations that celebrate the wholesome goodness of oats combined with delightful flavors:
- Cranberry White Chocolate Oatmeal Cookies: These soft and chewy cookies, bursting with tart cranberries and sweet white chocolate, are the ideal holiday cookie recipe or a festive treat any time of year.
- Peanut Butter Oatmeal Chocolate Chip Cookies: Get your ultimate peanut butter and chocolate fix with these incredibly satisfying cookies. Perfectly paired with a big glass of milk, they’re a dream come true for peanut butter lovers.
- Coconut Milk Overnight Oats: For those mornings when you need your oat fix for breakfast, but prefer a healthier, no-bake option, try this creamy and delicious coconut milk overnight oats recipe. It’s a quick, easy, and nutritious way to start your day.
We love hearing about your baking adventures! If you make this oatmeal chocolate chunk cookies recipe, please be sure to give it a star rating on the recipe card below and/or leave a comment! Your feedback is incredibly valuable, and I personally read and respond to every single comment. Feel free to drop any questions below, too – I’m always happy to help!
Don’t forget to tag me on Instagram, Facebook, or Pinterest if you share your beautiful creations! Seeing these recipes come to life in your homes is truly my favorite thing, and it means the world to me. Also, if you want to stay updated on new recipes, baking tips, and the latest news, be sure to sign up for my newsletter!
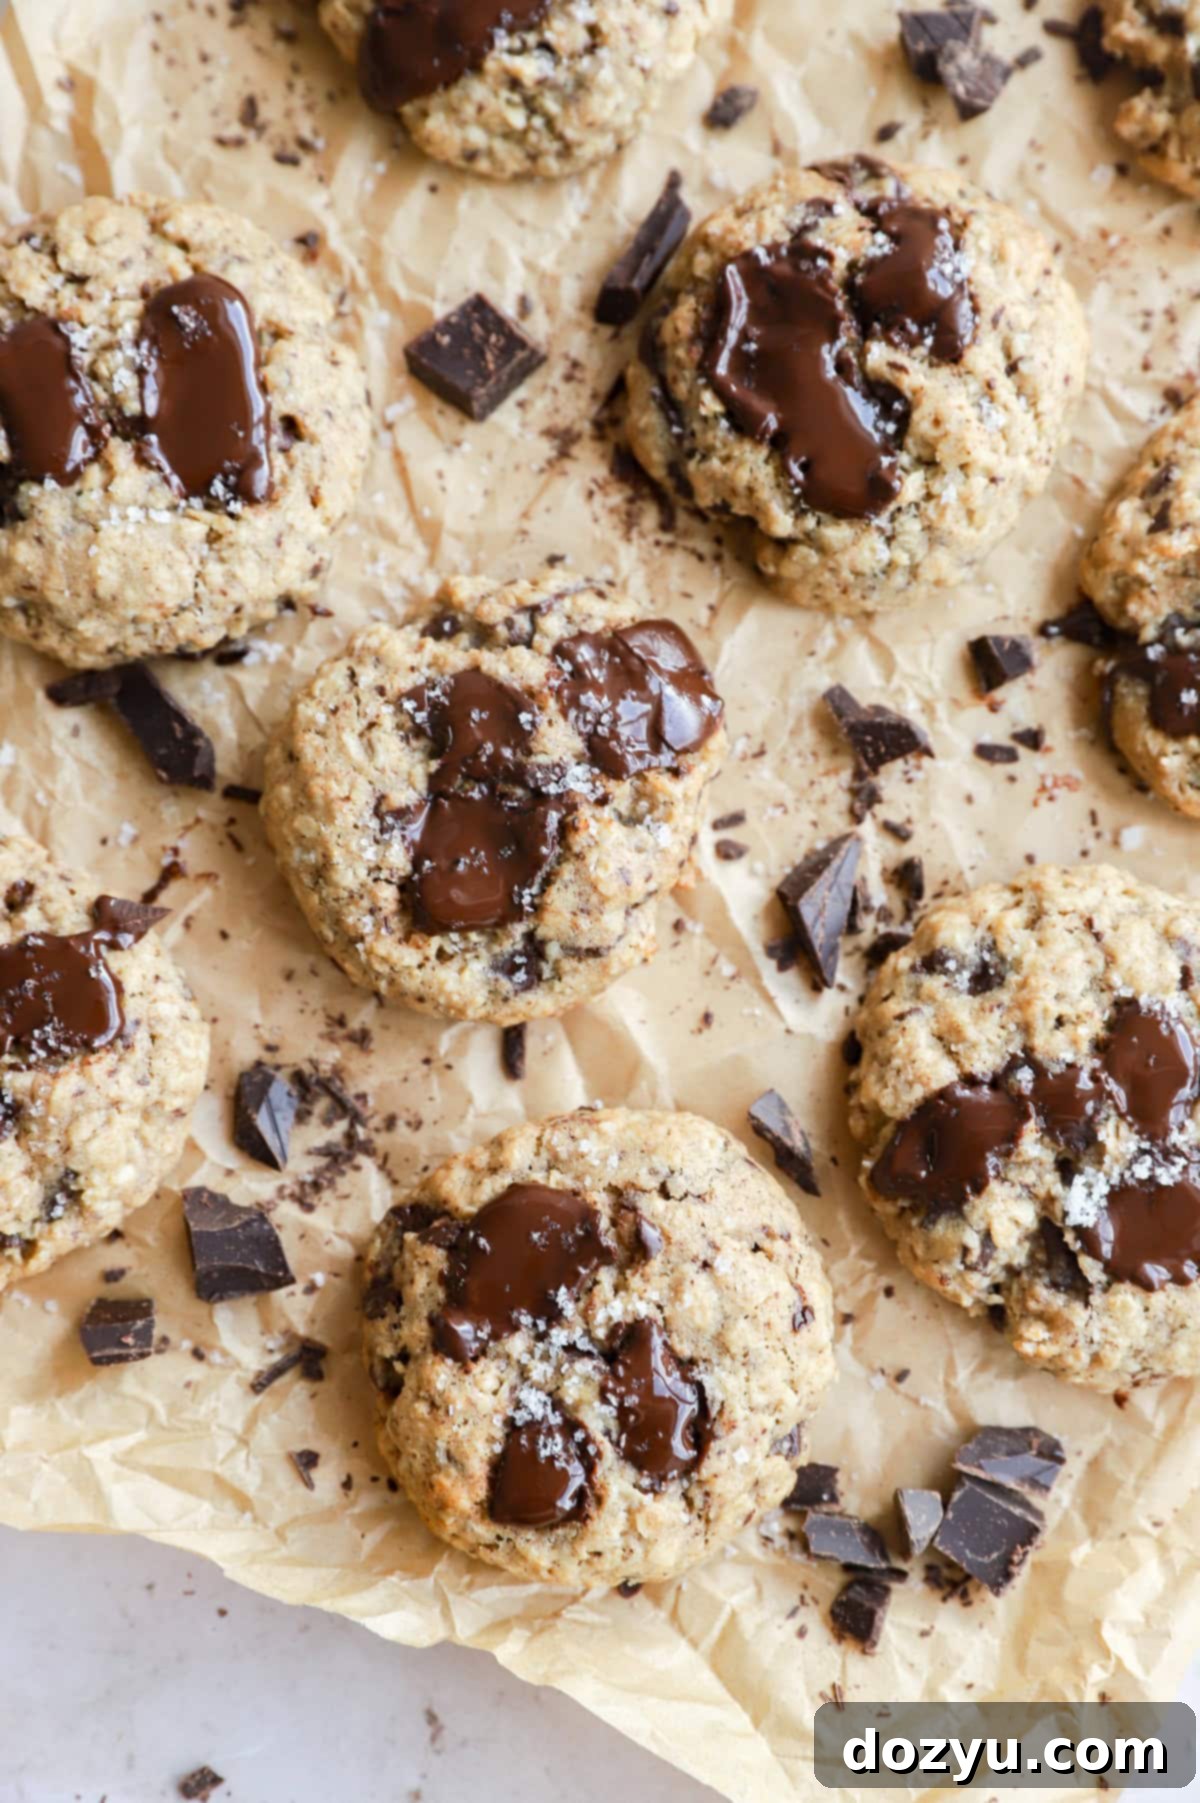
Oatmeal Chocolate Chunk Cookies
Equipment
-
Stand Mixer
-
Silicone Spatula
-
Half Sheet Pan
-
Silicone Baking Mats
Ingredients
- 1 cup all-purpose flour
- 1/2 tsp ground cinnamon
- 1/2 tsp baking soda
- 1/4 tsp kosher fine salt
- 1 1/2 cups old-fashioned rolled oats
- 1/2 cup unsalted butter room temperature
- 3/4 cup light or dark brown sugar packed
- 1 large egg room temperature
- 2 tsp pure vanilla extract
- 2 4 oz dark chocolate bars chopped (1 1/2 cups approx)
- Flaky sea salt for topping
Instructions
-
In a medium bowl, whisk together the dry ingredients – all-purpose flour, ground cinnamon, baking soda, fine kosher salt, and old-fashioned rolled oats. Ensure they are thoroughly combined. Set aside.
-
In the bowl of a stand mixer fitted with the paddle attachment (or using a handheld electric mixer), beat the room-temperature unsalted butter and brown sugar on medium-high speed for 2 to 3 minutes, until the mixture is light, fluffy, and pale. Add the large room-temperature egg and pure vanilla extract, beating until just combined. Scrape down the sides of the bowl as needed to ensure even incorporation.
-
Gradually add the whisked dry ingredients to the wet ingredients. Mix on low speed until they are *just* combined, being careful not to overmix.
-
Stir in 1 ¼ cups of your chopped dark chocolate chunks. Reserve the remaining ¼ cup of chocolate chunks for topping the cookie dough balls before baking.
-
Cover the bowl tightly with plastic wrap and chill the cookie dough in the refrigerator for at least 30 minutes to 1 hour. This step is crucial for flavor development and preventing cookie spread.
-
When the chilling time is complete, preheat your oven to 350˚F (175˚C). Line two rimmed baking sheets with silicone mats or parchment paper.
-
Using a 1 ½ tablespoon cookie scoop, portion out the chilled cookie dough into uniform balls. Place them on the prepared baking sheets, ensuring they are spaced about 2 inches apart to allow for proper spreading.
-
Take your reserved chocolate chunks and gently press a few pieces into the top of each cookie dough ball. This creates beautiful melted chocolate pools on your baked cookies. Sprinkle each dough ball with a pinch of flaky sea salt.
-
Bake for 10 to 13 minutes, or until the edges are set and have just started to turn a delicate golden brown. The centers will still appear soft and slightly underdone, which is exactly what you want for a chewy cookie.
-
Remove the baking sheets from the oven and let the cookies cool on the pan for 5 to 10 minutes. This allows them to finish cooking from residual heat and set properly. After this initial cooling, carefully transfer the cookies to a wire rack to cool completely. Enjoy!
