Baked Crispy Buffalo Cauliflower: Your Ultimate Healthy Game Day Snack & Easy Cleanup Solution
Baked crispy buffalo cauliflower is the ultimate game day snack, offering a healthy twist straight from your oven. Thanks to the magic of Reynolds Wrap® Non-Stick Aluminum Foil, not only is cleanup incredibly simple, but these flavorful buffalo cauliflower bites also lift effortlessly right off the pan!
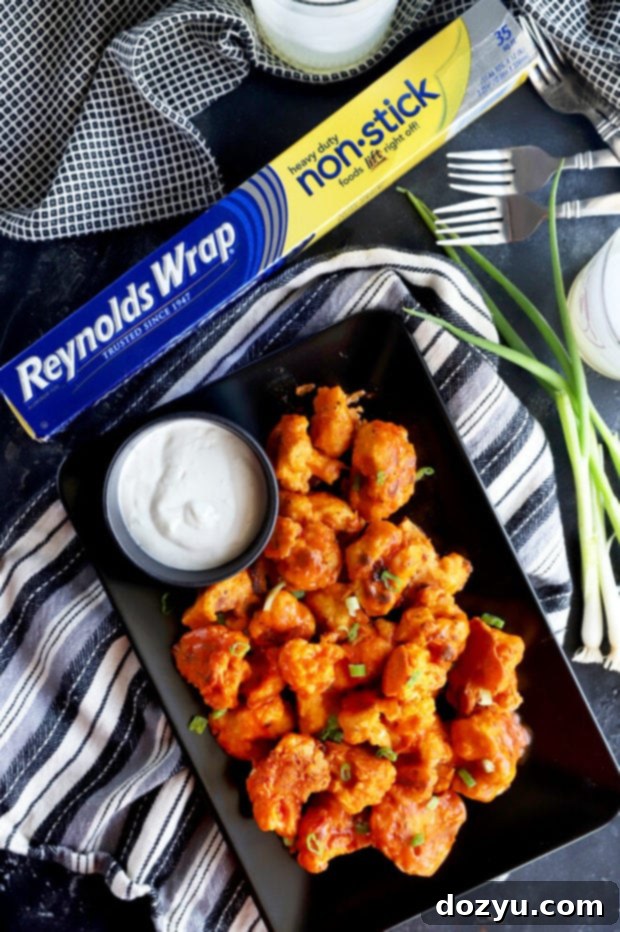
Disclosure: This post is sponsored by Reynolds Wrap®. As always, all opinions are my own.
With more time spent at home, I’ve found myself embracing the joy of cooking and experimenting with my favorite snack foods. There’s truly nothing quite like a platter of spicy, savory buffalo wings to kickstart a gathering or simply satisfy a craving. However, in an ongoing effort to incorporate healthier options into my diet, I’ve discovered an incredible alternative that doesn’t compromise on flavor: buffalo cauliflower.

Why Choose Baked Buffalo Cauliflower?
Cauliflower bites have undeniably taken the culinary world by storm, and for good reason. Whether baked or fried, these crispy florets offer a fantastic, often healthier, stand-in for traditional chicken wings, especially for those looking to add more vegetables to their diet without sacrificing taste. While many recipes call for frying, I wholeheartedly recommend baking these delightful florets. Baking significantly reduces calories, simplifies the cooking process, and perhaps most importantly for busy home cooks, makes cleanup a breeze.
This recipe transforms humble cauliflower into a star appetizer, perfect for game days, parties, or even a flavorful weeknight snack. The key lies in achieving that perfect crispy texture, which we’ll cover in detail, along with the irresistible spicy buffalo coating. It’s a plant-based option that even meat-lovers will crave, delivering all the bold flavor and satisfying crunch of its chicken counterpart.
The Secret to Success: Reynolds Wrap® Non-Stick Aluminum Foil
Achieving truly crispy baked cauliflower and ensuring effortless cleanup is made possible with the help of Reynolds Wrap® Non-Stick Aluminum Foil. I am thrilled to be collaborating with Reynolds Wrap® this month to share this fantastic recipe and highlight the exceptional benefits of their non-stick foil!
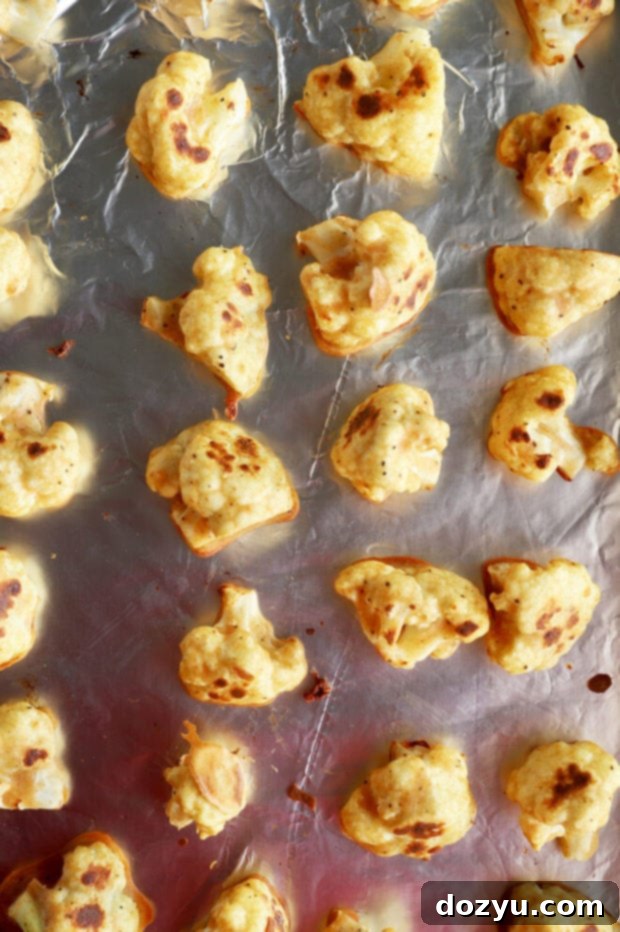
Why Reynolds Wrap® Non-Stick Aluminum Foil is a Kitchen Game-Changer
Let’s talk about why I’m so enthusiastic about something as seemingly simple as aluminum foil. While standard aluminum foil has countless uses, lining a baking sheet is one of its most common applications. With Reynolds Wrap® Non-Stick Aluminum Foil, this essential step becomes even more efficient and convenient. You don’t need any additional cooking spray, butter, or oil to grease your pan, which not only saves on calories but also eliminates extra mess.
The magic lies in the dull side of the foil, which features a food-safe, non-stick coating. This innovative design ensures that your food, whether it’s delicate cauliflower florets or any other baked good, slides right off the pan without any sticking. This is particularly vital for recipes like crispy buffalo cauliflower, where sticking can compromise the desired texture and make serving a challenge.
But the absolute best part? The cleanup! As someone who truly dislikes doing dishes, Reynolds Wrap® Non-Stick Aluminum Foil is a lifesaver. Once you’re done cooking, simply crumple up the used foil and toss it in the trash. No baked-on residue, no scrubbing, just a clean baking sheet ready for its next use. It’s significantly more convenient than parchment paper, which can sometimes tear or not handle higher temperatures as well.
Beyond baking, Reynolds Wrap’s heavy-duty aluminum foil also proves invaluable for grilling. Whether you’re lining your grill grates to prevent smaller items from falling through or creating flavorful foil packets for vegetables and proteins, its durability and non-stick properties make outdoor cooking a breeze.
Hosting a party? Add pizza muffins to the spread for a cheesy spin on your favorite pizza flavors, cooked with the same ease and minimal cleanup!

Essential Tools for Perfect Buffalo Cauliflower
To whip up a batch of these delectable crispy buffalo cauliflower bites, you’ll need a few key items in your kitchen:
- **Reynolds Wrap® Non-Stick Aluminum Foil:** This is paramount for lining your baking sheet, ensuring no sticking and making cleanup a breeze.
- **Half Baking Sheet Pan:** A sturdy pan is essential for even baking and proper crisping of the cauliflower florets.
- **Mixing Bowls:** You’ll need at least two – one for preparing the batter and another for tossing the baked cauliflower with the buffalo sauce.
- **Small Saucepan:** For melting the butter and simmering the hot sauce to create that rich, flavorful buffalo coating.
- **Whisk:** To ensure your batter is perfectly smooth and lump-free.

How to Make Crispy Baked Buffalo Cauliflower: A Step-by-Step Guide
Follow these simple steps to create perfectly crispy and spicy buffalo cauliflower that will be an instant crowd-pleaser.
1. Prepare and Coat the Cauliflower
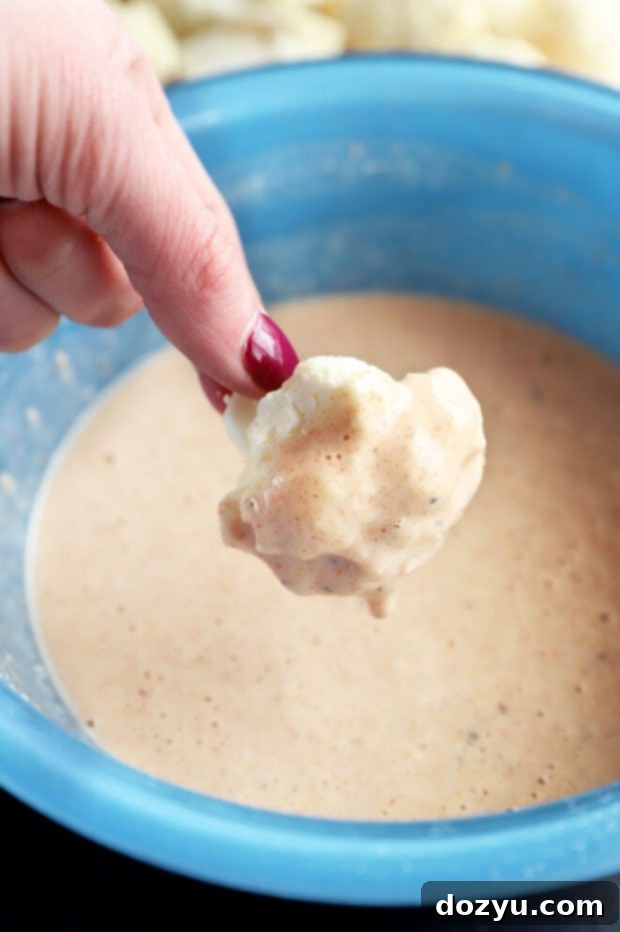
The secret to wonderfully crispy cauliflower lies in its thin, flavorful batter. Begin by whisking together water, milk, all-purpose flour, and a blend of spices including garlic powder, onion powder, cumin, smoked paprika, salt, and ground pepper in a medium bowl until smooth. Once your batter is ready, dip each cauliflower floret, ensuring it’s fully coated. Crucially, shake off any excess batter before carefully placing each piece onto a baking sheet generously lined with Reynolds Wrap® Non-Stick Aluminum Foil. Remember, there’s no need for olive oil or cooking spray to prep the non-stick foil, keeping things healthier and cleaner!
For the best results, ensure your cauliflower florets are cut into roughly uniform sizes. This helps them cook evenly. As you place them on the foil-lined baking sheet, make sure there’s at least an inch of space between each floret. Overcrowding the pan can lead to steaming rather than crisping, which is the exact opposite of what we’re aiming for.
2. Initial Bake for Crispiness
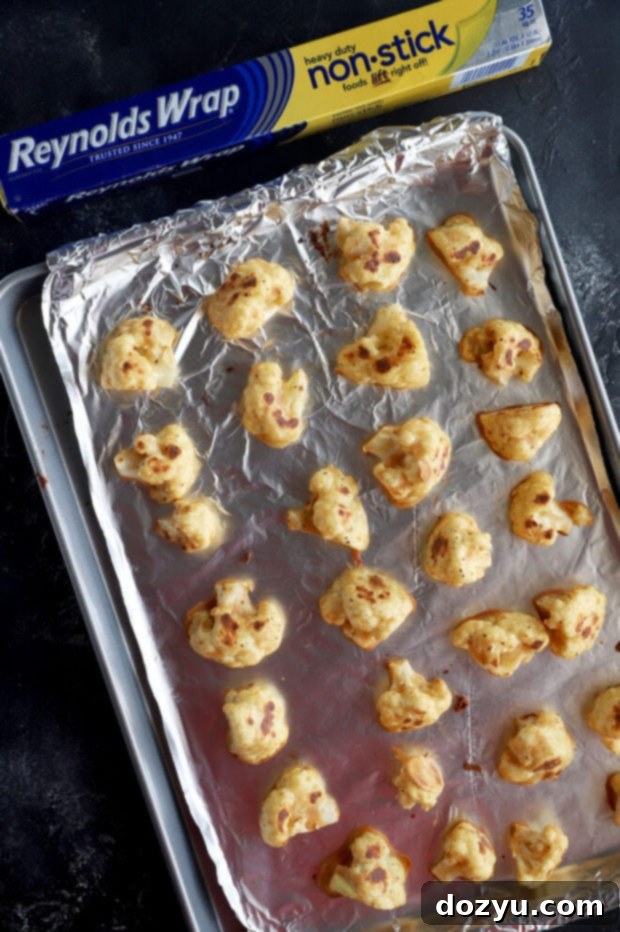
Now it’s time to bake! Your cauliflower florets will bake in a preheated oven until they reach a beautiful golden-brown color and a satisfying crispy texture on the outside. To ensure even browning and maximum crispiness, remember to stir or flip the florets halfway through the baking time. This exposes all sides to the hot air, promoting a consistent crunch. This initial bake is critical for developing that foundational crispness before the sauce is added.
3. Craft the Flavorful Buffalo Sauce
While your cauliflower is baking, prepare the star of the show: the buffalo sauce. This couldn’t be simpler! In a small saucepan, melt the butter over medium heat. Once melted, stir in your favorite hot sauce (Frank’s Red Hot is classic for a reason!) and a touch of honey. The honey helps to balance the heat and adds a lovely glaze. Allow the sauce to simmer for about 5 minutes, stirring occasionally, until it slightly thickens. Then, remove it from the heat and let it cool slightly while your cauliflower finishes its initial bake.
4. Toss, Bake Again, and Serve
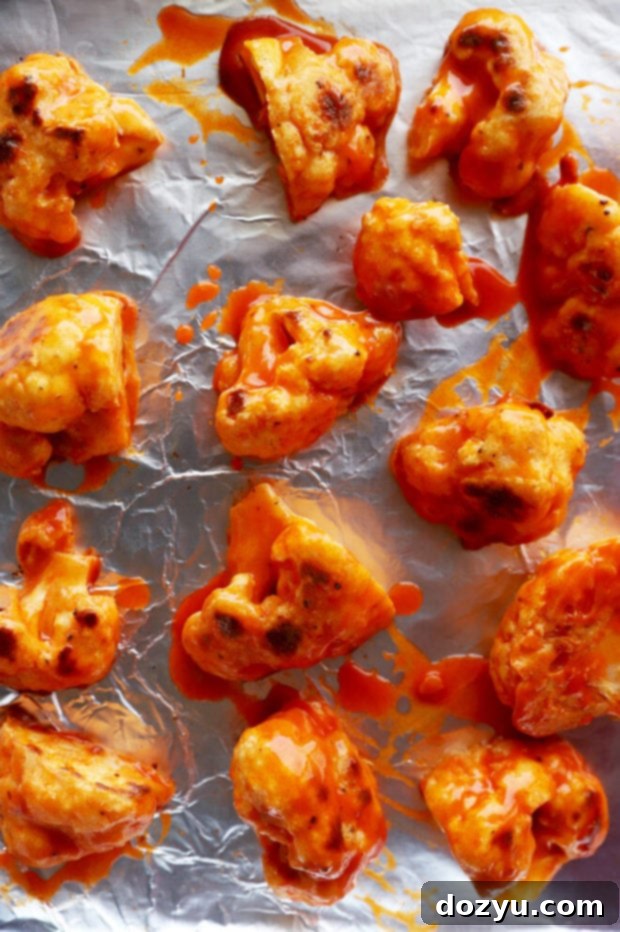
Once your cauliflower florets are perfectly crispy from their first bake, transfer them to a large mixing bowl. Pour about three-quarters of your freshly made buffalo sauce over the florets and toss gently to ensure every piece is evenly coated in that spicy, tangy goodness. Return the coated florets to the same Reynolds Wrap® Non-Stick Aluminum Foil-lined baking sheet, spreading them out in a single layer once more. Bake for another 15 minutes to allow the sauce to set and the cauliflower to crisp up further. Finally, remove from the oven, drizzle with the remaining buffalo sauce for an extra burst of flavor, and serve immediately.
These crispy buffalo cauliflower bites are fantastic served with your favorite dipping sauce in a small bowl – I’m a big fan of blue cheese dressing, but ranch dressing is also a classic choice. For an authentic buffalo wing experience, consider serving them alongside crisp celery sticks and carrot sticks. They make an ideal appetizer, side dish, or even a light main course!

Troubleshooting: Help! My Cauliflower Isn’t Getting Crispy!
Achieving that perfect crispy texture is key to delicious buffalo cauliflower. If your florets aren’t crisping up as desired, don’t worry! Here are a few essential tips to ensure a golden, crunchy result every time:
- Ensure Excess Batter Drips Off: Before placing the cauliflower bites on the baking sheet, make sure to gently shake off any excess batter. If the coating is too thick, it won’t be able to crisp up properly within the recommended baking time. A thin, even layer of batter is what creates that satisfying crunch.
- Proper Spacing is Crucial: This is a common mistake! If the florets are too close together on the baking sheet, they release steam, which gets trapped and prevents them from baking to a crisp. Instead, they’ll end up steaming. Always space your florets at least 1-inch apart. If necessary, use two baking sheets to avoid overcrowding.
- Bake Until Truly Crispy: Oven temperatures and performance can vary. The recommended baking time is a guideline, but the ultimate indicator is visual. Continue baking until the cauliflower is genuinely golden brown and crispy to your liking. This might mean an additional 5 to 10 minutes, or even a bit longer, depending on your specific oven. Don’t pull them out too early!
- Crispiness Before Sauce: It’s vital that your cauliflower is crispy *before* you add the buffalo sauce. If you coat them while they’re still soft or slightly undercooked, the moisture from the sauce will absorb into the batter, making them soggy rather than enhancing their crunch. Let them achieve their initial crispiness in the oven first, then add the sauce for the final bake.
Love all things buffalo? For a fantastic dinner option, try whipping up these easy, spicy buffalo chicken tacos!


Baked Crispy Buffalo Cauliflower
equipment
-
saucepan
-
French Wire Whisk
-
Stainless Steel Mixing Bowls
-
Half Sheet Pan
-
Non-Stick Aluminum Foil
ingredients
- Reynolds Wrap® Non-Stick Aluminum Foil
- 1/2 cup water
- 1/2 cup milk
- 3/4 cup all-purpose flour
- 2 tsp garlic powder
- 1 tsp onion powder
- 1 tsp cumin
- 1 tsp smoked paprika
- 1/4 tsp salt
- 1/4 tsp ground pepper
- 1 head of cauliflower washed and cut into florets (approx. 4 cups of florets)
- 1/2 cup Frank’s red hot sauce
- 1 tbsp butter
- 1 tsp honey
- Sliced green onion for garnish
instructions
-
Preheat oven to 425˚F (218˚C). Line a rimmed baking sheet with Reynolds Wrap® Non-Stick Aluminum Foil, ensuring the dull, non-stick side faces up. If you don’t have non-stick foil, be sure to coat regular foil lining with nonstick cooking spray. Set aside.
-
In a medium bowl, whisk together water, milk, flour, garlic powder, onion powder, cumin, smoked paprika, salt, and ground pepper until the batter is smooth and well-combined.
-
Dip each cauliflower floret into the batter, allowing any excess to drip off thoroughly. Arrange the coated florets on the prepared baking sheet in a single layer, ensuring they are spaced at least 1-inch apart to prevent steaming and promote crispiness.
-
Bake for 20 minutes, flipping the florets halfway through (after 10 minutes), until they are golden brown and visibly crispy. It’s crucial that the florets achieve a good level of crispiness before moving to the next step; baking time may vary based on your oven, so continue baking longer if needed.
-
While the cauliflower is undergoing its initial bake, prepare the buffalo sauce. Melt butter in a small saucepan over medium heat. Once melted, stir in Frank’s red hot sauce and honey. Cook for another 5 minutes, stirring occasionally, until the sauce slightly thickens. Remove the saucepan from heat and allow the sauce to cool slightly.
-
Transfer the crispy baked florets to a large bowl. Pour about ¾ of the prepared buffalo sauce over them and toss gently to coat each piece evenly. Return the sauced florets to the same Reynolds Wrap® Non-Stick Aluminum Foil-lined baking sheet, spreading them out again in a single layer. Bake for an additional 15 minutes to allow the sauce to caramelize slightly and the cauliflower to regain maximum crispiness.
-
Remove from the oven, drizzle with the remaining buffalo sauce, and garnish with sliced green onion if desired. Serve immediately with ranch or blue cheese dressing and celery/carrot sticks.
nutrition
Enjoy this delicious and healthier alternative to classic buffalo wings, made even easier with the non-stick power of Reynolds Wrap! It’s a fantastic way to enjoy bold flavors with minimal fuss and effortless cleanup. Happy cooking!
