Baked Crispy Buffalo Cauliflower: Your Ultimate Healthy Game Day Snack
Transform your snacking experience with this incredible recipe for Baked Crispy Buffalo Cauliflower. It’s the perfect guilt-free alternative to traditional buffalo wings, delivering all the flavor and crunch you crave, straight from your oven. And with the indispensable help of Reynolds Wrap® Non-Stick Aluminum Foil, preparing these spicy, flavorful bites is a breeze, and cleanup is astonishingly simple! The cauliflower florets lift effortlessly off the pan, ensuring every piece is perfectly crispy without any sticking.
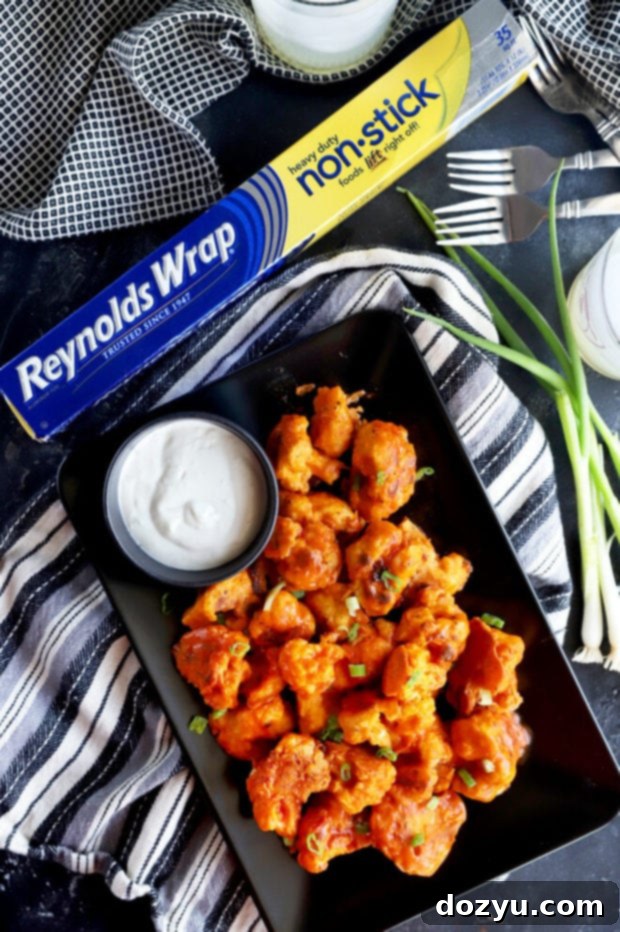
Disclosure: This post is sponsored by Reynolds Wrap®. As always, all opinions are my own.
In these times when we find ourselves spending more moments at home, there’s no better excuse to indulge in cooking up some of our all-time favorite snack foods. For many, nothing quite ignites the palate like a generous plate of spicy buffalo wings. That fiery kick and satisfying crunch are simply irresistible. However, in an ongoing effort to embrace healthier eating habits without sacrificing flavor, I’ve discovered a fantastic plant-based alternative that truly shines: cauliflower.
Cauliflower bites have truly taken the culinary world by storm, and for good reason! Whether they’re baked to a golden crisp or expertly fried, these humble florets have become the go-to substitute for chicken wings, offering a delicious and nutritious option for anyone looking to incorporate more vegetables into their diet. The beauty of cauliflower lies in its incredible versatility and its ability to absorb flavors, making it an ideal canvas for the bold and zesty buffalo sauce.

Instead of deep-frying, which often adds unnecessary calories and can be quite messy, this recipe opts for baking. This not only significantly reduces the fat content but also makes the entire process incredibly straightforward, from preparation to the all-important cleanup. And that’s where the magic of Reynolds Wrap® Non-Stick Aluminum Foil comes into play. I am absolutely thrilled to be partnering with Reynolds Wrap® this month to share this fantastic recipe, demonstrating how effortless healthy cooking can be with the right tools.
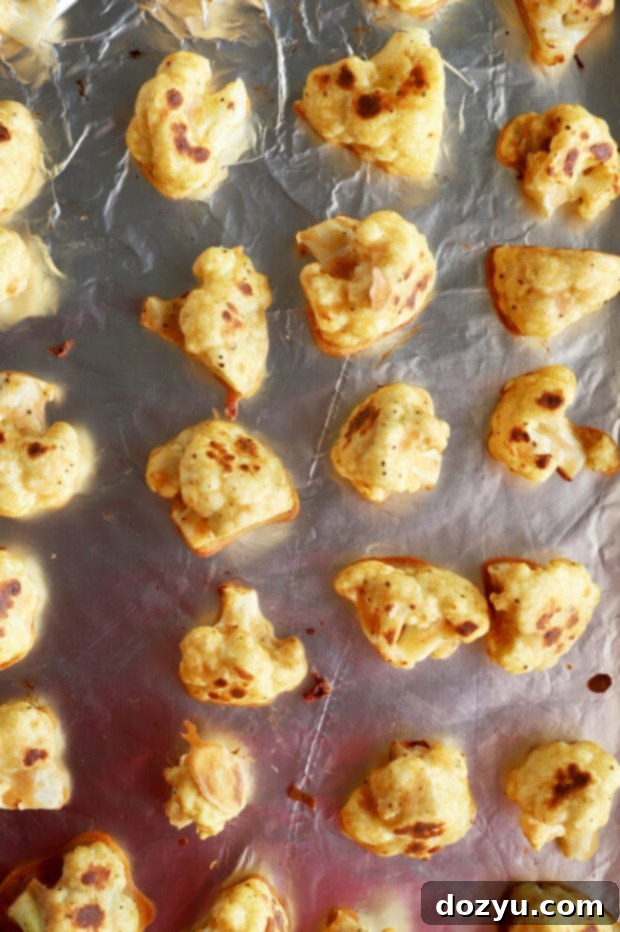
table of contents
Toggle
The Non-Stick Advantage of Reynolds Wrap® Aluminum Foil
Let’s dive into why Reynolds Wrap® Non-Stick Aluminum Foil is an absolute game-changer in the kitchen, especially for a recipe like this. While aluminum foil has countless uses, one of its most common applications is lining baking sheets. Here, it’s not just a liner; it’s an essential part of ensuring success. The non-stick variety eliminates the need for any additional cooking spray, butter, or oil to grease your pan. This means fewer calories, less mess, and a healthier overall dish.
When you use the dull side of Reynolds Wrap® Non-Stick Aluminum Foil – which is the specially designed non-stick surface – you get a food-safe coating that prevents even the stickiest foods from adhering. This makes lining your baking sheet incredibly simple, and when your delicious buffalo cauliflower bites are done, they slide right off the pan without a struggle. But the true hero here? The unparalleled ease of cleanup. As someone who genuinely dislikes doing dishes, this feature is a lifesaver. With this innovative non-stick foil from Reynolds Wrap®, you’re spared the chore of scrubbing baked-on residue. Simply crumple up the used foil and toss it in the trash when you’re finished. Boom! Effortless cleanup, every single time. It truly outperforms traditional parchment paper, especially when dealing with sticky marinades or batters.

Beyond baking, the heavy-duty strength of Reynolds Wrap® also makes it an excellent choice for grilling. Whether you’re lining your grill grates to prevent small items from falling through or creating flavorful foil packets filled with vegetables and proteins, this foil stands up to the heat and ensures your food cooks perfectly. It’s a versatile kitchen staple that streamlines your cooking and minimizes post-meal tidying, allowing you more time to enjoy your culinary creations and less time at the sink.
Why Cauliflower is the Perfect Wing Substitute
Cauliflower might seem like an unlikely candidate to replace the beloved chicken wing, but its texture and mild flavor profile make it an absolutely brilliant choice. When prepared correctly, cauliflower florets achieve a tender-crisp interior and a wonderfully crunchy exterior, remarkably similar to traditional bone-in or boneless wings. It’s a fantastic way to enjoy the bold flavors of buffalo sauce while significantly boosting your vegetable intake.
Nutritionally, cauliflower is a powerhouse. It’s low in calories, high in fiber, and packed with essential vitamins and minerals, including Vitamin C and K. By opting for baked buffalo cauliflower, you’re making a conscious choice to reduce saturated fats and cholesterol often found in meat-based wings or fried snacks. This makes it an ideal option for those following vegetarian, vegan, or simply health-conscious diets, without feeling like you’re missing out on a classic game day favorite. Its ability to absorb marinades and sauces is exceptional, ensuring every bite is bursting with that iconic spicy, tangy goodness.
Hosting a party? While these buffalo cauliflower bites will be a hit, you could also add pizza muffins to the spread for a cheesy spin on your favorite pizza flavors, offering even more variety for your guests.

Essential Tools for This Recipe
To ensure a smooth and successful culinary adventure, gathering your tools before you begin is key. First and foremost, you will absolutely need a roll of Reynolds Wrap® Non-Stick Aluminum Foil to line a sturdy half-baking sheet pan. This is critical for preventing sticking and simplifying cleanup. In addition, you’ll want a reliable set of mixing bowls in various sizes for preparing the batter and tossing the florets in the delicious buffalo sauce. A small saucepan will be necessary to gently melt the butter and whisk together the ingredients for your spicy buffalo sauce, ensuring a smooth and flavorful coating for your cauliflower.

How to Make Crispy Buffalo Cauliflower: Step-by-Step
Prepare and Coat the Cauliflower
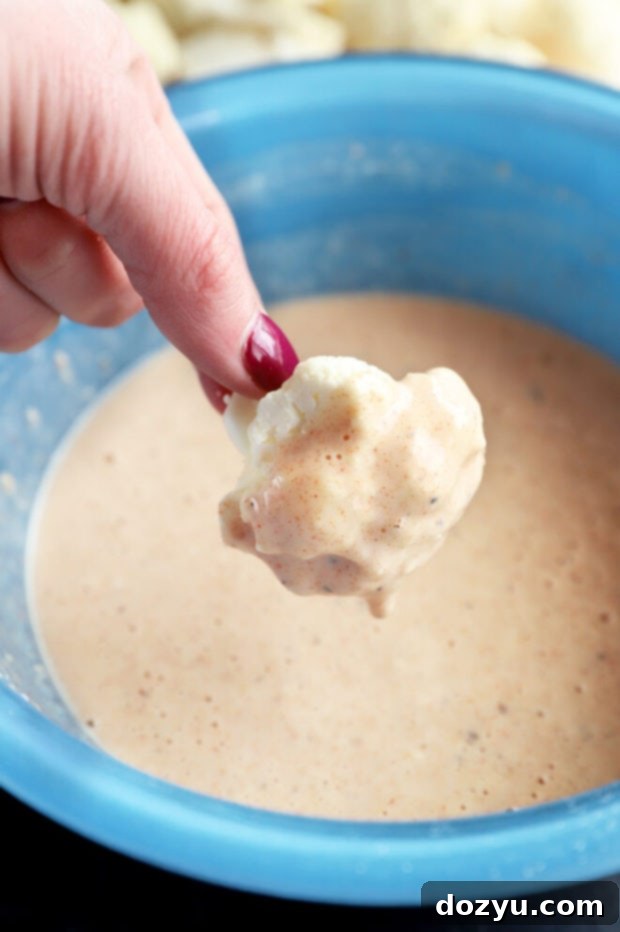
The secret to achieving that coveted crispy texture lies in the thin, flavorful batter that meticulously coats each cauliflower floret. Begin by ensuring your cauliflower head is thoroughly washed and cut into uniform, bite-sized florets – aiming for pieces roughly 1 to 1.5 inches in size ensures even cooking. In a medium mixing bowl, whisk together your water, milk, all-purpose flour, and a blend of aromatic spices: garlic powder, onion powder, cumin, smoked paprika, salt, and ground black pepper until you have a smooth, lump-free batter. The consistency should be thin enough to coat lightly but thick enough to adhere. Dip each individual floret into this batter, making sure to gently shake off any excess before carefully placing it onto your baking sheet. Remember, there’s no need for olive oil or cooking spray to prep the Reynolds Wrap® Non-Stick Aluminum Foil since its inherent non-stick properties handle that for you!
First Bake for Crispiness
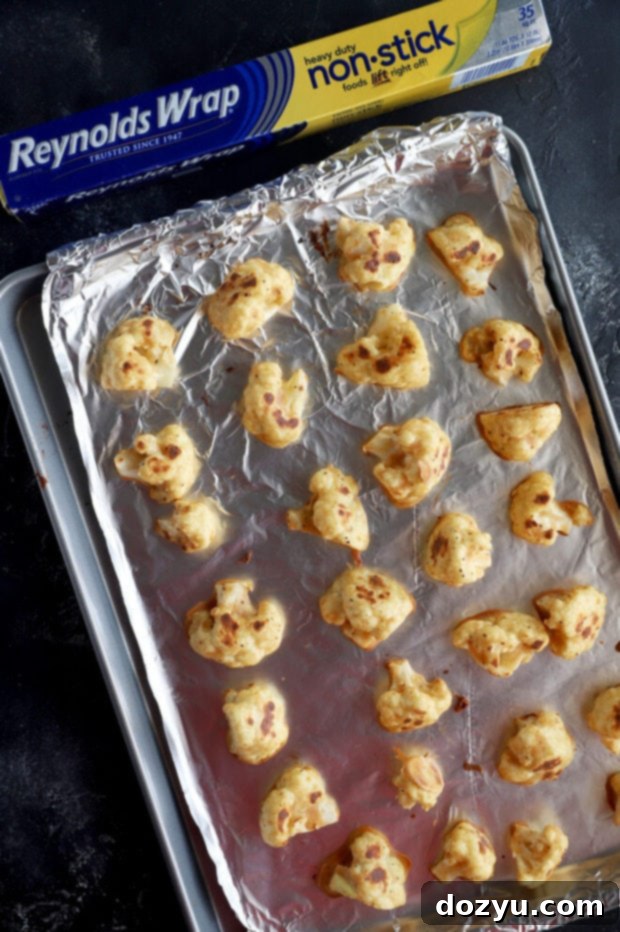
Once all your battered florets are neatly arranged in a single layer on the foil-lined baking sheet, it’s time for their first round in the oven. Bake them at 425°F (220°C) for approximately 20 minutes. Crucially, midway through this baking period (around the 10-minute mark), take a moment to gently stir or flip the florets. This ensures that every side gets exposed to the direct heat, allowing them to brown evenly and develop that irresistible golden-brown crispness we’re aiming for. It’s essential that the cauliflower is firm and crispy before moving on to the next step, as this initial bake sets the foundation for a truly excellent texture once the sauce is applied.
Whip Up the Buffalo Sauce
While your cauliflower is getting crispy in the oven, you can quickly prepare the signature buffalo sauce. This simple yet potent sauce requires minimal effort but delivers maximum flavor. In a small saucepan set over medium heat, melt the butter until it’s fully liquefied. Once melted, stir in the Frank’s RedHot sauce – the classic choice for authentic buffalo flavor – and a touch of honey. The honey helps to balance the heat of the hot sauce with a subtle sweetness and adds a lovely glaze. Allow the mixture to simmer gently for about 5 minutes, stirring occasionally, until it slightly thickens to a consistency that will perfectly coat your florets. Remove it from the heat and let it cool slightly while you wait for the cauliflower to finish its first bake.

Sauce and Final Bake
Once your cauliflower florets are beautifully crispy and golden brown from their initial bake, carefully transfer them to a large mixing bowl. Pour about three-quarters of your prepared buffalo sauce over the florets and gently toss them until each piece is thoroughly coated. The non-stick foil makes it easy to remove them from the pan without leaving behind any delicious crispy bits. Return the sauced florets to the same Reynolds Wrap® Non-Stick Aluminum Foil-lined baking sheet, spreading them out again in a single, even layer. Pop them back into the oven for another 15 minutes. This second bake allows the sauce to caramelize slightly and adhere perfectly to the cauliflower, intensifying the flavors and ensuring that satisfying sticky-crisp exterior. Once done, remove them from the oven, drizzle with the remaining buffalo sauce for an extra kick of flavor and shine, and serve them immediately. They are fantastic with your favorite dipping sauce – be it classic blue cheese dressing for that authentic wing experience or creamy ranch dressing for a milder contrast. For a truly traditional presentation, don’t forget a side of crisp celery sticks and carrot sticks, just like you’d get with conventional buffalo chicken wings!
Troubleshooting: Achieving Perfectly Crispy Cauliflower
Getting your baked buffalo cauliflower perfectly crispy is the key to this recipe’s success. If you find your florets aren’t reaching that ideal crunch, here are some essential tips and tricks to ensure you achieve restaurant-quality results every time:
- Thin Batter, Not Thick: The batter is crucial. Before placing the cauliflower bites on the baking sheet, make sure to let any excess batter drip off. A thick coating will steam rather than crisp up, leading to a soggy texture instead of a crunchy one. A thin, even layer is your goal for maximum crispiness.
- Give Them Space: Overcrowding your baking sheet is a common culprit for lack of crispiness. Cauliflower florets need room to breathe and roast. Ensure they are spaced at least 1 inch apart on the baking sheet. If necessary, use two baking sheets to avoid overcrowding. This allows for proper air circulation, which is vital for them to roast and brown, not steam.
- Bake Until Golden and Crispy: Ovens can vary significantly in temperature and performance. The baking times provided are a guideline. Don’t be afraid to leave your cauliflower in for an additional 5 to 10 minutes if they haven’t achieved that beautiful golden-brown color and firm, crispy texture. Keep a close eye on them, but prioritize crispiness over strict adherence to time.
- Crisp First, Sauce Later: This is perhaps the most important tip. Ensure your cauliflower is undeniably crispy before you add the buffalo sauce. If you coat them while they are still soft or slightly undercooked, the moisture from the sauce will prevent them from crisping up, and they will become soggy. The initial bake is all about creating that perfect crispy base.
- Consider Your Oven’s Hot Spots: If you notice uneven browning, rotate your baking sheet halfway through both baking periods. This can help compensate for any hot spots in your oven and ensure all florets cook evenly.
Love all things buffalo? For a heartier meal, why not whip up these easy, spicy buffalo chicken tacos for dinner after enjoying these cauliflower bites as an appetizer!


Baked Crispy Buffalo Cauliflower Recipe Card
Equipment
-
Saucepan
-
French Wire Whisk
-
Stainless Steel Mixing Bowls
-
Half Sheet Pan
-
Reynolds Wrap® Non-Stick Aluminum Foil
Ingredients
- Reynolds Wrap® Non-Stick Aluminum Foil
- 1/2 cup water
- 1/2 cup milk
- 3/4 cup all-purpose flour
- 2 tsp garlic powder
- 1 tsp onion powder
- 1 tsp cumin
- 1 tsp smoked paprika
- 1/4 tsp salt
- 1/4 tsp ground black pepper
- 1 large head of cauliflower washed and cut into uniform florets (approx. 4 cups of florets)
- 1/2 cup Frank’s RedHot Original Hot Sauce
- 1 tbsp unsalted butter
- 1 tsp honey
- Sliced green onion for garnish (optional)
- Ranch or Blue Cheese dressing for serving
- Celery sticks and carrot sticks for serving (optional)
Instructions
-
1. Preheat your oven to 425˚F (220°C). Line a large, rimmed baking sheet with Reynolds Wrap® Non-Stick Aluminum Foil, ensuring the dull, non-stick side is facing up. This will guarantee easy release and minimal cleanup. If you are not using non-stick foil, make sure to coat your regular foil lining generously with nonstick cooking spray or a thin layer of oil. Set the prepared baking sheet aside.
-
2. In a medium-sized mixing bowl, combine the water, milk, all-purpose flour, garlic powder, onion powder, cumin, smoked paprika, salt, and ground black pepper. Whisk these ingredients together thoroughly until the mixture is smooth and all lumps have disappeared, forming a thin, consistent batter.
-
3. Take each cauliflower floret and dip it into the prepared batter. Allow any excess batter to drip off before carefully arranging the coated florets onto the lined baking sheet. It is crucial to space them at least 1-inch apart to ensure they roast and crisp evenly, rather than steaming. You may need to use a second baking sheet if your florets are too crowded.
-
4. Bake the cauliflower for 20 minutes in the preheated oven. Halfway through the baking time (after about 10 minutes), gently flip or stir the florets to promote even browning and crisping on all sides. Continue baking until they are golden brown and notably crispy. This initial crispiness is vital; ensure they are firm before proceeding to the next step, as oven temperatures can vary.
-
5. While the cauliflower is in its first bake, prepare the buffalo sauce. In a small saucepan, melt the butter over medium heat. Once melted, stir in Frank’s RedHot Original Hot Sauce and the honey. Continue to cook this mixture for another 5 minutes, stirring occasionally, until it has slightly thickened and is well combined. Remove the saucepan from the heat and allow the sauce to cool slightly.
-
6. Once the cauliflower florets are crispy from their first bake, transfer them to a large mixing bowl. Pour approximately ¾ of the prepared buffalo sauce over them and toss gently to ensure every floret is evenly coated in the spicy, tangy goodness. Return the sauced florets to the same foil-lined baking sheet, spreading them out in a single layer once more. Bake for an additional 15 minutes.
-
7. Remove the crispy buffalo cauliflower from the oven. Drizzle the remaining buffalo sauce over the top for an extra layer of flavor and a glossy finish. Serve immediately, accompanied by your choice of cooling ranch or savory blue cheese dressing, and fresh celery and carrot sticks for a complete game day spread. Enjoy your healthy, flavorful, and incredibly satisfying snack!
