Spooktacularly Easy: How to Create the Ultimate Halloween Dessert Charcuterie Board
Looking for a fun, festive, and utterly delicious way to delight guests at your Halloween celebration? Look no further than a Halloween dessert charcuterie board! This highly customizable and visually stunning centerpiece allows you to showcase all your favorite sweet treats, making it a guaranteed hit for any spooky gathering. Forget the stress of individual desserts; this board is all about effortless presentation and abundant choice, ensuring everyone finds something enchanting to enjoy.
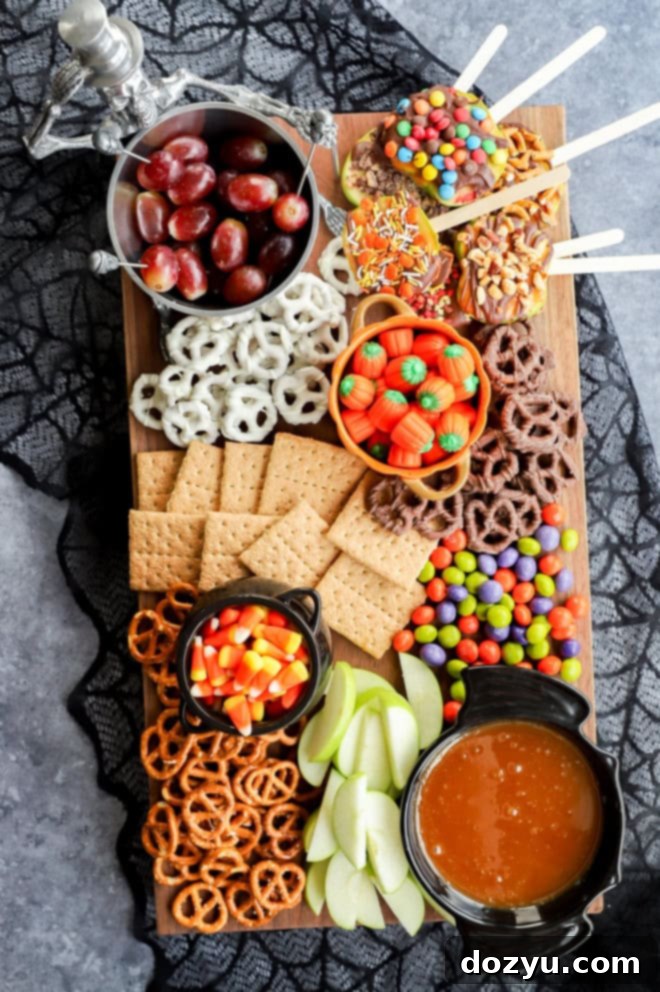
table of contents
Toggle
About Your Spooky Halloween Dessert Charcuterie Board
As the leaves change and a chill fills the air, Halloween brings with it a unique opportunity to indulge in all things sweet and spooky. A Halloween dessert charcuterie board is the ultimate solution for serving up an array of hauntingly delicious treats without the fuss of baking multiple elaborate desserts. It’s an innovative and interactive way to present sweets that will impress your guests and cater to every palate.
The beauty of this dessert board lies in its incredible flexibility and customization. You are the master of your spooky spread! Whether you prefer classic candy corn and pumpkin-shaped candies, gourmet chocolate truffles, or freshly baked homemade cookies, anything goes. Simply gather your favorite Halloween candies, add a selection of crunchy snacks, spoon in a sweet dip or two, and include some fresh, seasonal fruit for a touch of natural sweetness and color. The possibilities are truly endless, allowing you to create a unique display for every occasion. This isn’t just a dessert; it’s an edible work of art that invites exploration and indulgence. Who said charcuterie boards were only for meats and cheeses?
One of the best aspects of a dessert charcuterie board is its simplicity. There’s no need to spend hours meticulously baking or decorating. The majority of your items can be store-bought or prepared with minimal effort. All you need to do is arrange your chosen treats artfully on a large board, and you’re ready to impress. This also makes it incredibly portable—perfect for a Halloween potluck, a casual horror movie night with friends, or as the grand finale to your family’s festive dinner. Wherever it goes, this board is destined to be a memorable centerpiece.
Dessert boards embody the kind of fun, creative, and stress-free hosting that I adore. They offer something for everyone, making them ideal for diverse groups and various Halloween-themed events. From spirited kids’ parties to sophisticated adult gatherings, a well-curated Halloween dessert board elevates the experience and makes dessert a delightful interactive adventure.
Essential Ingredients for Your Halloween Treat Board
Curating the perfect Halloween dessert board means having a diverse selection of textures, flavors, and colors. Here’s a comprehensive guide to what you’ll need to create a truly spectacular spread:
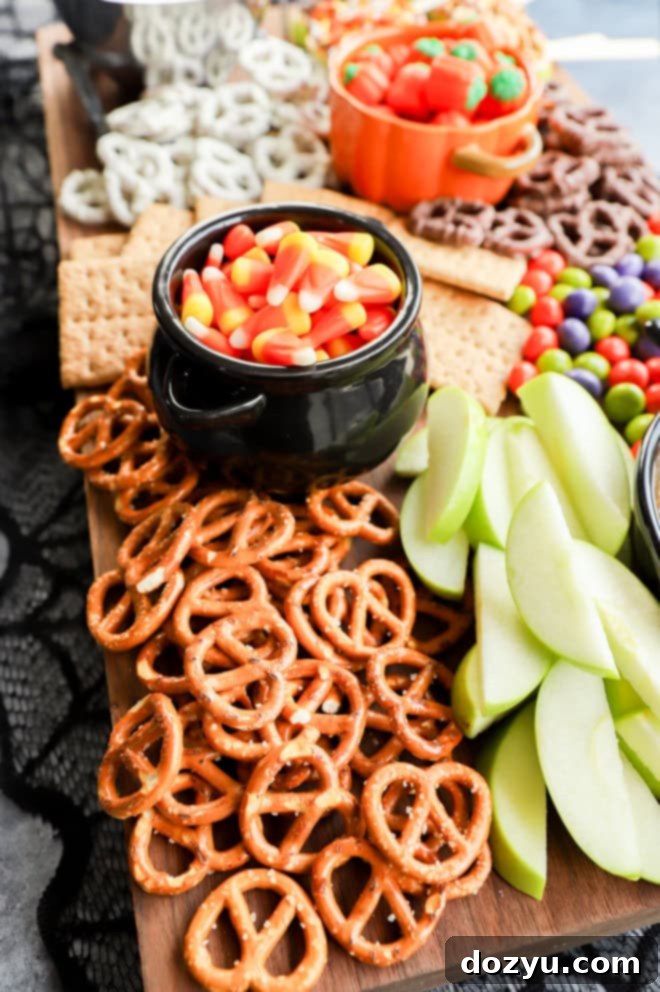
Candy. This is Halloween, so go wild with your favorite candies! Embrace the classics like candy corn, candy pumpkins, and seasonal M&Ms. Beyond the traditional, consider adding a variety of textures and flavors. Think chewy gummy worms (perfect for a “creepy crawly” effect), sour candies for a zesty kick, mini chocolate bars, peanut butter cups, or even sophisticated chocolate truffles. Don’t forget novelty Halloween candies like vampire teeth, ghost-shaped gummies, or brightly colored sprinkles to scatter over the board for extra flair. Choose candies in classic Halloween colors like orange, black, purple, and green to enhance the festive theme.
Snacks. To balance the sweetness and add crunch, a variety of snacks is essential. Chocolate-covered pretzels (milk, dark, or white chocolate with Halloween sprinkles!), plain salty pretzels, mixed nuts (candied pecans or spiced almonds add an autumn touch), graham crackers, candy apple slices, and various cookies like Oreos (regular or Halloween-themed), Nutter Butters, or animal crackers. Consider adding mini rice crispy treats for a chewy element. Popcorn, especially caramel corn, can also be a delightful addition.
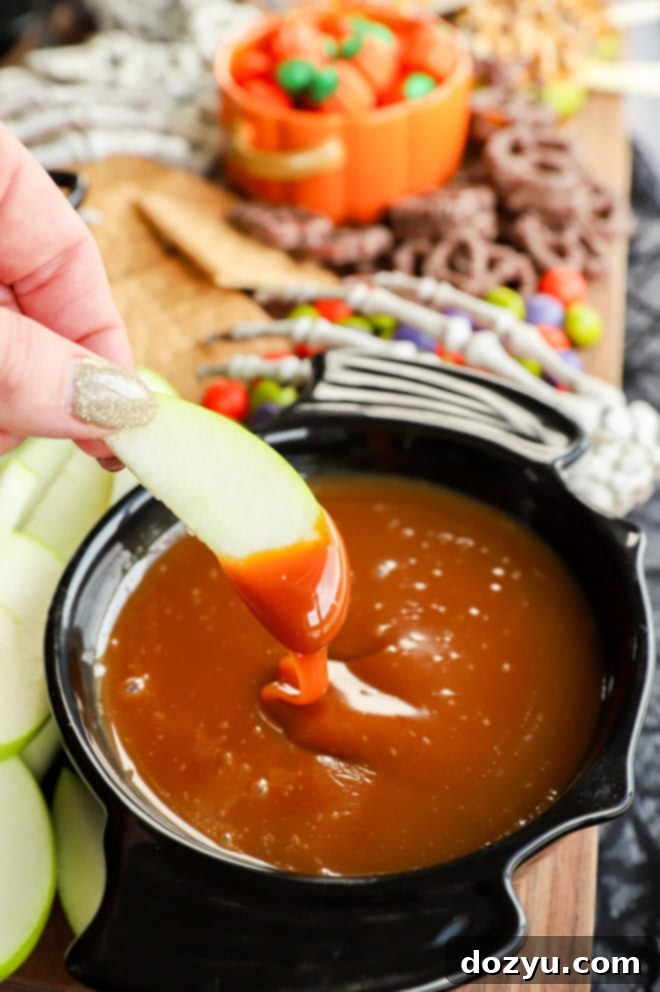
Dips. Dips are the gooey heart of any dessert board, offering a perfect vehicle for dippers. A homemade caramel apple dip is a seasonal favorite, evoking cozy autumn vibes. Other fantastic options include a luscious chocolate dip (melted chocolate or Nutella), a fluffy marshmallow dip, a creamy fruit dip (made with cream cheese and powdered sugar), or even a warm chocolate fondue for an extra interactive element. Offering a couple of different dips provides variety and caters to different preferences.
Dippers. The dippers are just as important as the dips! For caramel apple dip, tart green apple slices, salty pretzels, and graham crackers are excellent choices. If you’re using a chocolate or marshmallow dip, consider soft marshmallows (large or mini), banana slices, strawberries, shortbread cookies, and waffle cone pieces. You can even use small brownie bites or mini churros for an indulgent experience. Store-bought caramel sauce or hot fudge is also a perfectly acceptable shortcut if you’re short on time but still want a delicious dip option.
Fruit. Fresh fruit provides a refreshing contrast to the richness of the sweets and adds vibrant natural colors to your Halloween board. Red grapes and sliced green apples are visually appealing and offer a crisp texture. Beyond these, consider a bounty of other seasonal fruits: blackberries, figs, kiwi slices, pears, pomegranates (for a “bloody” effect), or star fruit. For a truly spooky touch, you can use a small cookie cutter to shape apple slices into ghosts or pumpkins, or add edible candy eyes to fruit skewers. If you decide to adapt this board for other holidays, swap in strawberries, raspberries, blueberries, or orange slices for a different seasonal feel.
Baked Goodies. While not strictly necessary, homemade or store-bought baked treats elevate your board to another level. Consider adding spiderweb cookies, spooky Halloween cheesecake brownies, spooky peanut butter rice krispie treats, delicate macarons, or fun Halloween monster cookies. Mini cupcakes or small sugar cookies decorated with festive frosting or sprinkles are also fantastic additions. Even simple homemade cookies can become “spooky” by pressing candy eyes into them before baking or drizzling them with colored icing after they cool. These personal touches make the board extra special.
Must-Have Tools for Board Assembly
To create your impressive Halloween dessert charcuterie board, you won’t need many specialized tools, but a few essentials will make the process smooth and enjoyable:
- Serving Board: The foundation of your masterpiece! Bring out your favorite charcuterie serving board, whether it’s a rustic wooden slab, an elegant slate platter, or a large ceramic tray. A sturdy, large cutting board, like the one pictured here, also works perfectly and has been my go-to serving platter for various boards over the years. Choose one with enough surface area to accommodate all your desired treats.
- Small Bowls: You’ll need several small bowls or ramekins to hold your dips, smaller candies, nuts, or jams. These add visual interest and keep wet ingredients separate from dry ones. Look for bowls in festive Halloween colors (orange, black, purple) or with spooky designs.
- Chef’s Knife & Cutting Board: Prepare any fruits, baked goods, or larger snacks that need slicing or chopping with a sharp chef’s knife and a separate, clean cutting board.
- Small Spoons/Spreaders: Include a few small spoons or spreaders in each dip bowl for easy and hygienic serving.
- Optional: Tongs/Picks: Small tongs or decorative picks can be helpful for guests to grab items, especially smaller candies or fruit pieces, keeping hands clean and maintaining the board’s pristine look.
Step-by-Step: Assembling Your Halloween Dessert Board
Assembling a visually appealing Halloween dessert board is simpler than you might think. Follow these steps for a stunning and inviting display:
Start with Your Spooky Bowls
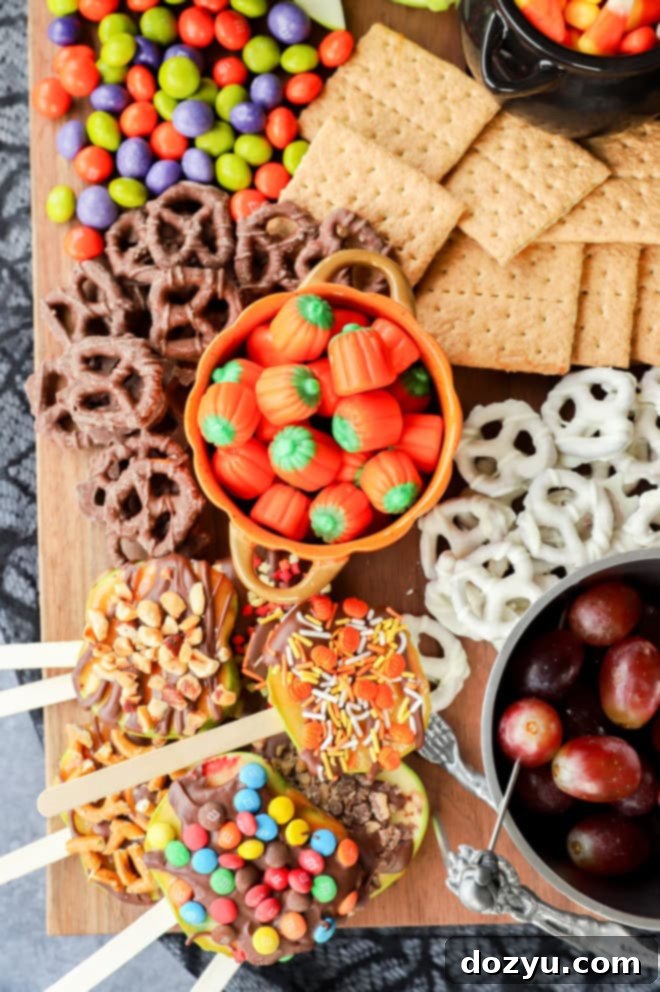
Always begin arranging your board with the larger, more stationary items. These are typically your small bowls or ramekins. Place each bowl strategically around the board, ensuring there’s ample space between them. Avoid crowding them all on one side; spread them out to create balance and flow. Fill these bowls with your chosen sweet dips (like caramel or chocolate), smaller candies (like M&Ms or gummy worms), nuts, or any other loose ingredients. This step sets the anchor points for the rest of your treats.
Arrange the Perfect Dippers
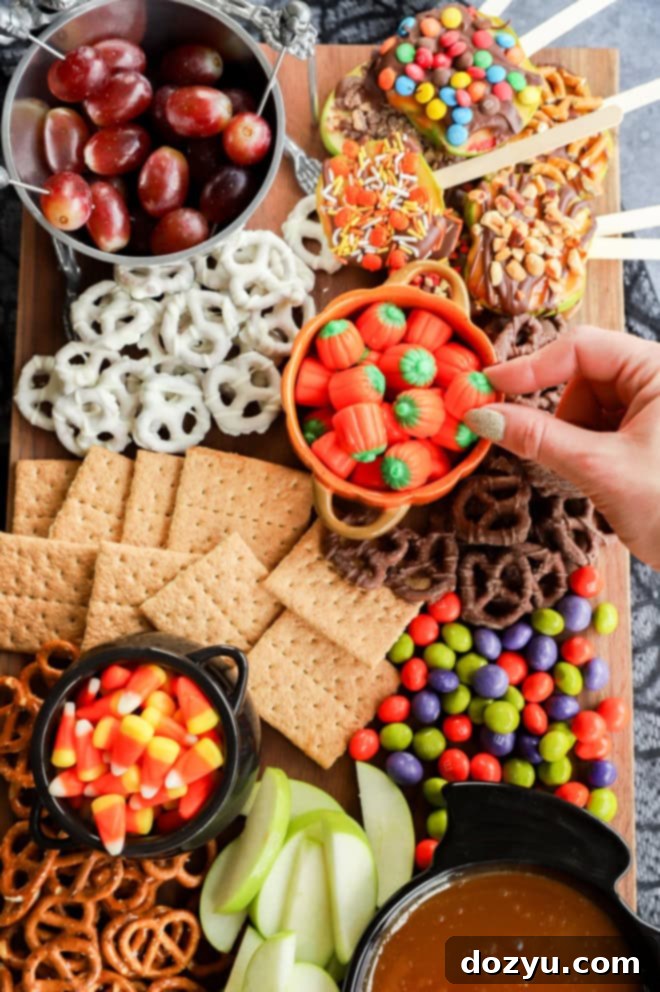
Once your dips are in place, arrange their corresponding dippers nearby. This makes it intuitive and easy for guests to grab and dip. For instance, place apple slices and pretzels right next to the caramel dip. If you’re incorporating baked goodies like cookies, brownies, or mini cupcakes, now is the ideal time to add them to the board. Ensure they are distributed evenly and that there’s enough room for each item to stand out without being squashed.
Incorporate Fresh, Vibrant Fruit
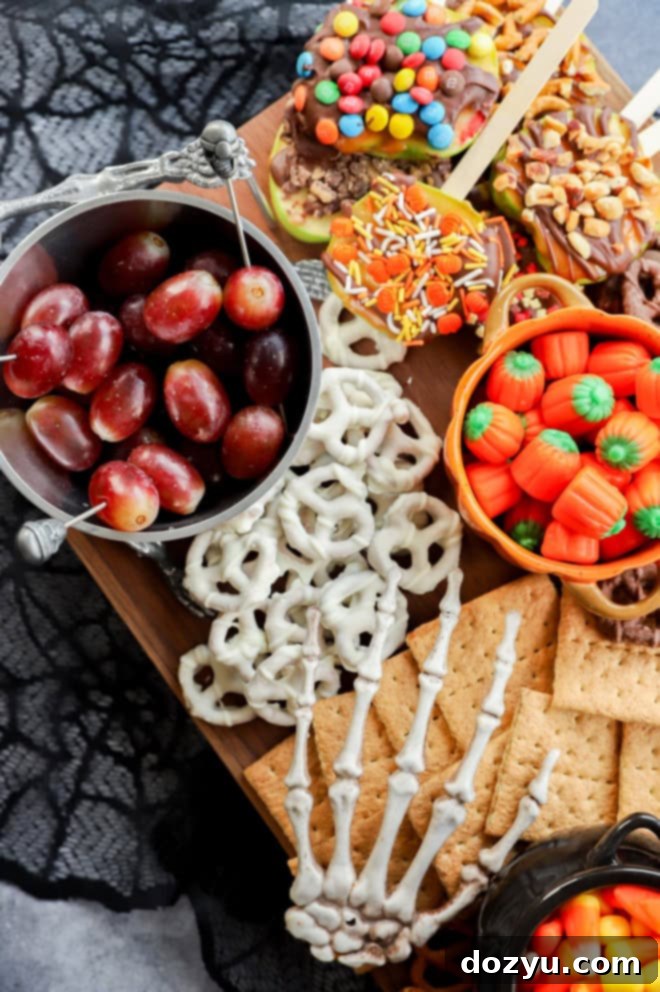
Next, it’s time to add the fruit. Whether you’re using just a couple of types or a broader selection, pile them together in distinct sections or clusters around the board. This helps to spread out the colors and textures. For instance, create a vibrant cascade of red grapes in one corner and a fan of green apple slices in another. The fruit adds freshness and a beautiful pop of color that contrasts with the candies and baked goods.
Fill Gaps with Spooky Snacks and Candies
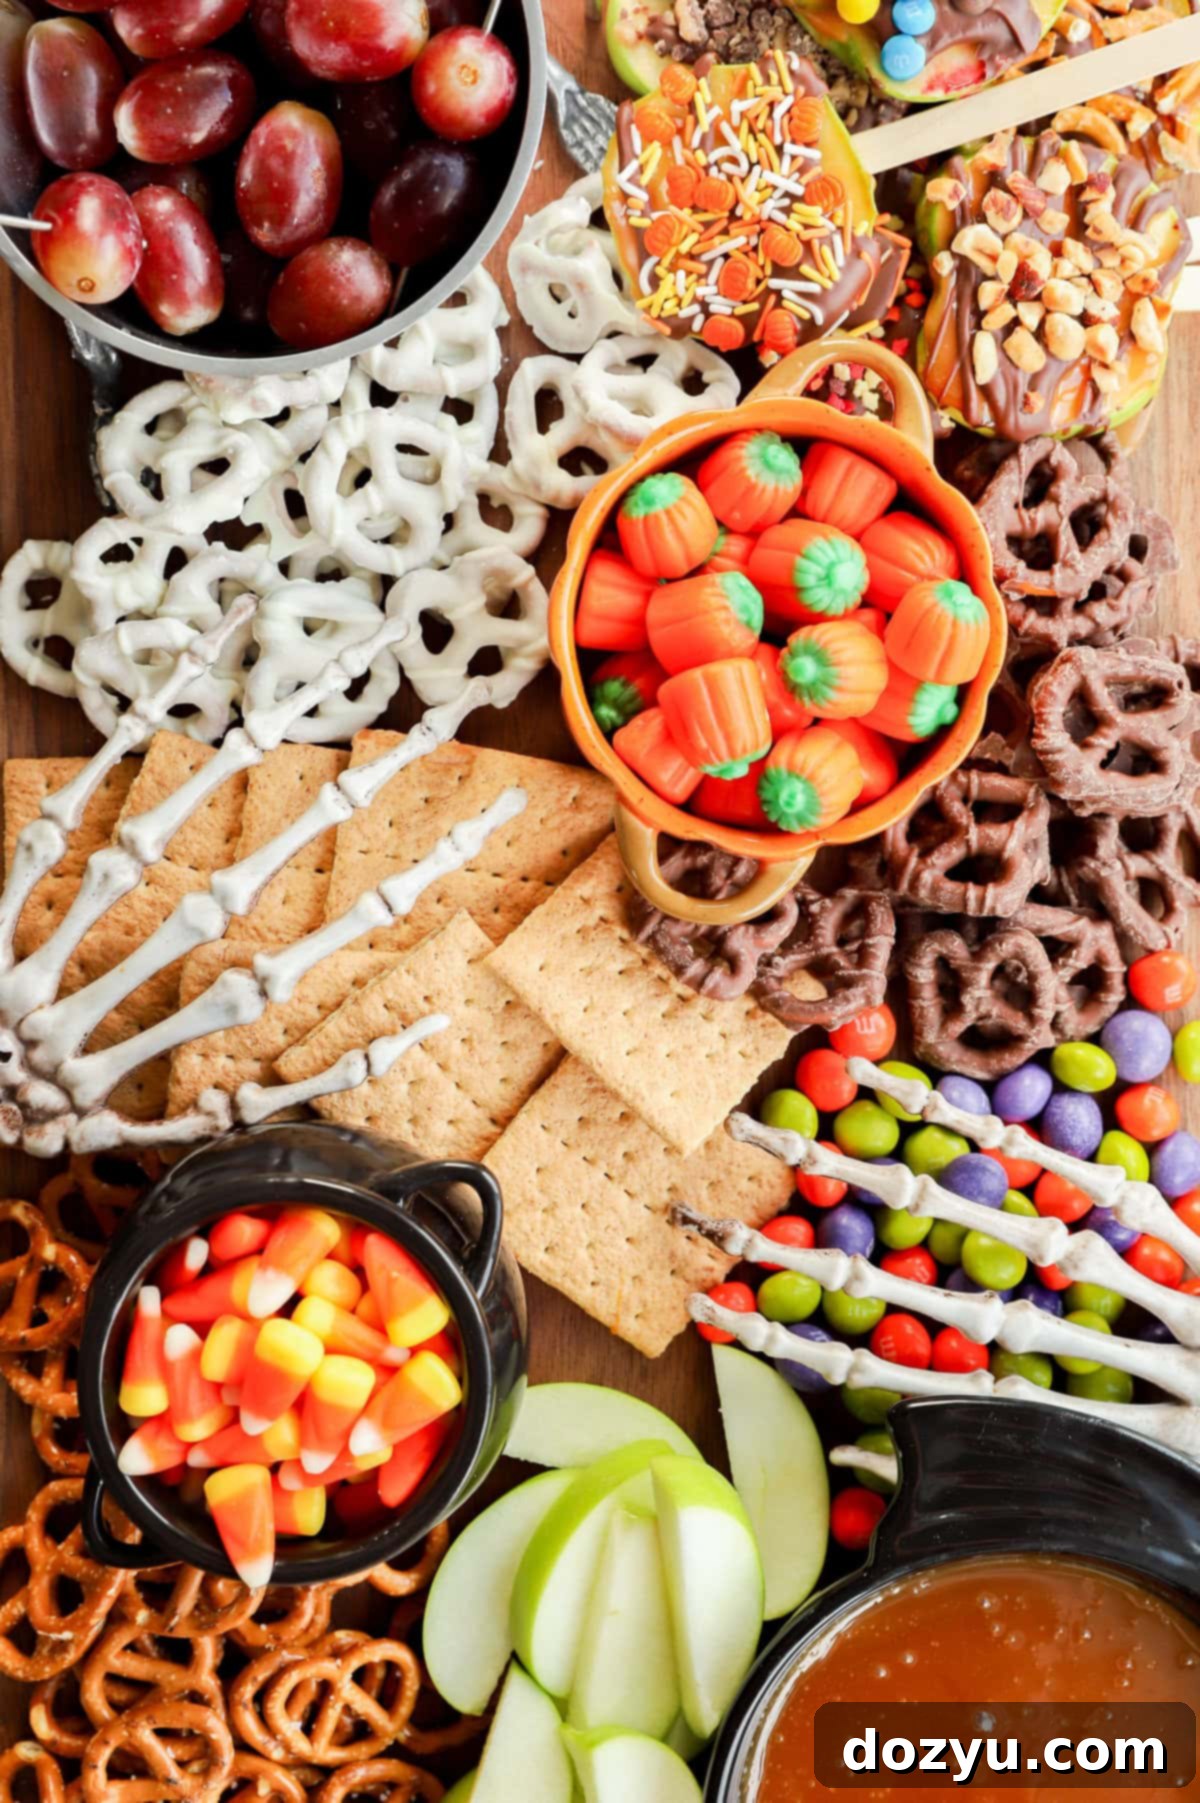
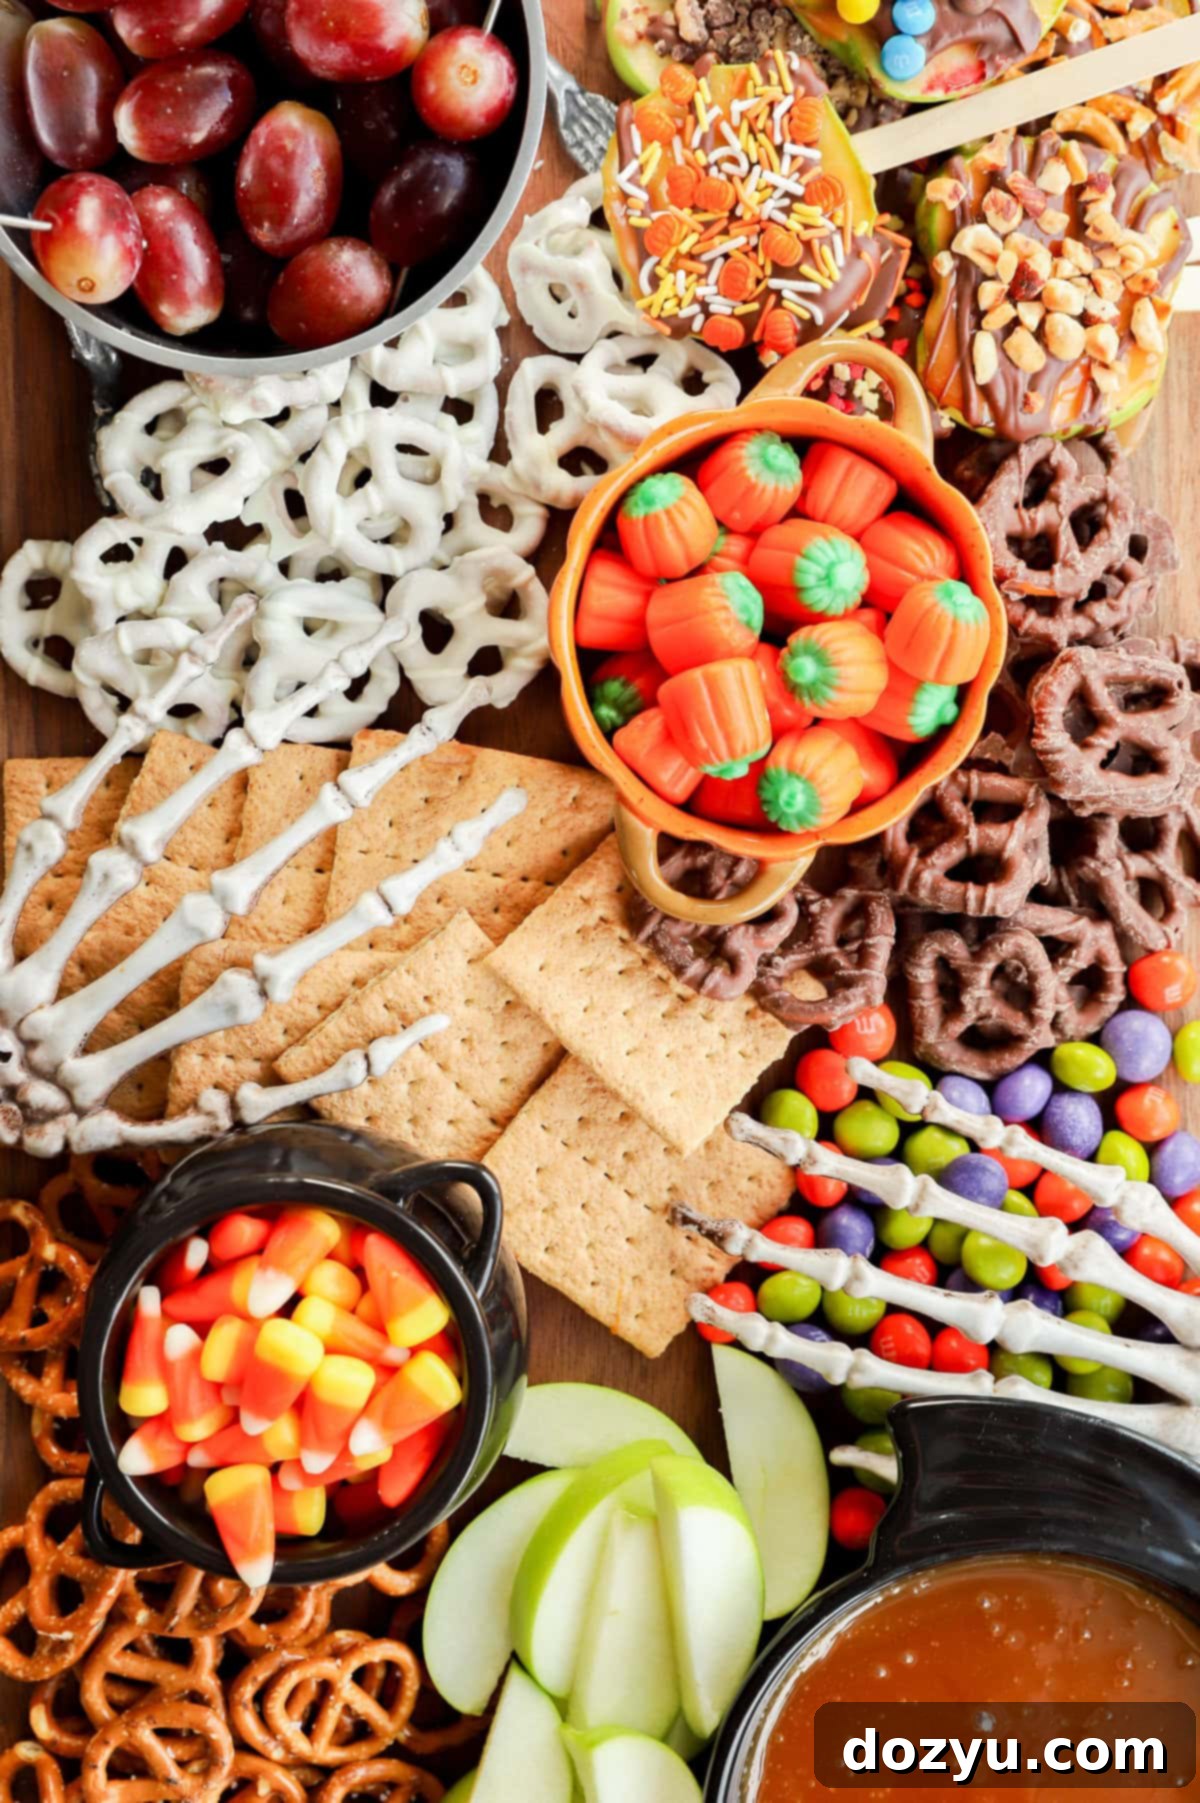
Now for the fun part: filling in all the empty spaces! This is where your extra snacks and candies come into play. Artfully arrange chocolate-covered pretzels, candy corn, gummy creatures, and any other treats you’ve chosen. Don’t be afraid to overlap slightly or create small piles to achieve an abundant and inviting look. The goal is to make the board look full and overflowing with goodness. For an extra touch of Halloween magic, add some spooky decorations: plastic spiders tucked into crevices, small ghost figurines, or skeleton hands strategically placed to “reach” for treats. These elements tie the whole theme together and make your board truly Instagram-worthy.
Pro Tip: Adapt this dessert board for any holiday or special occasion! Simply switch out the themed candies, colors, and decorations. You can easily create a festive board for Valentine’s Day (red and pink sweets), Christmas (gingerbread and peppermints), Mother’s Day (pastel treats and flowers), New Year’s Eve (sparkling chocolates and glittery fruits), and many more celebrations!
Expert Tips & Creative Ideas for Your Board
Creating a show-stopping Halloween dessert board is about more than just placing items on a platter. Here are some tips to make yours truly exceptional:
- Keep it Simple but Impactful! There’s no need to overcomplicate things. Focus on a few key treats that you absolutely love and know your guests will enjoy. This could mean pairing a special homemade cookie with a variety of readily available store-bought Halloween candies. To keep costs down, mix in budget-friendly options like pretzels and classic bulk candies with a few premium items. The goal is to create a visually appealing spread that’s fun and delicious, without unnecessary fuss or expense.
- Don’t Stress About the Look! It’s easy to get caught up in making your dessert charcuterie board look absolutely “perfect” or like a magazine cover. But the most important thing is to have fun with the process! In all my experience putting together boards, the key is simply to ensure items are spread out and that no two identical or very similar items are directly next to each other. This creates visual interest and variety. The ultimate priority is to make the board appear abundant, full, and inviting. When guests see a generous spread brimming with treats, they’ll be delighted and impressed by your effort and creativity, regardless of minor imperfections. Use varying heights with small stands or bowls to add dimension and make the board appear even more lavish.
- Play with Colors & Textures: Halloween offers a fantastic palette. Incorporate a mix of bright oranges, deep blacks, ghostly whites, and vibrant greens or purples. Combine crunchy pretzels with soft marshmallows, gooey caramel with crisp apple slices, and smooth chocolate with chewy gummies. This variety makes every bite an adventure.
- Spooky Decor Beyond Food: Enhance the Halloween theme by integrating non-edible decorations directly onto the board. Think small plastic spiders, spiderweb lace overlays, miniature gravestones, toy bats, or even a small amount of dry ice (used safely in a separate bowl for fog effect) to create a truly eerie ambiance.
- Pre-prep is Your Friend: Slice fruits, bake cookies, and prepare dips ahead of time. This way, assembly on the day of your party is quick and stress-free, allowing you more time to enjoy the festivities.
More easy board ideas to try: Fall Charcuterie Board | Fruit Charcuterie Board | Breakfast Charcuterie Board | Summer Charcuterie Board
Serving & Storage: How Long Can the Board Sit Out?
When preparing any food for a gathering, especially one with fresh ingredients, food safety is paramount. Since your Halloween dessert charcuterie board will feature fresh fruit, it’s important to be mindful of how long it sits at room temperature. Freshly cut fruit, particularly apples and bananas, can oxidize and turn brown relatively quickly, and some dips might contain dairy or other perishable ingredients.
Therefore, if your board includes fresh fruit or dairy-based dips, it’s best not to let it sit out for more than 2 hours total at room temperature. After this time, any remaining perishable items should be refrigerated. If you plan for a longer event, consider having a backup board ready in the fridge to swap out, or only put out smaller portions of fruit and replenish as needed.
If you opt for a board that strictly features non-perishable items like only candies, cookies, nuts, and chocolate-covered pretzels (without fresh fruit or dairy dips), you can leave it out for a much longer period, typically up to 4-6 hours, assuming the environment is not excessively hot or humid. Always use your best judgment regarding food safety and guest enjoyment.
Perfect Pairings: What to Serve with Your Dessert Board
This Halloween dessert charcuterie board is a comprehensive and satisfying dessert on its own, designed to be the grand finale after any meal or the star of a casual snack spread. You won’t need to add other sweet treats once this impressive platter makes its appearance. Its diverse offerings ensure that every guest finds something to love, making it the ideal sweet ending for any spooky gathering.
However, to complete the festive experience, pairing it with themed beverages is a fantastic idea. I always recommend complementing this board with fun cocktails or mocktails. Here are some of our reader favorites, perfect for a spooky celebration:
- For a party, this big batch bloody sangria Halloween punch is both festive and not overly sweet, making it a perfect companion to rich desserts. Its deep red hue adds to the spooky ambiance.
- Butterbeer cocktails are a beloved classic in our house, especially for those who love a touch of magic! This recipe offers both cold and warm options, catering to different preferences and weather.
- For a fun and spirited kick-off to your party, these Vampire Bite Shots are a playful and vibrant choice that will get everyone in the Halloween spirit.
- Non-Alcoholic Options: For younger guests or those who prefer not to drink alcohol, consider a vibrant green “Witch’s Brew” punch (ginger ale with lime sherbet and food coloring), sparkling cider, or homemade pumpkin spice lattes.

Storing Leftovers: Keeping Your Treats Fresh
If, by some miracle, you have any leftovers from your Halloween dessert charcuterie board, proper storage is key to keeping the individual ingredients fresh for longer. Since the board is an assortment of different items, it’s best to store them separately:
- Fruits: Any remaining fresh fruit should be transferred to airtight containers and refrigerated promptly. If apples or other easily oxidizing fruits were cut, you might want to discard those that have browned, or soak them in a little lemon-water solution to prevent browning if storing for a short period.
- Dips: Caramel apple dip, chocolate dip, or any other creamy dips should be transferred into separate, sealed containers and refrigerated. Check the specific dip’s guidelines for how long it can be stored.
- Candies: Most Halloween candies can be returned to their original packaging or transferred to airtight bags or containers and stored at room temperature. This prevents them from drying out or absorbing unwanted odors.
- Baked Goods: Cookies, brownies, or mini cupcakes should be stored in airtight containers at room temperature (or refrigerated if they contain cream cheese frosting or perishable fillings). They usually last a few days this way.
- Snacks: Pretzels, graham crackers, and nuts should be stored in airtight containers to maintain their crunchiness and prevent them from going stale. Return them to their original packaging if suitable.
By storing each component correctly, you can enjoy the lingering flavors of your Halloween dessert board for a few more days.
More Spooky & Delicious Halloween Recipes
If you’re loving the Halloween spirit and want to continue your culinary adventures, here are a few more spooky and delightful recipes that are perfect for the season:
- Caramel Apple Ice Cream is a dreamy, no-churn dessert brimming with comforting apple pie spices and a luscious caramel swirl. No ice cream maker is required, making it incredibly easy to whip up!
- These are, without a doubt, the best roasted pumpkin seeds you’ll ever make. Perfectly seasoned and delightfully crunchy, they’ll disappear in a flash after you carve your pumpkins!
- For a savory and spicy treat, these Chorizo Jalapeño Mummy Poppers are an absolute crowd-pleaser. Cheesy, spicy, and adorable, everyone will gobble these up.
Seasonal Ingredient Spotlight
For the freshest and most flavorful dessert board, always select seasonal produce that is perfectly ripe! Refer to our quick start guide to seasonal cooking to find comprehensive lists for what’s in season during autumn. Incorporating fruits like crisp apples, juicy grapes, sweet pears, and vibrant pomegranates will not only enhance the taste but also add authentic fall colors and textures, making your board truly special and tailored to the harvest season!
Finally, if you make this ultimate Halloween dessert charcuterie board, please be sure to give this recipe a rating and/or leave a comment! I absolutely love hearing when you all try out these recipes and truly appreciate the feedback. I do take the time to read and respond to every single comment, so don’t hesitate to share your thoughts or ask any questions you might have.
Oh, and be sure to tag me on Instagram, Facebook, or Pinterest if you create this spooky spread! Seeing these recipes come to life in your homes is my absolute favorite thing, and I truly cherish looking through those photos. Your creativity and enjoyment mean the world to me!
Halloween Dessert Charcuterie Board Recipe
Ingredients
- Candy Corn
- Candy Pumpkins
- Assorted Halloween-themed Candies e.g., M&Ms, mini peanut butter cups, gummy worms, chocolate bars, sour candies, chocolate truffles.
- Milk Chocolate Covered Pretzels
- White Chocolate Covered Pretzels
- Graham Crackers
- Candy Apple Slices
- Salty Pretzels
- Assorted cookies e.g., Oreos, Nutter Butters, mini chocolate chip cookies, or even small homemade baked goods.
- Caramel Apple Dip
- Additional Sweet Dips e.g., melted chocolate, Nutella, marshmallow fluff, fruit dip.
- Apple Slices any variety, consider tart green apples for contrast.
- Red Grapes and/or other seasonal fruits like blackberries, figs, kiwi, pears, pomegranate seeds.
Instructions
-
Begin by placing your small bowls strategically across your serving board. Leave enough space between them so they aren’t crowded. Fill these bowls with your chosen dips, smaller candies, or nuts.
-
Next, arrange your dippers around their respective dip bowls for easy access. If you are including baked goodies like cookies or brownies, add them to the board now, ensuring good distribution and space.
-
Carefully add the fresh fruit to the board. Pile them together in appealing sections or clusters, spreading them out to add bursts of color and freshness across the board.
-
Finally, fill in all the remaining empty spaces with your assortment of extra snacks and candies. Arrange them artfully to create an abundant and inviting display, ensuring every nook and cranny is filled.
-
For an enhanced Halloween theme, consider adding spooky decorations such as plastic spiders, small ghost figurines, or skeleton hands to complete your festive dessert charcuterie board.
