Mastering Homemade Empanada Dough: Your Guide to Flaky, Versatile Pastry (Baked or Fried!)
Embark on a culinary journey to create the perfect empanada dough right in your own kitchen! This comprehensive guide provides an easy-to-follow recipe for homemade empanada dough, yielding a buttery, incredibly flaky pastry that is ideal for both baking and frying. Whether you’re a novice baker or a seasoned chef seeking a reliable, foolproof recipe, this staple will quickly become a favorite. We’ll share all the essential tips and tricks accumulated from years of testing countless batches, ensuring your empanadas are consistently delicious.

table of contents
Toggle
Why This is the Best Empanada Dough Recipe
For a long time, my kitchen relied on convenient store-bought empanada dough and even puff pastry for quick solutions. While these shortcuts have their place, I eventually discovered their limitations. Store-bought options often fall short, resulting in a dough that is either too tough to bite through, surprisingly dry, or simply lacking in flavor. The texture often isn’t quite right for the satisfying experience a true empanada offers.
Driven by a desire for perfection, I dedicated considerable time to experimenting with numerous homemade empanada dough recipes. Through extensive testing and fine-tuning, I developed this particular recipe, not only for its superior quality but also for its remarkable ease of preparation. This recipe consistently delivers a tender, flaky crust with a rich, buttery flavor that complements any filling, whether sweet or savory.
This versatile homemade empanada dough is perfectly suited for both baked and fried empanadas. It forms a sturdy yet delicate shell for a wide range of fillings, from savory Caprese empanadas bursting with mozzarella, tomatoes, and fresh basil, to sweet, decadent Nutella-filled treats. Even if you’re entirely new to making dough from scratch, you’ll be pleasantly surprised by how easily this recipe comes together. The most ‘challenging’ part, if you can even call it that, is simply rolling out the individual dough discs!
Wait, What is an Empanada Anyway?
The delightful name “empanada” is derived from the Spanish verb empanar, which beautifully translates to “to wrap or coat in bread.” This definition perfectly encapsulates what these delicious handheld pastries are all about. Empanadas consist of a thin, pliable dough that is carefully folded over a savory or sweet filling, then sealed and cooked. Traditionally, they are either baked or fried to a golden crisp, but for a lighter alternative, you can also prepare them in an air fryer.
Empanadas boast a rich and diverse history, deeply woven into the culinary fabric of Latin America and Spain. Each country, and often each region within those countries, proudly presents its unique interpretation of this beloved dish. From the hearty beef-filled empanadas of Argentina to the distinct flavors of Puerto Rican or Spanish varieties, the versatility is astounding. I’ve personally tested this homemade empanada dough recipe with a wide array of flavor combinations, drawing inspiration from various cultures, and it consistently delivers exceptional results across the board.
There’s an almost magical quality to empanadas: they are humble in their presentation but profoundly satisfying in taste. Whether you choose to stuff them with gooey, melty cheese, robust smoky beef, a medley of roasted vegetables, or a sweet fruit compote, the foundation of a truly great empanada begins with a superior dough. And with this recipe, you’re perfectly covered to create culinary magic.
Ingredients for the Perfect Empanada Dough
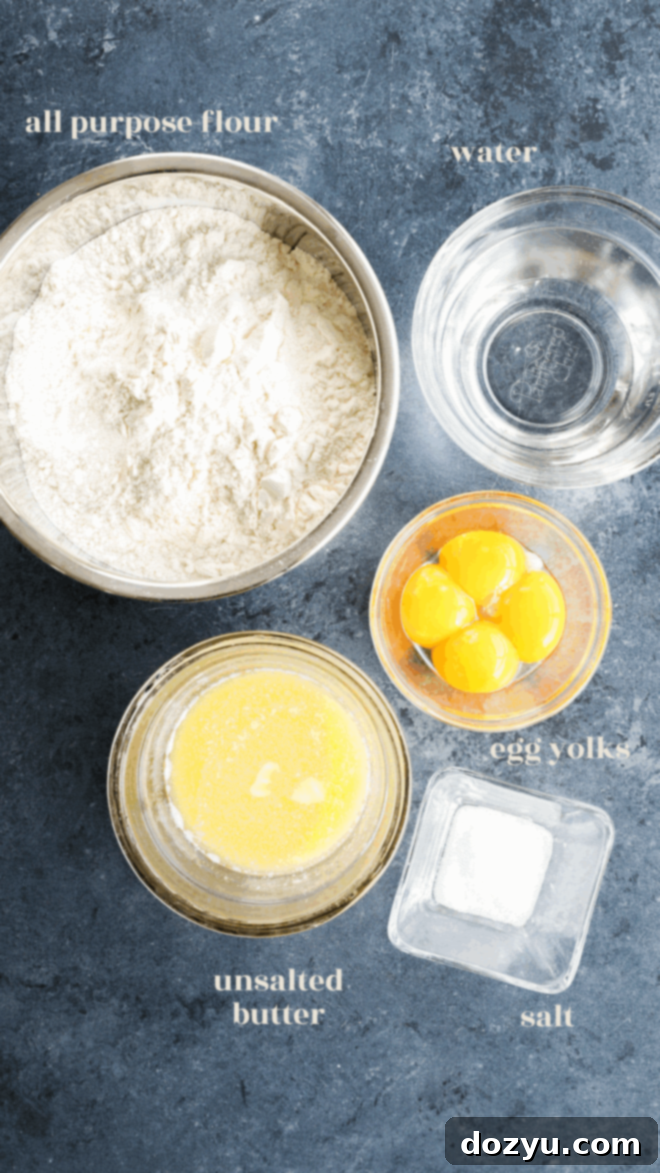
Crafting the perfect empanada dough from scratch requires just a few basic ingredients. Each plays a crucial role in achieving that desirable flaky texture and rich flavor:
- All-Purpose Flour: This is the foundation of our dough. All-purpose flour provides the ideal balance of protein to create a tender yet structured crust. While this recipe is optimized for all-purpose flour, you can also explore gluten-free 1:1 ratio flour blends for a gluten-free version, or a partial whole wheat blend for a heartier dough. I delve deeper into flour types in the FAQs section below to help you choose the best option.
- Salt: A fine kosher salt is recommended here. Salt is not just for seasoning; it enhances the overall flavor profile of the dough, balancing the richness of the butter. Coarse salts won’t dissolve as evenly and might leave pockets of intense saltiness, so opt for a fine grain.
- Unsalted Butter: Since we’re adding a controlled amount of salt to the recipe, unsalted butter is key. This allows you to manage the sodium level precisely. Make sure to melt the butter, but then let it cool slightly before incorporating it into the other ingredients. Using butter that is too hot can negatively affect the dough’s texture by making it greasy. If you only have salted butter on hand, remember to reduce the amount of added salt in the recipe accordingly.
- Egg Yolks: We use only the egg yolks from large eggs in this recipe. The yolks contribute significantly to the dough’s richness, tenderness, and beautiful golden hue. They also act as an emulsifier, helping to bind the ingredients together smoothly.
- Cold Water: This is a critical ingredient for achieving that coveted flaky texture. The water should be genuinely cold – ideally straight from the refrigerator or from a cold tap. Using cold water prevents the butter from melting too quickly when mixed with the flour, ensuring that it remains in small pieces throughout the dough. These small pockets of butter will then create steam during baking or frying, resulting in those delicate, flaky layers we all love.
Essential Tools for Making Homemade Empanada Dough
Making empanada dough from scratch is a straightforward process, and you don’t need a lot of fancy equipment. Here’s what you’ll find most useful:
- Large Mixing Bowl: For bringing the ingredients together, a generously sized mixing bowl is essential. This gives you ample space to combine the flour and other wet ingredients without making a mess.
- Wooden Spoon or Spatula: You can start by incorporating the ingredients with a sturdy wooden spoon or a silicone spatula. However, don’t be afraid to get your hands in there; hand-mixing is often the most effective way to ensure everything is properly combined and the dough comes together. There’s absolutely no need for specialized equipment like a food processor or a stand mixer for this recipe, keeping it accessible for everyone.
- Rolling Pin: A good rolling pin is crucial for flattening your dough into thin, uniform empanada discs. We highly recommend a marble rolling pin if you have one. Its inherent coolness helps keep the dough chilled as you work, preventing it from becoming too warm and sticky, which is key for a flaky pastry.
- Baking Sheet and Silicone Mat (for baking): If you plan to bake your empanadas, a half-sheet baking pan lined with a silicone mat or parchment paper will ensure even cooking and prevent sticking.
- Silicone Pastry Brush: This tool comes in incredibly handy for applying the egg wash to the edges (for sealing) and tops (for golden-brown color) of your empanadas, giving them a professional finish.
How to Make Flaky, Versatile Empanada Dough
Creating homemade empanada dough is a rewarding process that results in a superior texture and flavor compared to store-bought alternatives. Follow these simple steps for a perfect batch every time.
Make the Dough
Begin by combining your dry ingredients. In a large mixing bowl, thoroughly stir together the all-purpose flour and fine kosher salt until they are well combined. Next, add the wet ingredients: the slightly cooled melted unsalted butter, the rich egg yolks, and crucially, the cold water. Remember, the colder the water, the better for achieving that coveted flaky texture, so using it straight from the fridge is ideal.
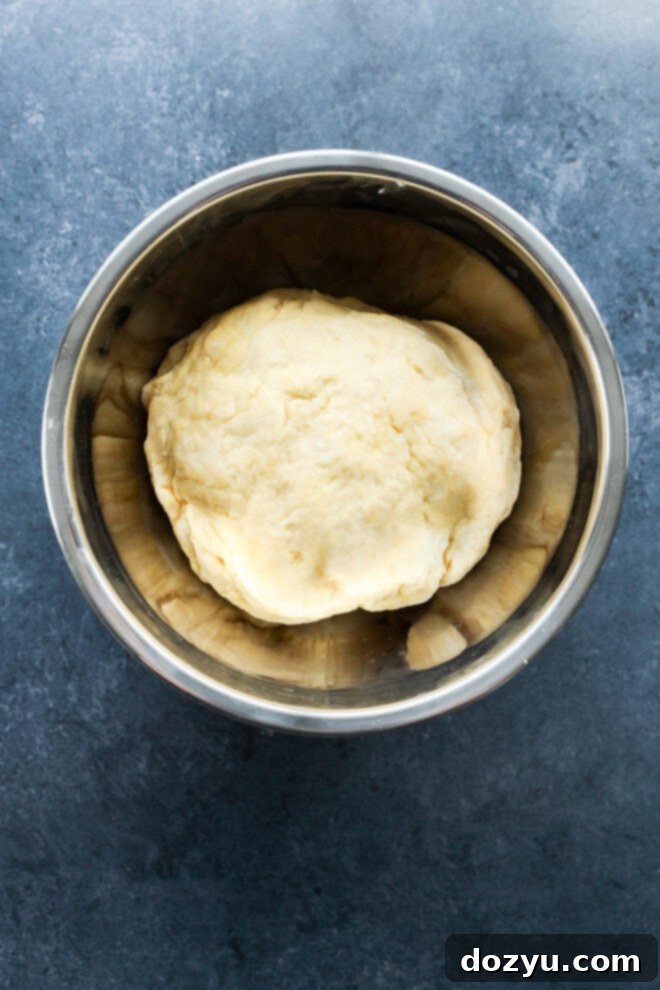
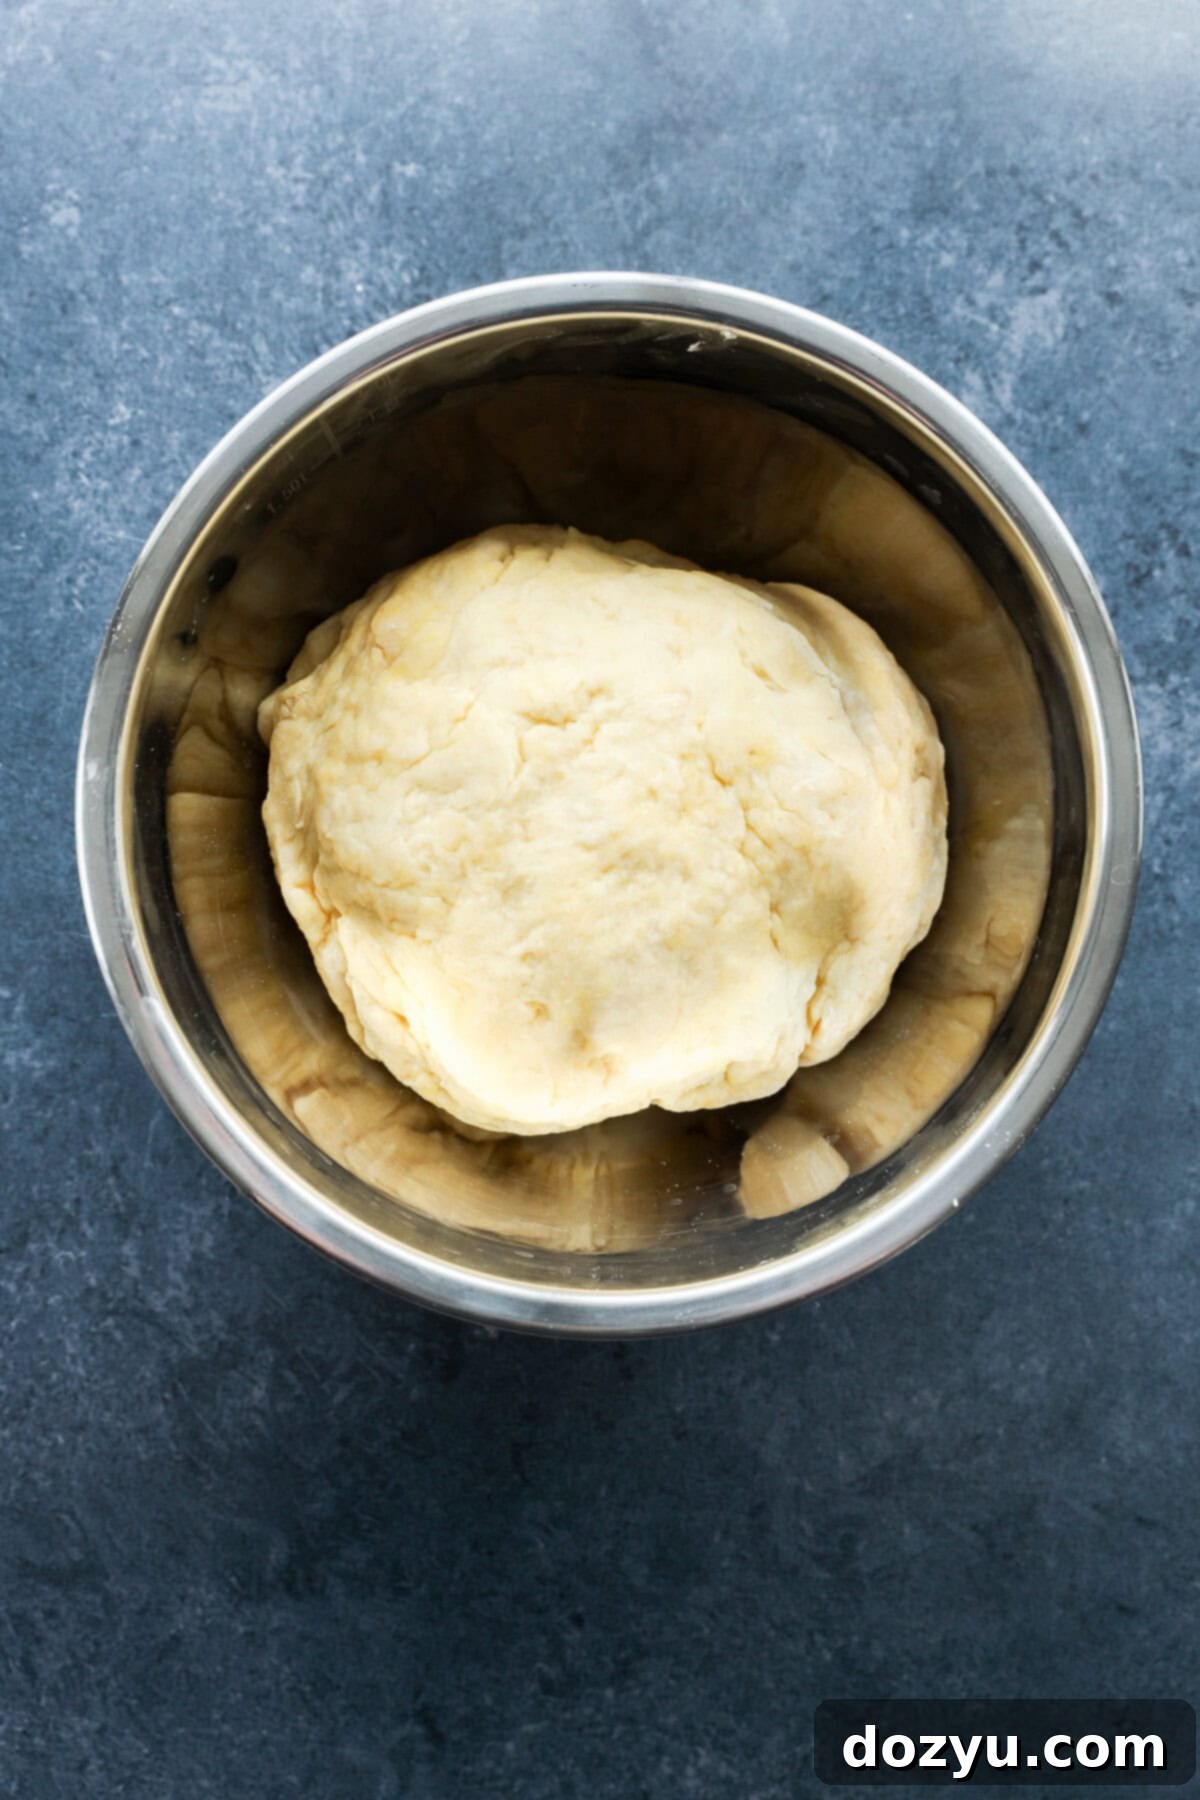
Now, it’s time to bring the dough together. You can start with a wooden spoon, but for the best feel and control, I highly recommend using your hands. Mix until the ingredients just start to come together, forming a “shaggy” dough – meaning it will look a bit crumbly and not yet cohesive. Turn this shaggy dough out onto a clean, lightly floured surface. Gently knead it, folding and pressing, until it forms a smooth, uniform ball with no visible streaks of dry flour. Be careful not to over-knead, as this can develop too much gluten and result in a tough dough.
Troubleshooting Tip: If your dough feels overly sticky and difficult to handle, incorporate additional flour, one tablespoon at a time. Knead gently after each addition until the dough is soft, pliable, and no longer sticks to your hands. Conversely, if the dough appears too dry and crumbly, sprinkle in a very small amount of cold water (a teaspoon at a time) and knead until it reaches the desired consistency.
Chill the Dough
Once your dough ball is smooth, return it to a clean bowl. Cover the bowl securely with a clean tea towel or plastic wrap. This is a crucial step: place the dough in the refrigerator to chill for a minimum of 30 minutes, though an hour is even better if time allows.
Why chilling is essential: This resting period allows the gluten in the flour to relax, making the dough much easier to roll out without it springing back. More importantly, it re-solidifies the butter, which is vital for creating those distinct, flaky layers when the empanadas are cooked. Don’t skip this step!
Form Empanada Discs
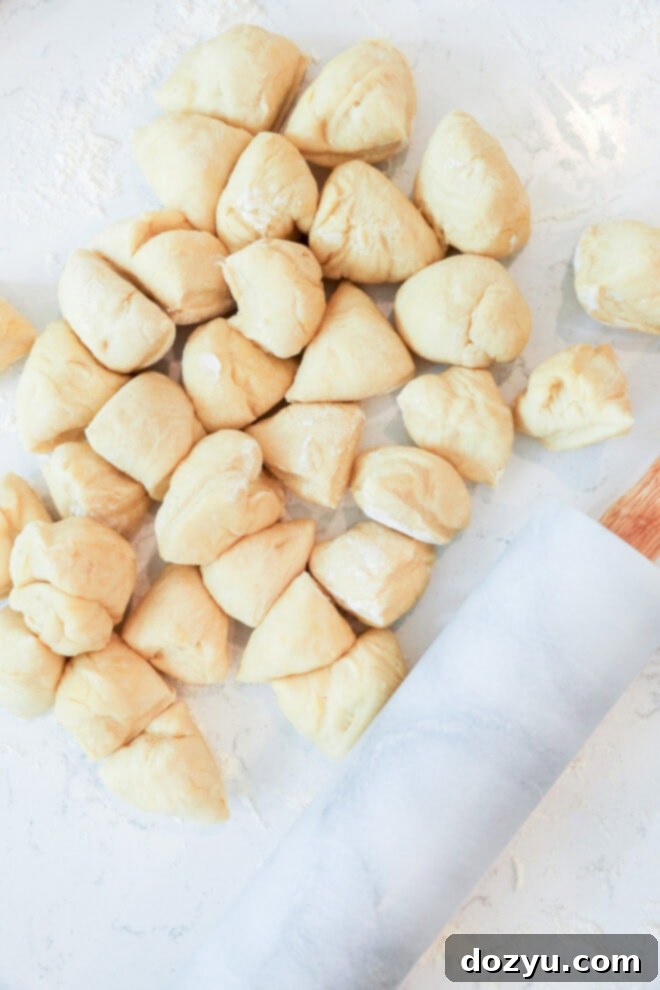
After the dough has sufficiently chilled, remove it from the refrigerator and place it back onto your clean, lightly floured work surface. Divide the dough into 32 equal-sized pieces. For precise consistency, especially if you’re aiming for uniformly sized empanadas, you can use a kitchen scale to weigh each portion. However, most of the time, eyeballing it works perfectly fine for homemade charm!
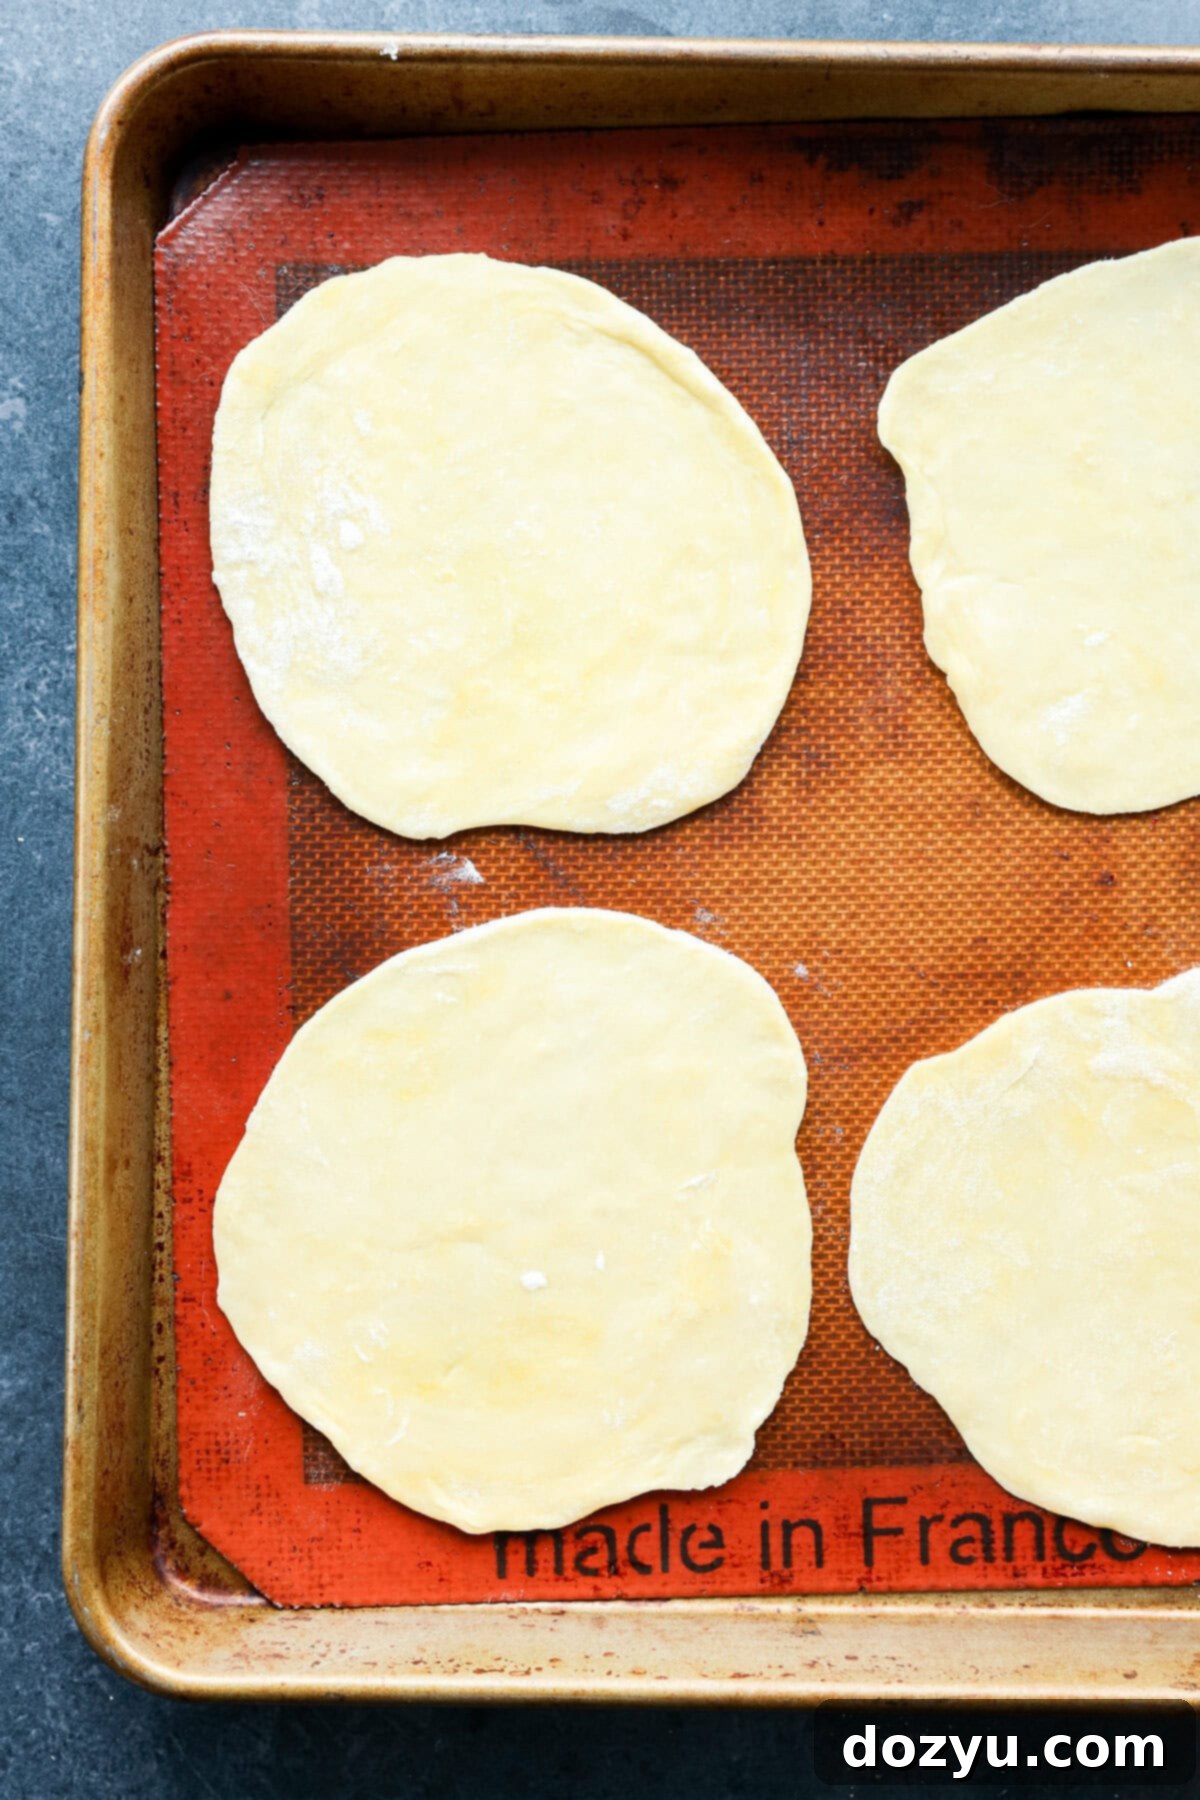
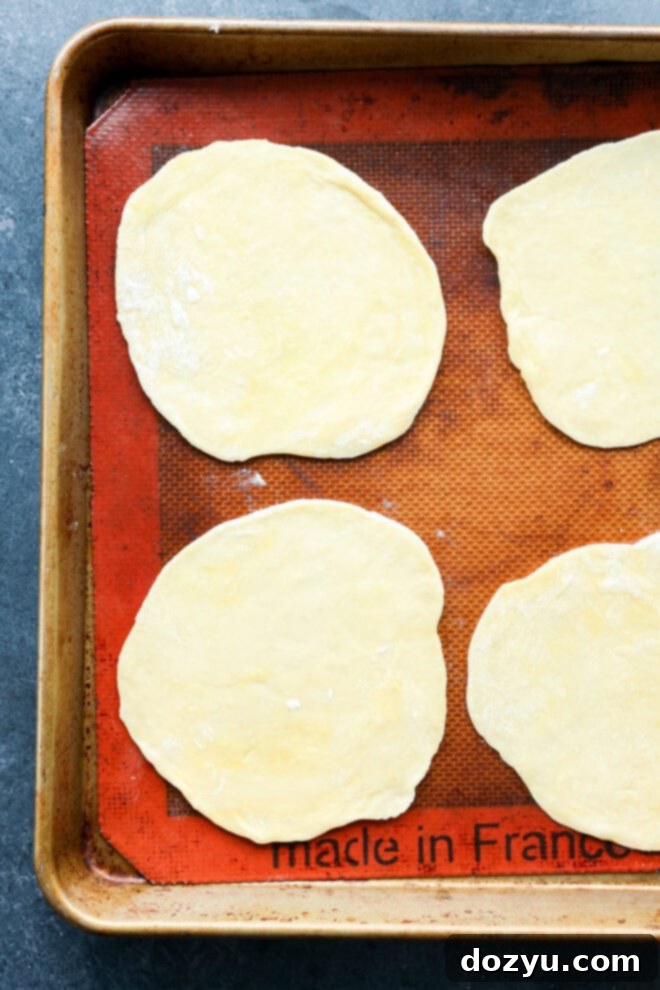
Take each piece and roll it into a small ball. Then, using your rolling pin, flatten each ball into a thin, round disc. Aim for a thickness of approximately 1/8-inch and a diameter of 4 to 5 inches. The thinness of the dough is key to a delicate, crispy shell.
Pro Tip for Stacking and Freezing: If you are preparing these discs to freeze for later use, or simply need to stack them temporarily, do not place them directly on top of each other. Always place a layer of parchment paper between each disc to prevent them from sticking together. This makes them easy to separate when you’re ready to fill them.
Fill and Bake or Fry
With your empanada discs ready, it’s time for the delicious filling! Spoon your chosen filling just off-center on each dough disc. Be mindful not to overfill; 1 to 2 tablespoons is usually the maximum to prevent any messy leaks during cooking. Less is often more for proper sealing.
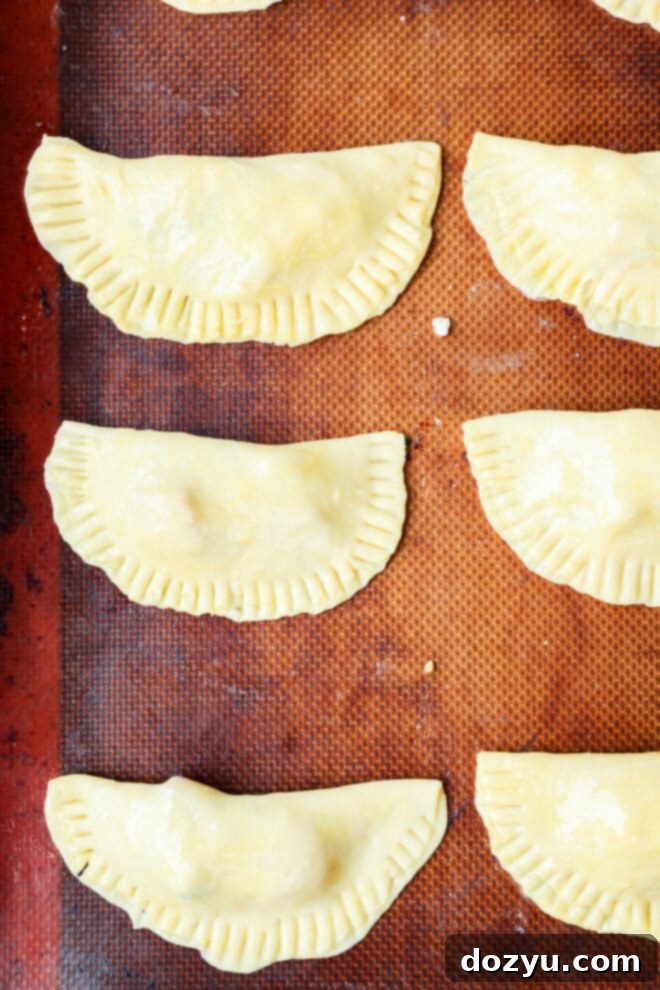
Prepare a simple egg wash by whisking together 1 large egg with 1 tablespoon of cold water in a small bowl. Lightly brush the edges of each dough disc with this egg wash before folding it over into a classic half-moon shape. The egg wash acts as a glue, ensuring a tight seal. Press the edges firmly to seal, then crimp them decoratively with a fork for that signature empanada look. For an extra touch of artisanal flair, you can also curl and twist the edges by hand.
Here are your cooking options:
- To Bake: Preheat your oven to 400°F (204°C). Arrange the sealed empanadas on a parchment-lined baking sheet. Before baking, brush the tops of the empanadas with the remaining egg wash for a beautiful golden-brown finish. Bake for 20 to 30 minutes, or until they are golden brown and wonderfully crisp.
- To Fry: Heat a generous amount of neutral oil (such as vegetable or canola) in a deep pot or Dutch oven to 350˚F (177˚C). Carefully fry a few empanadas at a time, ensuring not to overcrowd the pot, which can lower the oil temperature. Fry until they are golden brown and crispy, typically about 3 to 4 minutes per side. Remove with a slotted spoon and place on a wire rack lined with paper towels to drain excess oil.
- To Air Fry: Preheat your air fryer to 400˚F (204°C). Brush the tops of the sealed empanadas with egg wash. Arrange them in a single layer in the air fryer basket (you’ll likely need to work in batches, depending on the size of your air fryer). Air fry for 8 to 12 minutes, or until they are beautifully golden brown and crispy.
Tips for Success
Achieving perfectly flaky and flavorful empanadas requires attention to a few key details. Here are my top tips to ensure your homemade empanada dough is a resounding success:
- Don’t Skip the Rest (Chill Time is Crucial): This is perhaps the most important tip. Allowing the dough to rest in the refrigerator for at least 30 minutes (or even up to an hour) is absolutely vital. The chilling process relaxes the gluten in the dough, which prevents it from being too elastic and difficult to roll out. More importantly, it solidifies the butter, ensuring that it remains in tiny pockets within the dough. These butter pockets are what create those incredible, airy, flaky layers as they melt and release steam during cooking. A well-chilled dough is much easier to work with and yields a far superior texture.
- Adjust the Texture if Needed (Dough is Flexible!): Baking is an art, not always a precise science, and various factors can influence your dough, such as the humidity in your kitchen, your elevation, or even the specific brand of flour.
- If your dough feels too sticky and is difficult to handle, add a small amount of flour, about 1 tablespoon at a time, kneading it gently until the dough becomes smooth and no longer adheres to your hands.
- Conversely, if the dough appears too dry or crumbly, sprinkle in a small amount of cold water, a teaspoon at a time, and knead until it comes together into a soft, pliable ball. Don’t worry, dough is quite forgiving, so don’t be afraid to make minor adjustments!
- Seal It Well (Prevent Leaks!): A properly sealed empanada is a happy empanada. Don’t just save the egg wash for brushing the tops; it’s essential for the edges too! Lightly brush the inner edges of your dough disc with the egg wash before folding it over. This creates a strong adhesive bond. After pressing the edges together firmly, use the tines of a fork to crimp them securely. This not only adds a classic decorative touch but also reinforces the seal, preventing your delicious filling from leaking out during cooking.
- Freeze Them for Future Use (Meal Prep Friendly!): This empanada dough is wonderfully freezer-friendly, making it perfect for meal prepping!
- To freeze rolled-out discs: Roll out your dough discs as instructed, then stack them with layers of parchment paper in between to prevent sticking. Place the stack in a freezer-safe airtight container or a resealable bag and freeze for up to 3 months. When ready to use, thaw them overnight in the refrigerator before filling.
- To freeze filled, unbaked empanadas: After filling and sealing your empanadas (but *before* brushing the tops with egg wash), arrange them in a single layer on a baking sheet and freeze until solid (this usually takes a few hours). Once frozen, transfer them to a freezer-safe airtight container or bag. You can bake or fry these directly from frozen; just add an extra 5 to 10 minutes to the cooking time to ensure they are thoroughly cooked and golden. Remember to label your containers with the date for easy tracking!
Variations and Customization
This versatile empanada dough recipe serves as an excellent base, but don’t hesitate to get creative and customize it to your liking. Here are some delicious variations:
- Switch the Fat: While butter offers a rich, buttery flavor and beautiful flakiness, you can experiment with other fats. Shortening or lard can be used instead of butter. Shortening tends to produce an even crispier, more tender crust, while lard imparts a unique, savory depth of flavor traditional in many Latin American recipes.
- Try Whole Wheat (Partially): For a heartier, more rustic dough with added fiber, you can replace up to 50% of the all-purpose flour with whole wheat flour. However, avoid using 100% whole wheat flour, as its higher protein content can result in a chewier, denser empanada dough, which isn’t ideal for that delicate, flaky texture.
- Add Flavor to the Dough: Infuse your dough with additional savory notes to complement your fillings. A pinch of smoked paprika can add a subtle smoky depth, while ground cumin offers an earthy warmth. Incorporating dried herbs like oregano or a blend of Italian herbs can also elevate the flavor of the pastry itself, making it perfect for savory fillings.
- Make it Sweet: This dough is incredibly adaptable for dessert empanadas. To transform it into a sweet pastry, simply omit the salt entirely and replace it with an equal amount of granulated sugar. This slight adjustment makes the dough perfect for fruit fillings, chocolate, or sweet cheeses.
- Make it Gluten-Free: For those with dietary restrictions, creating a gluten-free empanada dough is entirely possible. While I haven’t personally tested a gluten-free version of this specific recipe, many readers have reported great success using a high-quality gluten-free 1:1 ratio flour blend, such as King Arthur’s GF blend. Ensure the blend you choose is designed for baking and has a good texture for pastry.
More how-to guides to improve your skills in the kitchen: Perfect Galette Dough | Simple Syrup Guide | How to Make Risotto | Homemade Vanilla Extract
Empanada Dough FAQs
Here are answers to some of the most frequently asked questions about making and using homemade empanada dough:
Can you make empanada dough ahead of time?
Absolutely! This empanada dough is ideal for making ahead, which can significantly streamline your meal preparation. You have several options for storing it:
- As a Dough Ball: If you want to prepare the dough and chill it until you’re ready to make the empanadas, wrap the dough ball tightly in plastic wrap. It will keep well in the refrigerator for up to 3 days. When you’re ready to use it, let the dough sit at room temperature for 10 to 15 minutes before rolling to make it more pliable and easier to work with.
- As Rolled Discs: For even greater convenience, you can roll out the individual empanada discs ahead of time. Stack them with a piece of parchment paper between each disc to prevent sticking. Store the stack in a resealable bag or an airtight container in the refrigerator for up to 2 days. If you need to store them longer than 2 days, it’s best to freeze them, as they can dry out in the fridge.
- Frozen Discs: Empanada discs can be layered with parchment paper, sealed in a freezer-safe bag, and frozen for up to 3 months. Always label your bag with the date to keep track of freshness. To use, simply thaw the frozen discs in the refrigerator overnight.
- Frozen Filled Empanadas: You can also freeze entire filled, unbaked empanadas! Arrange them in a flat, single layer on a baking sheet and freeze until they are solid. Once frozen, transfer them to a freezer-safe container or bag. You can cook these directly from frozen; just add an additional 5 to 10 minutes to the recommended cook time.
Can you bake instead of fry empanadas?
Yes, absolutely! This dough is specifically designed to work beautifully for both baking and frying. Baking offers a lighter option with less oil. You’ll find detailed instructions for baking empanadas in the recipe card below, ensuring a golden, flaky crust every time.
What’s the best flour for empanada dough?
For this specific recipe, the best flour to achieve the desired flaky and tender texture is **all-purpose flour**. It provides the perfect balance of protein content, allowing for a dough that is both pliable and capable of crisping up beautifully. Avoid using cake flour, as it has a lower protein content and might result in a too-soft or crumbly dough. Similarly, bread flour, with its higher protein content, can make the dough too chewy and tough. As mentioned in the variations, a gluten-free 1:1 ratio blend or a 50% whole wheat blend can be used for dietary preferences or a heartier profile, but all-purpose flour remains the top choice for the classic empanada experience.
Can I use this dough for sweet empanadas?
Absolutely! This dough is wonderfully versatile. To adapt it for sweet empanadas, simply omit the salt from the recipe and replace it with an equal amount of granulated sugar. This subtle change transforms the dough into a perfect vessel for fruit fillings, chocolate, or sweet cream cheeses, making delicious dessert empanadas.
Need more inspiration for appetizers? Check out my appetizers recipe page!
How to Maximize Your Homemade Empanada Dough: Filling Ideas and Beyond
While empanada dough consists of just a few basic ingredients, its potential for culinary creativity is truly boundless once it’s rolled out and ready for fillings! This versatile homemade dough is your blank canvas for crafting an endless array of sweet, savory, spicy, or cheesy empanadas to suit any craving or occasion.
This particular empanada dough recipe has been rigorously tested over a dozen times in my kitchen to guarantee it’s not only simple to make, but also reliably flaky and foolproof – even for those who are just beginning their baking journey. You can confidently trust this dough to expertly hold any filling you choose, even those that might be a little more moist or prone to leaking with lesser quality doughs.
The beauty of this dough lies in its flexibility: you can choose to bake or fry your empanadas, depending on your preference for texture and richness. Both methods yield fantastic results, giving you control over the final product.
Now, all that’s left is to select your perfect filling. Here are some inspiring ideas:
- Beef Picadillo: A classic and hearty choice, combining seasoned ground beef with savory onions, aromatic garlic, warm cumin, and a hint of briny green olives.
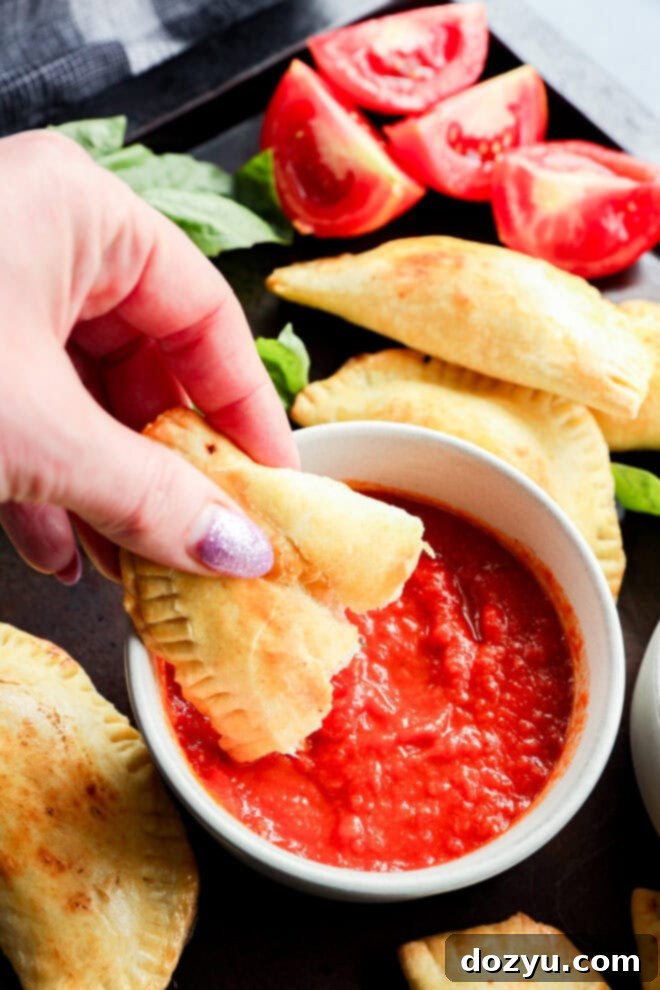
- Caprese Empanadas (my absolute favorite!): A delightful fusion of fresh mozzarella, ripe tomatoes, and fragrant fresh basil, offering a taste of Italian summer in every bite.
- Spicy Chicken & Cheese: Shredded rotisserie chicken mixed with fiery pepper jack cheese and a dash of your favorite hot sauce for a satisfying kick.
- Roasted Veggie + Feta: A fantastic way to utilize leftover roasted vegetables! Combine zucchini, red peppers, onions, or whatever roasted veggies you have, with crumbled feta cheese for a flavorful vegetarian option.
- Poblano Enchilada Chicken Empanadas: Tender chicken, roasted poblano peppers, rich enchilada sauce, and melted cheese create a deeply satisfying, slightly spicy experience.
- Butternut Squash Goat Cheese: A wonderfully autumnal and creamy combination of sweet roasted butternut squash and tangy goat cheese.
- Chipotle BBQ Steak Empanadas: Smoky chipotle BBQ sauce paired with tender steak pieces for a robust and flavorful handheld meal.
- Go Cheesy!: Embrace the cheese with combinations like sharp cheddar and spicy jalapeno, or creamy queso fresco with flavorful chorizo.
- Apple Cinnamon: Just like a miniature handheld apple pie! For an extra special touch, sprinkle the tops with cinnamon sugar just before baking.
- Nutella: Simple, incredibly easy, and undeniably delicious. A perfect sweet treat for any occasion.
And if you want to venture beyond traditional empanadas, this versatile pastry can also be used to create other delectable baked goods, such as mini hand pies, savory breakfast pockets, or even tiny calzones!
How to Store Empanada Dough (and Finished Empanadas)
Proper storage ensures your homemade empanada dough remains fresh and ready to use, minimizing waste and maximizing convenience. Here’s how to store both the dough and finished empanadas:
- Store Dough Ball: For short-term storage, wrap the ball of dough tightly in plastic wrap. This prevents it from drying out and absorbing odors from the refrigerator. It will stay fresh in the fridge for up to 3 days. Before use, let it sit at room temperature for about 10-15 minutes to make it easier to roll.
- Store Rolled Discs: If you’ve already rolled out your empanada discs, layer them with sheets of parchment paper in between each disc. This prevents them from sticking together. Place the stacked discs in an airtight container or a large resealable bag. They can be stored in the refrigerator for up to 2 days. For longer storage, freezing is recommended to maintain freshness and texture.
- Freeze Dough Discs: To freeze rolled-out discs for extended periods, stack them with parchment paper in between, then transfer them to a freezer-safe resealable bag or an airtight container. They can be frozen for up to 3 months. Label with the date of freezing.
- Freeze Unbaked, Filled Empanadas: You can also freeze your empanadas after they’ve been filled and sealed, but before baking or frying. Arrange them in a single layer on a baking sheet and place them in the freezer until completely solid (this usually takes a few hours). Once solid, transfer the frozen empanadas to an airtight freezer-safe container or bag. They can be stored for up to 3 months. When ready to cook, bake or fry them directly from frozen; just add an extra 5 to 10 minutes to the cook time to ensure they cook through evenly.
- Thaw: When using frozen dough discs, always thaw them overnight in the refrigerator for best results. Avoid thawing at room temperature, as this can make the butter too soft and compromise the flakiness.

More Tasty Savory Baking Recipes
If you’ve enjoyed making this empanada dough and are looking for more savory baking adventures, here are some other delicious recipes to try:
- Black Pepper Steak Hand Pies: These delightful savory hand pies are generously filled with tender steak and boast a bold, peppery flavor from freshly cracked black pepper, all encased in a golden, flaky crust. They make for a perfect portable meal or impressive appetizer.
- Bacon Brie Pockets: Looking for a simple yet elegant appetizer? These bite-sized pockets are stuffed with crispy bacon and luscious, melty brie cheese, making them incredibly rich, gooey, and irresistibly poppable.
- Savory Chicken Caprese Galette: A stunning and easy-to-make savory galette that has become a kitchen favorite. It features juicy chicken, fresh, vibrant tomatoes, and sweet basil, all baked within a rustic, buttery crust. It’s perfect for a light dinner or a sophisticated brunch.
Everyday Seasonal Cookbook
Packed with invaluable seasonal produce guides, inspiring recipes, and much more, this cookbook is your ultimate resource for creating delicious, seasonal food for every occasion throughout the year.
Finally, if you take the time to make this easy homemade empanada dough recipe, please be sure to give this recipe a star rating on the recipe card and/or leave a comment! Your feedback is incredibly valuable to me. I genuinely love hearing about your experiences with my recipes and always make an effort to respond to every single comment.
Also, feel free to drop any questions you might have in the comments section below – I’m here to help!
And if you do make the recipe, don’t forget to tag me on Instagram, Facebook, or Pinterest! Seeing these recipes come to life in your homes is truly my favorite thing, and I adore looking through all your wonderful photos. It means the world to me!
Want to stay updated with new recipes and the latest culinary news? Sign up for my exclusive newsletter to get them delivered straight to your inbox!
homemade empanada dough
equipment
-
mixing bowls
-
wooden spoon
-
Marble Rolling Pin
ingredients
- 4 cups all purpose flour
- 1 tsp salt
- 1/2 cup unsalted butter melted
- 4 egg yolks
- 1 cup water
- 1 egg + 1 Tbsp water for egg wash
instructions
-
In a large bowl, stir together flour and salt until combined.
-
Add the melted butter, egg yolks, and water into the dry ingredients.
-
Mix together until a dough begins to form. Dump the dough out onto a clean work surface that’s been lightly dusted with flour. Continue to knead the dough until it comes together and no flour streaks remain. If the dough feels too wet and sticky, add 1 Tablespoon of flour at a time until it is no longer sticky.
-
Cover the dough with a tea towel and place in the fridge. Let chill for at least 30 minutes.
-
Remove the dough from the fridge and place on a clean surface that’s been lightly dusted with flour. Divide the dough into 32 equal-sized pieces. Roll each piece into a ball, then roll into a round circle with a rolling pin.
-
Fill your empanada discs with your desired filling. Be sure not to overfill your empanada dough.
-
Make an egg wash by combining 1 egg and 1 Tbsp water in a small bowl, whisking to combine.
-
To bake: Brush the sealed empanadas with beaten egg and crimp the edges with a fork to seal. Bake at 400˚F for 20 to 30 minutes, until golden brown.
-
To fry: Heat oil to 350˚F (177˚C) and fry a few empanadas at a time until golden and crispy. This should take about 3 to 4 minutes per side.
-
To air fry: Brush the sealed empanadas with beaten egg and crimp the edges with a fork to seal. Air fry at 400˚F for 8 to 12 minutes until golden brown.
video
notes
To freeze: Stack the empanada discs between pieces of parchment paper. Wrap in plastic wrap or place in a freezer-safe resealable bag. Freeze for up to 3 months. To use, thaw in the refrigerator before filling.
