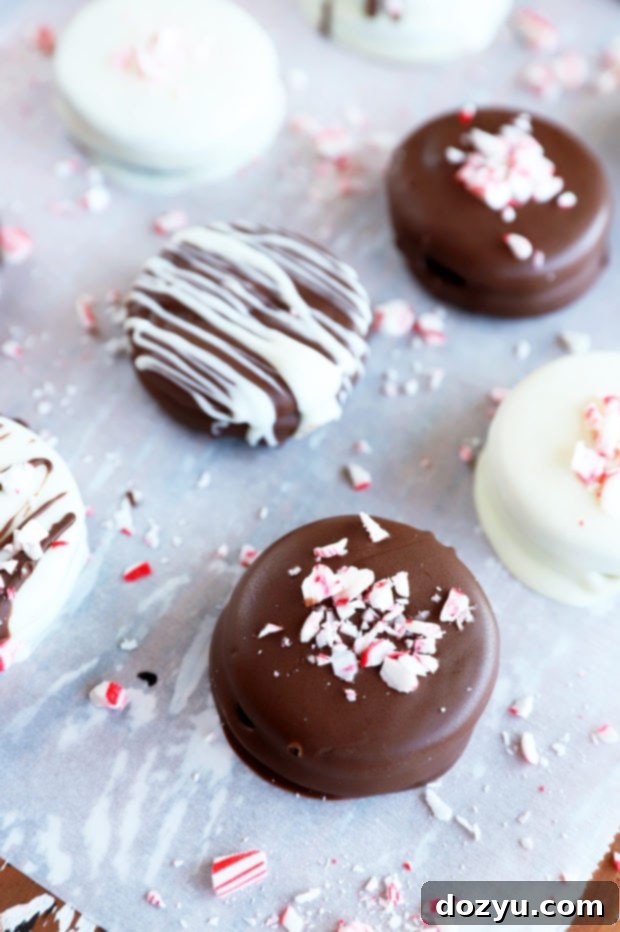
Irresistibly Easy Chocolate Covered Oreos: The Ultimate Holiday Treat & Gifting Guide
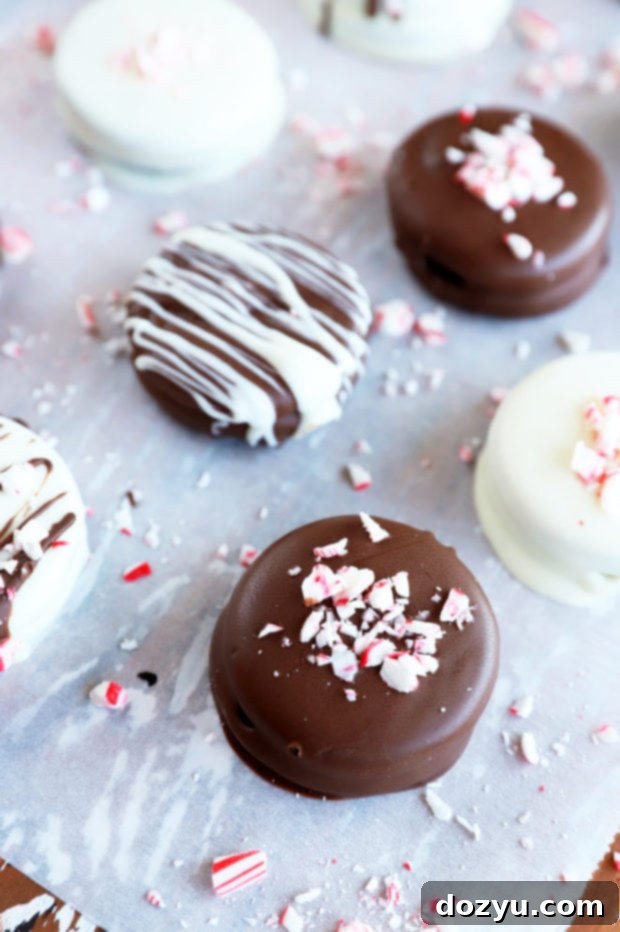
Chocolate Covered Oreos are a true classic, effortlessly simple to make and perfect for any occasion, especially during the bustling holiday season! Whether you dip them in rich white chocolate, decadent dark chocolate, adorn them with festive peppermint sprinkles, or get creative with your own unique decorations, these delightful treats come together quickly, even at the last minute. This recipe yields approximately 2 1/2 to 3 dozen cookies, making them ideal for sharing, gifting, or simply indulging.
Note: This post is an updated version of the original, first published on December 18, 2012, refreshed with even more tips and delightful details.
Table of Contents
Toggle
About These Chocolate Covered Oreos
As the holiday season draws to a close, there’s always one last festive flourish I love to add: dipping everything in chocolate! And naturally, a batch of easy chocolate covered Oreos is always at the top of my list. They’re not just simple to make; they’re a guaranteed crowd-pleaser and a beautiful addition to any holiday table or gift box.
Call it a delicious habit, but I inevitably melt more chocolate than I initially need. Why, you ask? Because it’s the perfect excuse to coat anything and everything in sight with a luscious layer of chocolate! Marshmallows, almonds, pretzel rods, spoons… if it can be dipped and eventually make its way to my mouth, it’s fair game. It’s a delightful process of creative culinary exploration (and pure indulgence).
A Confession: My Chocolate Obsession
I know, I know, my love for chocolate might be a bit excessive, but how can anyone resist the allure of chocolate-dipped Oreos? They are incredibly easy to prepare and lend themselves beautifully to festive decorations, making them perfect for Christmas, New Year’s, or any winter celebration.
Homemade treats are my go-to for holiday gifts. Not only do they convey a personal touch, but they also give me a fantastic excuse to bake (and taste!) extra, thereby contributing to my annual holiday weight gain. It’s a delicious, albeit slightly indulgent, method to my madness!
This entire week, I’ve been fully immersed in the holiday spirit. From preparing for Babycakes’ first Christmas to organizing our holiday hosting duties, every moment is filled with joy and anticipation. I’m eagerly counting down to our cherished traditions: cozying up with Love Actually and a glass of rum-laced eggnog, savoring fish chowder on Christmas Eve, watching our beloved pups excitedly tear into their stockings, indulging in an abundance of desserts, and simply enjoying the magical twinkle of Christmas lights for just a little longer before they’re packed away.
Christmas lights hold a special place in my heart. No matter how stressful or hectic things get, the sight of houses and buildings adorned with twinkling lights instantly calms my soul. Pair that serene moment with a plate of these irresistible chocolate-covered cookies and a mug of insanely delicious hot chocolate, and I am truly in heaven. It’s these simple pleasures that make the season so special.
As this will be my last post before Christmas, I want to extend my warmest wishes for a very Merry Holiday to all of you! I sincerely hope you spend this precious time surrounded by loved ones, creating beautiful memories with your favorite foods, movies, songs, games, and whatever other traditions fill your home with warmth and happiness this time of year.

Essential Ingredients for Perfect Chocolate Covered Oreos
Spoiler alert! This recipe is incredibly minimalist, requiring just three core ingredients. And honestly, it’s essentially a two-ingredient wonder, as the third is purely for optional, yet highly recommended, decorative flair!
- Oreos: The Foundation of Fun. When it comes to selecting your Oreos, I wholeheartedly recommend the Double Stuff Oreo Cookies. Why Double Stuff? Because that extra creamy filling not only provides a better cookie-to-chocolate ratio but also helps the cookie maintain its structure better during the dipping process. Trust me, after countless experiments, these are the champions of chocolate dipping! They offer that perfect balance, ensuring the rich chocolate doesn’t completely overpower the classic Oreo flavor.
- Chocolate: Your Canvas for Creativity. The star of the show, of course, is the chocolate. Feel free to use your absolute favorites here! I personally love to use a combination of dark chocolate and white chocolate melting wafers. This creates a beautiful visual contrast and offers a delightful variety in flavor for your guests. While chocolate chips can work in a pinch, melting wafers (also known as candy melts or confectionery coating) are superior for dipping because they melt smoothly, set quickly, and create a beautiful, glossy finish without the need for tempering. You can choose dark chocolate for a richer experience, white chocolate for a creamy sweetness, or classic milk chocolate for a universally loved treat.
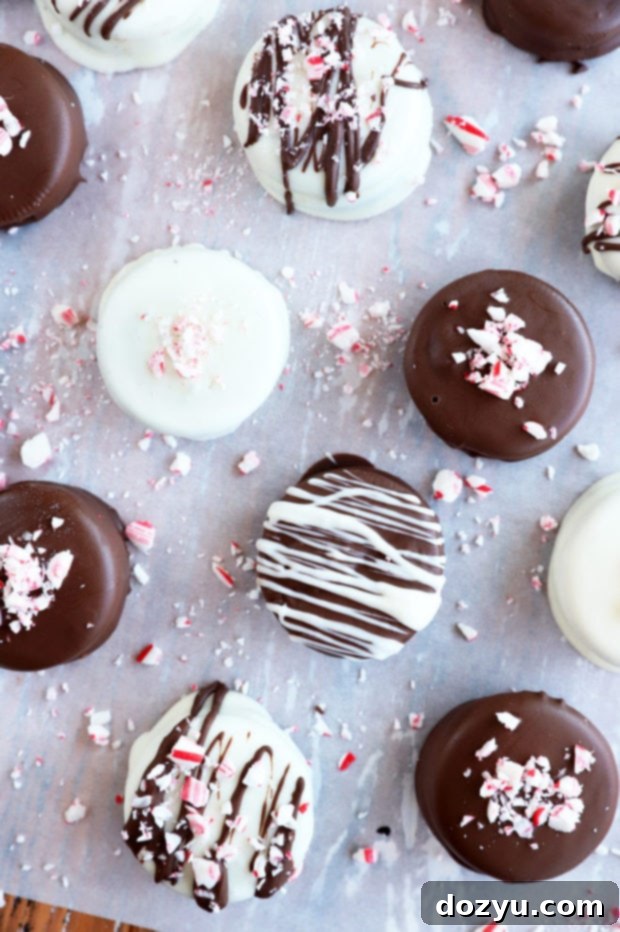
- Candy Canes: The Festive Finishing Touch (Optional). To add a touch of holiday magic, I adore drizzling the cookies with a contrasting chocolate color (e.g., white chocolate over dark, or vice versa) and then sprinkling them with crushed candy canes. The cool, minty crunch of peppermint is simply divine with the chocolate and Oreo. But the possibilities don’t stop there! Other fantastic topping ideas include festive sprinkles, finely crushed extra Oreos (for a double Oreo effect!), finely chopped nuts (like pecans or almonds), or even tiny colorful candies. Let your imagination run wild!

Must-Have Tools for This Recipe
One of the many beauties of this recipe is its minimal equipment requirements. You don’t need fancy gadgets or specialized tools to create these impressive treats!
- Microwave-Safe Bowls: You’ll need a couple of these to efficiently melt your chosen chocolate wafers. Using separate bowls for different chocolate types keeps colors clean and allows for easy rotation in the microwave.
- Fork or Dipping Tool: A simple kitchen fork is your best friend here! It allows you to submerge the Oreos completely in the melted chocolate and then lift them out, letting excess drip off for a clean finish. Specialized candy dipping tools are also available if you prefer, but a fork works perfectly.
- Parchment Paper Lined Baking Pan: This is an absolute must! Lining a half-sheet baking pan with parchment paper prevents the chocolate-covered Oreos from sticking as they set. Once chilled, they’ll lift off effortlessly, leaving you with perfectly smooth backs and easy cleanup.
- Cutting Board and Chef’s Knife (Optional): If you plan on incorporating toppings like crushed candy canes, chopped nuts, or other solid embellishments, a reliable cutting board and a sharp chef’s knife will come in handy for preparing your decorative elements.
Looking for other yummy holiday cookie recipes to complete your spread? Check out these favorites: Christmas Shortbread Cookies | Chewy Snickerdoodle Cookie Bars | Italian Rainbow Cookies | Peppermint Hot Chocolate Cookies
How to Make Chocolate Covered Oreos: Step-by-Step
Creating these delightful chocolate-covered Oreos is a straightforward process that anyone can master. Just follow these simple steps for perfect results every time:
Perfectly Melt Your Chocolate
Begin by placing your chocolate melting wafers (or chocolate chips, though wafers are preferred for a smoother finish) into a microwave-safe bowl. Heat the chocolate in the microwave for 30 seconds, then remove and stir thoroughly with a rubber spatula. Even if it doesn’t look fully melted, stirring helps distribute the heat. Continue to heat in 15-second increments, stirring well after each interval, until the chocolate is completely smooth and free of lumps. Be careful not to overheat, as this can cause the chocolate to seize or burn. If using different types of chocolate, melt them in separate bowls.
Dip and Decorate Your Cookies
Once your chocolate is perfectly melted and smooth, it’s time to dip! Carefully immerse each Oreo cookie into the melted chocolate using a fork or a dipping tool. Ensure the cookie is fully submerged and coated evenly. Gently tap the fork against the side of the bowl to remove any excess chocolate, allowing it to drip back into the bowl. This helps create a clean, thin coating. Transfer the dipped cookie onto your parchment paper-lined baking sheet. While the chocolate is still wet, sprinkle with your chosen toppings, such as crushed candy canes, colorful sprinkles, finely chopped nuts, or a drizzle of a contrasting chocolate color. Work quickly, especially if your kitchen is cool, as the chocolate will begin to set.
Chill to Perfection
Once all your Oreos are dipped and decorated, place the baking sheet into the refrigerator. Chill for approximately 30 minutes, or until the chocolate is completely set and firm to the touch. This chilling process helps the chocolate harden quickly, ensuring a beautiful, glossy finish and preventing any smudging. Once set, carefully remove the chocolate-covered Oreos from the parchment paper – they should lift off easily. Now they are ready to be enjoyed, shared, or stored!
Pro Tips for Chocolate Covered Oreo Success
Achieving perfectly coated and beautifully set chocolate-covered Oreos is simpler than you might think, especially with a few insider tips:
- Embrace Melting Wafers: While chocolate chips are convenient, I strongly recommend using chocolate melting wafers (also often labeled as candy melts or confectionery coating). These are specifically designed for melting smoothly and setting quickly, providing a superior, glossy finish without the fuss of tempering real chocolate. Using melting wafers helps avoid the common issue of chocolate seizing or becoming clumpy, which can happen with regular chocolate chips if not melted carefully.
- Patience with Melting: Whether using a microwave or a double boiler, melt your chocolate slowly and at a low temperature. Overheating chocolate can cause it to become thick, grainy, or “seize,” making it unusable for dipping. Stir frequently to ensure even melting and prevent burning.
- Ensure Your Tools are Dry: Even a tiny drop of water can cause chocolate to seize and become thick and grainy. Make sure all your bowls, spatulas, and dipping tools are completely dry before they come into contact with melted chocolate.
- The Parchment Paper Advantage: As mentioned in the equipment section, parchment paper is non-negotiable for this recipe! It creates a non-stick surface, allowing your chocolate-covered Oreos to easily lift off the baking sheet once they’ve set. If you don’t have parchment paper, a silicone baking mat is another excellent alternative. Using a cooling rack is also an option, but be aware that some chocolate might drip through, potentially causing a bit more mess.
- Work in Batches: If you’re making a large quantity or using different types of chocolate, it’s often easier to melt and dip in smaller batches. This keeps your chocolate at the ideal dipping consistency for longer and prevents it from setting prematurely.
- Get Creative with Toppings: Don’t limit yourself to just crushed candy canes! Think about drizzles of contrasting chocolate, edible glitter, mini chocolate chips, finely crushed nuts, sprinkles for different holidays (red and green for Christmas, pastels for Easter, orange and black for Halloween), or even a sprinkle of sea salt for a sophisticated touch. Apply toppings immediately after dipping, while the chocolate is still wet.
Need some more inspiration for holiday cooking? Explore my extensive holiday recipes page for more festive ideas!

How Long Do Chocolate Covered Oreos Last?
When stored correctly, your delicious homemade chocolate-covered Oreos will maintain their freshness and delightful texture for up to one week in the refrigerator. This makes them an excellent make-ahead treat for holiday parties or a thoughtful edible gift.
Do Chocolate Covered Oreos Need Refrigeration?
Yes, I strongly recommend storing your chocolate-covered Oreos in the refrigerator. Since we’re typically using melting wafers or chocolate chips (which don’t require the precise tempering process of couverture chocolate), refrigerating them helps the chocolate set firmly and prevents it from becoming too soft or sticky at room temperature. Simply place the set cookies in an airtight container. For best results and to prevent them from sticking to each other, you can layer them with small sheets of parchment paper in between. Stored this way, they will stay fresh and delicious for up to seven days.
Creative Ways to Decorate Chocolate Covered Oreos
Decorating chocolate-covered Oreos is where the real fun begins! You can personalize them for any holiday, event, or simply to match your mood. Here are some of my favorite ideas:
- Contrasting Chocolate Drizzle: This is a classic for a reason! After dipping a dark chocolate Oreo, drizzle it with white chocolate, and vice versa. Use a fork or a piping bag with a tiny hole for neat lines.
- Crushed Candy Canes/Peppermint: Perfect for the holidays, the vibrant red and white of crushed candy canes add both visual appeal and a refreshing minty crunch.
- Sprinkles Galore: The simplest way to add instant festivity! Choose sprinkles in colors appropriate for the season (e.g., red and green for Christmas, pastels for Easter, orange and black for Halloween, or rainbow for birthdays).
- Extra Crushed Oreos: For the ultimate Oreo lover! Crush some extra cookies and sprinkle them over the wet chocolate for an intensified Oreo experience.
- Finely Chopped Nuts: Almonds, pecans, walnuts, or peanuts add a lovely texture and nutty flavor. Toast them lightly for extra depth.
- Mini Chocolate Chips: A simple yet effective topping that adds more chocolatey goodness and a slight texture contrast.
- Edible Glitter or Lustre Dust: For a touch of elegance, lightly brush or sprinkle edible glitter onto the set chocolate. Gold or silver dust can make them look truly gourmet.
- Sea Salt Flakes: A sprinkle of flaky sea salt on dark chocolate Oreos creates a sophisticated sweet and salty flavor profile that is absolutely addictive.
- Melted Caramel Drizzle: A luscious caramel drizzle can elevate your Oreos to a new level of decadence.
- Tiny Candies: Mini M&M’s, small gummy bears, or other tiny confectionery pieces can be pressed into the wet chocolate for a playful touch.
Remember to apply your chosen decorations while the chocolate is still wet, ensuring they adhere properly before chilling.
Curate the Ultimate Holiday Cookie Spread
If you’re anything like me, the holiday season means one thing: cookies, cookies, and more cookies! There’s simply nothing better than a lavish cookie spread, whether it’s for Christmas Eve festivities, a bustling holiday party, or a delightful cookie swap. These chocolate-dipped Oreos are a fantastic foundation, but to truly impress, here are some complementary cookies I’d whip up to pair alongside them, ensuring a variety of flavors and textures:
- I absolutely adore these Chai Snickerdoodle Cookies. They take all the comforting, cinnamon-sugar goodness of a classic snickerdoodle and infuse it with a warm, aromatic kick of chai spice, creating a unique and sophisticated twist.
- For those who prefer a traditional snickerdoodle fix, or simply can’t get enough, these Chewy Snickerdoodle Cookie Bars are an absolute dream. They’re soft, chewy, bursting with cinnamon flavor, and generously topped with a thick, creamy layer of eggnog frosting—pure holiday indulgence! YUM.
- These Peppermint Hot Chocolate Cookies are a winter wonderland in cookie form. With a rich chocolate base and a gooey, marshmallow center, they’re tailor-made for cozy nights and are an ideal companion to a steaming mug of hot cocoa.
- For the adults (or simply those craving a salty-sweet, boozy kick), Crispy Bourbon Buckeyes are the perfect treat. Easy to make and incredibly satisfying, they beautifully merge the irresistible combination of chocolate and peanut butter with a hint of warming bourbon.
- Consider adding some brightly colored Italian Rainbow Cookies for a visual pop and a delicate almond flavor.
- No holiday spread is complete without some festive Christmas Shortbread Cookies – their buttery richness and melt-in-your-mouth texture are always a hit.
Finally, if you make these utterly delightful chocolate-covered Oreos, please be sure to give this recipe a rating or leave a comment below! I genuinely love hearing from you all when you try my recipes, and I make it a point to respond to every single comment. Feel free to drop any questions you might have as well!
Oh, and don’t forget to tag me on Instagram if you share your creations! Seeing these recipes come to life in your homes is truly my favorite thing, and looking through those photos means the world to me!
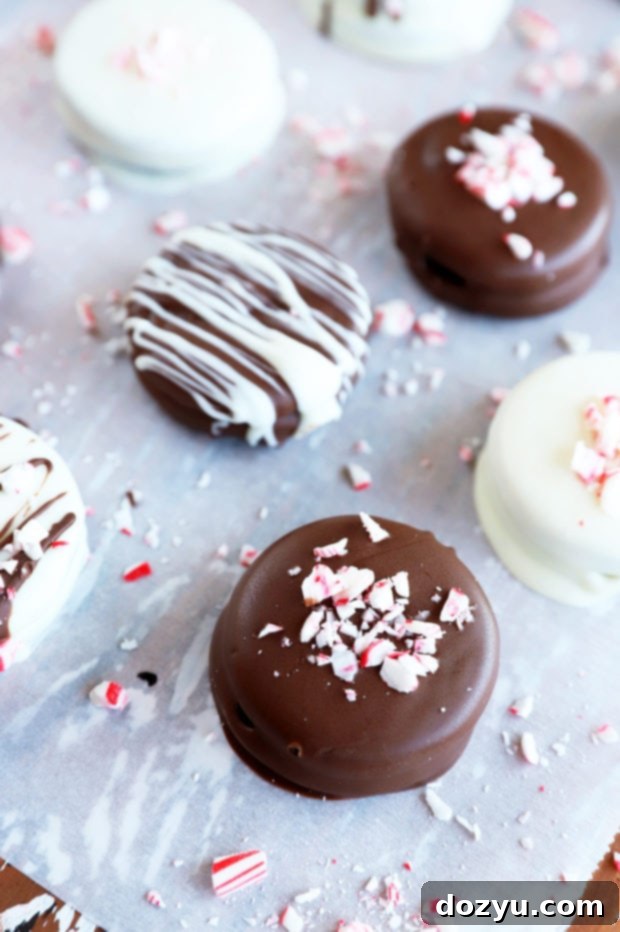
Chocolate Covered Oreos
Equipment
-
Stainless Steel Mixing Bowls (for melting chocolate)
-
Silicone Baking Mat Sheets or Parchment Paper
-
Half Sheet Pan
-
Fork or Dipping Tool
Ingredients
- 1 package Double Stuff Oreo Cookies (approx. 36 cookies)
- 10 oz white chocolate melting wafers (or candy melts)
- 10 oz dark chocolate melting wafers (or candy melts, or milk chocolate)
- Crushed candy canes (for topping, optional)
- Assorted sprinkles, chopped nuts, or other decorations (optional)
Instructions
-
Prepare Your Workspace: Line a large baking sheet with parchment paper or a silicone baking mat. Have your crushed candy canes or other desired toppings ready and easily accessible.
-
Melt the White Chocolate: Place the white chocolate melting wafers in a microwave-safe bowl. Heat in the microwave for 30 seconds, then stir well. Continue heating in 15-second intervals, stirring thoroughly after each, until the chocolate is completely smooth and fluid. Be careful not to overheat.
-
Dip White Chocolate Oreos: Using a fork, carefully submerge half of the Oreo cookies (approx. 15-18) one at a time into the melted white chocolate. Tap the fork gently against the side of the bowl to remove excess chocolate. Transfer the dipped Oreo to the prepared baking sheet. While the chocolate is still wet, generously sprinkle with crushed candy canes or other desired decorations. Repeat for all white chocolate dipped Oreos.
-
Melt and Dip Dark Chocolate: Repeat the melting process from Step 1 for the dark chocolate melting wafers in a separate microwave-safe bowl. Dip the remaining half of the Oreo cookies into the melted dark chocolate, following the same method as with the white chocolate. Decorate these cookies with contrasting white chocolate drizzles, sprinkles, or any other toppings you prefer.
-
Chill to Set: Once all Oreos are dipped and decorated, place the baking sheet into the refrigerator. Chill for approximately 30 minutes, or until the chocolate coating is completely firm and set.
-
Serve and Store: Carefully remove the chocolate-covered Oreos from the parchment paper. Serve immediately or store in an airtight container in the refrigerator for up to one week. Enjoy!
Nutrition
