Perfect Air Fryer Roasted Garlic: Quick, Easy, and Flavorful Guide
Experience the unparalleled convenience and speed of making exquisite roasted garlic right in your air fryer! This simple recipe requires just a few heads of fresh garlic and a drizzle of high-quality extra virgin olive oil. It’s not only incredibly fast and straightforward but also unlocks a world of culinary possibilities for enhancing countless dishes. Say goodbye to long oven times and hello to perfectly mellow, sweet roasted garlic in minutes!

table of contents
Toggle
About This Air Fryer Roasted Garlic Recipe
There’s an undeniable magic in roasted garlic. The pungent, sharp flavor of raw garlic transforms into something wonderfully sweet, mellow, and spreadable, offering a depth of flavor that can elevate almost any dish. Historically, roasting garlic meant preheating your oven, wrapping bulbs in foil, and waiting upwards of 45-60 minutes, all while heating up your kitchen. For many, this time commitment made it a special occasion ingredient rather than an everyday staple.
But what if I told you there’s a much faster, more efficient way to achieve that same golden, caramelized perfection? Enter the air fryer – a game-changer for so many kitchen tasks, and roasted garlic is no exception. With this innovative appliance, you can cut the roasting time in half, enjoying rich, flavorful roasted garlic in a mere 20 to 25 minutes. This means you can whip up a batch on a weeknight without any fuss, making it incredibly easy to incorporate this delicious ingredient into your daily cooking.
Whether you’re planning to make a gourmet roasted garlic bread, enrich a hearty soup, spread it on sandwiches, or even blend it into a savory paste, the air fryer makes it accessible. I first discovered this method when I was craving homemade roasted garlic bread and didn’t want to wait an hour. The results were so impressive that I’ve been using this technique constantly ever since. It works beautifully with any style of air fryer, be it a basket model or an oven-style unit. All you need are two simple ingredients – fresh garlic heads and a good quality extra virgin olive oil – and you’re ready to create a versatile flavor bomb that will quickly become a favorite in your kitchen.
Beyond its speed, air frying garlic uses less energy than a traditional oven, making it a more eco-friendly choice. Plus, the concentrated heat circulation of an air fryer ensures even cooking and that beautiful caramelization you crave. You can even roast multiple heads at once and freeze the extra cloves, so you always have this delightful ingredient on hand for future culinary adventures. Let’s dive into the details of making this incredibly simple yet impactful ingredient!

Key Ingredients for Flavorful Roasted Garlic
The beauty of this recipe lies in its simplicity, requiring just two core ingredients to achieve magnificent flavor. Choosing the right ones is key to the best results.
- Garlic: The star of our show! For optimal flavor and texture, always opt for fresh, firm garlic bulbs. Avoid bulbs that feel soft, appear moldy, or have sprouted green shoots, as these can indicate older garlic that may be more bitter or have less flavor. While standard white garlic is commonly used, feel free to experiment with different varieties like elephant garlic (which is actually a leek, but roasts similarly with a milder flavor) for slight variations in taste. Fresh bulbs ensure that when roasted, the cloves become wonderfully soft, sweet, and easily spreadable.
- Oil: A high-quality extra virgin olive oil is my top recommendation. Not only does it help the garlic roast beautifully and prevent it from drying out, but its rich, fruity notes also complement the sweet, earthy flavor of the roasted garlic. Furthermore, if you plan to preserve your roasted garlic by submerging it in oil (as discussed later), the quality of your olive oil will directly impact the flavor of the infused oil you create. You could also use other neutral oils like avocado oil, but olive oil truly shines here.
That’s it! Just these two humble ingredients combine to create a deeply flavorful, aromatic component that will transform your cooking.
Essential Tools for Air Fryer Roasted Garlic
Preparing roasted garlic in your air fryer is remarkably simple, and you likely already have most of the necessary tools in your kitchen. Here’s what you’ll need:
- Air Fryer: This is, of course, the central piece of equipment for this recipe. Whether you own a compact basket-style air fryer or a larger oven-style model, either will work perfectly. The principle remains the same: hot, circulating air will roast your garlic quickly and evenly. I personally love using my Instant Pot Duo Crisp Ultimate Lid for its versatility, but any reliable air fryer will get the job done.
- Aluminum Foil: A small sheet of aluminum foil is crucial for wrapping the garlic bulb. It creates a small packet that steams the garlic while it roasts, ensuring it becomes tender and moist, rather than dry and burnt. It also helps contain the olive oil and prevents it from dripping into your air fryer basket, making cleanup much easier. If you prefer to avoid foil, a small, oven-safe ramekin or baking dish that fits inside your air fryer can be used as an alternative (though you might need to adjust cooking times slightly and watch for browning).
- Sharp Knife: Essential for cleanly slicing off the top of the garlic bulb, ensuring all cloves are exposed for even roasting and oil penetration.
- Cutting Board: Provides a stable and safe surface for preparing your garlic.
- Tongs or Oven Mitts: For safely handling the hot garlic bulb once it’s finished air frying.
These simple tools, combined with your two ingredients, are all it takes to unlock a world of delicious roasted garlic.
Recommended Air Fryers
If you’re in the market for a new air fryer or simply curious about popular models, here are a few excellent options that perform wonderfully for this roasted garlic recipe and many other dishes:
Phillips Premium Air Fryer
Buy Now →
Instant Vortex Plus Air Fryer
Buy Now →
Instant Pot Duo Crisp Ultimate Lid
Buy Now →
Chefman TurboTouch Air Fryer
Buy Now →
Step-by-Step: How to Make Air Fryer Roasted Garlic
Making delicious roasted garlic in your air fryer is incredibly simple. Follow these straightforward steps to achieve perfect, golden, and tender results every time.
Prepare the Garlic Bulb
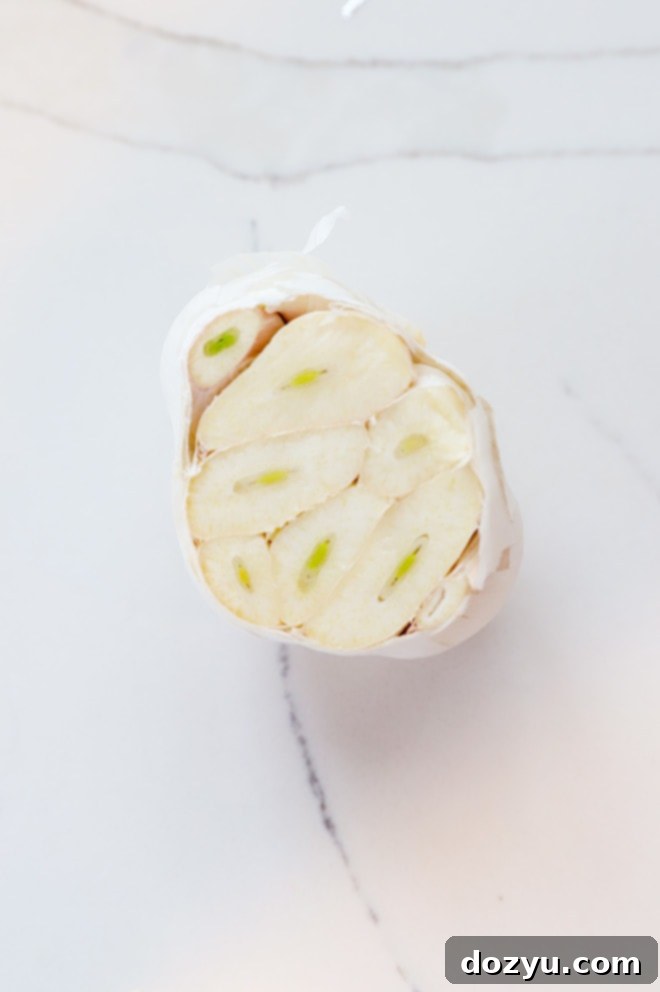
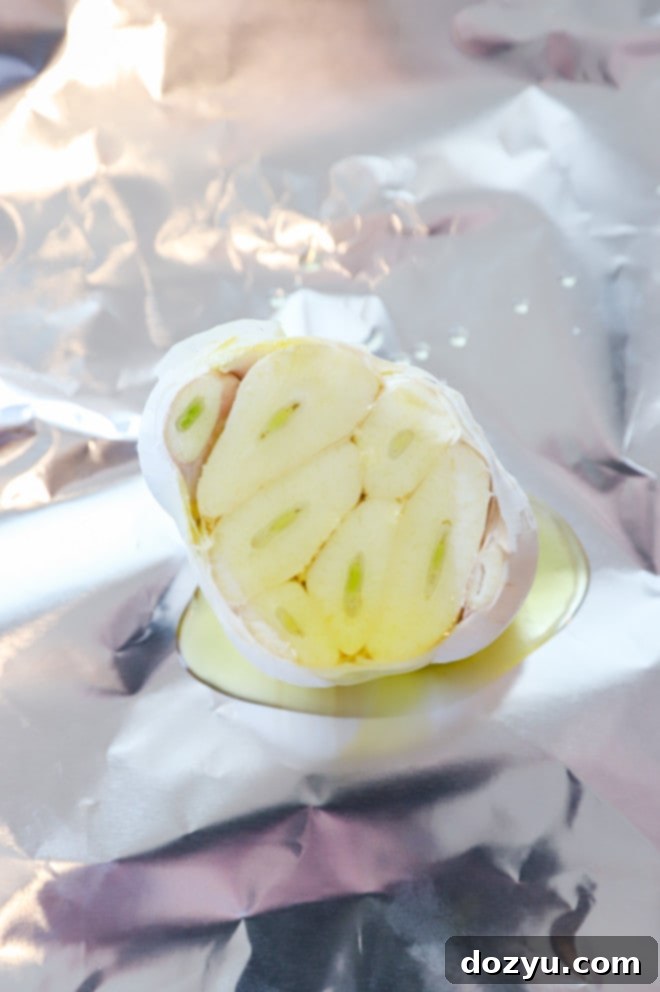
The first crucial step is to properly prepare your garlic bulb. Start by taking a sharp knife and carefully cutting off the very top of the garlic head. You’ll want to slice far enough down to expose the tops of all the individual cloves within the bulb. This ensures that the olive oil can penetrate each clove, leading to even roasting and a deliciously caramelized finish. Once the tops are exposed, place the garlic bulb(s) on a small square of aluminum foil. Drizzle each bulb generously with about 1 to 2 teaspoons of extra virgin olive oil. The oil not only adds flavor but also helps the garlic to soften and caramelize beautifully, preventing it from drying out during the air frying process. After drizzling, securely wrap the bulb in the aluminum foil, creating a sealed packet that will trap moisture and allow the garlic to steam as it roasts.
Air Fry to Perfection
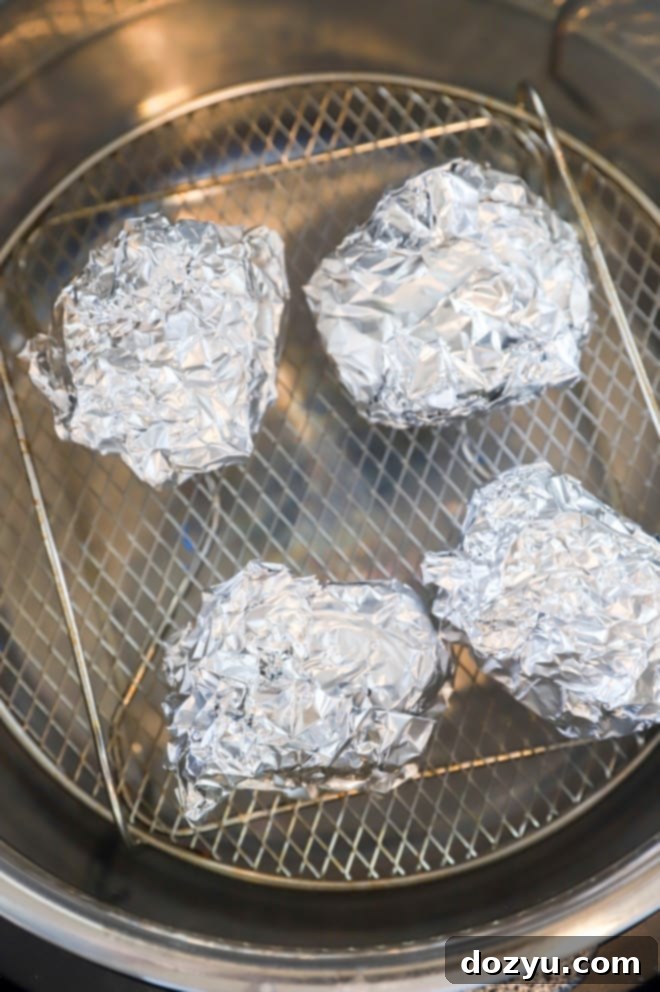
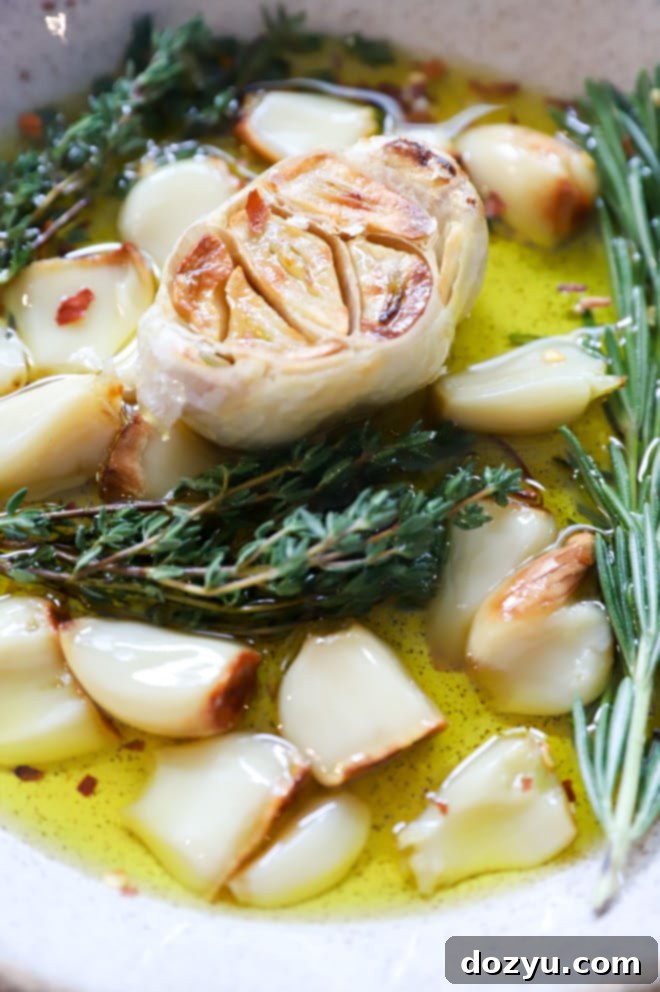
Once your garlic bulbs are prepped and wrapped, place them carefully into your air fryer basket. Ensure they are not overcrowded; if you are roasting multiple bulbs, arrange them in a single layer if possible, or work in batches if your air fryer is smaller. Set your air fryer to 390°F (199°C) and air fry for approximately 20 to 25 minutes. The exact timing can vary slightly depending on the size of your garlic bulbs and the specific model of your air fryer, so it’s always a good idea to keep an eye on them. You’ll know the garlic is finished when the exposed tops begin to brown or caramelize to a beautiful golden-amber color, and the cloves feel soft and tender when gently squeezed (through the foil, with caution). Once cooked, carefully remove the hot bulb(s) from the air fryer using oven mitts or tongs. Allow them to cool for a few minutes before unwrapping. Once cool enough to handle, you can easily squeeze out the sweet, soft cloves from their papery skins, ready to be used immediately or stored for later.
Tips for Air Fryer Roasted Garlic Success
Achieving perfectly roasted garlic in your air fryer is easy, but a few expert tips can ensure you get the best results every time, maximizing flavor and minimizing effort.
- Roast More at Once: Don’t just make one head of garlic! The air fryer is efficient enough that you can easily roast several heads simultaneously. Roasting a larger batch means you’ll have extra on hand for various recipes throughout the week. I love to roast 3-4 heads at a time and freeze any unused cloves. This foresight makes future meal prep a breeze.
- Ensure All Cloves Are Exposed: When cutting the top off the garlic bulb, it’s crucial to slice far enough down to expose the tops of *all* the cloves. If some cloves remain hidden under the papery skin, they won’t absorb the olive oil or roast evenly, potentially remaining hard or less flavorful. A good visual check before drizzling oil can save you from unevenly cooked garlic.
- Don’t Overcrowd the Basket: While air frying multiple bulbs is efficient, it’s vital not to overcrowd your air fryer basket. Air fryers work by circulating hot air, and if the basket is too full, the air won’t be able to reach all surfaces of the garlic evenly. This can lead to some cloves being perfectly roasted while others are undercooked. Arrange the foil-wrapped bulbs in a single layer, or roast in batches if necessary.
- Adjust Roasting Time for Garlic Size: Not all garlic bulbs are created equal! Smaller bulbs may cook faster, while larger ones might need a few extra minutes. The 20-25 minute window is a guideline, so start checking for doneness around the 18-minute mark for smaller heads and extend if needed for larger ones. Look for that golden-brown color and a soft, squeezable texture.
- Consider Your Air Fryer Model: Different air fryer brands and models can have slight variations in how they heat. If this is your first time roasting garlic in your specific air fryer, it might be wise to check on the garlic a couple of minutes earlier than recommended to gauge your appliance’s performance.
- Use Quality Olive Oil: As mentioned in the ingredients section, a good quality extra virgin olive oil truly makes a difference. It contributes to the rich, nuanced flavor of the finished product and is particularly important if you plan to store the garlic in oil.
Craving more quick and easy air fryer recipes? Explore these delicious options: Air Fryer Bacon Wrapped Pork Loin | Air Fryer Buffalo Jalapeno Poppers | Chipotle BBQ Steak Air Fryer Empanadas

Can Garlic Burn in the Air Fryer?
Yes, garlic can absolutely burn in the air fryer if not properly monitored, just like it can in a traditional oven. The high, circulating heat of an air fryer is excellent for quick cooking and achieving crispy textures, but it also means that delicate ingredients like garlic can go from perfectly roasted to burnt very quickly. The key to preventing this is the aluminum foil wrapping. The foil acts as a protective barrier, essentially creating a steaming environment that allows the garlic to soften and sweeten without direct exposure to the intense circulating heat. This is why following the recommended temperature and time (390°F for 20-25 minutes) with the foil wrap is crucial. Without the foil, or if cooked for too long at too high a temperature, the outside of the cloves will dry out and blacken, leading to a bitter, unpleasant taste. Always keep an eye on your garlic during the last few minutes of cooking, especially if you’re experimenting with different air fryer models or garlic sizes. A slight golden-brown caramelization is ideal, but anything darker suggests it’s approaching or past the point of burning.
Roasting Garlic in the Air Fryer Without Foil?
Yes, you can roast garlic in the air fryer without using foil, but there are a few important considerations and potential differences in the final product.
When you roast garlic without foil, you expose the cloves more directly to the hot circulating air. This can lead to a slightly crispier exterior on the cloves, and they might brown faster. However, there’s a higher risk of the garlic drying out or burning if not carefully watched. The foil creates a mini-steaming environment that ensures the garlic remains moist and tender throughout the roasting process.
If you prefer not to use foil, here’s how you can do it:
- Use a Small Baking Dish or Ramekin: Instead of wrapping in foil, place the trimmed, oil-drizzled garlic bulb(s) directly into a small, air-fryer-safe baking dish or ramekin. This still helps to contain the oil and prevent excessive drying.
- Consider Parchment Paper: You can also use air fryer-safe parchment paper liners in your basket, and place the oiled garlic bulb directly on top.
- Adjust Oil Quantity: You might need to use a bit more olive oil to prevent the garlic from drying out, ensuring each clove is well coated.
- Reduce Cooking Time and Temperature: Because the garlic is more exposed, it will cook faster. You might want to start with a slightly lower temperature (e.g., 375°F / 190°C) and reduce the cooking time significantly (e.g., 10-15 minutes).
- Monitor Closely: This method requires much closer monitoring. Check the garlic frequently after the 8-minute mark. You’re looking for tender cloves with a golden hue, not blackened ones.
The foil method is generally recommended for its consistent results in achieving soft, sweet, and perfectly moist roasted garlic. However, if you’re seeking a slightly firmer texture or need to avoid foil, the dish method is a viable alternative with careful attention.
Freezing Roasted Garlic for Later Use
Absolutely! Freezing roasted garlic is a fantastic way to preserve its delicious flavor and have it ready for whenever inspiration strikes. This is especially useful if you’ve followed the tip to roast multiple heads at once. Roasted garlic freezes beautifully and retains its sweet, mellow flavor and soft texture for an extended period. Here are a few popular methods for freezing:
- Whole Cloves in Ziplock Bags: Once your roasted garlic bulbs have cooled, gently squeeze out the individual cloves. Place these soft cloves into freezer-safe ziplock bags. Press out as much air as possible before sealing and flattening the bag for easier storage. These will keep well for up to 4 months in the freezer. When ready to use, simply thaw a few cloves at room temperature or in the refrigerator.
- Garlic Paste in Ice Cube Trays: For ultimate convenience, transform your roasted garlic into a paste before freezing. After roasting and cooling, combine the peeled cloves with a little extra olive oil in a food processor or mash them thoroughly with a fork. Spoon this paste into ice cube trays and freeze until solid. Once frozen, pop out the cubes and transfer them to a freezer-safe bag or container. Each cube represents a pre-portioned amount of roasted garlic, perfect for dropping directly into sauces, soups, or stews. This method can preserve the garlic for 3-6 months.
- In Oil in Small Jars: While freezing in oil requires glass jars (make sure they are freezer-safe and leave headspace for expansion), it’s another great option. Pack peeled roasted garlic cloves into small jars, then cover completely with extra virgin olive oil. Seal tightly and freeze. The oil will solidify, but it creates a protective layer around the garlic. Thaw in the refrigerator before using.
Freezing ensures you always have this versatile ingredient on hand, ready to elevate your culinary creations without the need for immediate roasting.
Looking for more delectable snacks? Dive into my full snacks recipe collection!
Preserving Your Air Fryer Roasted Garlic
Beyond simply storing it, there are wonderful ways to preserve your air fryer roasted garlic to enhance its flavor and extend its shelf life, making it a true kitchen staple.
Garlic-Infused Oil
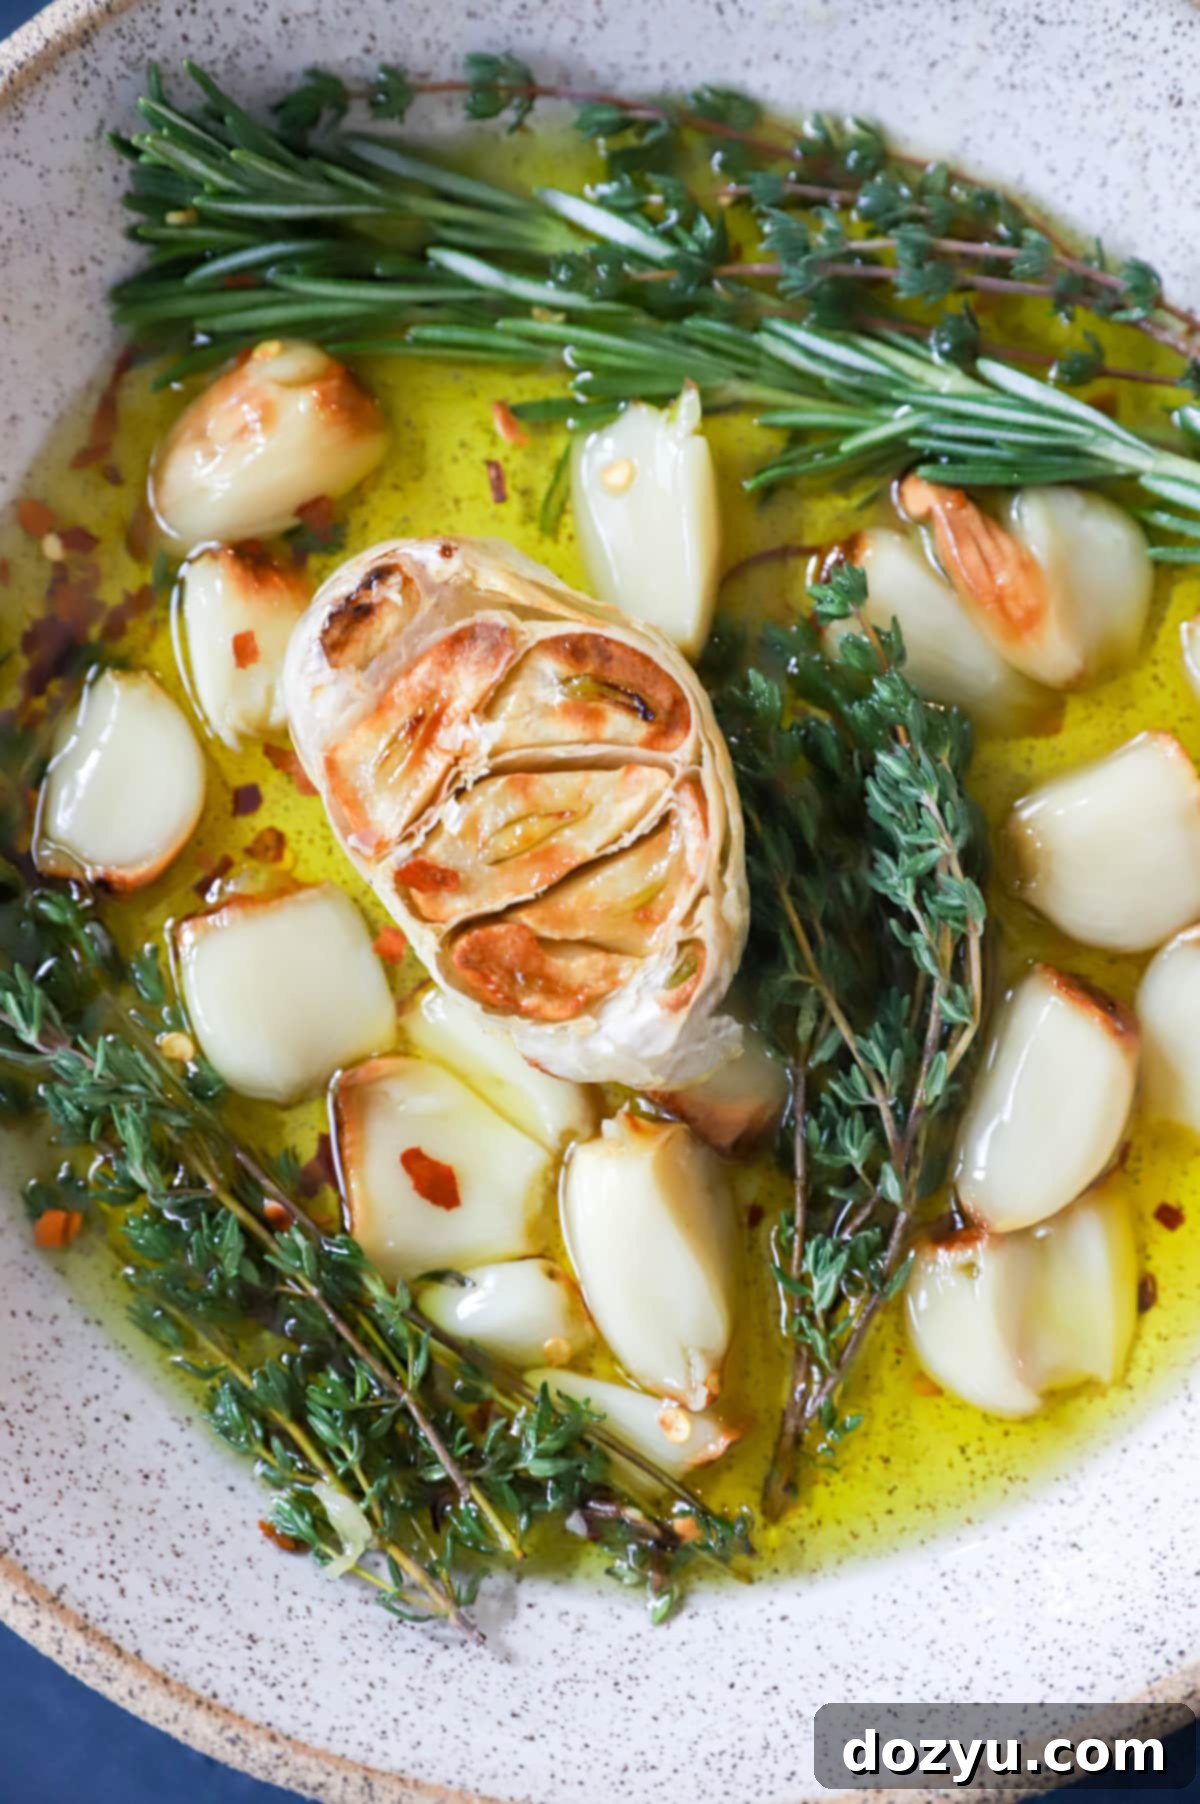
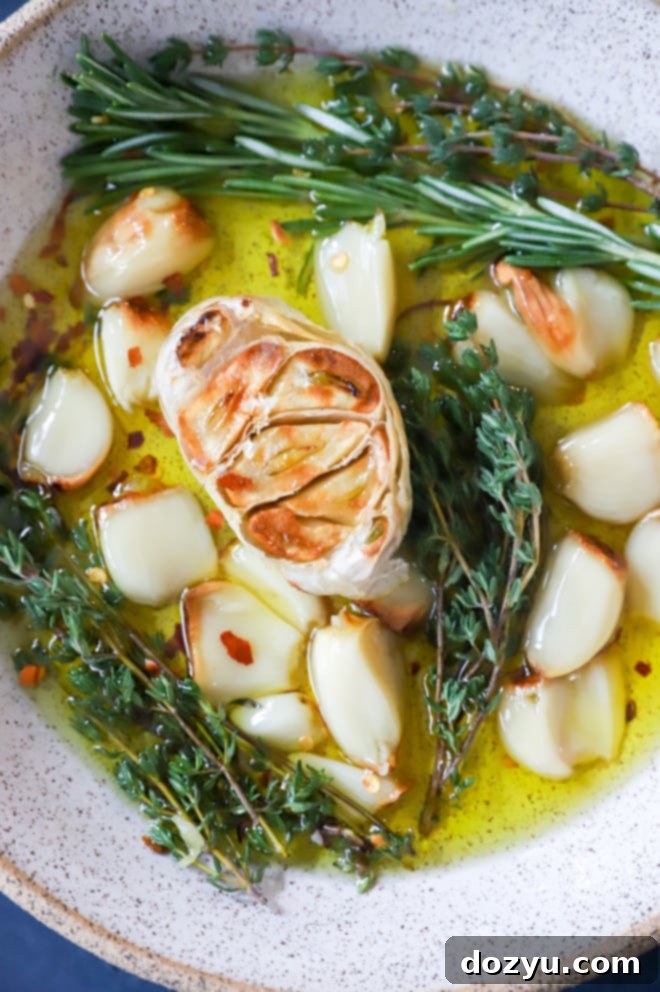
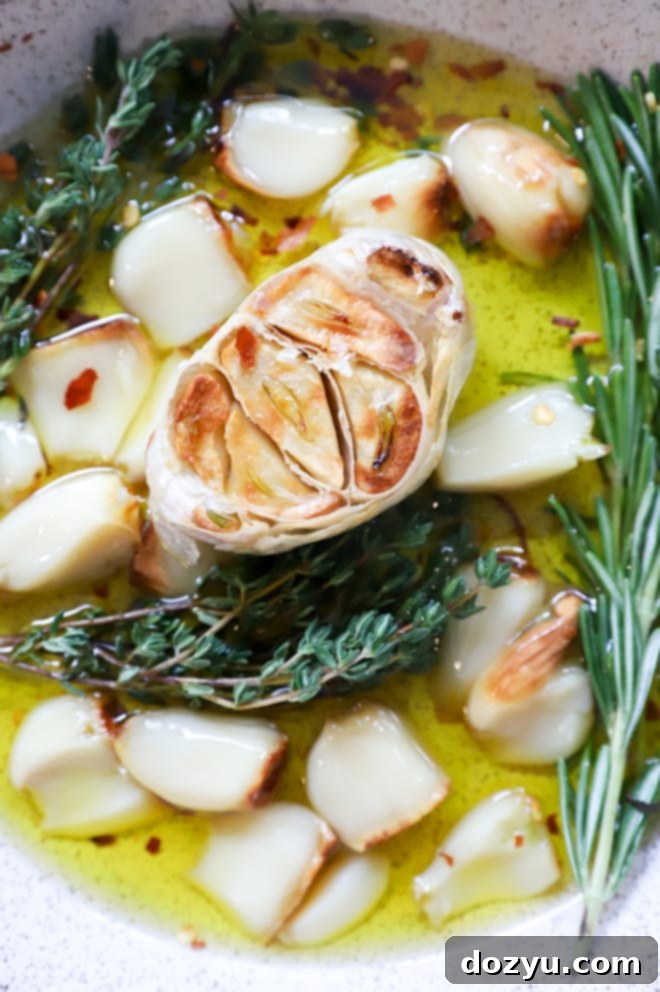
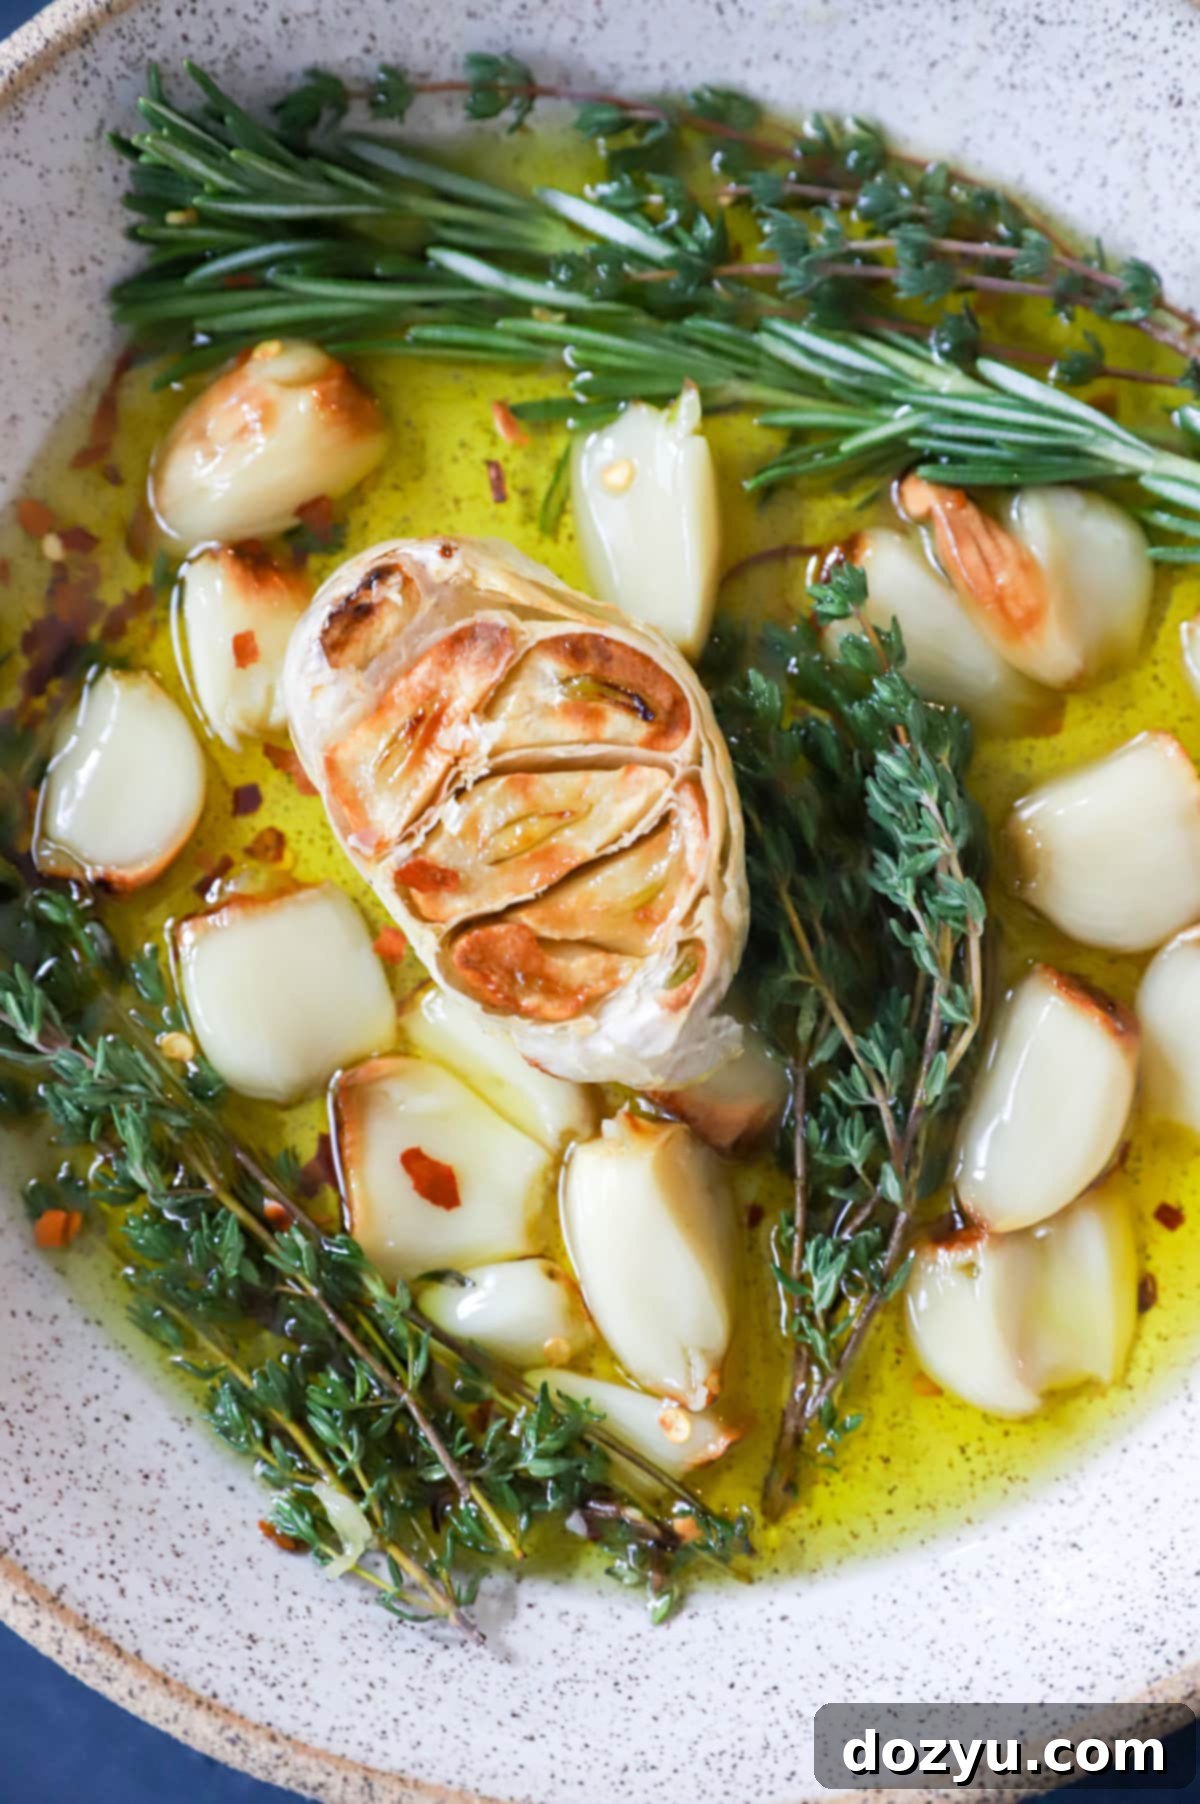
My absolute favorite way to preserve roasted garlic cloves is to store them submerged in high-quality extra virgin olive oil. Not only does this method keep the garlic cloves moist and flavorful, but it also creates a bonus garlic-infused oil that is incredibly versatile in its own right. As the garlic sits in the oil, its sweet, mellow essence seeps into the oil, creating a fragrant condiment perfect for drizzling over salads, pasta, bread, or even using in sautés. For an even more exciting flavor profile, consider adding fresh lemon zest, a pinch of chili flakes for a gentle heat, or your favorite herbs like rosemary or thyme to the jar along with the cloves. Just be sure to use a clean, airtight glass jar. Whenever you scoop out some cloves or use the infused oil, make sure to top off the jar with additional olive oil so that all the remaining garlic cloves remain fully submerged. This method, when stored properly in the refrigerator, can preserve your cloves for up to 10 days, allowing you to enjoy garlic-infused deliciousness for a longer period.
Important Note on Garlic in Oil: When preserving garlic in oil, it is crucial to always store it in the refrigerator to prevent the growth of *Clostridium botulinum*, which can produce a dangerous toxin in anaerobic (oxygen-free) environments like oil. Never store garlic in oil at room temperature. For maximum safety, consume within 10 days or freeze.
Roasted Garlic Paste
Another fantastic preservation method is to turn your roasted garlic into a smooth, flavorful paste. This is incredibly easy to do and offers a convenient form for quick cooking. After air frying and peeling the cloves, simply place them into a food processor. Add a small amount of extra virgin olive oil (start with a tablespoon or two and add more if needed) and blend until a smooth, spreadable paste forms. The amount of oil can be adjusted to achieve your desired consistency – a thicker paste for spreading or a thinner one for mixing into dressings. This roasted garlic paste can be stored in an airtight container in the refrigerator for about 10 days. For longer storage, freeze the paste! Spoon it into ice cube trays and once frozen, transfer the cubes to a freezer-safe bag. These convenient frozen portions can be added directly to hot dishes, thawing and infusing them with rich garlic flavor.
Creative Ways to Use Air Fryer Roasted Garlic
Once you’ve experienced the ease and deliciousness of air fryer roasted garlic, you’ll find endless ways to incorporate its sweet, mellow flavor into your cooking. It’s an incredibly versatile ingredient that can elevate both simple and complex dishes. Here are some of my top recommendations and creative ideas:
- Enhance Pasta Dishes: Stir mashed roasted garlic into your favorite pasta sauces. It adds a deep, umami-rich sweetness to classics like fresh tomato sauce, creamy Alfredo, or a hearty lasagna. You can even simply toss it with hot pasta, a little pasta water, Parmesan, and fresh herbs for a quick, flavorful meal.
- Gourmet Garlic Bread: This is a classic for a reason! Spread mashed roasted garlic directly onto toasted bread for simple garlic bread, or mix it with butter, fresh parsley, and a sprinkle of Parmesan for an extra indulgent version. It’s far superior to raw garlic bread. Try my air fryer garlic bread for a quick and easy side.
- Elevate Sandwiches and Wraps: Add a smear of roasted garlic to your sandwiches or wraps. It pairs exceptionally well with grilled cheese, offering a sophisticated twist. I highly recommend trying it on my balsamic grilled vegetables grilled cheese sandwich, pesto grilled cheese, or grilled tomato Italian grinder sandwich for an explosion of flavor.
- Creamy Mashed Potatoes: Fold roasted garlic cloves or paste into mashed potatoes for an incredible depth of flavor. It adds a subtle sweetness and richness that makes plain mashed potatoes truly special. My instant pot mashed potatoes with roasted garlic and parmesan is a perfect example.
- Flavorful Pizza Base: Before adding your sauce and toppings, spread a thin layer of mashed roasted garlic directly onto your pizza dough. It infuses the entire pizza with a wonderful garlicky aroma and taste.
- Boost Vegetable Side Dishes: Toss roasted garlic with steamed or roasted vegetables (like broccoli, green beans, or asparagus) along with a pat of butter or a drizzle of olive oil. It transforms simple greens into something extraordinary.
- Homemade Salad Dressings: Blend roasted garlic into your homemade salad dressings. Its mellow flavor is less harsh than raw garlic and adds a delightful complexity, especially to vinaigrettes or creamy dressings.
- Savory Dips and Spreads: Mix roasted garlic into hummus, yogurt dips, cream cheese, or goat cheese for quick and easy appetizers. It’s also fantastic stirred into guacamole or a chunky salsa.
- Soups and Stews: Stir a few mashed cloves into simmering soups and stews during the last few minutes of cooking. It dissolves beautifully, adding a rich, savory backbone without being overpowering.
- Flavorful Compound Butters: Mash roasted garlic into softened butter along with fresh herbs (like rosemary or chives) and a pinch of salt. Roll it into a log, chill, and then slice to serve with steaks, chicken, or spread on warm bread.
- Pair with Confit: Serve roasted garlic alongside quick cherry tomato confit and crusty bread for a rustic and elegant appetizer.
The possibilities are truly endless once you have a batch of air fryer roasted garlic ready to go!
Storing and Reheating Roasted Garlic
Proper storage is essential to keep your air fryer roasted garlic fresh and safe for future use. Here’s how to ensure it lasts as long as possible:
Refrigerator Storage
- In Oil: The most popular and flavorful method for short-term storage is to place the peeled roasted garlic cloves in a clean, airtight glass jar and cover them completely with extra virgin olive oil. As discussed previously, you can also add optional flavorings like herbs, chili pepper flakes, or lemon zest to create a customized garlic-infused oil. It’s critical that the garlic cloves remain fully submerged in the oil at all times. If you use some of the oil or cloves, top off the jar with fresh olive oil to ensure the remaining cloves are covered. Store this jar tightly sealed in the refrigerator. The cloves preserved this way will last for up to 10 days. Always remember: garlic in oil MUST be refrigerated to prevent botulism. Never store at room temperature.
- Whole Heads or Peeled Cloves (without oil): For shorter durations, you can store the whole roasted garlic heads (unpeeled) in an airtight container or ziplock bag in the refrigerator for up to 4 days. If you’ve already peeled the cloves but don’t want to submerge them in oil, store them in a similar airtight container in the fridge for up to 3-4 days. While still delicious, they may dry out a little more quickly than those stored in oil.
Freezer Storage
For long-term storage, freezing is your best bet, as it maintains the garlic’s quality for months.
- Individual Cloves: Once cooled and peeled, place the roasted garlic cloves in small, freezer-safe ziplock bags. Press out as much air as possible before sealing. Flatten the bag to create a thin layer of garlic, which makes it easier to break off individual portions when needed. Roasted garlic cloves can be stored in the freezer for about 4 months.
- Garlic Paste: As mentioned in the preservation section, blending roasted garlic with a little olive oil to form a paste and then freezing it in ice cube trays is incredibly convenient. Once frozen solid, transfer the cubes to a freezer-safe bag or container. This paste will keep well for 3-6 months in the freezer.
Reheating Roasted Garlic
Roasted garlic is often used cold or at room temperature when added to dishes like dressings, spreads, or sandwiches. However, if you need to warm it up or incorporate it into a hot meal:
- From the Refrigerator: Simply add the cloves or paste directly to warm dishes, sauces, or soups. They will quickly warm through. If you prefer them warm on their own, you can gently heat them in a small pan with a tiny bit of olive oil over low heat, or microwave for a few seconds.
- From the Freezer: Frozen cloves or paste can often be added directly to hot cooking liquid (like a simmering sauce) or mashed into hot foods (like mashed potatoes), where they will thaw and integrate seamlessly. If you need them thawed for a cold application, transfer them to the refrigerator a few hours before use or use the defrost setting on your microwave.
Finally, if you make this air fryer roasted garlic, please be sure to give this recipe a rating or leave a comment! I love to hear when you all make recipes, and I do take the time to respond to every single comment. Feel free to drop questions below too, if you have them!
Oh and be sure to tag me on Instagram if you make the recipe! I love being able to see these recipes come to life in your homes – it’s my favorite thing to look through those photos. It really means the world to me!
Air Fryer Roasted Garlic
Equipment
-
Utility Cutting Board
-
Shun Chef’s Knife
-
Non-Stick Aluminum Foil
-
9-Inch Tongs
-
Instant Pot Vortex Plus 6-in-1 Air Fryer
-
Instant Pot Air Fryer Lid 6 in 1
Ingredients
- 1 fresh garlic head
- 1 Tbsp extra virgin olive oil
Instructions
-
Using a sharp knife, carefully cut off the top quarter of the garlic bulb, ensuring that the tops of all the individual cloves are exposed. This allows the oil to penetrate and the garlic to roast evenly.
-
Place the prepared garlic bulb on a small square of aluminum foil. Drizzle the exposed cloves generously with the extra virgin olive oil.
-
Wrap the garlic bulb securely in the aluminum foil, creating a sealed packet. Place the foil-wrapped bulb into your air fryer basket.
-
Set your air fryer to 390°F (199°C). Air fry for 20 to 25 minutes, or until the garlic cloves are golden brown, caramelized, and feel very soft when gently squeezed (through the foil).
-
Carefully remove the hot garlic bulb from the air fryer using oven mitts or tongs. Allow it to cool for a few minutes until it’s comfortable enough to handle.
-
Unwrap the bulb and gently squeeze out the soft, sweet roasted garlic cloves. Use immediately in your favorite dishes or store for later as described above. Serve in pasta, dips, salad dressings, sandwiches, garlic bread, and much more!
