Crispy Potato Cheese Balls: The Ultimate Easy Recipe for Cheesy Golden Perfection
Craving a delicious and incredibly easy snack that’s guaranteed to be a hit? These easy potato cheese balls are a game-changer! Imagine a perfectly crispy, golden-brown exterior giving way to a warm, gooey, and unbelievably cheesy interior. They are truly the ultimate party snack, appetizer, or even just a delightful treat for a cozy night in. Get ready to experience pure comfort food bliss!

table of contents
Toggle
About These Irresistible Potato Cheese Balls
Get ready to be introduced to the ultimate crispy, cheesy potato sensation! If you’re anything like me – a true potato enthusiast – then these potato cheese balls are about to become your new favorite obsession. As someone with Irish heritage, I often joke that no meal is complete without potatoes, and it’s a “joke” that only becomes truer with time. Especially when there’s a generous amount of cheese involved!
These delightful spheres are a brilliant fusion, blending the best qualities of a classic mozzarella stick with the comforting essence of a fried mashed potato ball, similar to potato croquettes. You get the incredible creamy texture of perfectly mashed potatoes combined with the luscious, savory goodness of melted cheese. It’s a culinary experience that hits all the right notes!
What sets these potato cheese balls apart is their textural perfection. The moment you bite into one, you’re met with an incredibly crispy, golden-brown exterior, thanks to the Panko breadcrumbs. This satisfying crunch quickly gives way to a soft, fluffy potato interior that’s studded with melted cheese. And let’s not forget that iconic, irresistible cheese pull – it’s pure joy on a plate! The flavor profile is equally enticing, packed with savory potato and cheese notes, brightened by a hint of garlic and fresh chives, making every bite incredibly flavorful.

These versatile golden bites are perfect for any occasion. Whether you’re hosting a lively party, looking for an impressive appetizer for a family gathering, or simply craving a savory snack on a quiet afternoon, these potato cheese balls fit the bill perfectly. They’re quick enough to whip up for a last-minute craving but impressive enough to serve to guests. Unlike some recipes that call for inserting individual cheese cubes into the middle of each ball – which can be a bit fiddly – our recipe simplifies the process by incorporating shredded cheese directly into the potato mixture. This ensures every bite is uniformly cheesy and makes forming the balls much easier, saving you precious time and effort without compromising on that amazing cheese factor.

Essential Ingredients for Perfect Potato Cheese Balls
Creating these delightful crispy potato cheese balls starts with selecting the right ingredients. Here’s a detailed look at what you’ll need and why each component is crucial for achieving that perfect balance of flavor and texture:
- Potatoes: For the best results, we highly recommend using **Russet potatoes**. Their high starch content makes them incredibly fluffy when mashed, creating a light and airy base for our cheese balls. This starchy texture is key to getting that creamy interior while allowing the balls to hold their shape without becoming dense or watery.
- Butter: Opt for **unsalted butter** to give you complete control over the seasoning. If you only have salted butter on hand, simply adjust or omit the additional salt in the recipe to prevent the mixture from becoming overly salty. Butter adds a rich, decadent flavor and contributes to the smooth texture of the potato mixture.
- Spices: A simple yet effective blend of **salt, black pepper, and garlic powder** forms the foundation of our seasoning. These staples enhance the natural flavors of the potatoes and cheese, with garlic powder adding a wonderful aromatic depth without being overpowering.
- Cream: A touch of **heavy cream** is essential for achieving that luxurious, velvety consistency in the potato filling. It makes the mixture wonderfully creamy and smooth, ensuring a melt-in-your-mouth experience.
- Egg: A single **large egg** plays a vital role as a binder. It helps hold the potato and cheese mixture together, preventing it from crumbling or falling apart during the frying process. This is crucial for maintaining the ball shape and ensuring a successful fry.
- Chives: Freshly chopped **chives** introduce a delicate, fresh, and slightly oniony herbaceous flavor that beautifully complements the richness of the potatoes and cheese. While optional, they add a gourmet touch and a pop of color. If fresh chives aren’t available, you can omit them or try a tiny pinch of dried chives as a substitute, though fresh is always best.
- Cheese: **Shredded mozzarella cheese** is our top choice for its incredible meltability and fantastic cheese pull. However, feel free to experiment with other cheeses to customize the flavor. Sharp cheddar cheese will give you a bolder, more piquant taste, while pepper jack cheese adds a pleasant spicy kick. Monterey Jack cheese offers a mild, creamy alternative. The key is to use a cheese that melts well.
For the Crispy Coating:
- Flour: You’ll need **all-purpose flour** for the first dredging step. It provides a dry surface for the egg wash to adhere to, ensuring a thorough and even coating.
- Panko Breadcrumbs: This is a non-negotiable for superior crispiness! **Panko breadcrumbs** are lighter, flakier, and absorb less oil than regular breadcrumbs, resulting in an exceptionally crunchy and golden exterior. While regular breadcrumbs can be used, panko truly delivers the best texture.
- Eggs (for coating): Additional **eggs**, lightly beaten, act as the binder between the flour and the panko, creating a sticky layer that helps the breadcrumbs adhere perfectly to the potato balls.
For Frying:
- Oil: A good quality **neutral oil** with a high smoke point is crucial for deep frying. We recommend **canola oil** for its affordability and neutral flavor, but **vegetable oil, peanut oil, or avocado oil** are also excellent choices. The high smoke point ensures the oil won’t burn prematurely, giving you beautifully golden and crispy results without imparting unwanted flavors.
This Recipe’s Must-Haves: Essential Equipment
To make these delightful potato cheese balls efficiently and safely, having the right tools on hand can make all the difference. Here’s a rundown of the essential equipment you’ll need:
- Chef’s Knife and Cutting Board: For peeling and precisely cubing your potatoes. A sharp knife ensures easy, safe preparation.
- Vegetable Peeler: To quickly and effectively peel the russet potatoes, ensuring a smooth texture once mashed.
- Large Pot or Saucepan: For boiling the potatoes until they are tender.
- Potato Masher or Fork: A potato masher is ideal for achieving a lump-free, creamy mashed potato base. If you don’t have one, a sturdy fork will also do the trick, though it might require a bit more effort.
- Large Mixing Bowls: You’ll need at least three for the dredging process (flour, egg, panko) and one for mixing the potato and cheese filling. A good set of mixing bowls is invaluable in any kitchen.
- Heavy-Bottomed Pot or Dutch Oven: This is my absolute must-have for frying. A heavy-bottomed pot, like a Dutch oven, distributes heat evenly and maintains a consistent oil temperature, which is key for perfectly cooked, crispy fried foods. It also minimizes splashing and heat loss.
- Deep-Fry Thermometer: Crucial for monitoring and maintaining the optimal oil temperature (350˚F). This prevents your potato balls from becoming greasy (if the oil is too cold) or burning on the outside before they’re heated through (if the oil is too hot).
- Spider Strainer: An invaluable tool for safely adding and removing the potato balls from hot oil. Its wide mesh and long handle make it much safer and more efficient than a slotted spoon, helping to prevent burns and ensuring gentle handling of the delicate balls.
- Baking Sheet with Paper Towels: For draining excess oil from the fried potato cheese balls, ensuring they remain perfectly crispy and not greasy.
- Cookie Scoop (optional but recommended): A 2-tablespoon cookie scoop can help you portion out the potato mixture evenly, making it easier to form uniform balls and ensuring consistent cooking times.
Here’s How to Make Crispy Potato Cheese Balls
Follow these simple steps to create perfectly crispy and cheesy potato balls that will impress everyone!
1. Cook the Potatoes
There are two primary ways to cook your potatoes for this recipe, ensuring they are perfectly tender and ready for mashing. For the stovetop method, begin by bringing a large saucepan of salted water to a rolling boil over high heat. Add your peeled and chopped russet potatoes (cut into ½-inch cubes) to the boiling water and cook for approximately 8 to 10 minutes, or until they are easily pierced with a fork. Ensure they are fully tender but not waterlogged. Alternatively, for a quicker microwave method, place the chopped potatoes in a microwave-safe bowl. Cover the bowl with microwave-safe plastic wrap, piercing the film a few times to allow steam to escape, and cook on high for about 10 minutes. Once cooked by either method, drain the potatoes thoroughly if boiled, and let them cool for at least 10 minutes. This cooling step is important to allow some moisture to evaporate, which will result in a firmer potato mixture.
2. Make the Potato and Cheese Mix
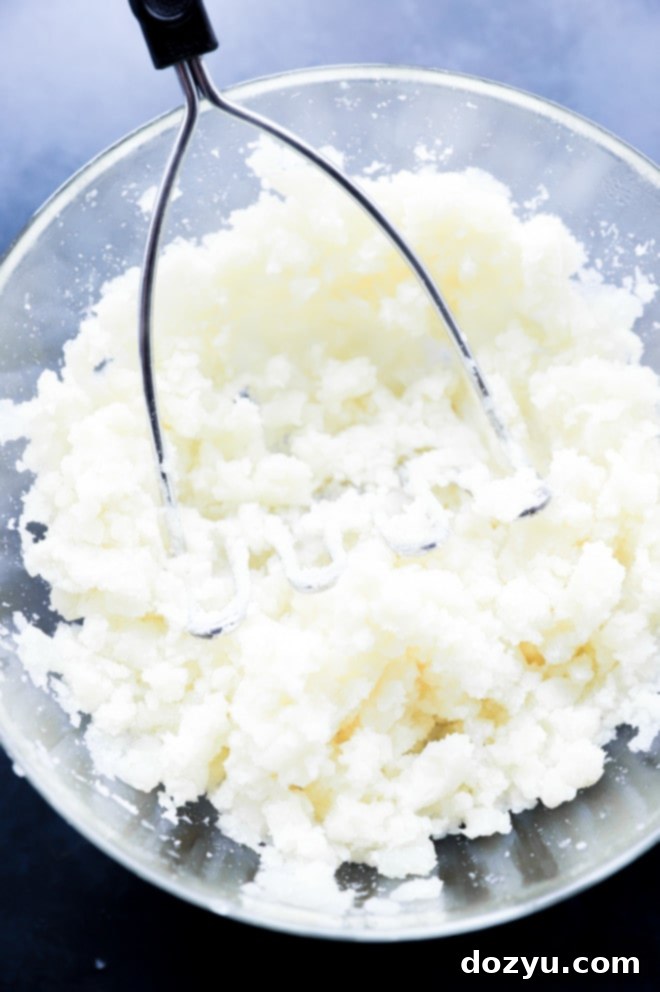
Transfer the cooled, cooked potatoes to a large mixing bowl. Using a potato masher or a sturdy fork, mash the potatoes thoroughly until they are smooth and free of any large lumps. Achieving a creamy texture here is key for a consistent filling. Once mashed, add the melted butter, salt, garlic powder, black pepper, heavy cream, the whole egg, and fresh chopped chives. Finally, stir in the shredded mozzarella cheese. Mix everything together until all ingredients are well combined and the cheese is evenly distributed throughout the potato mixture. Ensure not to overmix, just enough to incorporate everything.
3. Chill the Mixture
This step is critical for success! Once your potato and cheese mixture is ready, cover the bowl and place it in the refrigerator until it is thoroughly cold and firm, which usually takes about 1 hour. Chilling allows the mixture to firm up, making it much easier to handle and form into balls without falling apart during the dredging and frying process. If you’re in a hurry, you can speed up the chilling by placing the bowl in the freezer for about 30 minutes, keeping a close eye on it to prevent freezing solid.
4. Dredge for a Crispy Coating
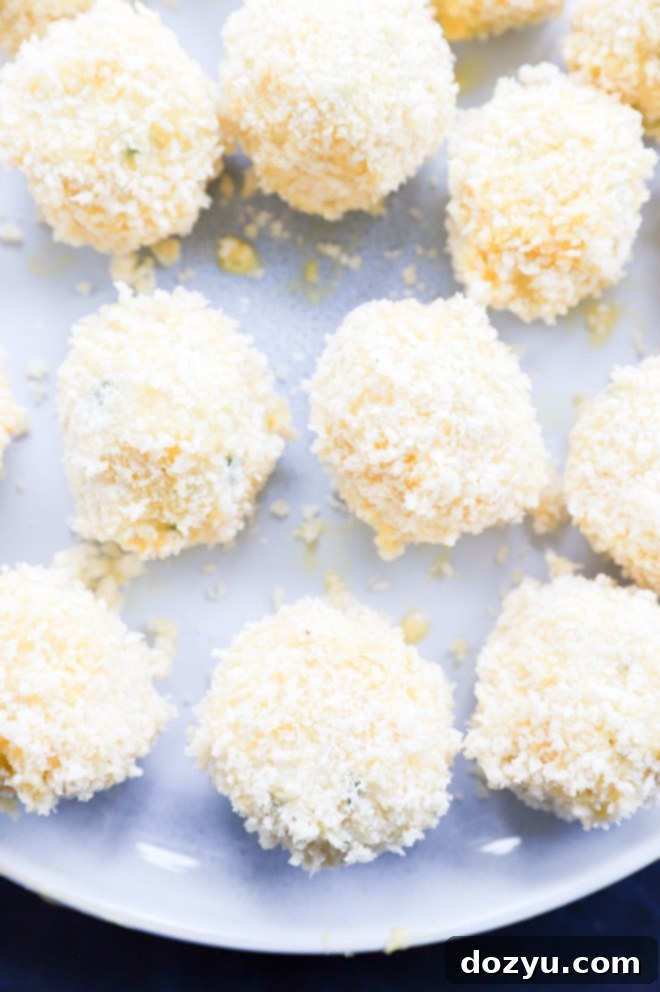
Once the potato mixture is perfectly chilled, it’s time to form the balls and prepare them for frying. Scoop out portions of the chilled mixture, about 2 tablespoons each, and gently roll them into smooth, compact balls. A cookie scoop can be incredibly helpful here for creating uniform sizes. Next, set up your dredging station: prepare three separate shallow bowls. In the first bowl, place the all-purpose flour. In the second bowl, lightly beat the two whole eggs with a fork. In the third bowl, add the panko breadcrumbs. Now, take each potato ball and first dip it into the flour, shaking off any excess. Then, dip it into the beaten egg, allowing any extra egg to drip off. Finally, roll the ball thoroughly in the panko breadcrumbs, pressing gently to ensure a complete and even coating all over. This three-step process creates a robust crust that will become incredibly crispy when fried and helps prevent the cheese from oozing out.
5. Fry to Golden Perfection
In a deep skillet or a Dutch oven, pour your chosen neutral oil (like vegetable or canola oil) to a depth of about 2-3 inches. Heat the oil over medium-high heat until it reaches 350˚F (175˚C) – a deep-fry thermometer is essential for accuracy here. Carefully lower the breaded potato cheese balls into the hot oil in small batches, being careful not to overcrowd the pot. Overcrowding will drop the oil temperature and lead to greasy, less crispy results. Fry for approximately 2 to 3 minutes per batch, turning occasionally, until the balls are beautifully golden brown and crispy on all sides. Using a spider strainer, carefully remove the fried potato balls from the oil and transfer them to a plate lined with paper towels to drain any excess oil. Immediately sprinkle them with flaky sea salt for an extra burst of flavor and texture. Serve these hot and enjoy the perfect crispy, gooey, cheesy experience!

Tips and Variations for Your Potato Cheese Balls
Making these potato cheese balls is straightforward, but a few tips and creative variations can elevate your results and ensure success every time.
- Thoroughly Chill the Potatoes: This cannot be emphasized enough! The potato and cheese mixture absolutely *must* be thoroughly chilled. If the mixture is too warm or soft, it will be very difficult to form into coherent balls, and they’ll be prone to falling apart in the hot oil. Plan for at least 1 hour in the refrigerator, or 30 minutes in the freezer if you’re short on time. A firm, cold mixture ensures easy handling and maintains shape during frying.
- Utilize Leftover Mashed Potatoes: This recipe is fantastic for repurposing leftover mashed potatoes! If you’re using pre-made mashed potatoes, you’ll likely need to adjust the flour quantity. Mashed potatoes often contain milk, butter, or other additions that can make them stickier. If your mixture feels too soft or sticky, gradually add a tablespoon or two of extra all-purpose flour until it reaches a consistency that’s easy to roll into balls. If they seem too dry, a tiny splash of heavy cream or an extra egg yolk can help bind them.
- Don’t Overcrowd the Pot: When frying, always cook your potato cheese balls in small batches. Overcrowding the pot significantly lowers the oil temperature. This results in the balls absorbing too much oil, making them greasy and preventing that desired crispy, golden-brown crust from forming. Give each ball space to cook evenly and crisp up beautifully.
- Flavor Boosters:
- Spicy Kick: Finely chop some jalapeños or serrano peppers and mix them into the potato and cheese mixture for a delightful heat. A pinch of cayenne pepper or red pepper flakes also works.
- Herbaceous Twist: Experiment with other fresh herbs! Finely chopped parsley, cilantro, or even a hint of rosemary can add unique flavor dimensions.
- Smoky Goodness: Cooked and crumbled bacon bits or finely diced ham can be folded into the potato mixture for a savory, smoky element.
- Different Cheeses: While mozzarella is classic, try a blend of cheeses like cheddar and Monterey Jack for a richer flavor, or add a touch of Parmesan for an umami kick.
- Ensure Even Coating: Take your time during the dredging process. A complete and even coating of flour, egg, and panko is essential not only for crispiness but also to create a protective barrier that keeps the gooey cheese inside where it belongs.
- Serving Temperature: These potato cheese balls are best served hot, fresh out of the fryer, when the exterior is at its crispiest and the interior cheese is at its meltiest.
More crunchy appetizers to try out: Crispy Baked Cauliflower | Cheese Corn Balls | Mashed Potato Fritters | Jalapeño Popper Wontons

Can I Air Fry These Potato Balls?
Absolutely! Air frying is a fantastic alternative to deep frying, offering a lighter yet still crispy result. To air fry your potato cheese balls, first ensure your air fryer basket is lightly greased with cooking spray to prevent sticking. Arrange the breaded potato balls in a single layer in the basket, making sure not to overcrowd them to allow for even cooking and crisping. You may need to cook them in batches. Air fry them at 425˚F (218˚C) for approximately 10 to 15 minutes, or until they are beautifully golden brown and deliciously crispy on the outside. For best results, shake the basket halfway through the cooking time to promote even browning and a uniform crunch.
Can You Freeze Potato Cheese Balls?
Yes, these potato cheese balls are excellent for meal prep and can be frozen for future enjoyment! The key is to freeze them before frying them. After you have formed and breaded the potato balls, arrange them in a single layer on a baking sheet. Place the baking sheet in the freezer and freeze until the balls are solid, which usually takes about 3 to 4 hours. Once completely frozen, transfer them to a freezer-safe bag or an airtight container. They can be stored in the freezer for up to 2 months. When you’re ready to cook them, you can fry them directly from frozen. Just add a few extra minutes to the cooking time, making sure they are heated through and golden brown. This makes them a perfect make-ahead appetizer for unexpected guests or a quick snack.
Help! My Potato Mixture Is Falling Apart!
If you find your potato mixture is crumbling or refusing to hold its shape when you try to form balls, the most common culprit is insufficient chilling. The potato mixture needs to be thoroughly cold and firm to maintain its structure. Ensure that you’ve left the potato mixture in the refrigerator for at least 1 hour, or in the freezer for a minimum of 30 minutes. A cold mixture is much easier to work with. If chilling doesn’t fully resolve the issue, it could also be that your mixture is a bit too wet. This can happen if the potatoes weren’t properly drained after boiling or if they absorbed too much moisture. In this case, try adding a tablespoon or two of extra all-purpose flour to the mixture, mixing it in gently until it becomes more cohesive and easier to roll. Conversely, if your mixture is too dry, it might also fall apart. A very small amount of extra heavy cream or an additional egg yolk could help bind it.
What Are the Best Kind of Potatoes to Use for This Recipe?
For this potato cheese ball recipe, we strongly recommend using **Russet potatoes**. Russets are high in starch and relatively low in moisture, which makes them incredibly fluffy and dry when mashed. This texture is ideal for forming balls that hold their shape well and achieve a wonderfully creamy, non-gummy interior. Softer, waxier potatoes like red potatoes or Yukon Gold potatoes, while delicious in other applications, have a higher moisture content and lower starch. If used in this recipe, they can result in a stickier, denser, or even watery mixture that is more prone to falling apart during frying. Stick with the robust Russets for the best possible crispy, cheesy potato balls!
Can I Bake Potato Cheese Balls?
While deep-frying yields the ultimate crispiness, baking is indeed a viable option for these potato cheese balls if you prefer to avoid frying! Although I haven’t personally tested baking them, here’s how you could achieve a delicious baked version. To help them crisp up and prevent the cheese from oozing out, I would highly recommend giving them a double coating of the egg and panko mixture. This creates a thicker, more protective crust. Arrange the breaded potato balls in a single layer on a baking sheet lined with a silicone mat or parchment paper (this prevents sticking). Lightly spray the balls with cooking spray or brush them with a little oil to promote browning. Bake them in a preheated oven at 400˚F (200˚C) for approximately 13 to 15 minutes, or until they are golden brown and crispy to your liking. Keep an eye on them, as oven temperatures can vary.
Need some inspiration for appetizers? Check out my appetizer recipes page!

What to Serve with Potato Cheese Balls
These versatile potato cheese balls are incredibly delicious on their own, but they truly shine when paired with the right accompaniments. Here are some fantastic ideas to elevate your serving experience:
- Dipping Sauces: The possibilities are endless!
- Classic Ketchup: A timeless favorite that always works.
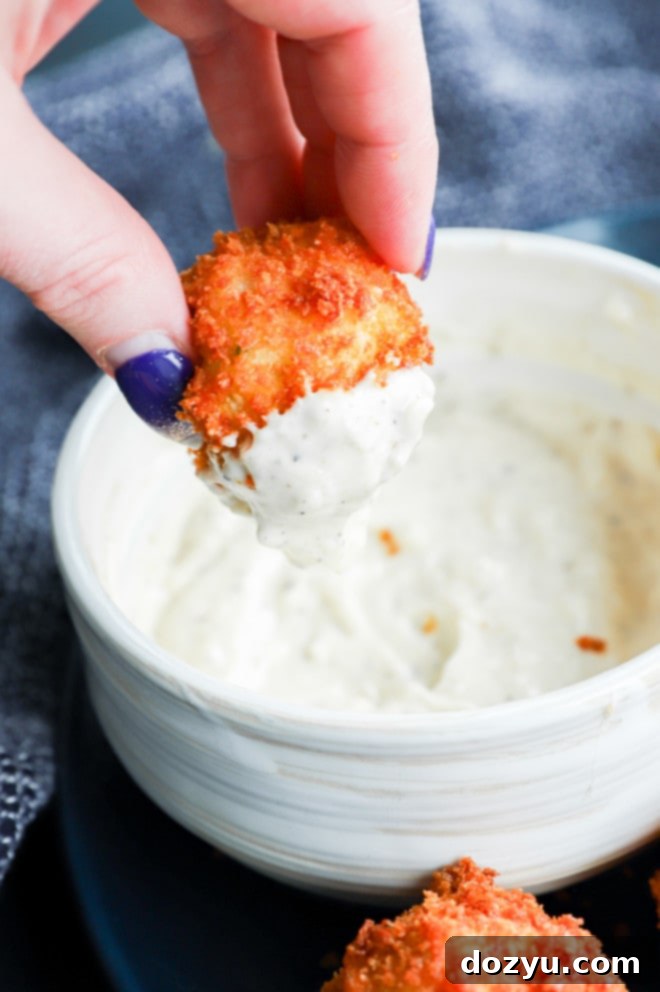
- Creamy Aioli: Elevate the experience with a rich aioli. Try a roasted garlic aioli for deep flavor, a spicy chipotle aioli for a kick, or a quick garlic aioli for simplicity.
- Mustard: A tangy Dijon or honey mustard can cut through the richness beautifully.
- Cheese Dips: For even more cheesy goodness, serve with a warm queso or a creamy cheddar dip.
- Ranch Dressing: A cool and herbaceous ranch offers a popular contrast.
- Marinara Sauce: Just like with mozzarella sticks, a good marinara can be a fantastic complement.
- Cocktail Pairings: For adult gatherings, consider serving these with refreshing cocktails:
- Spiced Rum Punch: An easy-to-make cocktail that’s perfect for a crowd and complements savory snacks.
- Tart & Spicy Salty Dog: The vibrant citrus and subtle heat of a chili salty dog cocktail can provide a wonderful counterpoint to the rich potato and cheese flavors.
- As Part of a Meal: These aren’t just appetizers! They can be served as a delightful side dish for:
- Grilled Meats: Perfect alongside steaks, chicken, or sausages.
- Burgers and Sandwiches: A fun and more exciting alternative to regular fries.
- Salads: Add a crispy, savory component to a fresh green salad.
How to Store and Reheat Potato Cheese Balls
If you happen to have any leftover potato cheese balls (a rare occurrence!), proper storage and reheating will ensure they remain delicious.
Store: First, allow the cooked potato cheese balls to cool completely to room temperature. Once cooled, transfer them to an airtight container. They can be stored in the refrigerator for up to 4 days. Storing them in an airtight container helps to prevent them from drying out and absorbing odors from other foods.
Reheat: To bring them back to their crispy glory, reheating is best done in the oven or an air fryer. Avoid the microwave, as it will make them soft and soggy. Arrange the refrigerated potato cheese balls in a single layer on a baking sheet. Reheat them in a preheated oven at 400˚F (200˚C) for approximately 10 to 20 minutes, or until they are thoroughly warmed through and their exterior has regained its desired crispiness. For an even quicker reheat and crispier results, an air fryer works wonderfully. Place them in a single layer in the air fryer basket and air fry at 375˚F (190˚C) for 5-8 minutes, shaking the basket halfway, until hot and crispy.
More Yummy Loaded Potato Recipes
If you’re a true potato lover like me, you know the magic doesn’t stop with these incredible potato cheese balls! Here are a few more loaded potato recipes that are sure to satisfy your cravings:
- Loaded baked potato fries are piled high with rich cheese, savory bacon, and fresh chives, transforming a simple plate of fries into the ultimate indulgent treat.
- For those who adore grilled delights, these loaded bacon potato skewers offer a smoky, flavorful side dish that’s perfect for barbecues and outdoor gatherings.
- And if you’re looking for a fun and unexpected twist, these loaded mashed potato egg rolls capture all the comforting flavors of a classic baked potato in a crispy, portable wrapper.
Finally, if you whip up this fantastic potato cheese balls recipe, please be sure to give it a star rating on the recipe card below and/or leave a comment! Your feedback means the world to me, and I genuinely love hearing about your culinary creations. I always make an effort to respond to every single comment.
Feel free to drop any questions you have below as well – I’m here to help!
Oh, and don’t forget to tag me on Instagram if you share your delicious results! Seeing these recipes come to life in your homes is truly my favorite part, and it means the world to me to see those photos!

Potato Cheese Balls Recipe Card
Equipment
-
8-Inch Chef’s Knife
-
Utility Cutting Board
-
Spider Strainer
-
Dutch Oven
Ingredients
- 1 lb russet potatoes peeled and cut into 1/2-inch cubes
- 1/4 cup unsalted butter melted
- 1/2 tsp salt
- 1/2 tsp garlic powder
- 1 Tbsp heavy whipping cream
- 1/4 tsp black pepper
- 1 large egg
- 2 Tbsp fresh chopped chives
- 8 oz shredded mozzarella cheese
- 1/2 cup all-purpose flour
- 1 cup panko breadcrumbs
- 1/2 tsp salt
- 2 large eggs lightly beaten
- 2 cups vegetable or canola oil
Instructions
-
Bring a large saucepan of salted water to a boil over high heat. Add peeled and chopped russet potatoes and cook for about 8 to 10 minutes, until fork tender. Drain well and let cool for 10 minutes.
-
Add the cooled, cooked potatoes to a large bowl. Mash thoroughly until creamy and there are no more lumps. Add melted butter, salt, garlic powder, black pepper, heavy cream, the large egg, fresh chives, and shredded mozzarella cheese. Stir until all ingredients are well combined.
-
Cover the bowl and place the potato mixture in the refrigerator until thoroughly cold and firm, about 1 hour. For faster chilling, place in the freezer for 30 minutes.
-
Scoop out the chilled mixture in portions of about 2 tablespoons each. Roll and form them into smooth, compact balls.
-
Set up your dredging station: Place all-purpose flour in one shallow bowl. Add the two lightly beaten large eggs to a second shallow bowl. Place panko breadcrumbs in a third shallow bowl.
-
Dip each potato ball first into the flour, shaking off the excess. Then dip into the beaten egg, allowing any excess to drip off. Finally, roll the ball thoroughly in the panko breadcrumbs, pressing gently to ensure it is coated well all over.
-
Heat vegetable or canola oil in a deep skillet or Dutch oven over medium-high heat until it reaches 350˚F (175˚C). Carefully cook the breaded potato balls in small batches for about 2 to 3 minutes per batch, turning occasionally, until golden brown and crispy on all sides. Do not overcrowd the pot.
-
Using a spider strainer, transfer the fried potato cheese balls to a plate lined with paper towels to drain any excess oil. Immediately sprinkle with flaky sea salt and serve hot with your favorite dipping sauce.
