Mastering Homemade Mozzarella: Your Ultimate Guide to Fresh, Creamy Italian Cheese at Home
There’s an undeniable magic that happens when you bring fresh, homemade cheese to your table. For me, it’s a culinary love affair – a simple pleasure that elevates any meal or snack into a truly special experience. While store-bought varieties certainly have their place, nothing quite compares to the nuanced flavor, the delicate texture, and the incredible satisfaction of cheese crafted right in your own kitchen. It’s more than just food; it’s a testament to patience, skill, and a passion for wholesome ingredients.
My journey into the world of fresh cheese making took an exciting turn when I discovered Lindsay’s June Mozzarella Challenge over at Love & Olive Oil. The idea of crafting my own mozzarella, with its signature milky taste and wonderfully elastic texture, was irresistible. I knew instantly that I had to dive in and attempt to create some truly gorgeous, handcrafted cheese. This wasn’t just about following a recipe; it was about embracing a craft, learning new techniques, and ultimately, experiencing the joy of a truly artisan food product.
To be completely transparent, this particular endeavor presented a significant challenge. I had successfully made homemade ricotta before, which is relatively forgiving, but mozzarella proved to be an entirely different ballgame. Ricotta is a by-product of whey, often simpler to achieve, whereas mozzarella demands precision and a keen sense of timing. It requires a meticulous eye for temperature control and, crucially, a deft hand when it comes to the stretching and molding phase. This is where the true art of mozzarella making lies – transforming the delicate curds into that iconic smooth, pliable ball.
In total, my initial attempt yielded approximately eight balls of mozzarella. While the quantity was there, the quality varied. Only three of them achieved that coveted decent, recognizable mozzarella shape and texture. The remaining five, unfortunately, suffered from various rookie mistakes. They broke apart and struggled to hold their form, primarily due to two critical factors: insufficient resting time for the curds and not reaching the precise temperature required before the stretching and shaping process. These seemingly small details are paramount in cheese making, directly impacting the final product’s integrity and elasticity.
This experience underscored a fundamental truth in cheese making: patience is not just a virtue, but an absolute necessity. And, if I’m being honest, I’m often in short supply of it! It really wasn’t a surprise that a good portion of the batch didn’t turn out as perfectly as envisioned. The urge to rush, to speed up a step, often leads to less-than-ideal results. Every stage, from warming the milk to setting the curd and finally stretching, has its rhythm, and respecting that rhythm is key to success. This journey taught me a valuable lesson in slowing down and appreciating the process.
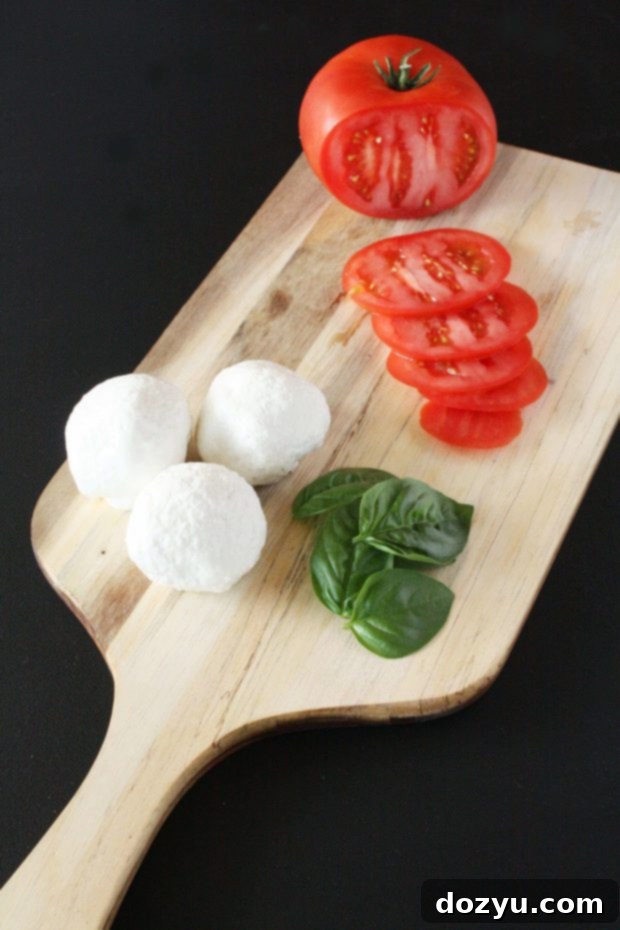
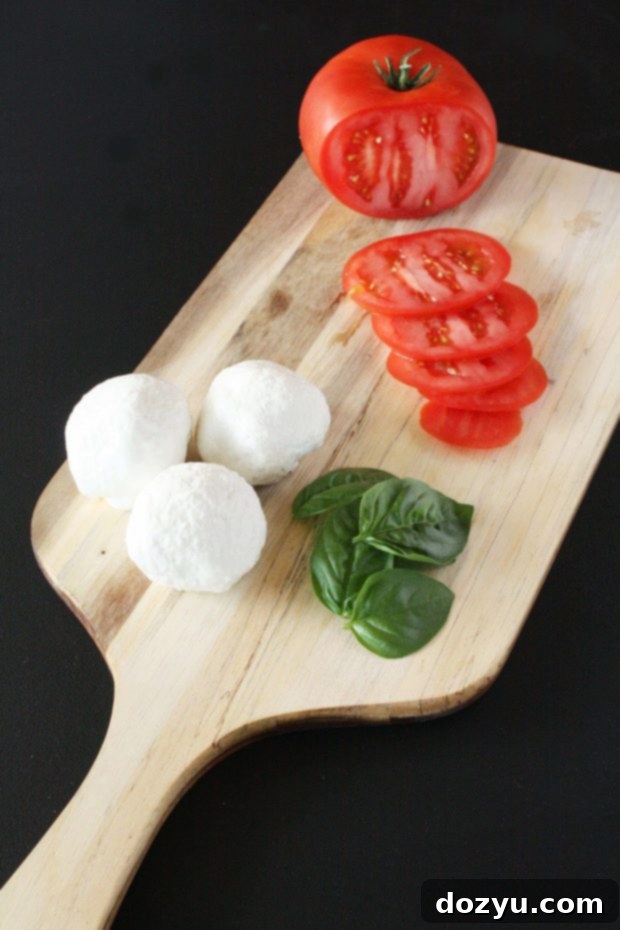
BUT, and this is a crucial “but,” the three mozzarella balls that *did* turn out perfectly – those were nothing short of sublime. Their creamy texture, milky sweetness, and slight tang were absolutely phenomenal. The moment they were ready, I immediately toasted some crusty bread and piled it high with slices of this exquisite homemade mozzarella, fresh basil leaves, ripe garden tomatoes, and a drizzle of rich balsamic vinegar. This simple combination, often called a Caprese toast or bruschetta, transformed into the most heavenly afternoon snack imaginable. The soft, yielding mozzarella melted ever so slightly, mingling beautifully with the vibrant flavors of the basil and tomato.
Let me tell you, that combination isn’t just a snack; it’s an experience. The fresh, mild taste of the mozzarella, paired with the peppery basil and juicy tomato, all brought together by the tangy balsamic, creates a symphony of flavors that is truly unforgettable. Or, if you’re like me, you can effortlessly make an entire meal out of it! It’s versatile enough for a light lunch, a satisfying appetizer, or even a delightful dinner. The effort, the learning, and the occasional missteps were all totally worth it for those few perfect, glorious bites of homemade fresh mozzarella. It’s a culinary achievement that rewards you with incredible taste and a deep sense of accomplishment. Ready to try your hand at this rewarding art? Here’s the detailed recipe.

Homemade Mozzarella
ingredients
- 1 gallon full fat un-homogenized milk (this is crucial for proper curd formation)
- 2 ml calcium chloride (helps curds firm up, especially important with pasteurized milk)
- 2 tsp citric acid dissolved in 1/4 cup of cool water (acidifies the milk for curdling)
- 1 tablet rennet dissolved in 1/4 cup of cold water (the enzyme that coagulates milk into curds)
- Salt to taste (for flavor and brining)
- 5-10 ice cubes (for the ice bath)
instructions
-
**Sterilize all your equipment.** This is a critical first step to ensure food safety and prevent unwanted bacterial growth. You will need a large pot, a draining spoon, an accurate thermometer, butter muslin (or cheesecloth), a large knife, two large bowls, and a colander. Proper sterilization ensures that only the desired cultures are at play in your cheese making.
-
**Prepare the milk and acid.** Pour the chilled, full-fat un-homogenized milk into your large sterilized pot. Add the calcium chloride, which helps create a firmer curd, especially with pasteurized milk. Stir it thoroughly. Then, slowly stir in the diluted citric acid. This step acidifies the milk, preparing it for curdling and the characteristic tang of mozzarella.
-
**Heat the milk gently.** Place the pot back on the stove over medium-low heat. Heat the milk until it reaches precisely 89 degrees F (31.7 degrees C). It’s essential to stir constantly and gently to prevent the milk from scalding or sticking to the bottom of the pot, which can impart an off-flavor. Use your thermometer to monitor the temperature closely.
-
**Add the rennet and let it set.** Once the milk reaches 89 degrees F, remove the pot from the heat. Gently stir in the diluted rennet. Rennet is an enzyme that causes the milk to coagulate and form curds. Cover the pot with a lid and leave it undisturbed to set for 25 to 30 minutes. Resist the urge to peek or disturb the milk during this crucial setting period.
-
**Check for a “clean break.”** After 25-30 minutes, check the curd. It should be firm and have what’s known as a “clean break.” To test this, insert a sterilized knife into the curd and lift it gently at an angle. The curds should break cleanly around the knife, and clear whey (the yellowish liquid) should rush into the gap created. The texture of the curds at this stage should feel somewhere between jelly and thick yogurt – firm enough to hold its shape but still delicate. If it’s not ready, cover the pot and allow it to sit for an additional 5 minutes, then test again. Repeat until you achieve the desired consistency.
-
**Cut and heat the curds.** Once a clean break is achieved, use your large knife to cut the curd into approximate 1-inch cubes while it’s still in the pot. This allows more whey to be released. Place the pot back on the stove over low heat and slowly warm the curds to 108 degrees F (42 degrees C), stirring very gently but constantly to prevent them from clumping too much or sticking. If your curds feel soft and delicate at 108 degrees F, continue heating and stirring until they become firmer and have a slightly springy, resilient feel when you gently press them. This step strengthens the curd structure.
-
**Drain the curds and prepare the water baths.** Scoop the warmed curds into a colander lined with butter muslin or cheesecloth. Allow them to drain for about 5 minutes. While the curds are draining, prepare your two bowls: one with cool salty ice water (this will be your brining bath) and another with non-salted water heated to approximately 150 degrees F (65.5 degrees C). This hot water is crucial for the stretching process.
-
**Stretch and mold the mozzarella.** Take a manageable handful of the mozzarella curd. Using your draining spoon or gloved hands (gloves are recommended as the water is hot), dip the curd under the hot water for about 20 seconds. Remove it from the water and carefully begin to stretch the curd. You’re looking for it to become smooth, shiny, and wonderfully flexible. This stretching takes a bit of practice and patience; don’t be discouraged if your first ball isn’t perfect – consider it a test run! If the curd resists stretching or starts to tear, it means it needs more heat. Simply place it back into the bowl of hot water for another 10-20 seconds before attempting to stretch and mold it into a round ball again. The goal is a uniform, elastic texture.
-
**Chill the finished mozzarella.** Once a mozzarella ball has been beautifully molded into its desired shape, immediately plunge it into the ice-cold salt water bowl. This ice bath stops the cooking process, firms up the cheese, and adds a delicate brininess. Continue this process with the rest of your mozzarella curd, working with one handful at a time to ensure even heating and stretching.
-
**Serve and enjoy!** Your homemade mozzarella will be ready to eat after it has spent at least 10 minutes cooling and firming up in the ice-cold salt water. While it’s fantastic right away, it will also keep well in its brine in the refrigerator for several days. Enjoy your incredibly fresh, tender, and flavorful homemade mozzarella in salads, on pizza, with pasta, or simply on its own with a sprinkle of salt and a drizzle of olive oil. The satisfaction of making this fresh Italian cheese from scratch is truly unmatched!
