Crispy, Cheesy & Irresistible: The Ultimate Homemade Cheese Corn Balls Recipe
Prepare to fall in love with these homemade Cheese Corn Balls – a delightful snack that combines the natural sweetness of corn with the irresistible gooeyness of melted cheese. Perfect for any gathering, a cozy night in, or simply when you crave something truly special, these golden-fried bites are a true crowd-pleaser. With a satisfyingly crispy exterior and a wonderfully creamy, flavorful center made from fresh corn, mashed potato, and a blend of aromatic herbs and spices, they offer a taste and texture sensation that’s hard to beat. Whether you prefer them deep-fried to golden perfection, air-fried for a lighter touch, or baked until beautifully crisp, this recipe offers versatility without compromising on flavor.

Table of Contents
Toggle
About These Amazing Cheese Corn Balls
My journey to creating this incredible cheese corn balls recipe began quite unexpectedly during a baby shower weekend in the beautiful, yet rustic, Hocking Hills region of Ohio. A sudden, torrential downpour led to a cabin-wide power outage, leaving us without cooking facilities. With dinner plans thwarted, we ventured into the nearest small town, where the warm hostess of a local restaurant insisted we try their “famous” cheese corn balls.
What an amazing recommendation it turned out to be! I had never encountered such a dish before, and these golden spheres were an absolute revelation. They were perfectly crispy on the outside, giving way to an incredibly tender, flavorful, and delightfully cheesy interior. This culinary discovery opened my eyes to a whole new world of delicious, fried goodness, and I knew I had to recreate them at home.
This particular recipe for cheese corn balls captures that magic perfectly. The foundation is a comforting blend of fluffy mashed potato and sweet fresh corn kernels, elevated with a generous amount of cheese and a thoughtfully selected mix of spices. It’s a remarkably straightforward recipe, especially when you leverage the efficiency of an Instant Pot to swiftly cook both the potato and corn. Why waste time waiting for water to boil when modern technology can speed things up?
The beauty of these cheese corn balls lies in their balanced texture and flavor. They are incredibly satisfying without being overly heavy, offering a lightness in the creamy center that perfectly complements the golden-brown, crispy crust. They make for an unforgettable appetizer, snack, or even a fun side dish.
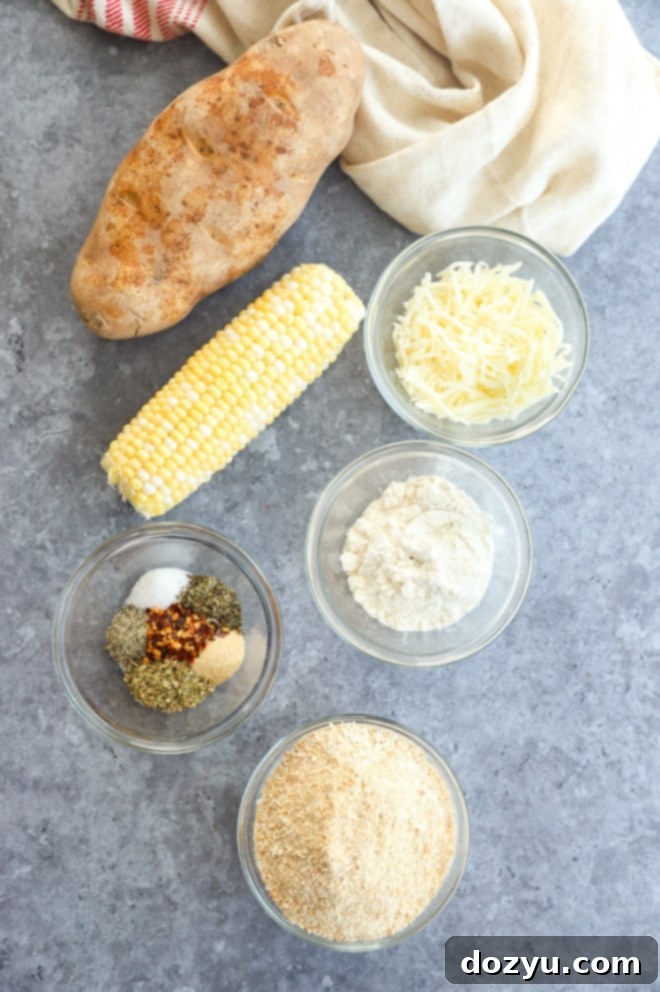
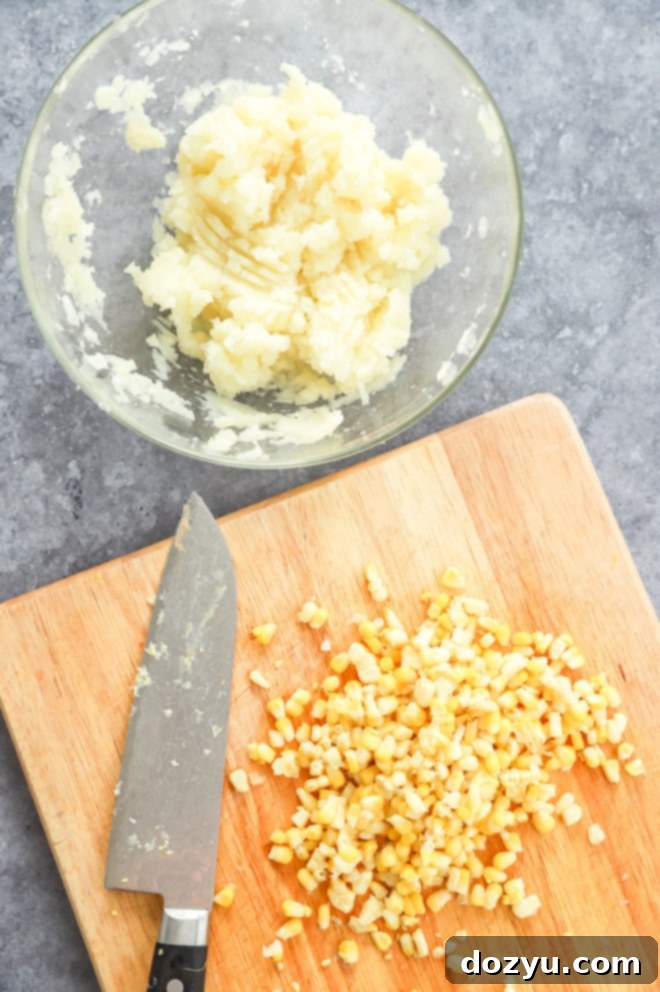
Essential Ingredients for Cheese Corn Balls
Crafting the perfect cheese corn ball starts with selecting high-quality ingredients. Here’s a breakdown of what you’ll need and why:
- Potato: The base of our mixture relies on a fluffy potato. I typically use one large Russet potato, known for its high starch content which makes it ideal for mashing and achieving that creamy consistency. Alternatively, you could use 3 to 4 smaller Yukon Gold potatoes, which offer a slightly buttery flavor and equally smooth texture when mashed. Just ensure they are peeled before cooking.
- Corn: For the best flavor and sweetness, I highly recommend using fresh sweet corn on the cob when it’s in season. Its natural juiciness and vibrant taste truly elevate these balls. However, if fresh corn isn’t available, don’t worry! Frozen or canned corn can also be used. For detailed instructions on how to prepare these alternatives, please refer to the FAQs section below.
- Cheese: The star of the show! Shredded mozzarella cheese is my go-to choice due to its excellent melting properties, which creates that desirable gooey center, and its mild flavor that allows the corn to shine. If you’re feeling adventurous or want to customize the flavor, several other cheese varieties work wonderfully, as discussed in detail in the FAQs.
- Spices: A thoughtful blend of seasonings gives these corn balls their depth. You’ll need freshly ground black pepper and salt to taste, along with dried oregano and dried basil for classic Italian-inspired herbaceous notes. Garlic powder adds a subtle savory punch, and a touch of red pepper chili flakes introduces a hint of warmth and spice. Feel free to adjust the amount of chili flakes to suit your heat preference.
- Flour: All-purpose flour acts as a binder, helping the corn and potato mixture hold its shape. For those with gluten sensitivities, a 1:1 gluten-free flour blend can be successfully substituted without compromising the recipe.
- Bread Crumbs: Plain bread crumbs provide the perfect coating for that satisfyingly crispy exterior. For an extra layer of flavor, Italian bread crumbs infused with herbs and spices are a fantastic option. If you need a gluten-free alternative, gluten-free bread crumbs work just as well to achieve that desirable crunch.
- Oil: For deep frying, I prefer canola oil due to its high smoke point and neutral flavor, which won’t overpower the delicate taste of the corn balls. Vegetable oil is another excellent and widely available option. Ensure you have enough oil to submerge the balls for even frying.
Must-Have Kitchen Equipment
Having the right tools can make all the difference in achieving perfect cheese corn balls with ease. Here are the essential pieces of equipment for this recipe:
- Electric Pressure Cooker or Instant Pot: To cook the corn on the cob and potato efficiently, an electric pressure cooker or Instant Pot Duo or Instant Pot Ultra is invaluable. It drastically cuts down cooking time, getting you to the frying stage much faster.
- Mixing Bowls: You’ll need several mixing bowls for preparing the corn mixture and for setting up your breading station.
- Measuring Spoons: Accurate measuring spoons are crucial for getting the right balance of spices.
- Wooden Spoon or Spatula: For combining ingredients evenly in the mixing bowl.
- Heavy Duty Pot (e.g., Dutch Oven): A Dutch oven or any other heavy-bottomed pot is essential for deep frying. Its thick construction ensures even heat distribution and helps maintain a consistent oil temperature, which is key for perfectly golden and crispy results.
- Spider Strainer or Slotted Spoon: To safely and easily remove the cooked cheese corn balls from the hot oil.
- Meat Thermometer (optional but recommended): For precise oil temperature monitoring during frying, ensuring your balls cook evenly without burning.
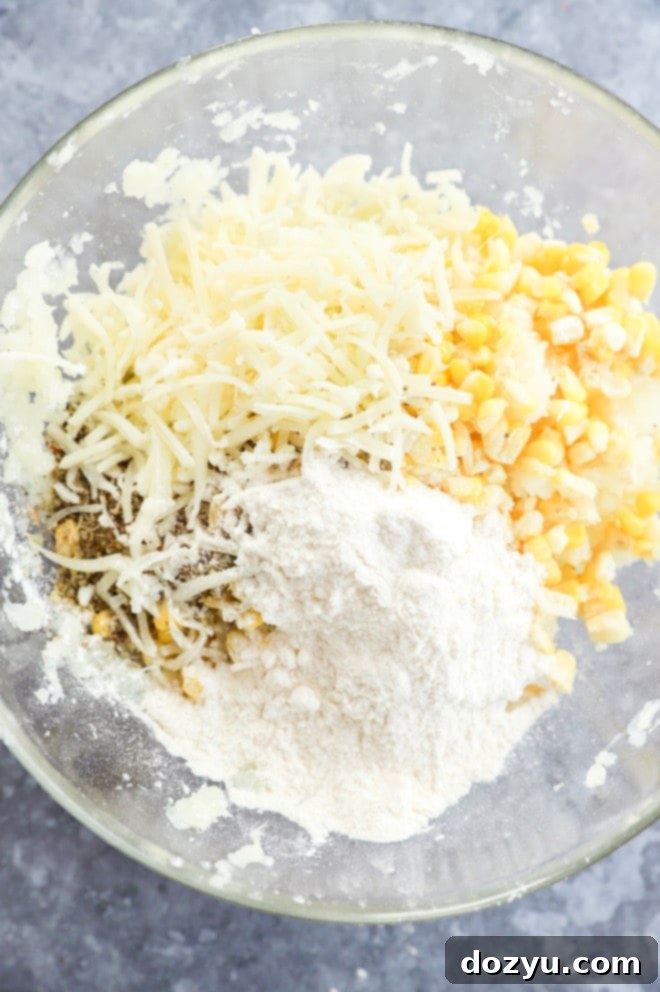
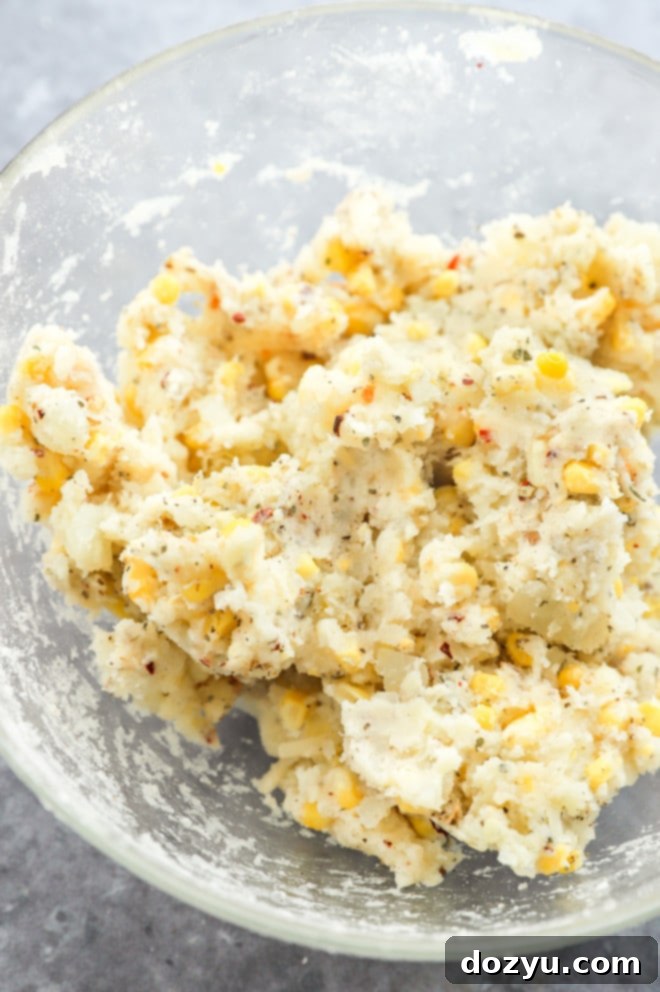
Step-by-Step: How to Make Cheese Corn Balls
Follow these detailed steps to create perfectly crispy and cheesy corn balls at home:
Perfectly Cook Your Corn and Potato
Start by preparing your main ingredients using an electric pressure cooker or Instant Pot for maximum efficiency. Pour 2 cups of water into the bottom of the Instant Pot insert. Place a trivet inside, then carefully set the peeled potato and corn cob on top. Secure the lid and cook on high pressure for 15 minutes. Once the cooking cycle is complete, allow the pressure to naturally release for 5 minutes before manually releasing any remaining pressure. This dual method ensures both ingredients are perfectly tender and ready for mashing.
Once cooled enough to handle safely, remove the potato and corn. In a large mixing bowl, thoroughly mash the potato until it’s smooth and free of lumps. Then, using a sharp knife, carefully slice the kernels off the corn cob. Set both aside, ready for combining.
Create the Flavorful Corn Ball Mixture
To the bowl with the mashed potato, add the fresh corn kernels. Now, it’s time to incorporate all the delicious flavorings: the shredded mozzarella cheese, black pepper, salt, dried oregano, garlic powder, dried basil, and red pepper chili flakes. Finally, sprinkle in the all-purpose flour. Using a sturdy wooden spoon or spatula, stir all the ingredients together until they are evenly combined and form a cohesive mixture. The mixture should be firm enough to handle and shape into balls.
While you’re mixing, begin preparing your oil for frying. Pour enough canola or vegetable oil into a heavy-duty pot, such as a Dutch oven, ensuring it’s about 3 inches deep. Place the pot over medium-high heat and allow the oil to heat up to a temperature between 350˚F and 375˚F (175˚C to 190˚C). Using a kitchen thermometer is highly recommended for accuracy, as proper oil temperature is crucial for crispy, non-greasy results.
Form and Coat Your Delicious Balls
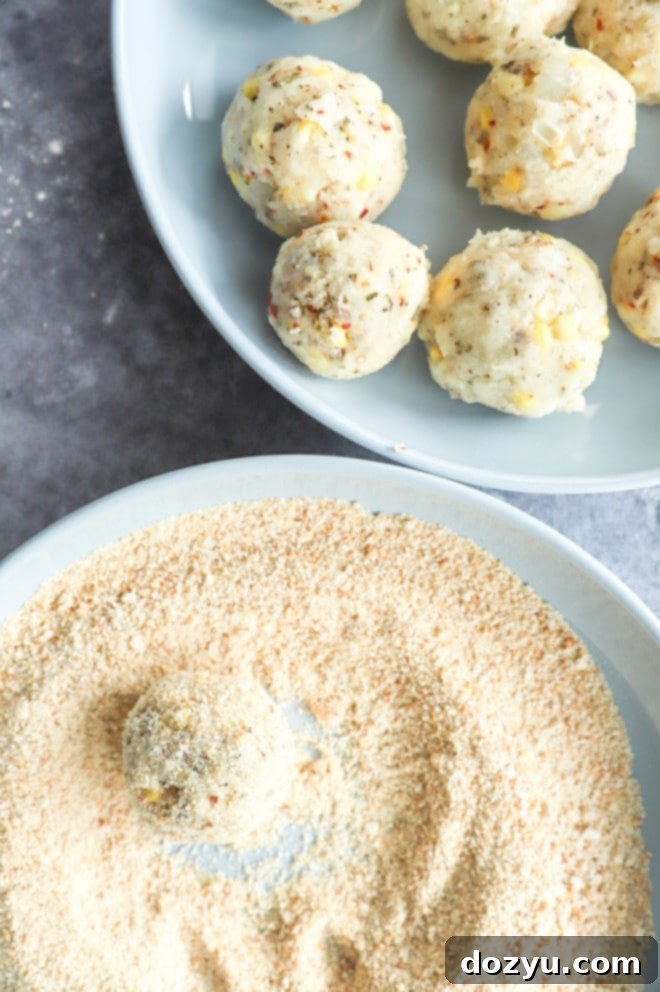
As the oil heats, you can start forming the corn mixture into balls. For easier handling and to prevent the mixture from sticking to your hands, lightly grease your palms with a little olive oil or cooking spray. Roll the mixture into balls, aiming for a consistent size of about 1 to 2 inches in diameter. Uniformity ensures even cooking.
Next, set up a breading station. Place the plain breadcrumbs in a shallow dish. Carefully roll each formed ball in the breadcrumbs, ensuring it’s completely coated on all sides. This breadcrumb coating is what will give your cheese corn balls their signature crispy crust.
Fry to Golden Perfection
Once your oil has reached the target temperature (350-375˚F), it’s time to fry! Gently add the breaded corn balls to the hot oil in batches. Avoid overcrowding the pot, as this can lower the oil temperature and result in soggy balls. Fry them until they are beautifully golden brown and crispy, which typically takes about 5 minutes total. Make sure to flip them halfway through cooking to ensure even browning on all sides.
Once fried, use a spider strainer or slotted spoon to remove the cheese corn balls from the oil. Transfer them to a plate or baking sheet generously lined with paper towels to drain any excess oil. While still hot, sprinkle them with a touch of flaky salt for an extra burst of flavor and a professional finish. Serve immediately with your favorite dipping sauce and enjoy these perfectly crispy and cheesy delights!
Looking for more amazing fried appetizers? You’ll love these: BBQ Fried Mac n Cheese Balls | Berbere Fried Ravioli | Jalapeño Avocado Cream Cheese Wontons | Grilled Vegetable Egg Rolls | Potato Cheese Balls | Cheese Croquettes

Pro Tips and Creative Ideas
Elevate your cheese corn ball game with these helpful tips and ideas:
- Grease Your Hands for Easy Shaping: The corn and potato mixture can be a bit sticky. Before you start rolling, lightly grease your hands with a little olive oil or cooking spray. This simple trick will prevent the mixture from adhering to your palms, making the ball-forming process much smoother and less messy.
- Proper Draining is Key: To ensure your cheese corn balls are perfectly crispy and not greasy, always have a plate generously lined with several layers of paper towels ready before you begin frying. As soon as the balls come out of the hot oil, transfer them directly to the paper towels. This will absorb any excess oil, leaving you with a delightful crunch.
- Watch for Oil Splatter: When frying, fresh corn kernels can sometimes burst due to the high heat, leading to oil splatter. It’s important to keep a close eye on the oil and use a splatter guard if you have one. Always exercise caution when working with hot oil to prevent burns.
- Maintain Oil Temperature: Use a deep-fry thermometer to monitor your oil temperature. Maintaining a consistent temperature between 350°F and 375°F is crucial. If the oil is too cool, the balls will absorb too much oil and become greasy. If it’s too hot, they’ll burn on the outside before the inside is properly heated and the cheese is melted.
- Batch Fry for Best Results: Never overcrowd your pot. Fry the cheese corn balls in small batches to ensure the oil temperature doesn’t drop significantly and that each ball has enough space to cook evenly and turn golden.
- Uniform Size Matters: Aim for balls of roughly the same size (1 to 2 inches in diameter). This ensures they all cook at the same rate, preventing some from being overcooked while others are still raw in the center. A small cookie scoop can help achieve consistency.
- Double Coating for Extra Crunch: For an even crispier crust, consider a double coating. After rolling in breadcrumbs, you can briefly dip the balls in a lightly beaten egg (or a flax egg for a vegan option) and then roll them in breadcrumbs again before frying.
Can I Experiment with Different Cheeses?
Absolutely! While shredded mozzarella cheese is fantastic for its melty goodness and mild flavor, you can certainly change up the cheese to customize the flavor profile of your corn balls. Here are some delicious alternatives and what they bring to the table:
- Pepper Jack: If you love a little heat, pepper jack is an excellent choice. Its spicy kick from the added peppers will infuse a vibrant warmth into each bite, pairing wonderfully with the sweet corn.
- Colby Jack: For a slightly sharper yet still creamy flavor, Colby Jack is a great option. It offers a rich, buttery taste that complements the potatoes and corn beautifully.
- Monterey Jack: Similar to mozzarella in its melting qualities, Monterey Jack provides a creamy, mild flavor that will ensure that satisfying gooey center. It’s a great choice if you want to stick close to the original but try something slightly different.
- Sharp Cheddar: For a bolder, more pronounced cheesy flavor, sharp cheddar is a fantastic pick. Its distinct tanginess will add a new dimension to the corn balls, making them incredibly savory.
- Smoked Gouda: For an elevated, sophisticated flavor, try smoked gouda. Its smoky, nutty notes would create a truly unique and irresistible cheese corn ball.
No matter which cheese you choose, ensure it’s shredded finely to melt evenly within the mixture. All these options blend harmoniously with the existing flavors in the recipe, allowing you to tailor this snack to your personal preferences.
Frying Alternatives: Air Fry or Bake!
While deep frying delivers that quintessential crispy texture, you absolutely don’t have to fry these cheese corn balls if you’re looking for a lighter option or prefer other cooking methods. Here are two fantastic alternatives:
Air Frying for a Crispy, Healthier Option
Air frying is my most preferred alternative to traditional deep frying, as it still yields a wonderfully crispy exterior with significantly less oil.
- Prepare: Lightly grease the insert or basket of your air fryer. This prevents sticking and helps achieve a golden crust.
- Arrange: Place the breaded cheese corn balls in a single layer in the air fryer basket, ensuring they are not touching. You may need to work in batches, depending on the size of your air fryer. Overcrowding can lead to uneven cooking and less crispiness.
- Cook: Air fry at 350˚F (175˚C) for a total of 15 minutes.
- Flip: Halfway through the cooking time (around the 7-8 minute mark), flip the balls to ensure even browning and crispiness on all sides. Continue air frying until they are golden brown and heated through.
The result is a delicious, guilt-free snack that’s still incredibly satisfying!
Baking for a Simple Approach
Baking is another great option, offering a hands-off approach to cooking these cheesy delights. While the crispiness might not be as intense as deep frying or air frying, they will still be deliciously golden and warm.
- Prepare: Preheat your oven to 375˚F (190˚C). Line a baking sheet with a silicone baking mat or parchment paper. For extra browning and to help them crisp up, you can lightly spray the balls with cooking oil before baking.
- Arrange: Place the coated balls on the prepared baking sheet, making sure to space them apart so they are not touching. This allows hot air to circulate around them, promoting even cooking.
- Bake: Bake for 15 to 20 minutes, or until golden brown and heated through.
- Flip: Flip the balls halfway through the baking time to ensure all sides get some crispiness.
Both air frying and baking offer excellent ways to enjoy these cheese corn balls, providing flexibility to suit your cooking preferences and equipment.

Using Frozen or Canned Corn
While fresh corn offers the best texture and flavor, both frozen and canned corn are perfectly acceptable substitutes for this recipe, especially when fresh corn is out of season or unavailable. When using these alternatives, you can skip the initial step of cooking the corn cob in the Instant Pot.
- For Frozen Corn: First, ensure your frozen corn is completely thawed. You can do this by letting it sit in the refrigerator overnight, or by placing it in a colander and running cool water over it until defrosted. Once thawed, it’s crucial to drain any excess liquid thoroughly. Then, pat the corn kernels very dry with paper towels. This step is vital to prevent the mixture from becoming too watery and to help the balls crisp up properly when cooked.
- For Canned Corn: Begin by draining the canned corn completely. After draining, rinse the kernels under cold water to remove any residual sodium or metallic taste. Just like with frozen corn, the most important step is to pat the kernels very dry with paper towels. Excess moisture can affect the consistency of your mixture and the crispiness of the final product.
By taking these simple steps to remove extra moisture, you’ll ensure that your cheese corn balls, whether made with fresh, frozen, or canned corn, turn out delicious every time.
Make-Ahead and Storage Tips
These cheese corn balls are a fantastic make-ahead appetizer, perfect for parties or busy weeknights. Here’s how to prepare them in advance and store any leftovers:
Make Ahead for Easy Entertaining
If you’re planning a party or just want to have a stash of these ready for a quick snack, you can easily prepare a large quantity of cheese corn balls ahead of time and freeze them uncooked.
- Form and Freeze: Prepare the mixture and form the balls as instructed in the recipe. Instead of rolling them in breadcrumbs and frying immediately, place the raw, unbreaded balls on a cookie sheet or baking tray lined with parchment paper. Make sure they are not touching.
- Flash Freeze: Place the tray in the freezer and “flash freeze” the balls until they are completely solid (this usually takes 1-2 hours). This step prevents them from sticking together.
- Store: Once frozen solid, transfer the balls to a resealable freezer bag or an airtight container. They can be stored in the freezer for up to 3 months. Clearly label the bag with the date.
- Cook from Frozen (or thawed): When you’re ready to cook them, you have a couple of options:
- Thaw & Cook: For best results, I recommend letting them thaw overnight in the refrigerator or for about an hour at room temperature on the countertop. Once thawed, roll them in breadcrumbs as instructed and proceed with frying, air frying, or baking.
- Cook from Frozen: You can also fry or air fry them directly from frozen, but you might need to increase the cooking time slightly (by a few minutes) and monitor them closely to ensure they cook through without burning.
Storing Cooked Leftovers
If you have any cooked cheese corn balls remaining (a rare occurrence!), proper storage ensures they stay delicious for future enjoyment.
- Cool Completely: Allow the cooked cheese corn balls to cool completely to room temperature before storing. Storing them while warm can create condensation, leading to sogginess.
- Refrigerate: Place the cooled balls in an airtight container and store them in the refrigerator for up to 2 days.
- Reheat for Best Texture: To restore their crispiness, I highly recommend reheating them in the oven. Preheat your oven to about 350˚F (175˚C) and place the balls on a baking sheet. Heat for 5-10 minutes, or until they are warmed through and the exterior is crisp again. You can also reheat them in an air fryer for a similar crispy result. While microwaving is an option for quick reheating, it often results in a softer, less desirable texture.
Need more inspiration for appetizers? Be sure to check out my comprehensive appetizer recipes page for a wealth of ideas!

What to Serve with Cheese Corn Balls
These versatile cheese corn balls are delicious on their own, but pairing them with the right accompaniments can elevate your snacking experience. Here are some of my favorite ways to serve them:
Dipping Sauces: The Perfect Complement
Dipping sauces are a must for these savory bites! You can go classic or get creative:
- Classic Favorites: Ketchup and ranch dressing are always popular choices, especially for a casual snack.
- Secret Sauce: If you have a favorite “secret sauce” from a certain chicken chain (you know the one!), it works incredibly well with these.
- Homemade Aiolis: For a more gourmet touch, whip up your own aioli. Try a simple garlic aioli, a rich roasted garlic aioli, a smoky chipotle aioli for a bit of spice, or an indulgent bacon aioli for extra savory depth.
Sweet and Savory Twist
For an unexpected and utterly addictive flavor combination, try drizzling the hot cheese corn balls with a touch of honey or hot honey. The blend of sweet and salty notes is truly irresistible and adds a gourmet touch that will impress your guests.
Beverage Pairings for the Perfect Occasion
If you’re serving these for a casual get-together or a summer party, consider these refreshing cocktail pairings:
- Watermelon Vodka Cocktail: A bright and refreshing watermelon vodka cocktail is the ideal summer refresher to complement the sweetness of the corn.
- Lavender Lemonade Cocktail: For a unique and elegant pairing, a lavender lemonade cocktail offers a beautiful balance of sweet, tart, and floral notes.
- Homemade Vodka Lemonade: Keep it classic and simple with the best homemade vodka lemonade, perfect for big-batch patio sipping.
Party Planning
These cheese corn balls are excellent for any celebratory spread. If you’re looking for a full list of party favorites, check out our collection of New Year’s Eve appetizers – don’t let the name fool you, these crowd-pleasing recipes are perfect year-round!
How to Store Leftovers and Freeze
Proper storage is essential to keep your cheese corn balls delicious, whether you’re saving leftovers or prepping ahead. Here’s a comprehensive guide:
Storing Cooked Leftovers (Refrigeration)
Once your cheese corn balls are cooked and cooled, they can be stored for a couple of days:
- Cool Completely: Always allow any leftover cooked cheese corn balls to cool down to room temperature before storing them. This prevents condensation, which can make them soggy.
- Airtight Container: Transfer the cooled balls to an airtight container.
- Refrigerate: Store in the refrigerator for up to 2 days.
- Reheating for Best Texture: To bring back their delicious crispiness, the best way to reheat is in the oven. Place them on a baking sheet and warm them in a preheated oven at 350˚F (175˚C) for about 5 to 10 minutes, or until they are heated through and the exterior is crisp again. An air fryer can also achieve excellent results in a similar timeframe. While you can microwave them, note that the texture won’t be as good, often resulting in a softer exterior.
Freezing Uncooked Cheese Corn Balls (Make-Ahead)
This recipe is excellent for making ahead and freezing for future use. This is perfect for party prep or having quick snacks on hand:
- Prepare and Shape: Follow the recipe instructions through shaping the mixture into balls. Do *not* roll them in breadcrumbs yet.
- Flash Freeze: Place the raw, unbreaded balls in a single layer on a baking sheet lined with parchment paper. Ensure they are not touching each other. Freeze for approximately 1-2 hours, or until they are completely solid. This “flash freezing” step prevents them from clumping together.
- Long-Term Storage: Once frozen solid, transfer the balls to a heavy-duty resealable freezer bag or an airtight freezer-safe container.
- Freeze Duration: They can be stored in the freezer for up to 3 months.
- Thawing Before Cooking: When you’re ready to cook them, you have a couple of options:
- Refrigerator Thaw: For optimal results, thaw the frozen balls overnight in the refrigerator.
- Room Temperature Thaw: Alternatively, let them sit at room temperature for about one hour before proceeding to the next step.
- Bread and Cook: Once thawed (or partially thawed if cooking from frozen), roll the balls in breadcrumbs as instructed in the recipe, and then fry, air fry, or bake them as desired. Adjust cooking times slightly if cooking directly from frozen.

More Mouthwatering Corn Recipes
If you’re a true corn enthusiast, don’t stop with these amazing cheese corn balls! Corn is an incredibly versatile ingredient, perfect for adding sweetness and texture to countless dishes. Here are a few more delicious corn recipes to inspire your culinary adventures:
- Smoky Charred Corn: For a delightful side dish that complements any summer BBQ, this blackened corn recipe is an absolute must-try. The char adds an incredible depth of smoky flavor that’s utterly addictive.
- Creamy Summer Corn Tomato Risotto: Elevate corn to a sophisticated main course with this creamy summer corn tomato risotto. It’s a comforting yet light dish that perfectly captures the essence of summer flavors.
- Grilled Salmon with Charred Corn Avocado Tomato Salsa: Make your grilled salmon truly spectacular by smothering it in a vibrant and fresh charred corn avocado tomato salsa. The combination is a burst of flavors and textures that’s both healthy and satisfying.
We hope you thoroughly enjoy creating and indulging in these irresistible cheese corn balls! If you do make this recipe, please be sure to give it a rating and/or leave a comment below! Your feedback is incredibly valuable, and I truly love hearing about your experiences in the kitchen. I always make an effort to respond to every single comment and answer any questions you might have.
And don’t forget to tag me on Instagram if you share your creations! Seeing these recipes come to life in your homes is one of my favorite things, and it genuinely means the world to me. Happy cooking!

Cheese Corn Balls Recipe Card
Equipment
-
Instant Pot DUO
-
Instant Pot Ultra
-
Instant Pot Max
-
Measuring Spoons
-
Mixing Bowls
-
Dutch Oven
Ingredients
- 1 large Russet potato peeled
- 1 large corn cob (fresh is best!)
- 1/2 cup shredded mozzarella cheese (or preferred cheese)
- 1/2 tsp black pepper
- 1/2 tsp salt
- 1 tsp dried oregano
- 1/2 tsp garlic powder
- 1/2 tsp dried basil
- 1/2 tsp red chili pepper flakes or more if you like it spicy!
- 1/4 cup all-purpose flour (or gluten-free 1:1 flour)
- 1 cup plain bread crumbs (or Italian, or gluten-free)
- Oil for deep frying (canola or vegetable)
- Flaky salt (for sprinkling)
Instructions
-
Add 2 cups of water to the insert of an electric pressure cooker or Instant Pot. Place a trivet in the insert, then set the peeled potato and corn cob on top. Cook for 15 minutes on High pressure. Allow the pressure to naturally release for 5 minutes, then manually release any remaining pressure.
-
Carefully remove the potato and corn cob and let them cool until they are easy to handle. In a large bowl, mash the potato thoroughly until smooth. With a sharp knife, remove the corn kernels from the cob.
-
Add the corn kernels, shredded cheese, black pepper, salt, dried oregano, garlic powder, dried basil, red chili pepper flakes, and all-purpose flour to the mashed potato. Stir vigorously with a wooden spoon until all ingredients are well combined and form a cohesive mixture.
-
Pour canola or vegetable oil into a heavy-duty pot or Dutch oven, ensuring it is about 3 inches deep. Heat the oil over medium-high heat until it reaches a temperature of 350˚F – 375˚F (175˚C to 190˚C). Use a kitchen thermometer for accuracy.
-
While the oil heats, lightly grease your hands with olive oil or cooking spray. Form the corn and potato mixture into uniform balls, approximately 1 to 2 inches in diameter.
-
Place the plain bread crumbs in a shallow dish. Roll each formed ball thoroughly in the bread crumbs until completely coated. Fry the breaded balls in batches in the hot oil, being careful not to overcrowd the pan. Fry for about 5 minutes total, flipping them halfway through, until they are golden brown and crispy on all sides.
-
Using a spider strainer or slotted spoon, remove the cooked cheese corn balls from the oil and transfer them to a plate or baking sheet lined with paper towels to drain any excess oil.
-
While still warm, sprinkle the cheese corn balls with flaky salt. Serve immediately with your favorite dipping sauce(s) and enjoy!
