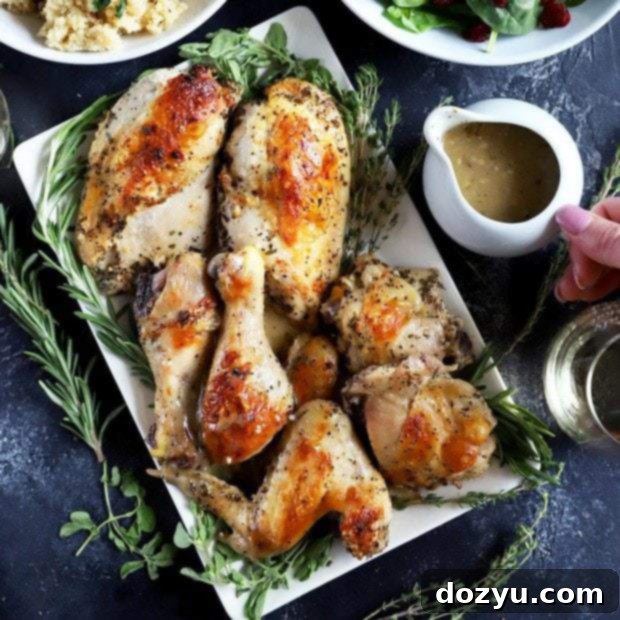
Perfectly Roasted Chicken with White Wine & Fresh Herbs: Your Ultimate Guide
Discover the magic of a beautifully roasted chicken infused with aromatic white wine and fresh herbs – a dish so versatile it shines as both a simple weeknight dinner and an impressive centerpiece for any dinner party. Learn how breaking down a whole chicken into individual pieces not only accelerates cooking time but also guarantees that coveted crispy skin, while locking in incredible flavor. This guide will walk you through every step to achieve roasted chicken perfection.
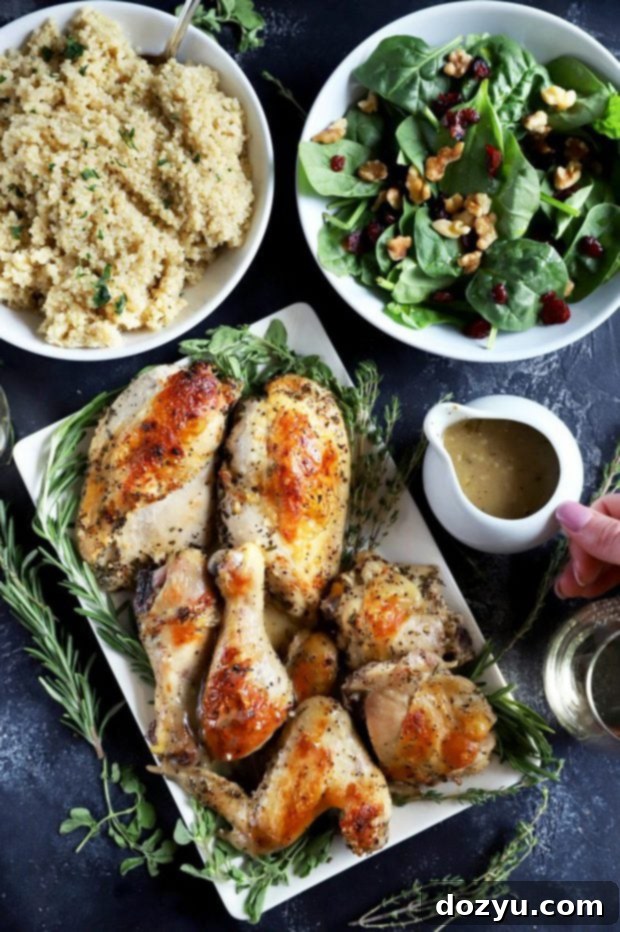
Table of Contents
Toggle
About This Roasted Chicken with White Wine and Herbs Recipe
There’s something incredibly satisfying about mastering a classic dish, and for me, breaking down a whole chicken for the first time was exactly that kind of culinary triumph! While many home cooks might routinely opt for pre-portioned chicken breasts or thighs, venturing into the world of butchering a whole bird opens up a realm of possibilities – and significant savings.
For years, I stuck to the convenience of buying pre-cut chicken from the supermarket, often out of a mild apprehension about handling a whole chicken and the sharpness of my knives. The fear wasn’t just about making a mess, but also the dreaded thought of improper cuts or, worse, a kitchen accident. If you’ve ever felt a similar hesitation, rest assured, you’re not alone. Many passionate home cooks share this initial intimidation when it comes to poultry prep.
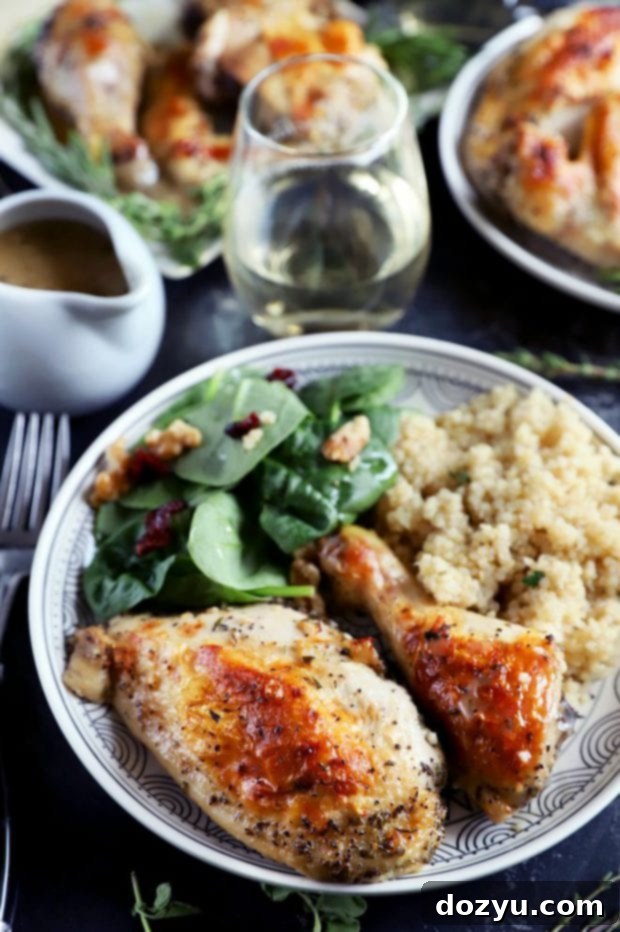
However, the moment I successfully transformed a whole chicken into perfectly portioned pieces, a wave of exhilaration washed over me. It was more than just a cooking task; it felt like conquering a personal culinary Everest. This newfound confidence paved the way for creating this exquisite Roasted Chicken with White Wine and Fresh Herbs recipe.
The beauty of this recipe lies not just in its ease but also in its incredible aroma and flavor. As the chicken roasts, your kitchen will be enveloped in an intoxicating fragrance – a harmonious blend of fragrant fresh herbs, savory garlic, and crisp white wine. This sensory experience alone elevates the meal beyond mere sustenance.
Designed for both efficiency and elegance, this dish is a true crowd-pleaser. It requires minimal active preparation – typically less than 10 minutes – allowing you to enjoy a delicious, homemade meal even on the busiest weeknights. Yet, its sophisticated flavors and appealing presentation make it equally suitable for entertaining guests. Roast it, pair it with your favorite vegetables, and get ready for rave reviews. Your family might just declare it a new weekly favorite!
(Originally published on October 7th, 2014, this beloved recipe has been refreshed and updated with new photos and expanded notes to enhance your cooking experience!)

Essential Ingredients for Flavorful Roasted Chicken
Crafting this succulent roasted chicken requires just a few high-quality ingredients. Each component plays a crucial role in building the rich, savory, and aromatic profile that makes this dish so irresistible.
- Whole Chicken: Opting for a whole chicken is not only more economical but also offers a fantastic opportunity to utilize all parts. Breaking it down yourself allows you to save the carcass and other trimmings for making a flavorful homemade chicken stock – a great way to reduce food waste and enhance future meals. Look for a fresh, plump chicken from a reputable source for the best flavor and texture.
- Garlic: The cornerstone of so many delicious savory dishes, garlic brings a robust, pungent flavor that mellows and sweetens as it roasts. While peeling and dicing fresh cloves is always an option for the most potent flavor, a jar of pre-minced garlic is a fantastic shortcut. It saves time and keeps your hands free from that lingering garlic scent, making weeknight cooking even easier.
- Fresh Herbs: The selection of fresh herbs is key to the aromatic depth of this roasted chicken. This recipe calls for a vibrant combination of fresh rosemary, thyme, and oregano. Rosemary offers a piney, earthy note; thyme contributes a subtle, peppery, and floral essence; and oregano adds a robust, slightly bitter, and warm flavor. For a delightful variation, consider swapping one of these for fresh sage, which provides a wonderfully aromatic and slightly peppery taste, especially lovely with poultry.
- Dry White Wine: White wine is more than just a liquid for the pan; it deglazes, infuses moisture, and adds a layer of sophisticated acidity and fruitiness to the chicken and its accompanying sauce. Any dry white wine will work beautifully. Excellent choices include Pinot Gris, Sauvignon Blanc, or an unoaked Chardonnay. Their crispness will complement the rich chicken without overpowering it. If you prefer to cook without alcohol, a good quality chicken stock can be used as a flavorful substitute, yielding equally delicious results.
- Olive Oil: Extra virgin olive oil is preferred for its rich flavor and ability to withstand roasting temperatures. It helps to crisp the chicken skin beautifully and carries the flavors of the herbs and garlic throughout the dish.
- Salt and Pepper: These fundamental seasonings are essential for bringing out the natural flavors of the chicken and herbs. I always recommend using kosher salt for its consistent texture and cleaner taste, and freshly cracked black pepper for its superior aroma and pungent kick. Season generously to ensure every bite is perfectly balanced.

Kitchen Tools for Perfect Roasted Chicken
Having the right tools can make all the difference in the kitchen, turning a daunting task into an enjoyable process. For this roasted chicken recipe, a few essential items will ensure your cooking experience is smooth and successful, from preparation to serving.
- High-Quality Roasting Dish: While not explicitly pictured, a sturdy, heavy-duty roasting dish is invaluable. My personal favorite is a Le Creuset baking dish (especially in classic cherry red!). These dishes provide even heat distribution, which is crucial for perfectly roasted chicken and developing those delicious pan juices that form the base of our sauce. Their excellent heat retention also keeps the chicken warm once it’s out of the oven.
- Reliable Tongs: A good set of 9-inch kitchen tongs is indispensable for handling raw chicken and turning the pieces in the white wine sauce without direct contact. This not only promotes hygiene but also ensures you can easily maneuver the chicken for even coating and browning, without making a mess or getting “chicken hands.”
- Sharp Chef’s Knife: Perhaps the most critical tool, especially if you’re breaking down a whole chicken, is a high-quality, razor-sharp chef’s knife. This will make the task of separating the chicken into pieces much safer and more efficient. A dull knife is actually more dangerous than a sharp one, as it requires more force and can slip. I’ve relied on a set of Shun knives for many years, and they’ve maintained their incredible sharpness, making every cutting task a breeze. Investing in a good knife is a game-changer for any serious home cook.
Many home cooks, myself included, harbor a healthy respect—or even a slight fear—of sharp knives, especially when dealing with something as inherently slippery as raw poultry. The thought of ‘butchering’ the chicken incorrectly or, worse, slicing a finger, is a common concern. However, with the right knife and a bit of guidance, this fear can be overcome, transforming a potentially intimidating task into a surprisingly empowering culinary skill. Trust me, it’s a feeling of accomplishment you’ll savor, almost as much as the roasted chicken itself!
Step-by-Step: How to Make Roasted Chicken with White Wine and Fresh Herbs
This recipe is surprisingly straightforward, relying on simple techniques to coax maximum flavor from minimal effort. Follow these steps for a perfectly roasted chicken every time.
Preparing the Chicken for Roasting
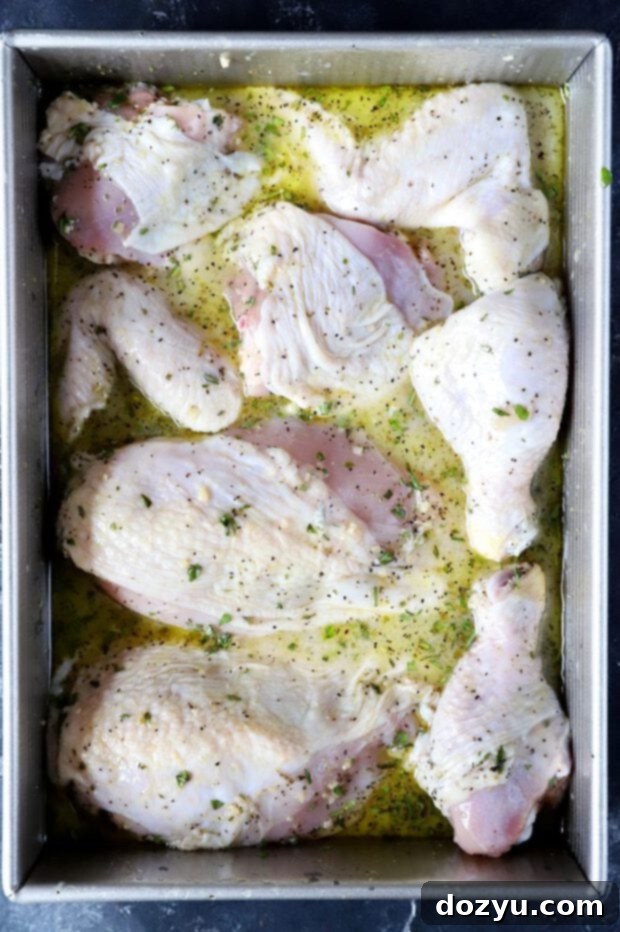
Begin by preheating your oven to 415°F (218°C) to ensure it’s at the optimal temperature for roasting as soon as your chicken is ready. In the bottom of your chosen large baking dish or roasting pan, combine the extra virgin olive oil, dry white wine, diced garlic, chopped fresh herbs (rosemary, thyme, and oregano), salt, and freshly cracked black pepper. Whisk these ingredients together thoroughly until they are well combined. This mixture will form the flavorful liquid base for your chicken and eventually become your delicious pan sauce.
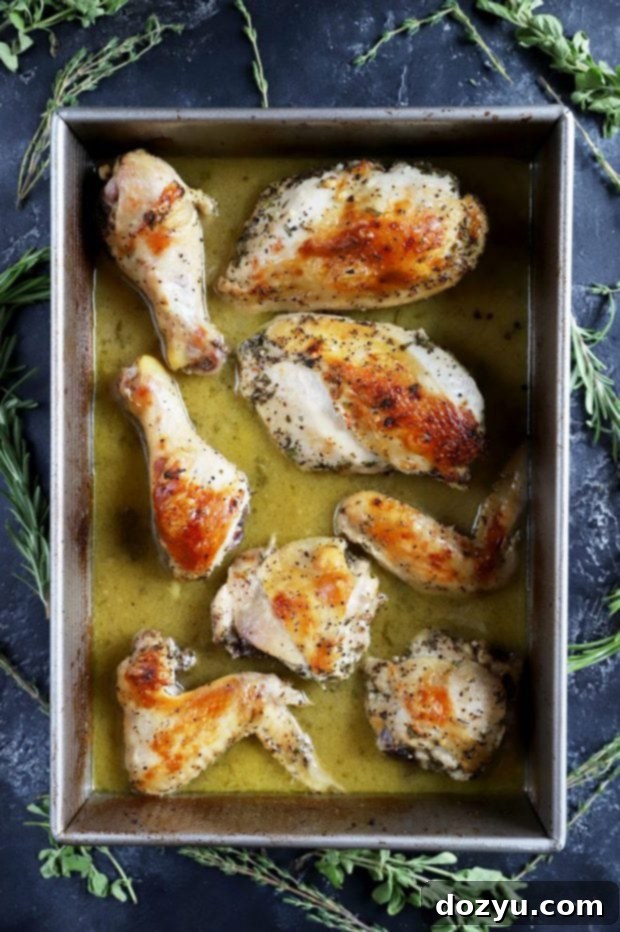
Carefully place your broken-down chicken pieces into the seasoned white wine mixture in the pan. There’s no need for a separate roasting rack as the chicken will sit directly in the liquid, allowing it to braise slightly and absorb all the wonderful flavors. Turn the chicken pieces over a few times to ensure they are generously coated on all sides. Finally, arrange the chicken skin-side up in a single layer. This orientation is crucial for achieving that desirable crispy skin during roasting. Place the baking dish on the middle rack of your preheated oven.
Roasting for Crispy Skin and Tender Meat
Roast the chicken for 25 to 30 minutes at 415°F (218°C). The exact cooking time may vary slightly depending on the size of your chicken pieces and your oven’s calibration. The most reliable way to determine doneness is by using an instant-read meat thermometer. The chicken is fully cooked and safe to eat when it reaches an internal temperature of 165°F (74°C) in the thickest part of the meat, avoiding the bone. For even cooking, you may want to rotate the pan halfway through.
If you find that your chicken skin isn’t as golden and crispy as you’d like after the initial roasting period, you can achieve a beautifully browned finish under the broiler. Carefully transfer the baking dish to a position closer to the broiler element (typically the top rack) and broil for the last 3 to 5 minutes of cooking. Crucially, do not walk away during this step! Broilers can brown very quickly, and chicken skin can go from perfectly crisp to burnt in a matter of seconds. Keep a close eye on it to prevent burning.
Crafting the Aromatic Pan Sauce
Once the chicken is cooked through and beautifully golden, carefully remove the baking dish from the oven. Transfer the roasted chicken pieces to a clean serving platter or cutting board and tent them loosely with foil. Allowing the chicken to rest for 5-10 minutes is a vital step; it allows the juices to redistribute throughout the meat, resulting in a more tender and flavorful bite. Skipping this step can lead to dry chicken.
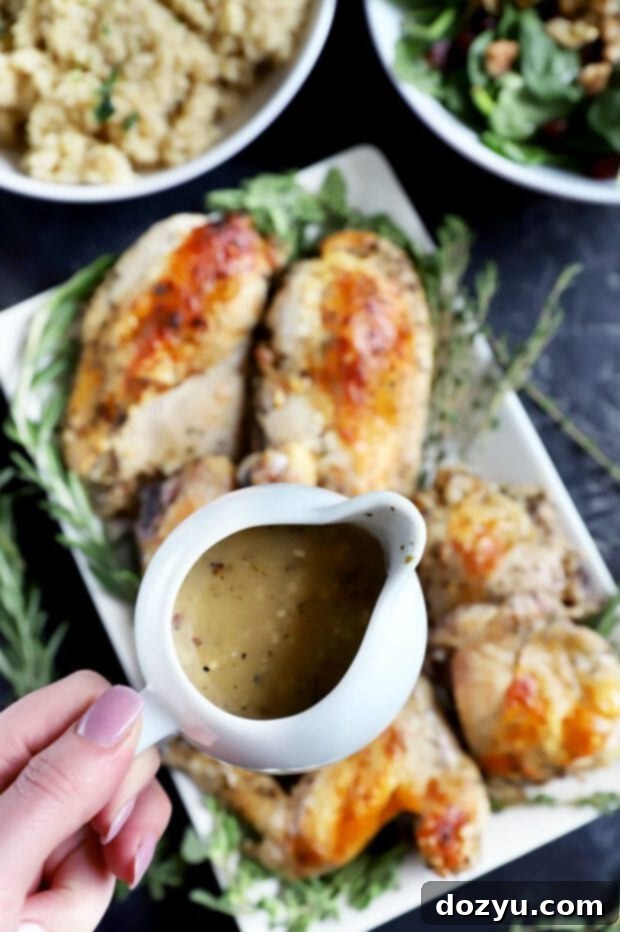
While the chicken is resting, turn your attention to the glorious pan juices left in the bottom of the baking dish. These are liquid gold, packed with concentrated flavors from the chicken, herbs, garlic, and white wine. Carefully pour these juices into a small saucepan. Place the saucepan over medium-high heat and bring the liquid to a rolling boil. Continue to boil, stirring occasionally, for approximately 5 to 6 minutes, or until the sauce has visibly thickened and reduced to your desired consistency. This reduction process intensifies the flavors, creating a rich, savory, and aromatic sauce that is the perfect accompaniment to your roasted chicken.
Finally, serve the perfectly roasted chicken, drizzled generously with the homemade pan sauce. Enjoy!
Pro Tips for Roasted Chicken Success
Achieving perfectly roasted chicken is simpler than you might think, especially with a few professional tips in your arsenal. These pointers will help you consistently create juicy, flavorful chicken with crispy skin.
- Invest in an Instant-Read Meat Thermometer: This is arguably the most important tool for ensuring perfectly cooked poultry. Overcooked chicken is dry and unappetizing, while undercooked chicken is unsafe. An instant-read meat thermometer takes the guesswork out of cooking. Insert it into the thickest part of the chicken (avoiding the bone) to confirm it has reached the safe internal temperature of 165°F (74°C). This simple step guarantees tender, moist meat every time.
- Pat the Chicken Dry: Before seasoning and roasting, always pat your chicken pieces thoroughly dry with paper towels. Excess moisture on the skin is the enemy of crispiness. A dry surface allows the skin to render fat and crisp up beautifully in the hot oven.
- Don’t Overcrowd the Pan: For optimal browning and crispy skin, ensure there’s enough space between your chicken pieces in the roasting dish. If the pan is too crowded, the chicken will steam rather than roast, leading to pale, rubbery skin. Use two pans if necessary.
- Rest the Meat: After roasting, it’s crucial to let the chicken rest for at least 5-10 minutes before carving or serving. This allows the juices, which have been drawn to the surface during cooking, to redistribute throughout the meat. The result is a much juicier and more tender chicken.
- Enjoy Roasted Chicken in Multiple Ways: This roasted chicken is magnificent as a standalone dinner, but its versatility extends far beyond that. Don’t let leftovers go to waste! The cooked meat can be easily sliced, shredded, or cubed and incorporated into a variety of dishes throughout the week. Think flavorful additions to grain bowls, vibrant salads, hearty sandwiches, tacos, wraps, or even pasta dishes. It’s an excellent component for meal prep, making your future meals quick and delicious.
Craving more delicious roasted chicken recipes? Explore these fantastic options: Berbere Roasted Chicken / Creamy White Wine & Garlic Roasted Chicken Thighs
Mastering the Art of Breaking Down a Whole Chicken
If the idea of breaking down a whole chicken feels intimidating, you’re not alone. However, it’s a fundamental skill that’s not only empowering but also highly practical. By processing a whole chicken yourself, you gain fresh, custom-sized pieces for roasting, and you get to keep the valuable carcass for making homemade stock, which is far superior to store-bought varieties.
Learning this technique also helps you understand the anatomy of the bird, which can improve your cooking intuition. It allows for more even cooking, as different parts of the chicken (breasts, thighs, drumsticks, wings) cook at slightly different rates. Plus, it’s significantly more cost-effective than buying pre-portioned cuts.
For a comprehensive, step-by-step guide complete with helpful pictures, I highly recommend checking out my detailed post on how to break down a whole chicken on Foodal. This resource will walk you through the process easily, making you a confident chicken butcher in no time!
Remember, always reserve the backbone and carcass. These seemingly leftover pieces are packed with flavor and make the richest, most nourishing homemade chicken stock, perfect for soups, sauces, and gravies.
Ensuring Doneness: What Temperature Should Roasted Chicken Be?
Food safety and optimal taste go hand in hand when roasting chicken. The most accurate way to ensure your chicken is perfectly cooked, juicy, and safe to eat is by checking its internal temperature with an instant-read meat thermometer. The USDA recommends cooking chicken to an internal temperature of 165°F (74°C).
Here’s how to do it correctly:
- Insert Properly: Always insert the thermometer into the thickest part of the meat, being careful not to touch any bones, as bones heat up faster than meat and can give a falsely high reading. For chicken pieces, check the thickest part of the thigh and the thickest part of the breast.
- Check Each Piece: Since different cuts of chicken vary in thickness, some pieces might cook faster than others. It’s a good practice to check each individual piece, especially if you’re roasting a broken-down whole chicken.
- Adjust as Needed: If some pieces reach 165°F while others are still under, remove the cooked pieces from the pan and tent them with foil to rest. Return the pan with the undercooked pieces to the oven for a few more minutes until they reach the target temperature. This prevents overcooking the smaller pieces while ensuring everything is safe to eat.
Don’t rely solely on visual cues, as chicken can still look pink but be fully cooked, or appear done but still be undercooked in the center. A thermometer is your best friend for peace of mind and delicious results!
Seeking more dinner ideas for the week? Dive into my extensive main dish recipes page for inspiration!
Perfect Pairings: What to Serve with White Wine and Herb Roasted Chicken
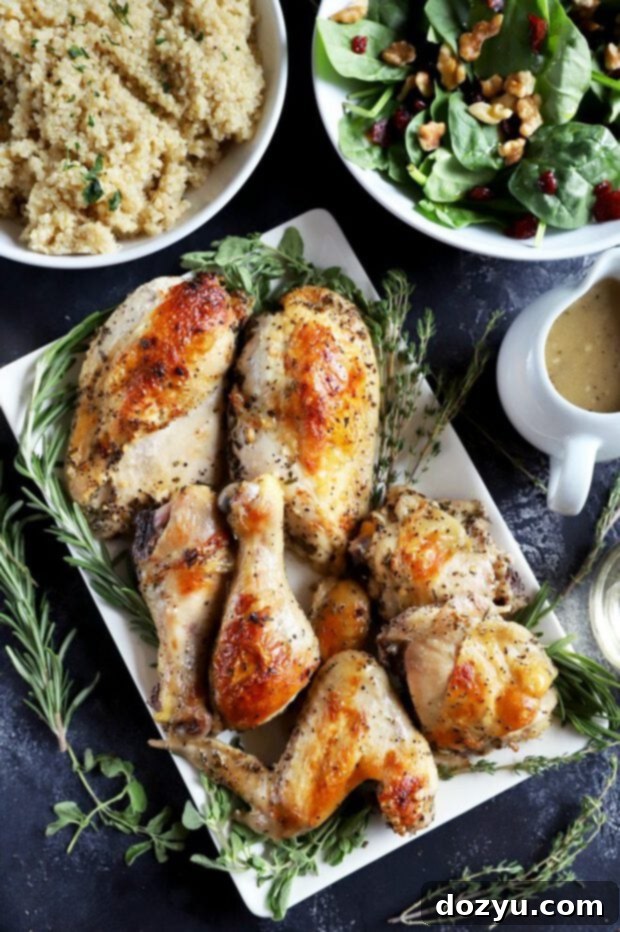
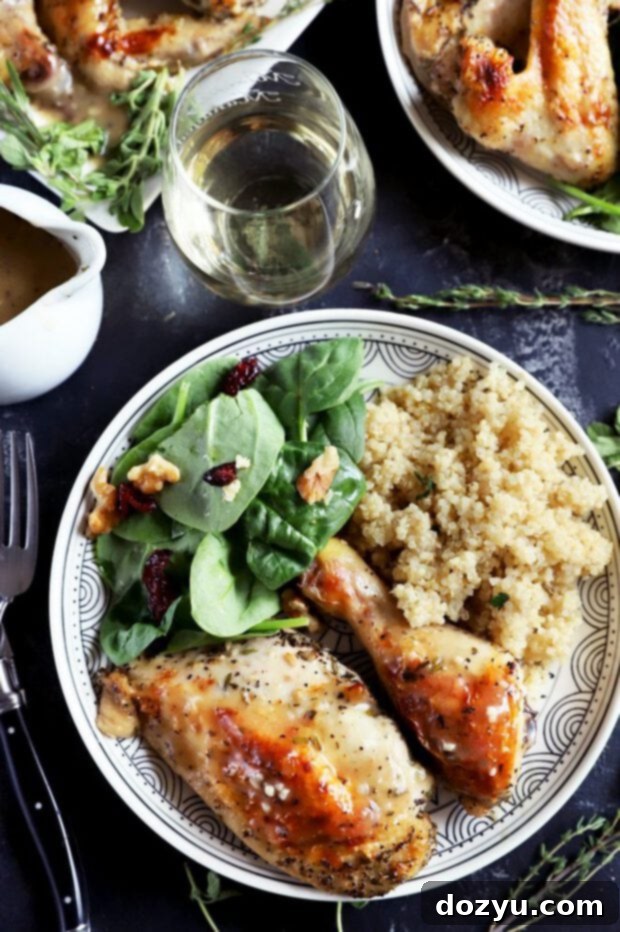
One of the many joys of this white wine and herb roasted chicken is its incredible versatility when it comes to side dishes. Its savory, aromatic profile makes it a perfect partner for a wide array of flavors and textures. Whether you’re aiming for a comforting family meal or an elegant dinner party spread, there’s a side dish to match. Here are some personal favorites and fantastic recommendations to complete your meal:
- Creative Potato Dishes:
- For a fun and flavorful twist on traditional mashed potatoes, try Chook Smashed Sweet Potatoes with Fresh Herbs. Their slight sweetness and creamy texture, complemented by fresh herbs, are a delightful contrast to the savory chicken.
- You can never go wrong with classic homemade mashed potatoes. They are a universally loved side, especially appealing to kids, and provide a comforting bed for the delicious pan sauce.
- If you prefer crispy potatoes, these intensely flavorful fried Mexican potatoes or rustic oven-fried potatoes and onions offer fantastic texture and taste.
- For an innovative potato side, potato fritters, served with a dollop of sour cream and fresh chives, add an unexpected and delicious element.
- Vibrant Vegetable Accompaniments:
- Add a delightful kick with Spicy-Sweet Roasted Broccolini. It’s bursting with flavor and requires minimal effort, perfectly balancing the richness of the chicken.
- My absolute favorite way to enjoy broccoli is Crispy Roasted Broccoli with Roasted Garlic Aioli. The crisp florets paired with a creamy, pungent aioli create a truly addictive side.
- For a touch of sweetness and earthiness, these sweet and savory honey-roasted carrots and parsnips are a simple yet elegant way to get your daily dose of vegetables.
- On a chilly evening, a vegetarian cheesy broccoli casserole offers warmth and creamy indulgence that pairs wonderfully with roasted chicken.
- Hearty Grain Dishes:
- A simple yet classic choice is Longhorn Steakhouse Rice Pilaf. Its savory notes and fluffy texture make it an excellent, easy-to-prepare pairing.
- For a more sophisticated and comforting option, tender and creamy Risotto with Asparagus and Peas is simple, flavorful, and particularly delightful in the spring.
Storing and Reheating Leftover Roasted Chicken
Proper storage and reheating are key to enjoying your delicious roasted chicken leftovers without compromising on flavor or texture. Here’s how to ensure your meal remains just as enjoyable the next day.
- Storage: Once your roasted chicken has cooled completely to room temperature (this is important to prevent bacterial growth and condensation that can make the skin soggy), transfer both the chicken pieces and any leftover pan sauce into separate airtight containers. Refrigerate promptly. Stored correctly, your roasted chicken and sauce will keep fresh in the refrigerator for up to 3 to 4 days. For longer storage, you can freeze the cooked chicken (without the sauce, as the texture can change upon thawing) for up to 2-3 months.
- Reheating: To reheat the chicken and restore its deliciousness, place the leftover pieces in a baking dish. To prevent the chicken from drying out, it’s best to cover the dish loosely with aluminum foil. Bake in a preheated oven at 350°F (175°C) until the chicken is heated through to an internal temperature of 165°F (74°C). If you want to regain that crispy skin, remove the foil for the last 5-10 minutes of reheating. The reserved pan sauce can be gently reheated in a small saucepan over medium heat on the stovetop, stirring occasionally, until it’s warmed through and slightly simmering. Avoid boiling the sauce aggressively when reheating, as this can cause it to reduce too much or alter its consistency. Serve the reheated chicken with the warmed sauce for a meal that’s almost as good as fresh!
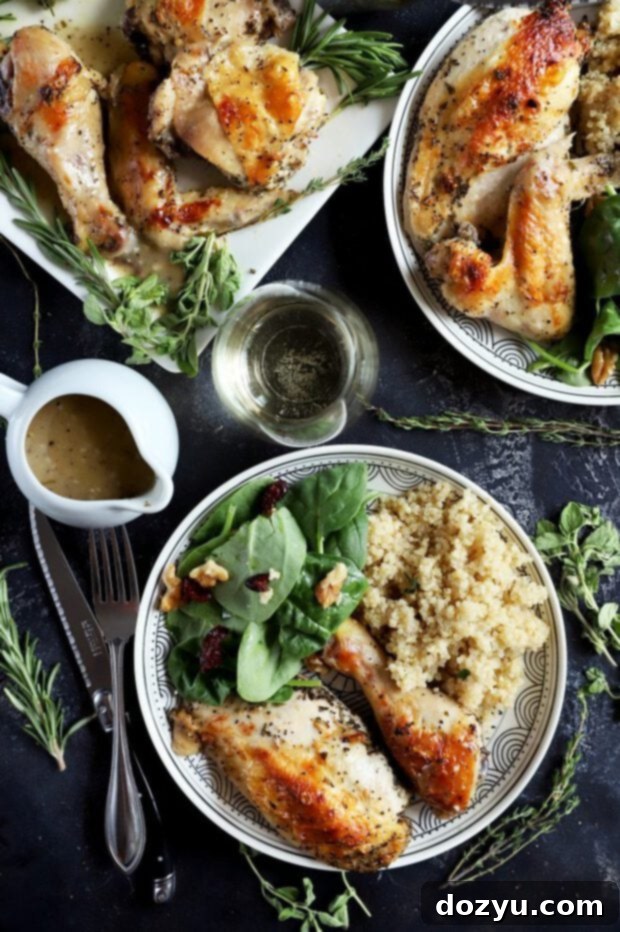
We absolutely love hearing from you! If you try this fantastic roasted chicken recipe, please consider leaving a star rating on the recipe card below and/or sharing your thoughts in the comments section. Your feedback is invaluable, and I always make an effort to respond to every comment. Feel free to ask any questions you might have about the recipe, and I’ll be happy to help!
Don’t forget to tag me on Instagram, Facebook, or Pinterest when you make this dish! It’s truly inspiring to see these recipes come to life in your kitchens, and it brings me immense joy to browse through your photos. Your culinary creations mean the world to me!
To stay updated with my latest recipes, cooking tips, and exclusive news, be sure to sign up for my newsletter. Happy cooking!
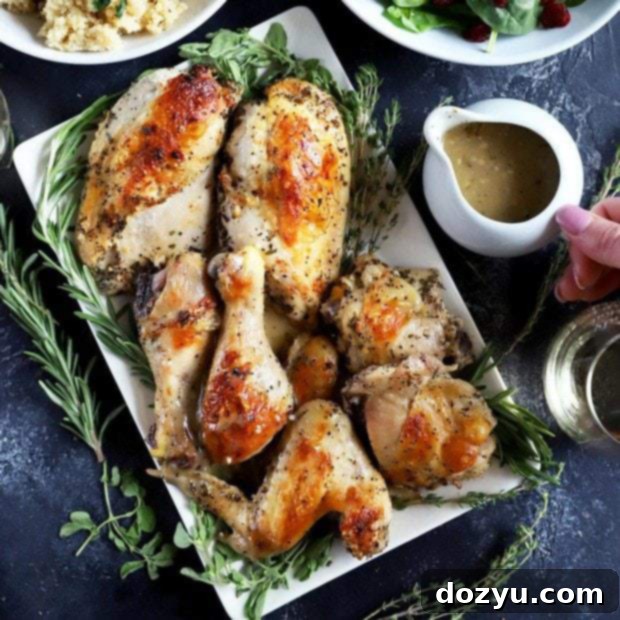
Roasted Chicken with White Wine and Fresh Herbs (Recipe Card)
Equipment for This Recipe
-
Utility Cutting Board
-
Le Creuset Stoneware Rectangular Dish
-
9-Inch Tongs
-
Shun Classic Western Chef’s Knife, 8-Inch
Recipe Ingredients
- 1 whole chicken cut into 6-8 pieces
- 6 cloves garlic diced or minced
- 1 Tbsp fresh thyme chopped
- 1 Tbsp fresh rosemary chopped
- 1 Tbsp fresh oregano chopped
- 3 Tbsp extra virgin olive oil
- 1 cup dry white wine (or chicken stock)
- 1/2 Tbsp kosher salt
- 1/2 Tbsp freshly cracked black pepper
Cooking Instructions
-
Preheat your oven to 415˚F (218°C).
-
In a large roasting pan or baking dish, whisk together the olive oil, white wine (or chicken stock), minced garlic, fresh herbs (thyme, rosemary, oregano), salt, and pepper. Stir until all ingredients are well combined.
-
Place the chicken pieces into the seasoned mixture at the bottom of the pan. Turn them over a few times to ensure they are thoroughly coated. Arrange the chicken pieces skin-side up in a single layer and place the roasting pan on the middle rack of the oven.
-
Roast the chicken for 25 to 30 minutes, or until an instant-read meat thermometer inserted into the thickest part of the chicken (avoiding the bone) registers 165˚F (74°C).
-
For extra crispy, browned skin, you can carefully turn on the broiler during the last 3-5 minutes of cooking. Watch closely to prevent burning.
-
Remove the chicken from the pan and transfer to a serving platter to rest, tented loosely with foil, for 5-10 minutes. While the chicken rests, pour the remaining pan juices into a small saucepan. Bring to a boil over medium-high heat and cook for about 5 to 6 minutes, stirring occasionally, until the sauce thickens and reduces.
-
Serve the roasted chicken immediately, drizzled with the flavorful pan sauce.
Important Notes
Nutrition Facts
Carbohydrates: 5g |
Protein: 36g |
Fat: 39g |
Saturated Fat: 10g |
Polyunsaturated Fat: 7g |
Monounsaturated Fat: 20g |
Trans Fat: 0.2g |
Cholesterol: 143mg |
Sodium: 1010mg |
Potassium: 461mg |
Fiber: 1g |
Sugar: 1g |
Vitamin A: 390IU |
Vitamin C: 7mg |
Calcium: 67mg |
Iron: 3mg
