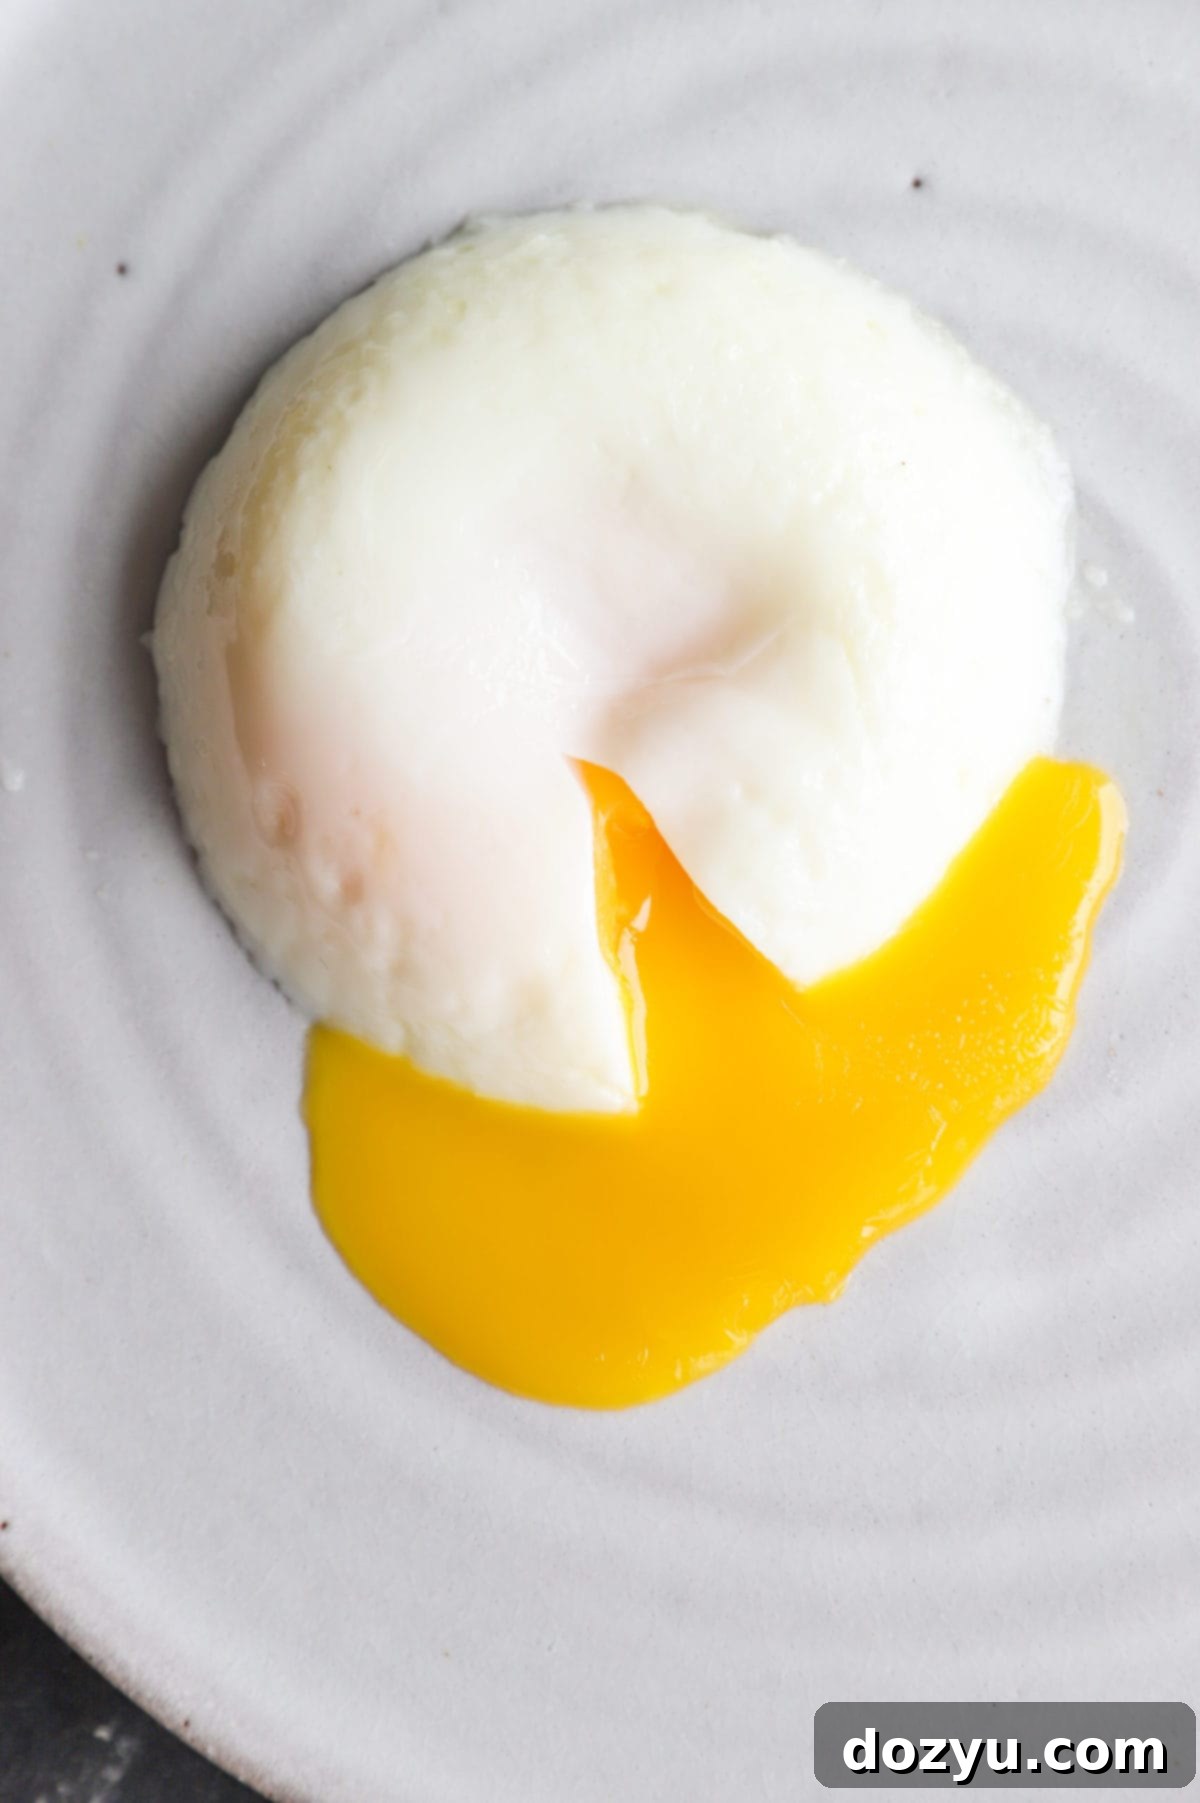
Effortless Instant Pot Poached Eggs: Achieve Perfect Runny Yolks Every Time
Transform your breakfast routine with the easiest and most reliable method for making poached eggs – the Instant Pot! Forget the fuss of stovetop swirling and uncertain outcomes; with your electric pressure cooker, you’ll achieve perfectly runny yolks and tender whites, consistently and effortlessly. This guide unlocks the secret to making luxurious Instant Pot poached eggs in mere minutes, elevating everyday meals into a gourmet experience that is truly attainable for everyone.
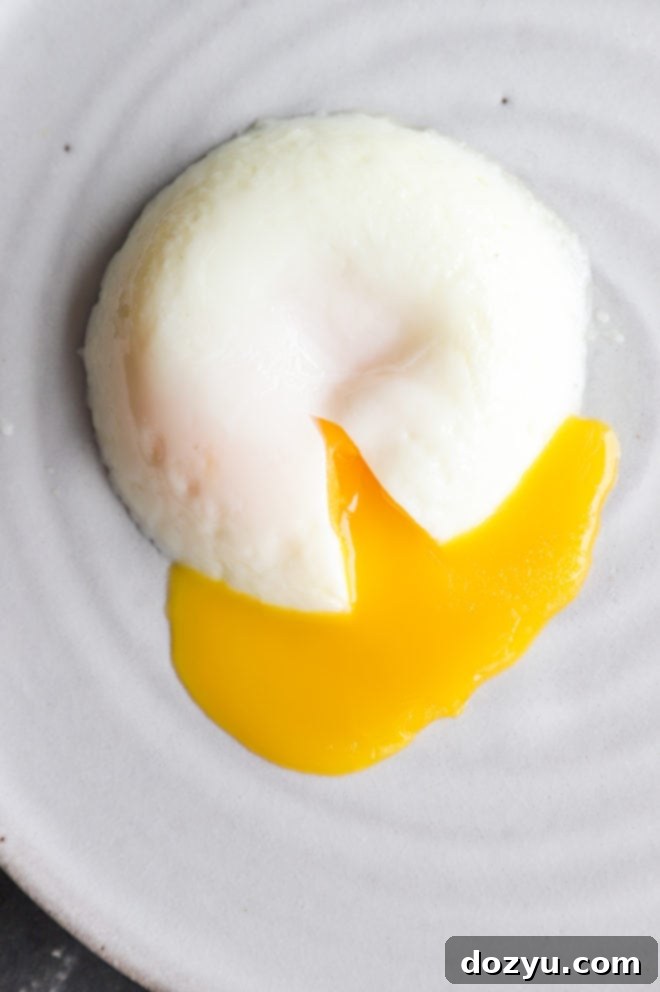
Table of Contents
Toggle
About These Instant Pot Poached Eggs
For too long, the idea of perfectly poached eggs has been reserved for restaurant brunches or leisurely weekend mornings with an abundance of time and patience. However, thanks to the magic of the Instant Pot, this culinary luxury is now readily accessible any day of the week. My personal journey to mastering the Instant Pot poached egg began with a 30-day breakfast challenge, aiming to consistently make a wholesome morning meal. While some days were as simple as granola and milk, others featured these incredible poached eggs, which quickly became a staple.
The inspiration struck when I stumbled upon someone mentioning their use of the Instant Pot for Eggs Benedict. Immediately, my mind went to my ultimate comfort food: avocado toast, crowned with a perfectly runny poached egg. After a few initial attempts – as with any new method – I refined the technique to create a recipe that guarantees success every single time. This isn’t just about cooking eggs; it’s about unlocking a level of culinary confidence that makes gourmet breakfasts an everyday reality. These easy poached eggs are a game-changer for busy mornings.
Poached eggs possess a unique ability to elevate almost any dish they grace. Their delicate texture and rich, flowing yolk add a touch of sophistication, transforming simple ingredients into something truly special. Whether you’re serving them over toast, a vibrant salad, or a hearty grain bowl, they make an impact. And if you’re hosting a brunch or a gathering, preparing a batch of these foolproof poached eggs in your Instant Pot is incredibly convenient, allowing you to feed a crowd without the usual stress of stovetop poaching. Imagine serving a dozen guests perfectly poached eggs without breaking a sweat – that’s the power of the Instant Pot.
Why the Instant Pot is a Game-Changer for Poached Eggs
Let’s be honest: making poached eggs on the stovetop can be quite a challenge. It often involves meticulous temperature control, creating a gentle swirl in simmering water, and carefully lowering each egg, all while hoping the whites don’t disperse into a cloudy mess. The traditional method demands a delicate touch and a fair amount of trial and error to get that coveted perfect shape and runny yolk. This is where the Instant Pot truly shines, eliminating all the guesswork and inconsistency, making poaching eggs effortlessly achievable.
An electric pressure cooker, like the Instant Pot, provides a consistent, controlled environment that is ideal for delicate cooking tasks. Instead of submerging eggs directly in swirling water, this method uses silicone cups or ramekins, allowing the eggs to steam gently under pressure. This steam ensures even cooking and prevents the whites from feathering, resulting in beautifully shaped, uniform poached eggs every time. It’s a truly foolproof way to achieve that elusive runny center with a perfectly set white.
My top tip for achieving *your* perfect runny yolk is to conduct a small test run. Begin by cooking just one egg in the Instant Pot for 2 minutes. Assess the result – if you prefer a looser, more liquid yolk, 2 minutes might be your sweet spot. If you like a slightly jammy edge with a still-runny center, try 3 minutes. For a mostly set but still soft yolk, 4 minutes might be ideal. At 5 minutes, you’ll find the yolk is more firm, resembling a hard-boiled egg. Once you’ve identified your preferred cook time, you can confidently cook as many eggs as your Instant Pot insert can hold, using the same precise timing without any adjustments. The consistent pressure means that the cook time is independent of the number of eggs, which is a major time-saver, especially for meal prepping or entertaining. The end result? Consistently perfect poached eggs, tailored exactly to your liking, making the Instant Pot the best tool for perfect poached eggs.

Essential Ingredients for Perfect Poached Eggs
Achieving culinary perfection often comes down to the quality and proper use of a few key components. For our Instant Pot poached eggs, the ingredient list is refreshingly short and sweet, allowing the natural goodness of each item to shine through. Simplicity is key to this method’s success.
- Eggs: Naturally, the eggs are the undisputed star of this dish! I typically opt for large eggs as they offer a good balance of size and consistent cooking. While any fresh egg will work, very fresh eggs tend to have firmer whites that hold their shape better when cooked, resulting in a more aesthetically pleasing poached egg. Consider using organic or free-range eggs for potentially superior flavor and a richer, brighter yolk color. Always check for freshness; fresher eggs are less likely to spread.
- Cooking Spray: This might seem like a minor detail, but a good quality non-stick cooking spray is absolutely crucial for this recipe. Its purpose is to grease the poaching cups thoroughly, ensuring that your delicate eggs slide out effortlessly once cooked. I’ve experimented with various alternatives, including brushing with olive oil and melted butter, but neither provided the flawless non-stick performance of cooking spray. Olive oil can sometimes leave a residue, and butter can be less effective at coating every crevice, potentially leading to sticking. A simple, even coat of cooking spray creates the ideal barrier for easy release and beautifully formed eggs.
- Water: You’ll need just one cup of regular tap water for the base of your Instant Pot. There’s no need for filtered or special water; its sole purpose is to create the steam necessary for the pressure cooking process. This steam gently cooks the eggs to perfection within their individual cups, eliminating the need for a pot of simmering water on the stovetop and ensuring consistent results. The amount of water is critical for proper pressure build-up, so stick to exactly one cup.
Recommended Equipment for Instant Pot Poaching
To embark on your journey to consistently perfect pressure cooker poached eggs, having the right tools makes all the difference. Thankfully, the equipment needed is minimal and highly efficient, leveraging the capabilities of your Instant Pot to its fullest.
- Instant Pot (Electric Pressure Cooker): A reliable Instant Pot is, of course, the cornerstone of this recipe. I personally highly recommend the Instant Pot Duo or the Instant Pot Pro. Both models are incredibly dependable, offering consistent performance that stands the test of time. I’ve owned mine for years, and it remains one of the most invaluable appliances in my kitchen. The Instant Pot’s ability to maintain a precise temperature and pressure environment is what makes poaching eggs effortlessly possible, delivering consistent results that are difficult to achieve with traditional stovetop methods. Any model (3-quart, 6-quart, or 8-quart) will work, as the cooking time remains the same regardless of capacity. Its hands-off operation is truly a game-changer.
- Silicone Egg Poaching Cups: While you can use other small, heat-safe containers, these silicone egg cups are my absolute top recommendation for achieving beautiful, perfectly shaped poached eggs. They are incredibly easy to use, store compactly, and, most importantly, provide a perfectly rounded egg shape that elevates presentation. The non-stick nature of silicone, combined with a quick spray, ensures the eggs slide out without any fuss or damage. These durable cups are designed to withstand high pressure and heat, making them a lasting investment for your kitchen and ensuring consistent results every time you make Instant Pot poached eggs.
- Cooking Rack/Trivet: Every Instant Pot comes with a metal trivet or cooking rack. This accessory is essential as it elevates the egg cups above the water, allowing them to steam rather than boil directly in the liquid. This crucial separation ensures the eggs cook gently and evenly. If you’ve misplaced yours, a steamer basket or even a stack of metal cookie cutters can serve as an improvised trivet, as long as it keeps the cups out of the water and allows steam to circulate.
- Optional: Glass Custard Cups or Small Ramekins: If you don’t have silicone cups, heat-safe glass custard cups or small ceramic ramekins can work in a pinch. However, be aware that the final shape of your poached eggs might be less consistently round or “perfect” compared to using dedicated silicone poaching cups. They might also require a slightly more generous coating of cooking spray to prevent sticking. Regardless of your choice, remember to spray them generously with cooking spray to ensure easy release!

How to Make Instant Pot Poached Eggs: Step-by-Step
Mastering how to make Instant Pot poached eggs is surprisingly simple and requires just a few straightforward steps. Follow this guide to achieve consistently perfect results every single time, making your morning routine a breeze.
Preparing Your Egg Cups
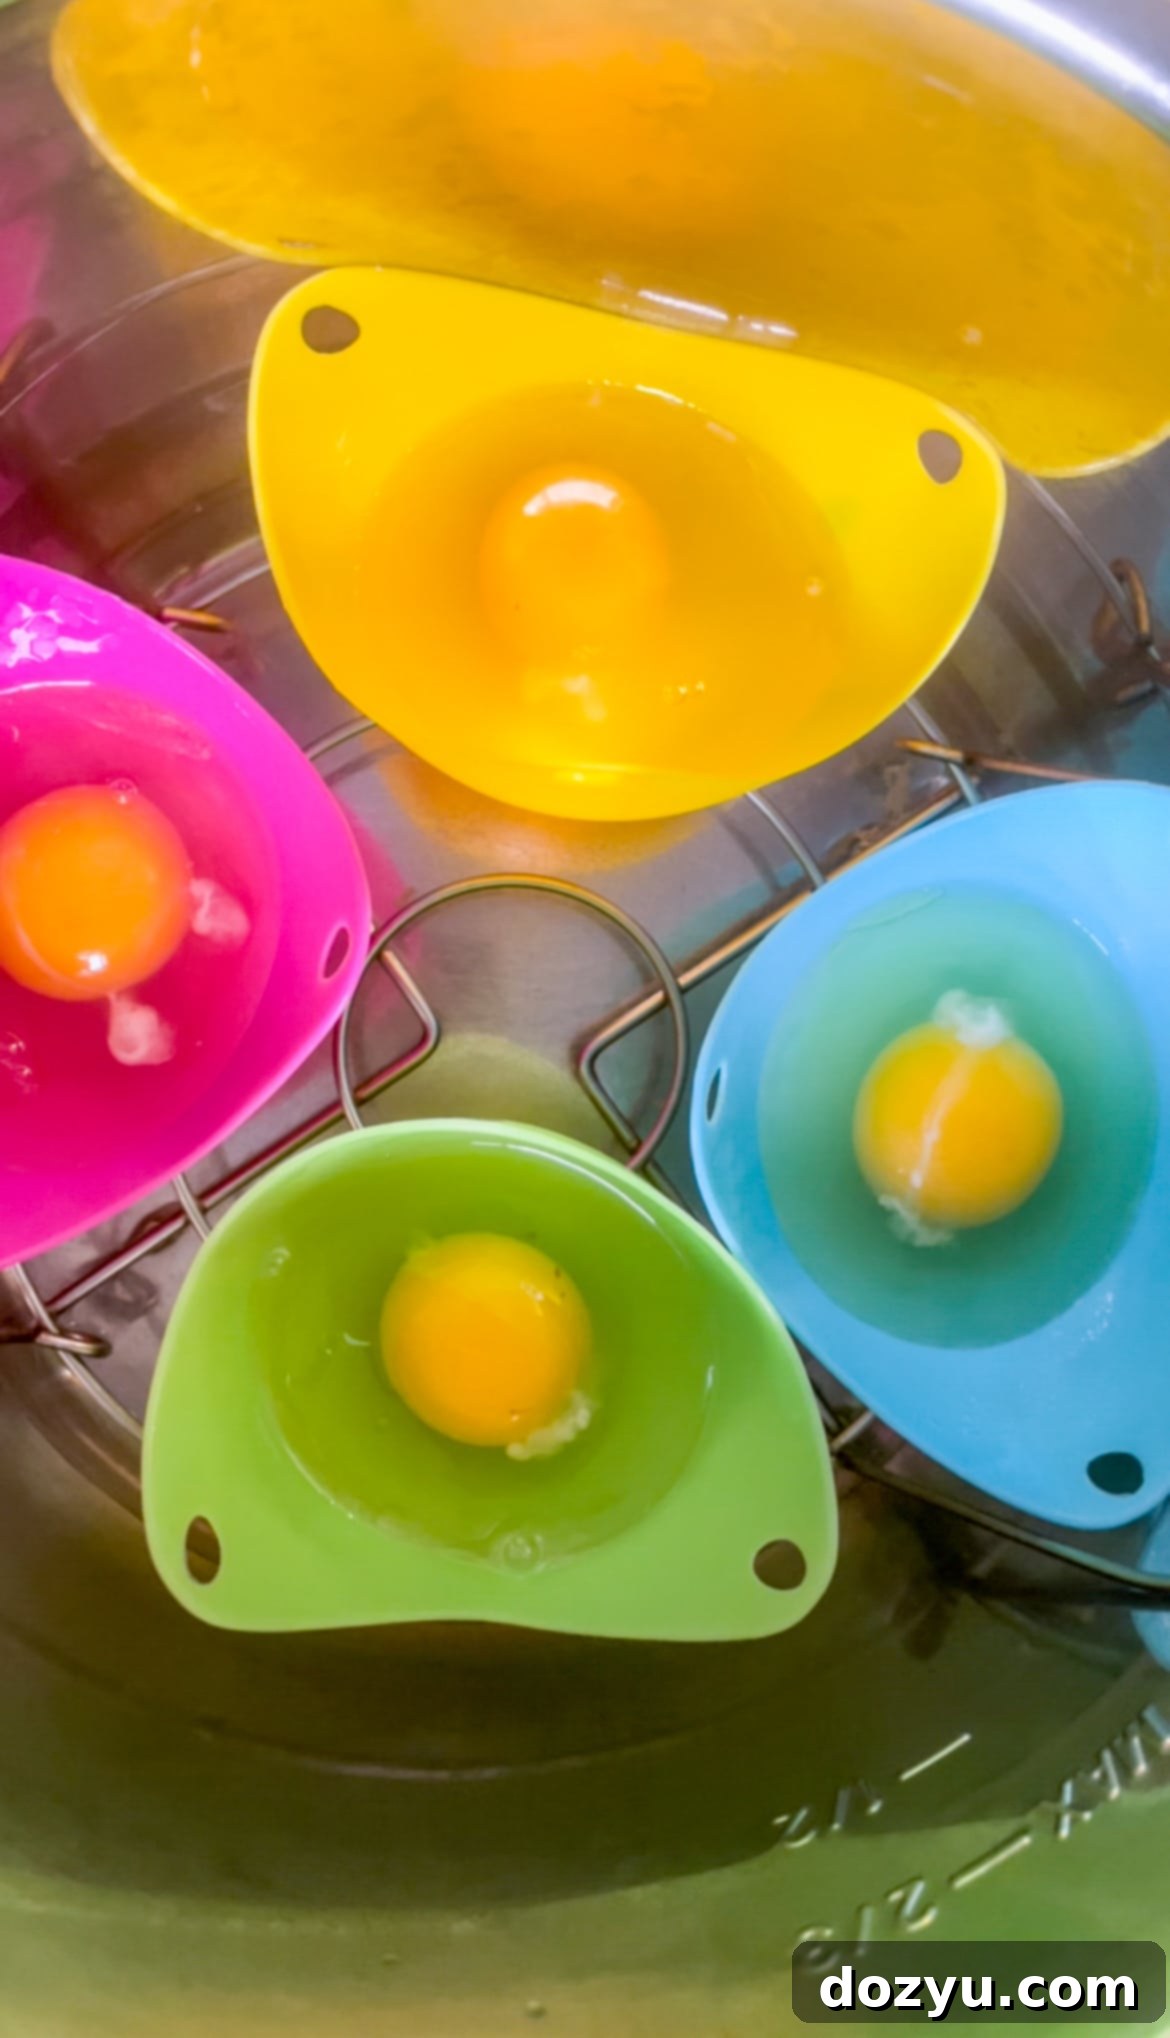
- Grease the Cups: The first and most critical step is to lightly but thoroughly spray the inside of your silicone egg cups (or ramekins) with nonstick cooking spray. Ensure an even coating across the entire interior surface, reaching all sides and the bottom. This creates the necessary barrier to prevent the delicate cooked eggs from sticking, allowing for easy removal and pristine presentation. A well-greased cup is key to a hassle-free experience.
- Add Water to the Instant Pot: Pour exactly one cup of water into the stainless steel inner pot of your Instant Pot or electric pressure cooker. This precise amount of water is essential for creating the consistent steam necessary for the pressure cooking process. It’s what cooks the eggs gently without directly boiling them.
- Position the Cooking Rack: Place the metal cooking rack (trivet) that came with your Instant Pot inside the insert, ensuring it sits securely above the water. This elevates the egg cups, allowing them to steam gently rather than sit in the water, which is crucial for the poaching effect.
- Place Cups and Crack Eggs: Carefully place the greased egg cups onto the cooking rack. Then, gently crack one egg into each cup. Take care not to break the yolk during this process, as a beautiful runny yolk is the hallmark of a great poached egg. The number of eggs you cook simultaneously won’t affect the cooking time, so feel free to fill as many cups as your Instant Pot can comfortably hold on the trivet.
The Cooking Process
- Seal and Set: Securely close the lid of your Instant Pot and ensure the sealing valve is set to the “Sealing” position. Select the “Pressure Cook” or “Manual” setting and set the cooking time for 2 to 4 minutes on High Pressure. This range allows for customization based on your preference:
- 2 minutes: For a very soft, liquid, and perfectly runny yolk. The whites will be just set and incredibly tender.
- 3 minutes: Offers a slightly firmer white with a yolk that is beautifully runny in the center and just beginning to thicken at the edges. This is my personal preference for a classic runny yolk.
- 4 minutes: Results in a yolk that is more jammy in consistency – still soft and spreadable, but less liquid than 2 or 3 minutes. The whites will be fully set but still tender.
- 5 minutes: The yolk will be mostly set, similar to a soft-boiled egg, with very little runniness. This is ideal if you prefer a firmer yolk or plan to reheat them.
- Quick Release: As soon as the cooking time is complete and the Instant Pot beeps, immediately perform a quick release (QR) of the pressure. Carefully turn the sealing valve to the “Venting” position (using a kitchen towel or oven mitt for safety to protect from steam). Stand clear of the hot steam. This immediate release is crucial; if you allow the pressure to natural release (NR), the residual heat inside the pot will continue to cook your eggs, potentially leading to overcooked, firm yolks instead of the delicate poached consistency we’re aiming for. This step ensures your Instant Pot poached eggs achieve that desired texture.
- Serve Immediately: Once the pressure has fully released and the float valve drops, open the lid. Carefully remove the egg cups from the Instant Pot. The eggs should easily slide out of the greased silicone cups. If an egg gently resists, run a thin butter knife or small rubber spatula carefully around the inner edge to loosen it. Serve your perfect Instant Pot poached eggs immediately on your favorite breakfast, brunch, or lunch dishes!

Pro Tips for Instant Pot Poached Egg Success
While the Instant Pot method for poaching eggs is incredibly forgiving and yields consistently excellent results, a few expert tips can elevate your Instant Pot poached eggs from great to truly exceptional. These insights will help you achieve that perfectly runny yolk and tender white every single time, making your poached eggs consistently flawless and a joy to prepare.
- Stick with Cooking Spray: As mentioned, non-stick cooking spray is your best friend here. It outperforms melted butter, olive oil, or any other greasing agent in preventing sticking. Its fine, even mist ensures full coverage of the silicone cups, guaranteeing easy release of your delicate eggs without tearing the whites. For foolproof success, always rely on cooking spray.
- Consistency in Cook Time Regardless of Quantity: One of the most remarkable advantages of pressure cooker eggs is its consistency. Whether you’re poaching a single egg for a quick breakfast or filling your Instant Pot with as many silicone cups as can fit for a large brunch gathering, the cooking time remains precisely the same. The internal pressure and steam environment ensures uniform heat distribution, meaning you don’t need to adjust the timer based on the quantity of eggs. Once you’ve found your ideal cooking duration (2, 3, or 4 minutes), it’s set in stone! This makes batch cooking incredibly efficient.
- Immediate Pressure Release is Non-Negotiable: This tip is paramount for achieving perfectly runny yolks and maintaining the delicate texture of the egg. As soon as your Instant Pot signals that cooking is complete, you must manually release the pressure immediately. If you allow the pressure to release naturally, the residual heat within the Instant Pot will continue to cook the eggs, firming up the yolks beyond the desired poached consistency. A quick release halts the cooking process abruptly, preserving that beautifully delicate, flowing yolk that defines a perfect poached egg.
- Use Cold Eggs: While not strictly necessary, using eggs straight from the refrigerator can sometimes contribute to a slightly firmer white and better shape. The colder temperature helps the proteins set more quickly and cleanly, minimizing any spread of the whites.
- Gentle Egg Cracking: Always crack your eggs gently into the prepared silicone cups. Avoid harsh movements that could break the yolk or cause the egg to splash unevenly. A carefully cracked egg will result in a beautifully formed poached egg with its yolk perfectly intact, ready for that satisfying burst.
- Troubleshooting Sticky Eggs: If, for some reason, an egg doesn’t slide out easily from its cup, it almost certainly means the cup wasn’t sufficiently greased. Don’t force it out! Instead, take a thin butter knife or a small rubber spatula and gently run it around the inner edge of the cup to loosen the egg from the sides. It should then release without damage. For future batches, learn from the experience and ensure a more thorough, all-encompassing coating of cooking spray.
Beyond these Instant Pot poached eggs, explore other delectable egg recipes to diversify your breakfast and brunch menu: Cheesy Ham Avocado Egg In a Hole | Mexican Bacon Egg & Biscuit Bake | Ratatouille Hummus Toast with Soft Scrambled Eggs | BLAT Eggs Benedict
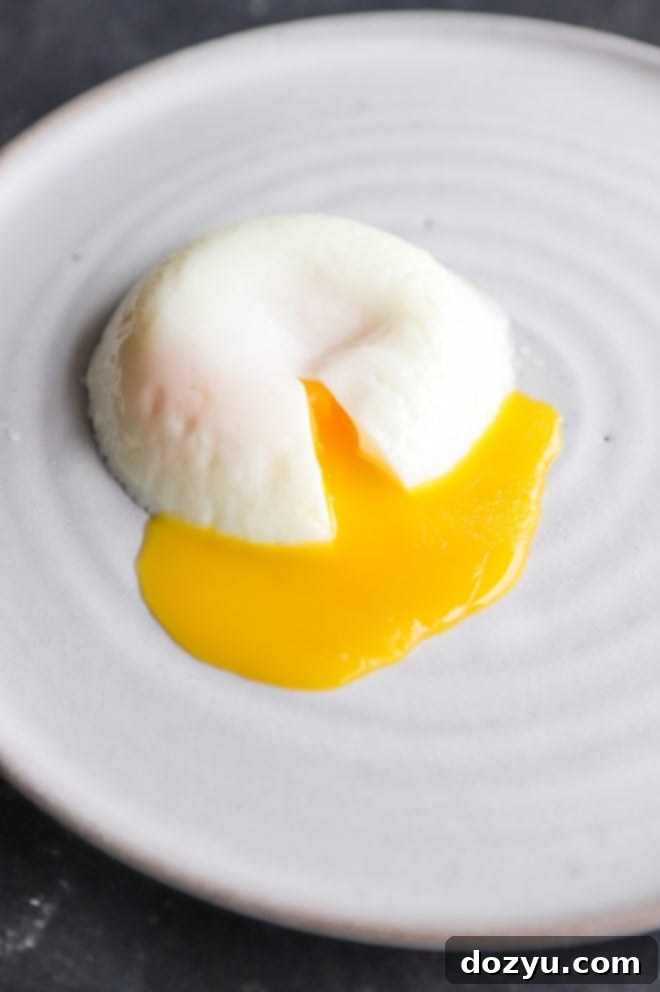
Can I Make Instant Pot Poached Eggs Ahead of Time?
One of the most surprising and incredibly convenient aspects of Instant Pot poached eggs is their ability to be prepared in advance, making them an excellent option for meal prep, busy weekday mornings, or stress-free entertaining. You might think that delicate poached eggs can’t be made ahead without compromising their texture, but I’m here to tell you that they absolutely can, and they reheat beautifully to near-perfect consistency!
To successfully make poached eggs ahead of time, you’ll need a large bowl filled with iced water. As soon as your eggs finish poaching in the Instant Pot, carefully remove them from their silicone cups. Using a slotted spoon, gently transfer each hot poached egg directly into the bowl of iced water. This ice bath serves two crucial purposes: it immediately stops the cooking process, preventing the yolks from firming up further, and it chills the eggs quickly, which helps to maintain their delicate texture and ensures they remain safe for storage. The eggs will keep well submerged in this cold water (or transferred to an airtight container with a little fresh water) in the refrigerator for up to two days. This method is fantastic for meal prepping for the week ahead.
When you’re ready to enjoy your pre-poached eggs, reheating them is a simple process that brings them back to their perfect, warm state without further cooking. Bring a saucepan of water to a gentle boil on your stovetop. Once boiling, immediately remove the pan from the heat entirely. This step is important to prevent the eggs from overcooking, as residual heat can be just enough to firm up the yolk. Carefully lower the chilled poached eggs into the hot (but no longer boiling) water for approximately 30 to 60 seconds, or until they are warmed through to your desired temperature. Be mindful not to overcrowd the pan; reheat them in batches if necessary to maintain water temperature and even cooking. If the water cools significantly between batches, bring it back to a boil briefly before removing it from the heat and adding the next set of eggs. This gentle reheating method ensures a warm center while preserving that delightful runny yolk.
Pro-Tip for Make-Ahead Eggs: If your primary intention is to make these eggs for later consumption and reheating, I strongly recommend reducing the initial Instant Pot cooking time to just 2 minutes. This ensures that the yolks remain extra runny before the first chill, giving you more leeway during the reheating process. This slight undercooking initially prevents the yolks from hardening completely upon rewarming, guaranteeing that beautiful, flowing center you crave when you finally serve them.
Need some more inspiration for breakfast? Don’t miss out! Check out my comprehensive breakfast recipes page for a wealth of ideas.

Creative Ways to Serve Instant Pot Poached Eggs
Once you’ve mastered the art of making perfect poached eggs in your Instant Pot, the culinary possibilities are virtually endless. Their delicate texture and rich, runny yolk make them an incredibly versatile ingredient, capable of enhancing everything from a simple breakfast to a sophisticated dinner. Here are some of my favorite creative and delicious ways to serve these delightful eggs, transforming everyday meals into something extraordinary:
- Classic Avocado Toast with a Twist: This is a personal favorite for a reason! Serve your poached egg simply on a slice of toasted artisanal bread, generously spread with creamy avocado, and finished with a sprinkle of red pepper flakes for a subtle kick. A drizzle of high-quality balsamic glaze, a sprinkle of everything bagel seasoning, or fresh herbs like cilantro or chives can further elevate this simple yet satisfying meal. It’s the ultimate breakfast luxury made easy.
- Eggs Benedict Variations: Poached eggs are the undisputed foundation of many beloved Benedicts. With your Instant Pot, these are easier than ever!
- BLAT Eggs Benedict: Take a classic with a fresh, vibrant twist! This version layers crispy bacon, fresh lettuce, creamy avocado, and ripe tomato slices beneath that perfectly poached egg, all drizzled with a rich, tangy hollandaise sauce. It’s a full meal in every mouth-watering bite, perfect for a special brunch.
- California-Style Eggs Benedict: For a lighter, fresher take on the classic, try this fantastic rendition featuring a vibrant avocado hollandaise sauce. It beautifully complements the delicate egg and offers a delightful burst of fresh, zesty flavor, making it a bright addition to any brunch menu.
- Savory Breakfast Tostadas: Easily swap out sunny-side up eggs for Instant Pot poached eggs on these delightful breakfast tostadas. The runny yolk will mingle beautifully with seasoned black beans, melted cheese, and fresh salsa or pico de gallo, creating a textural and flavorful sensation that’s both hearty and satisfying.
- Hearty Breakfast Sliders: Use your poached eggs as the star in these cheesy BBQ breakfast sliders. The soft, rich egg provides a perfect contrast to savory meat and melted cheese, all nestled in a warm, buttery bun. It’s a fun and interactive way to enjoy breakfast.
- Gourmet Breakfast Sandwiches: Elevate your morning sandwich game to new heights! Pair your runny pressure cooker eggs with fluffy honey butter biscuits or gluten-free bagels. Load them up with crispy bacon, melted cheese, and any other favorite toppings like fresh spinach, a slice of ripe tomato, or a smear of sriracha mayo for a truly satisfying and customizable start to your day.
- Protein-Packed Skillet Potatoes: For a more substantial and comforting meal, serve your poached eggs atop a generous portion of skillet breakfast potatoes. The luscious runny yolk acts as a natural, creamy sauce that coats the savory, seasoned potatoes, making for a delicious, balanced, and incredibly fulfilling plate.
- Pair with Baked Goods for a Complete Brunch: No brunch spread is complete without some delightful baked treats. Your poached eggs will shine alongside these sweet counterparts:
- For a healthy and fruity option, consider wholesome honey blackberry oatmeal muffins, delightful banana mini muffins, or classic, comforting banana bread muffins.
- For a sweet indulgence that’s surprisingly simple, these delightful air fryer biscuit doughnuts, generously dusted with cinnamon sugar, are quick to make and incredibly satisfying.
- If you’re aiming for something truly show-stopping and indulgent, a cinnamon roll cake with the best cream cheese glaze ever will undoubtedly impress your guests and provide a stunning centerpiece.
- Other delightful options for a sweet accompaniment include an apple dutch baby, crowned with a tasty apple compote, or simple yet elegant apple scones.
- On Salads or Grain Bowls: A warm, perfectly poached egg adds incredible richness, creamy texture, and a boost of protein to a fresh green salad or a hearty grain bowl. The runny yolk acts as a natural, luxurious dressing, tying all the vibrant flavors and textures together beautifully.
- Elevated Ramen or Soup: For a quick and delicious upgrade, drop a perfectly cooked poached egg into a bowl of hot ramen noodles or a savory, comforting soup. It instantly adds creaminess, body, and a comforting depth of flavor.
Finally, if you make this Instant Pot poached eggs recipe, please be sure to give this recipe a rating or leave a comment below! I absolutely love hearing about your culinary creations and take the time to respond to every single comment. Your feedback is invaluable, and I’m always happy to answer any questions you might have about making these easy poached eggs!
Oh, and be sure to tag me on Instagram if you make the recipe! Seeing these recipes come to life in your homes is truly my favorite thing to look through those photos. It really means the world to me to see your culinary successes!
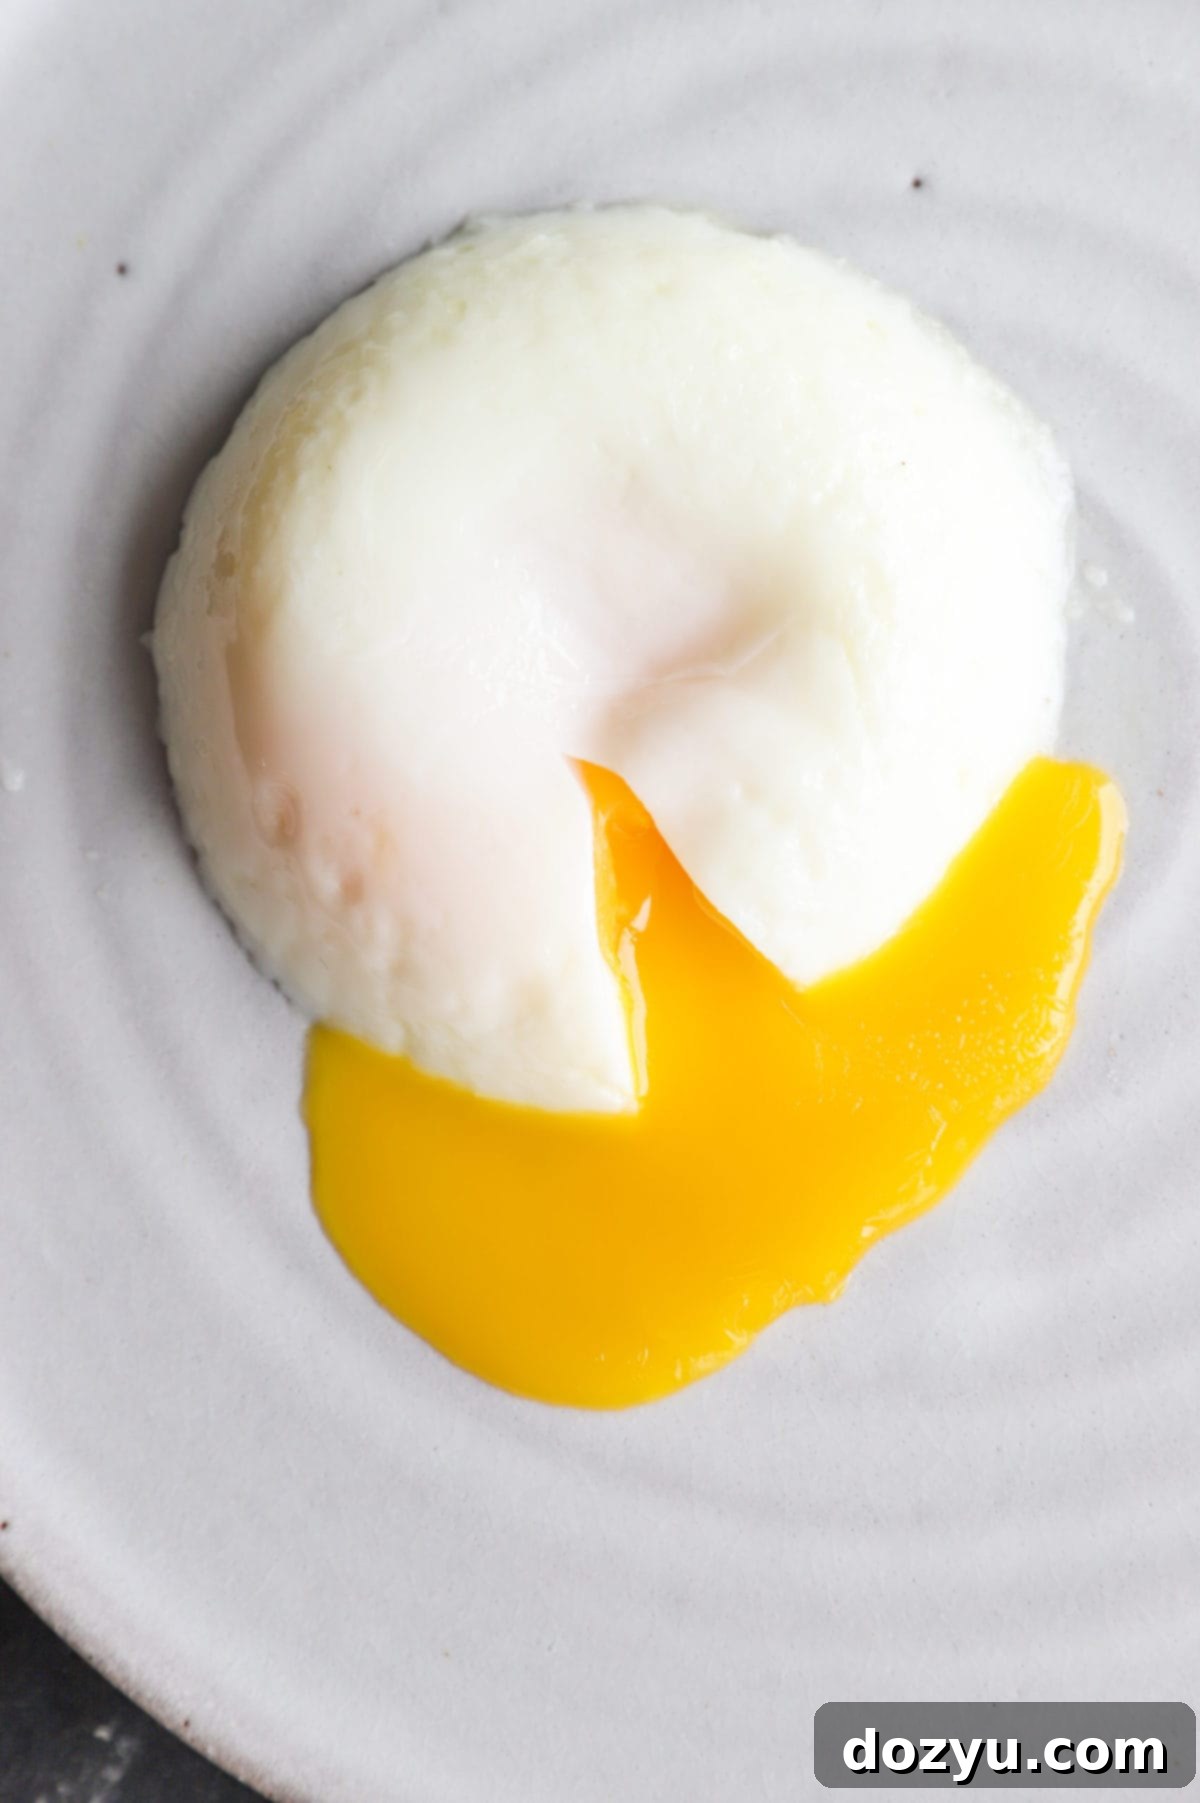
Instant Pot Poached Eggs
2 minutes
3 minutes
8 minutes
Equipment
-
Pyrex Prepware Measuring Cups
-
Silicone Egg Poaching Cups (Highly Recommended)
-
Instant Pot Max (or any Instant Pot model, e.g., Duo, Ultra)
-
Instant Pot Ultra 6 Qt
-
Instant Pot DUO
-
Instant Pot Trivet/Cooking Rack (comes with your Instant Pot)
Ingredients
- Non-stick Cooking spray
- 1 cup water
- 4 large eggs (or as many as your cups hold)
Instructions
-
1. Prepare Cups: Lightly but thoroughly grease four silicone egg cups or ramekins with non-stick cooking spray, ensuring full coverage to prevent sticking.
-
2. Setup Instant Pot: Pour 1 cup of water into the base of your Instant Pot’s inner pot. Place the metal cooking rack (trivet) inside the pot.
-
3. Add Eggs: Carefully place the greased cups on top of the rack. Gently crack one large egg into each prepared cup, taking care not to break the yolk.
-
4. Cook: Securely close the Instant Pot lid and ensure the sealing valve is set to “Sealing.” Select the “Pressure Cook” (or “Manual”) setting and set to High Pressure for 2 to 4 minutes, depending on your desired yolk consistency:
- 2 minutes: For a completely runny, liquid yolk.
- 3 minutes: For a perfectly runny yolk with slightly jammy edges. (Recommended)
- 4 minutes: For a softer, mostly jammy yolk with minimal runniness.
- At 5 minutes, the yolk will be fully set.
-
5. Quick Release & Serve: Once cooking is done, perform a manual Quick Release (QR) by carefully turning the sealing valve to “Venting” immediately (use a kitchen towel or mitt for safety). Once the pressure has fully released and the float valve drops, open the lid. Gently remove the eggs from the cups (they should slide out easily with proper greasing*). Serve your perfect poached eggs immediately!
Notes
**For make-ahead poached eggs, consider cooking for only 2 minutes initially before chilling in an ice bath. This prevents overcooking when reheated.
Breakfast, Brunch
