Deliciously Fluffy Red Velvet Muffins with White Chocolate Chips
Experience the classic charm of red velvet cake transformed into a delightful breakfast or anytime treat. These Red Velvet Muffins are incredibly soft, moist, and boast that unmistakable subtle cocoa tang, perfectly complemented by creamy white chocolate chips. They’re simple to make and promise a fluffy texture that will brighten any morning.

Table of Contents
Toggle
About These Red Velvet Muffins
There’s something inherently captivating about red velvet. It’s a flavor profile that evokes comfort, elegance, and a hint of indulgence. For many, including myself, it’s an irresistible treat, often the first choice on any dessert menu. The beauty of these Red Velvet Muffins is how they take all the beloved characteristics of a classic red velvet cake and transform them into a convenient, delightful muffin perfect for any time of day, especially breakfast!
Imagine waking up to the rich aroma of subtly cocoa-flavored muffins, their vibrant red hue promising a sweet start to your day. These muffins are not just visually stunning; their interior is wonderfully fluffy and tender, almost melting in your mouth. The light chocolate base is beautifully enhanced by the creamy sweetness of white chocolate chips, creating a harmonious balance that will make you fall in love at first bite. And the best part? You won’t even miss the cream cheese frosting, I promise. These muffins are simply that good on their own.
Whether you’re celebrating Valentine’s Day, adding a festive touch to Christmas morning, or simply craving that classic red velvet flavor, these white chocolate studded muffins are the ideal choice. They bring a pop of color and a burst of flavor to any occasion, making everyday moments feel a little more special.
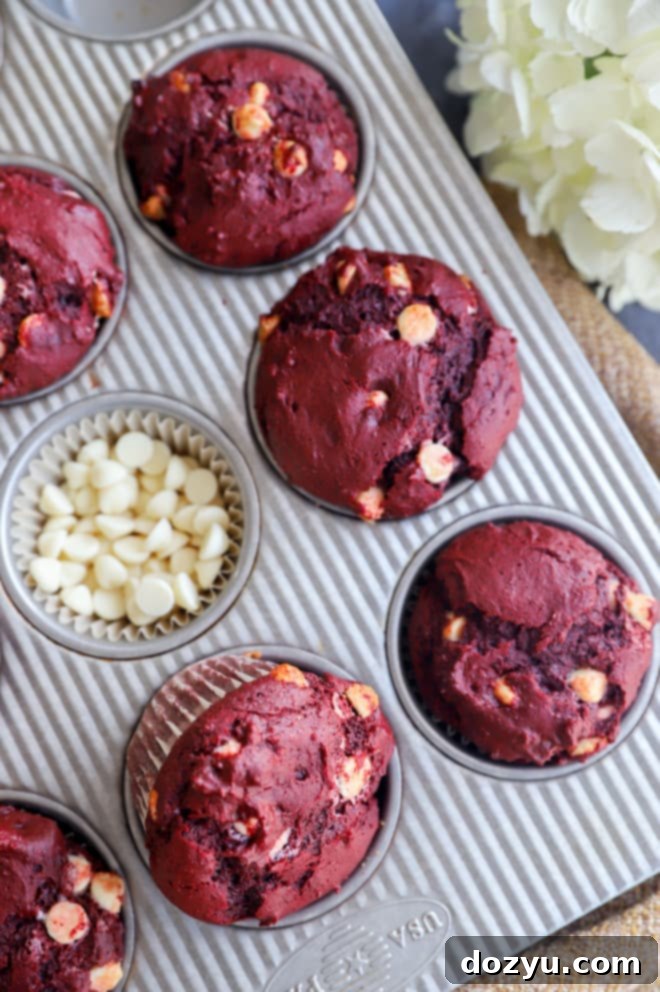
Key Ingredients for Perfect Red Velvet Muffins
Crafting the perfect red velvet muffin relies on a few key ingredients, each playing a crucial role in achieving that signature flavor, color, and texture. Here’s a closer look at what you’ll need:
- Cocoa Powder: This provides the subtle chocolate flavor that is characteristic of red velvet. While natural cocoa powder works, I personally prefer Dutch Process Cocoa Powder for a richer, smoother chocolate note and a deeper color reaction with the red food coloring.
- All-Purpose Flour: The foundation of our muffin structure. For those with dietary restrictions, a 1:1 gluten-free flour substitute can be used successfully.
- Light Brown Sugar: Instead of granulated sugar, brown sugar adds moisture and a slight caramel note, contributing to the muffins’ tender crumb. Make sure it’s packed when measuring for accuracy.
- Leavening Agents (Baking Soda & Baking Powder): Both are essential! Baking soda reacts with the acidic buttermilk to create lift, while baking powder provides additional aeration, ensuring your muffins are wonderfully fluffy. Always check their expiry dates for optimal results.
- Salt: A pinch of fine kosher salt balances the sweetness and enhances all the other flavors.
- Buttermilk: This is the secret to red velvet’s signature tang and incredibly moist texture. Store-bought or homemade buttermilk (milk + a tablespoon of lemon juice or vinegar, left to sit for 5-10 minutes) will work perfectly. Ensure it’s at room temperature for better incorporation.
- Large Eggs: Bind the ingredients and add richness to the batter. Like buttermilk, room temperature eggs mix more evenly into the batter.
- Pure Vanilla Extract: Use a high-quality vanilla extract to elevate the overall flavor. Nielsen Massey’s Madagascar Bourbon Pure Vanilla Extract is a personal favorite for its exceptional aroma and depth.
- Red Food Coloring: To achieve that iconic vibrant red hue. You’ll need about 1 oz of liquid food coloring, or you can use an equal amount of gel food coloring for a more concentrated color.
- Unsalted Butter: Provides richness and moisture. If using salted butter, remember to omit the added salt from the recipe to avoid overly salty muffins. Ensure it’s melted but not hot when adding to the mixture.
- White Chocolate Chips: These are the perfect counterpoint to the red velvet flavor, adding pockets of creamy sweetness. Feel free to experiment with dark or milk chocolate chips if you prefer, or omit them entirely for a pure red velvet experience.

Essential Baking Tools for This Recipe
Having the right tools can make all the difference in your baking experience. For these Red Velvet Muffins, you’ll need a few common kitchen essentials to ensure a smooth and successful process:
- Mixing Bowls: You’ll need at least two – one large for dry ingredients and a medium one for wet ingredients.
- Whisk: An essential tool for thoroughly combining dry ingredients and smoothly blending wet ones. A French wire whisk is ideal.
- Rubber Spatula: Perfect for scraping down the sides of bowls and gently folding in the white chocolate chips without overmixing.
- Measuring Cups and Spoons: Accurate measurements are key in baking, so a reliable set is a must-have.
- Muffin Tin (12-cup): The star of the show! Ensure it’s a good quality pan for even baking.
- Parchment Paper Liners: While regular paper liners can sometimes stick, parchment liners offer superior non-stick properties, ensuring your muffins release effortlessly. If you don’t have them, generously grease your muffin cups with cooking spray.
- Cookie Dough Scoop (optional but recommended): For easily and evenly dividing the batter among the muffin cups, resulting in uniformly sized muffins.
My Baking Favorites
Here are some of my go-to baking tools that make preparing these muffins, and many other recipes, a breeze:
High-Quality Muffin Tin
Buy Now →
Durable Mixing Bowls
Buy Now →
Versatile 9-inch Baking Pan
Buy Now →
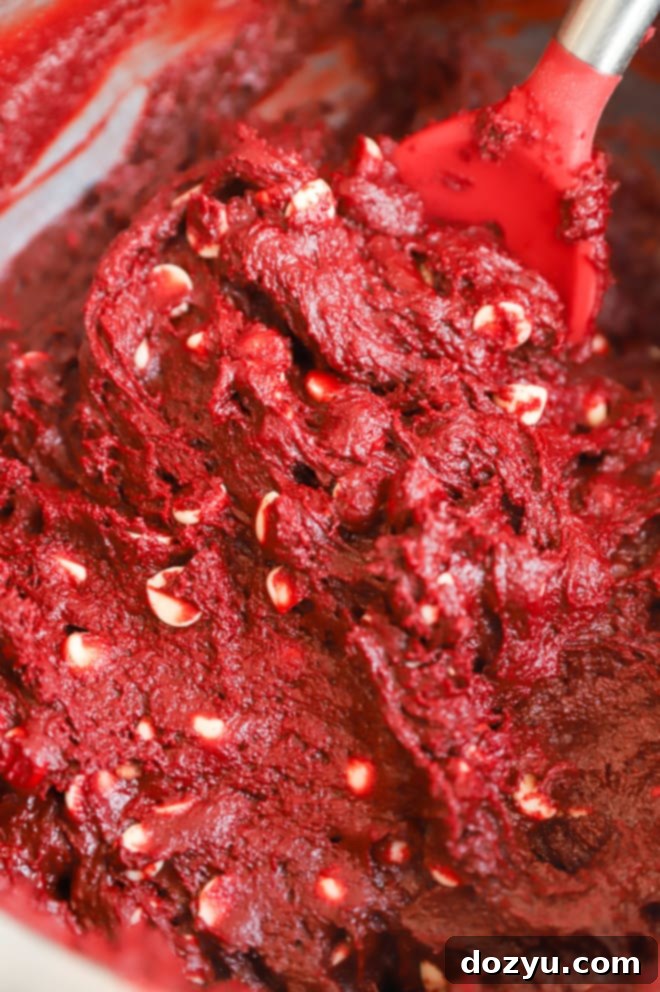
Step-by-Step Guide to Making Red Velvet Muffins
Making these glorious red velvet muffins is a straightforward process, perfect for bakers of all skill levels. Follow these steps to achieve perfectly fluffy and flavorful results:
1. Prepare Dry Ingredients
In a large mixing bowl, begin by combining your dry ingredients. Whisk together the cocoa powder, all-purpose flour, light brown sugar (ensure it’s packed for accurate measurement), baking powder, baking soda, and salt. Whisking them thoroughly ensures all ingredients are well distributed, preventing clumps and promoting an even rise. Once mixed, set this bowl aside.
2. Mix Wet Ingredients
In a separate medium bowl, combine the wet ingredients. Whisk together the room temperature buttermilk, large eggs, pure vanilla extract, and the 1 oz bottle of red food coloring. Whisk until the mixture is uniform in color and texture. Room temperature ingredients are crucial here, as they emulsify better and create a smoother, more cohesive batter.
3. Combine and Fold
Pour the wet ingredient mixture into the large bowl with your dry ingredients. Add the melted butter at this stage as well. Using a spatula, gently stir the batter until just combined. The key here is not to overmix; a few lumps are perfectly fine and often lead to a more tender muffin. Once the batter is mostly combined, fold in the white chocolate chips until they are evenly incorporated throughout the red velvet batter. Overmixing develops gluten, which can result in tough, dense muffins.
4. Bake to Perfection
Preheat your oven to 350˚F (175˚C) and line a 12-cup muffin tin with parchment paper liners. Divide the prepared red velvet batter evenly among the lined muffin cups. Bake for 18 to 20 minutes, or until a toothpick inserted into the center of a muffin comes out clean. This indicates they are fully cooked. Once baked, remove the muffin tin from the oven and allow the muffins to cool completely in the tin before transferring them to a wire rack. Cooling fully ensures they set properly and maintain their fluffy texture.

Expert Tips for Fluffy Red Velvet Muffins
Achieving bakery-quality muffins at home is easier than you think with a few simple tricks:
- Ensure Fresh Leavening Agents: This is arguably the most critical tip! Baking soda and baking powder lose their potency over time. An expired leavener is a common culprit for flat or dense muffins. To test baking soda, add a teaspoon to a few tablespoons of vinegar; it should bubble vigorously. For baking powder, add a teaspoon to hot water; it should fizz. If they don’t react, it’s time for a fresh container.
- Don’t Overmix the Batter: A lumpy batter is a happy batter for muffins! Overmixing develops gluten, leading to a tough, chewy texture instead of a tender, fluffy one. Stir just until the wet and dry ingredients are combined, leaving a few streaks of flour.
- Room Temperature Ingredients: Buttermilk and eggs at room temperature emulsify more easily with the melted butter, creating a smoother, more uniform batter and a better texture in your finished muffins.
- Use Parchment Liners: For easy removal and no sticky messes, parchment paper muffin liners are a game-changer. They peel away cleanly, preserving the muffin’s perfect shape. If you don’t have them, grease your muffin tin thoroughly.
- Don’t Overfill Muffin Cups: Filling cups about two-thirds full prevents overflow and helps create those beautiful domed tops. If you use a cookie scoop, one large scoop or two smaller scoops per cup should be sufficient.
- Test for Doneness: The toothpick test is reliable. Insert a toothpick into the center of a muffin; if it comes out clean or with a few moist crumbs (but no wet batter), your muffins are done. Overbaking can lead to dry muffins.
More tasty muffin recipes to try: Pumpkin Cream Cheese Streusel Muffins | Blueberry Jalapeño Bacon Cornbread Muffins | Orange Madeleine Mini Muffins | One Bowl Banana Nutella Muffins | Banana Peanut Butter Chocolate Chip Muffins
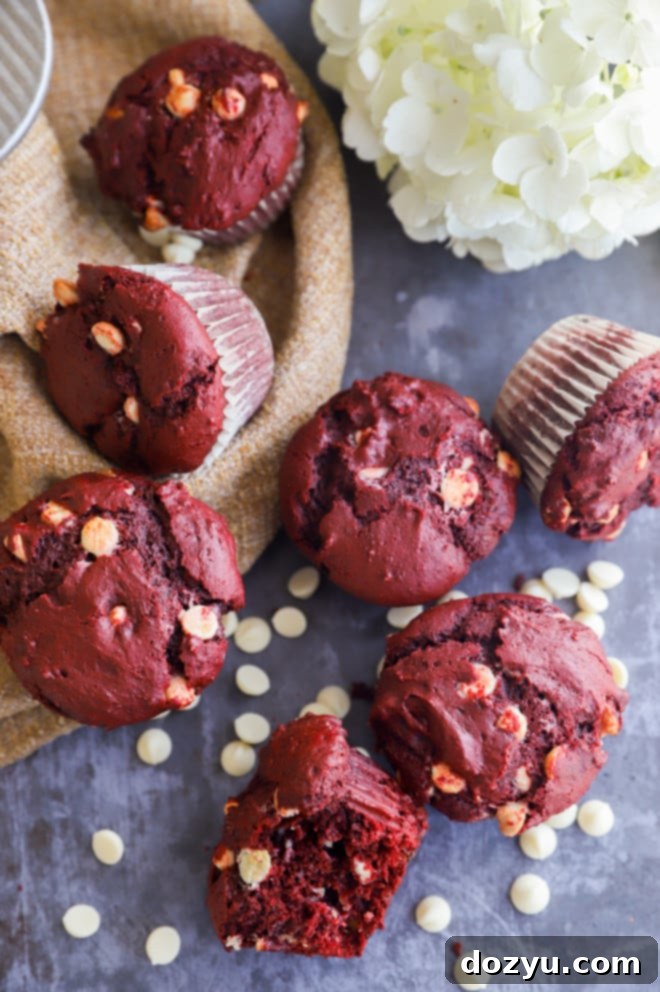
Troubleshooting: Why Your Muffins Might Not Be Fluffy
If your Red Velvet Muffins aren’t coming out as light and fluffy as you’d hoped, there are a few common culprits to investigate:
- Expired Leavening Agents: As mentioned in the tips, this is the most frequent reason. Baking soda and baking powder lose their effectiveness over time, even if the container isn’t technically “expired.” A quick freshness test can save your batch.
- Overmixing the Batter: This is a cardinal sin in muffin making. Overmixing develops the gluten in the flour, leading to a tough, dense, and chewy texture instead of a soft, airy crumb. Mix only until the ingredients are just combined, leaving some small lumps.
- Incorrect Oven Temperature or Over-baking: An oven that’s too hot or baking for too long can result in muffins with a firm, crisp exterior and a dry interior. Always trust the toothpick test, and consider investing in an oven thermometer to ensure your oven’s temperature is accurate.
- Cold Ingredients: Using cold buttermilk and eggs can prevent proper emulsification, leading to a less uniform batter and a less tender final product. Always bring these ingredients to room temperature before mixing.
Chocolate Chip Variations
While white chocolate chips offer a delightful creamy sweetness that beautifully complements the subtle cocoa tang of red velvet, this recipe is quite versatile. You absolutely can customize the chocolate chips to suit your preference!
- Dark Chocolate Chips: For a more intense chocolate flavor and a slightly less sweet muffin, dark chocolate chips are an excellent choice. Their bitterness contrasts wonderfully with the red velvet base.
- Milk Chocolate Chips: If you love a classic chocolate flavor, milk chocolate chips add a familiar sweetness and richness that pairs well with red velvet.
- Chocolate Chunks: For larger pockets of gooey chocolate, consider using chopped chocolate bars or chocolate chunks instead of chips.
- No Chocolate Chips: If you prefer your red velvet pure and simple, or if you simply don’t have chocolate chips on hand, feel free to omit them entirely. The muffins will still be incredibly tasty and moist.
Don’t be afraid to experiment with your favorite type of chocolate to make these muffins truly your own!
Freezing Red Velvet Muffins for Later
These Red Velvet Muffins are fantastic for meal prep or for stashing away for a quick treat whenever a craving strikes. Freezing them properly ensures they retain their fresh taste and texture for weeks. Here’s how to do it:
- Cool Completely: Before freezing, make sure the muffins are entirely cooled to room temperature. Any residual warmth can lead to ice crystals forming, which can make them soggy upon thawing.
- Individual Wrapping: For best results, wrap each muffin individually. First, wrap them tightly in a layer of plastic wrap, ensuring no air is trapped.
- Second Layer of Protection: Follow with a layer of aluminum foil. This double layer provides excellent protection against freezer burn and helps maintain their moisture.
- Airtight Container/Freezer Bag: Place the individually wrapped muffins into a large freezer-safe bag or an airtight container. This adds another layer of defense against freezer odors and temperature fluctuations.
- Label and Date: Don’t forget to label the container or bag with the date. Frozen Red Velvet Muffins can be stored for up to three months.
Need more inspiration for breakfast? Check out my breakfast recipes page!

Serving Suggestions for Red Velvet Muffins
These Red Velvet Muffins are delightful on their own, but they also make a wonderful addition to a larger breakfast or brunch spread. Their sweet, subtle chocolate flavor and vibrant color pair beautifully with both sweet and savory elements. Here are some ideas for what to serve alongside your muffins:
Savory Pairings:
- Classic Breakfast Meats: Crispy bacon, savory sausage patties, or even sliced ham provide a satisfying contrast to the muffins’ sweetness.
- Eggs: Soft scrambled eggs, fluffy omelets, or a classic Eggs Benedict will create a well-rounded and hearty meal. For something more unique, try:
- Southwestern Ham Hash: A flavorful and hearty hash with ham and vibrant vegetables.
- BLAT Eggs Benedict: A delicious twist on the classic with bacon, lettuce, avocado, and tomato.
- Fresh Fruit: A bowl of mixed berries, sliced bananas, or a colorful fruit salad offers a refreshing and healthy balance.
Drinks and Sweet Additions:
For a celebratory brunch, don’t forget the beverages! The festive color of red velvet muffins makes them a perfect match for sparkling cocktails:
- Mimosas: Elevate your brunch with a mimosa! Try a classic orange mimosa, or experiment with fruit-infused versions like a Raspberry Mimosa, Cranberry Mimosa, or a Strawberry Mimosa.
- Coffee or Tea: For a simpler pairing, a hot cup of coffee, latte, or your favorite tea is always a comforting choice.
- Cream Cheese Glaze: While these muffins are delicious without frosting, a light drizzle of cream cheese glaze (powdered sugar, softened cream cheese, milk, and vanilla) can add an extra layer of indulgence, reminiscent of their cake counterpart.
However you choose to serve them, these Red Velvet Muffins are sure to be a crowd-pleaser!
Storage and Reheating Instructions
To keep your Red Velvet Muffins fresh and delicious for as long as possible, follow these guidelines:
How to Store:
- Room Temperature: Once the muffins have cooled completely, store them in an airtight container at room temperature. They will stay fresh and moist for up to 3 days. Avoid refrigerating them, as the cold air can dry them out and alter their texture.
- Freezing: For longer storage, freezing is your best option. After cooling completely, wrap each muffin individually in a layer of plastic wrap, followed by a layer of aluminum foil. This double wrapping protects them from freezer burn. Place the wrapped muffins in a freezer-safe bag or an airtight container. They can be frozen for up to 3 months.
How to Reheat:
- From Room Temperature: If your muffins are at room temperature and you want to warm them slightly, you can microwave them for 10-15 seconds, or place them in a preheated oven at 300°F (150°C) for 5-7 minutes.
- From Frozen:
- Oven Method: For best results, reheat frozen muffins in a preheated oven at 350°F (175°C) for 10 to 15 minutes, or until warmed through and soft. This method helps retain their original texture.
- Microwave Method: For a quicker option, microwave a single frozen muffin for about 30-60 seconds, or until warmed through. Be careful not to overcook, as this can make them tough.
Enjoying a warm red velvet muffin anytime is easy with these storage and reheating tips!
Finally, if you bake these incredible Red Velvet Muffins, please don’t hesitate to give this recipe a rating or leave a comment below! Your feedback means the world to me, and I genuinely love hearing about your baking successes and answering any questions you might have. Feel free to drop questions below, and I’ll make sure to respond to every single comment.
Oh, and be sure to tag me on Instagram if you share your creations! Seeing these recipes come to life in your homes is truly my favorite thing. It inspires me and lets me connect with you all in a special way!
Discover More with the Everyday Seasonal Cookbook
Ready to expand your culinary repertoire? Our “Everyday Seasonal Cookbook” is brimming with fresh ideas, featuring seasonal produce guides, innovative recipes, and delightful treats for every occasion. It’s your ultimate companion for cooking delicious, seasonal food all year round.
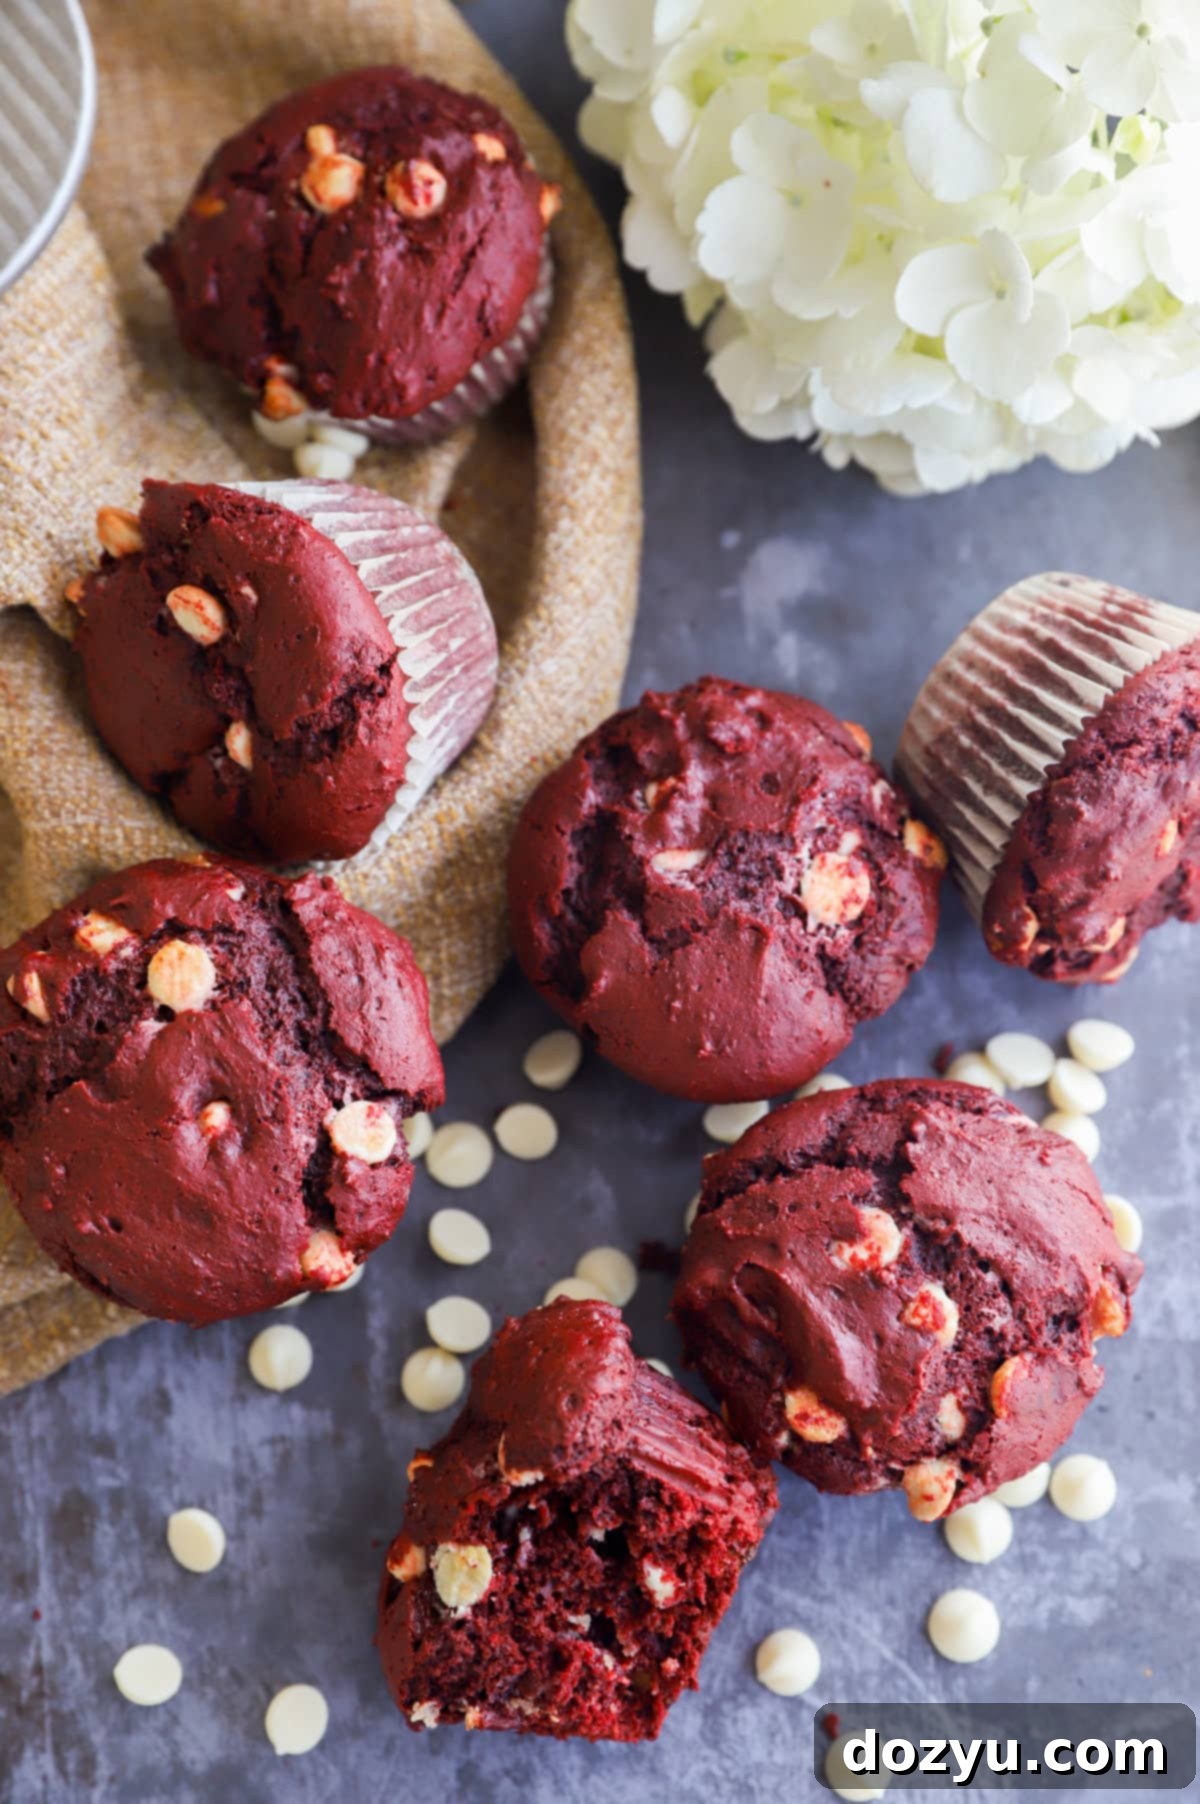
Red Velvet Muffins Recipe Card
Equipment Needed
-
Measuring Spoons
-
Measuring Cups
-
Silicone Spatula
-
French Wire Whisk
-
Mixing Bowls
-
Muffin Pan
Ingredients for the Recipe
- 2/3 cup cocoa powder
- 2 cups all-purpose flour
- 1 cup + 1 Tbsp light brown sugar packed
- 1 tsp baking powder
- 1 tsp baking soda
- 1/2 tsp salt
- 3/4 cup buttermilk room temperature
- 2 large eggs room temperature
- 1 1/2 tsp pure vanilla extract
- 1 1 oz bottle red food coloring
- 1/2 cup unsalted butter melted
- 1 cup white chocolate chips you can also use dark or milk chocolate
Baking Instructions
-
Preheat your oven to 350˚F (175˚C). Line a 12-cup muffin tin with parchment paper muffin liners and set aside.
-
In a large bowl, whisk together the cocoa powder, all-purpose flour, light brown sugar, baking powder, baking soda, and salt until thoroughly combined. Set aside.
-
In a separate medium bowl, whisk together the room temperature buttermilk, eggs, vanilla extract, and the red food coloring until the mixture is uniform in color.
-
Pour the wet ingredients into the dry ingredients, along with the melted butter. Stir gently with a spatula until the batter is just combined. Be careful not to overmix; a few lumps are fine.
-
Fold in the white chocolate chips until they are evenly incorporated into the batter.
-
Divide the batter evenly between the lined muffin cups. Bake for 18 to 20 minutes, or until a toothpick inserted into the center of a muffin comes out clean.
-
Remove the muffins from the oven and allow them to cool completely in the muffin tin before serving or transferring to a wire rack.
Nutrition Information
Carbohydrates: 46g |
Protein: 5g |
Fat: 15g |
Saturated Fat: 9g |
Polyunsaturated Fat: 1g |
Monounsaturated Fat: 4g |
Trans Fat: 0.3g |
Cholesterol: 52mg |
Sodium: 271mg |
Potassium: 196mg |
Fiber: 2g |
Sugar: 28g |
Vitamin A: 305IU |
Vitamin C: 0.1mg |
Calcium: 98mg |
Iron: 2mg
