Irresistible Whipped Goat Cheese Salsa Dip with Candied Bacon: Your Ultimate Easy Summer Appetizer
Looking for the perfect no-fuss appetizer that will impress everyone at your next summer gathering? This Whipped Goat Cheese Salsa Dip is your answer! It’s incredibly quick and easy to prepare, and the best part is, you can even make it ahead of time. Featuring a smooth and tangy whipped goat cheese base, generously topped with vibrant, chunky salsa (whether homemade or your favorite store-bought brand), and finished with a sprinkle of crispy, sweet, and savory candied bacon, this dip is guaranteed to get everyone in the party mood! Designed to serve 6 to 8 people, it’s a crowd-pleaser that combines exciting textures and flavors in every delightful bite.

table of contents
Toggle
About This Whipped Goat Cheese Salsa Dip
Whipped goat cheese holds a special place in my heart, a true indulgence that I love to prepare for special occasions and casual gatherings alike. The act of whipping goat cheese transforms its typically crumbly texture into something irresistibly smooth and spreadable, making it far easier and more pleasant to enjoy than its unadorned counterpart, especially on a charcuterie board or with crackers. It elevates simple goat cheese into a truly luxurious experience.
But why stop at just whipped goat cheese? My culinary philosophy often leans towards enhancing flavors and textures, so I decided to take this creamy base to the next level. By layering it with a vibrant, chunky salsa and adding a sprinkle of crispy, candied bacon, this dip becomes a symphony of tastes. The tangy and creamy goat cheese perfectly balances the bold, zesty notes of the salsa, while the candied bacon introduces a delightful savory sweetness and a satisfying crunch that makes every mouthful exciting.
The result is a dip that is not only visually appealing but also a celebration of contrasting yet complementary flavors: the bright freshness of summer from the salsa, the earthy tang of the goat cheese, and the comforting, smoky sweetness of the bacon. It’s truly a unique appetizer that will stand out at any event and become an instant favorite among your guests. Prepare for an unforgettable flavor experience that will have everyone asking for the recipe!

Key Ingredients for the Perfect Dip
Crafting this incredible dip relies on a few carefully selected ingredients, each playing a crucial role in the final flavor and texture. Here’s a breakdown of what you’ll need and why:
- Goat Cheese: This is, without a doubt, the star of our show. For the best whipped texture, I highly recommend using goat cheese in log form, typically vacuum-packed in plastic. These varieties tend to be creamier and easier to whip into a smooth consistency compared to the pre-crumbled goat cheese found in tubs. Ensure you choose a plain, unflavored variety so its natural tangy notes can shine through and perfectly complement the other ingredients. Bringing your goat cheese to room temperature before use is vital for achieving that effortlessly smooth, airy texture.
- Cream Cheese: The secret weapon for an extra velvety and spreadable dip! Cream cheese works harmoniously with goat cheese, adding richness and stability to the whipped base. While full-fat cream cheese offers the most luxurious texture, you can opt for a low-fat version if you prefer, though the final consistency might be slightly less decadent. Just like the goat cheese, make sure your cream cheese is softened to room temperature for optimal whipping results.
- Olive Oil: A touch of extra-virgin olive oil not only aids in the whipping process, helping to create a truly smooth and emulsified dip, but also contributes a subtle fruity and peppery undertone that beautifully enhances the overall flavor profile. Choose a good quality extra-virgin olive oil for the best taste.
- Salsa: Texture is paramount here! For this particular dip, the chunkier the salsa, the better. A smooth, restaurant-style salsa might be too watery and could thin out the whipped goat cheese. Instead, seek out a hearty chunky salsa or even pico de gallo, whether you’re making it from scratch or grabbing it from the store. If you’re venturing into homemade salsa, don’t forget to consult our guide on the best tomatoes for salsa to ensure maximum freshness and flavor.
- Bacon: This isn’t just any bacon; it’s candied bacon, and it brings a fantastic sweet and savory crunch that transforms the dip. I highly recommend using a thick-cut bacon, as its robust texture really stands out in each bite. Brands like Wright offer excellent thick-cut options that hold up beautifully to the candying process. The crispy, caramelized bacon pieces offer a delightful contrast to the creamy dip.
- Brown Sugar: Essential for candying the bacon! Light brown sugar is typically my go-to for its subtle molasses notes, but dark brown sugar can also be used for a deeper, more intense caramelization and flavor.
- Bread (for serving): A dip this good deserves the perfect vehicle! A nice crusty loaf of bread is ideal. Sourdough is a personal favorite for its tangy flavor and chewy texture, but a freshly baked baguette or even toasted pita bread slices make wonderful companions for scooping up this delightful dip.
- Parsley or Cilantro: Freshly chopped herbs are optional but highly recommended for a vibrant pop of color and a touch of aromatic freshness. Parsley offers a clean, slightly peppery note, while cilantro provides a more distinct, citrusy flavor that pairs wonderfully with the salsa. Choose based on your preference!

Essential Equipment You’ll Need
While this recipe is straightforward, having the right tools on hand will make the preparation process smooth and efficient. Here’s a quick rundown of the essential equipment you’ll need:
- Rimmed Half Sheet Baking Pan: This is crucial for making the candied bacon. The rim prevents any bacon grease or sugar runoff from spilling in your oven, keeping cleanup minimal.
- Baking Rack: A baking rack that fits snugly inside your rimmed baking pan is key for perfectly crisp candied bacon. It allows air to circulate around the bacon strips, ensuring even cooking and preventing them from sitting in their own rendered fat.
- Food Processor: For achieving that wonderfully smooth, airy, and creamy whipped goat cheese base, a food processor is your best friend. It quickly blends the goat cheese and cream cheese into a silken texture. If you don’t own one, don’t worry, an electric hand mixer can also do the job (though it might require a bit more effort and patience to reach a similar consistency).
- Serving Bowl: Once your masterpiece is assembled, you’ll need a beautiful bowl to present it in! Choose one that highlights the vibrant colors of the salsa and the rich texture of the dip, making it even more inviting for your guests.
- Aluminum Foil: For lining the baking sheet, especially when making candied bacon. This makes cleanup incredibly easy and helps prevent sticking.
Entertaining Must-Haves
Gatsby cocktail glasses
Buy Now →
cheese platter set
Buy Now →
drink dispenser
Buy Now →
large serving bowl
Buy Now →
coupe glasses
Buy Now →
How to Create Your Whipped Goat Cheese Salsa Dip
Making this incredible dip is surprisingly simple, broken down into three easy steps. You’ll be amazed at how quickly you can put together such a flavorful and impressive appetizer!
Crafting the Candied Bacon
The candied bacon adds a magical touch to this dip, providing a perfect balance of sweet and savory with an irresistible crunch. To prepare it, begin by arranging your bacon strips in a single layer on a baking rack. This rack should be placed over a rimmed baking sheet that you’ve lined with aluminum foil for easy cleanup. Once the bacon is laid out, sprinkle it generously and evenly with brown sugar.
Now, here’s a crucial tip for perfectly candied bacon: start with a cold oven! Place the entire baking sheet, with the bacon, into a cold oven. Then, set your oven to 425°F (220°C) and allow the bacon to cook as the oven preheats. This gradual heating process helps the sugar melt and caramelize slowly onto the bacon, resulting in that beautiful, crispy, candied finish. The cooking time will typically range from 20 to 30 minutes, but keep a close eye on it, as oven temperatures can vary. You’re looking for bacon that is deep golden brown, crispy, and glazed. Once cooked, remove it from the oven, let it cool slightly on the rack, then chop it into small, bite-sized pieces. Set these aside until you’re ready to assemble your dip.
Whipping the Goat Cheese Base
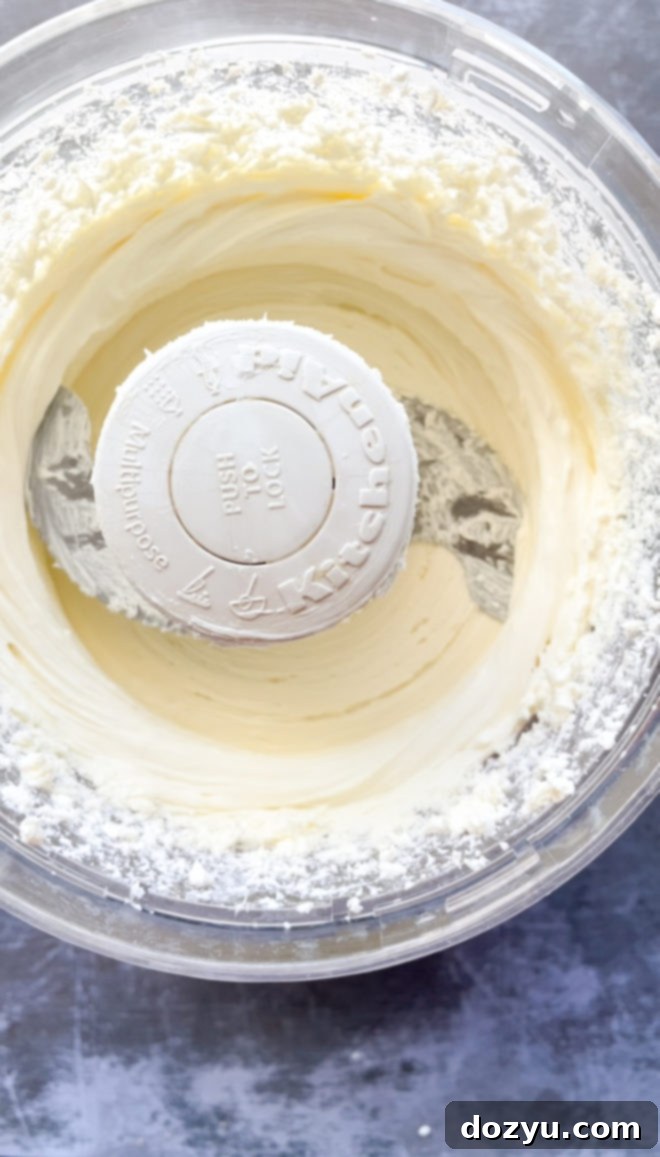
While your bacon is happily candying in the oven, you can prepare the creamy heart of the dip. In the bowl of a food processor, combine the room-temperature goat cheese, softened cream cheese, extra virgin olive oil, and a pinch of salt. It’s essential that both cheeses are at room temperature to ensure they whip up smoothly and effortlessly. Process these ingredients on high speed, allowing the machine to work its magic until the mixture is wonderfully smooth, airy, and creamy. You might need to pause once or twice to scrape down the sides of the food processor bowl with a spatula, ensuring everything is thoroughly incorporated.
One of the beauties of this recipe is its make-ahead potential! This whipped goat cheese mixture can be prepared up to 4 days in advance. Simply transfer it to an airtight container and store it in the refrigerator. When you’re ready to serve, remember to let it come to room temperature for about 15-20 minutes and give it a quick stir to regain its creamy consistency before spreading.
Assembling Your Delicious Dip
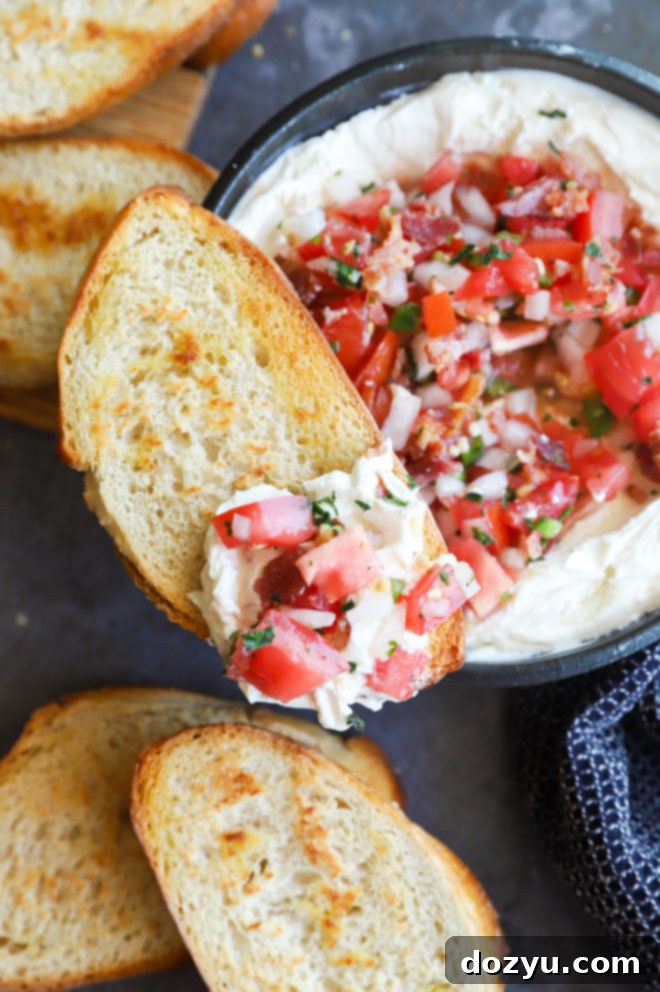
With your candied bacon chopped and your whipped goat cheese perfectly creamy, it’s time for the grand finale – assembly! Take your chosen serving bowl and spread the whipped goat cheese mixture evenly across the bottom, creating a smooth, inviting base. Next, spoon your chunky salsa generously over the center of the goat cheese, allowing its vibrant colors to pop against the creamy white. Finally, sprinkle the chopped candied bacon over the salsa and the edges of the dip, ensuring every bite gets a piece of that sweet and savory crunch. For a beautiful finish and an extra touch of freshness, garnish with freshly chopped parsley or cilantro. Serve immediately with toasted bread slices, crackers, or your favorite dippers, and watch it disappear!

Expert Tips for Dip Success
Achieving the perfect Whipped Goat Cheese Salsa Dip is all about paying attention to a few key details. Here are some expert tips to ensure your dip is a showstopper every time:
- Room Temperature is Non-Negotiable: This is arguably the most important tip! For both the goat cheese and cream cheese, ensure they are at true room temperature before you start whipping. Cold cheese will result in a lumpy, grainy texture that’s hard to spread, no matter how long you process it. Plan ahead and take them out of the refrigerator at least 30-60 minutes before you begin.
- The Right Salsa Makes All the Difference: As mentioned in the ingredients section, opt for a chunky salsa or pico de gallo. Smooth, thin salsas contain too much liquid, which can make your beautifully whipped goat cheese runny and watery. If you’re using store-bought salsa, look for labels like “chunky,” “restaurant style thick & chunky,” or “pico de gallo” for the best results.
- Don’t Over-process the Whipped Cheese: While you want a smooth and creamy texture, be careful not to over-process the goat cheese and cream cheese mixture. Once it’s smooth and airy, stop. Over-processing can sometimes lead to a slightly thinner consistency.
- Taste and Adjust: Before serving, always taste your whipped goat cheese base. Depending on the saltiness of your goat cheese and the salsa, you might want to add a tiny bit more salt or even a squeeze of fresh lemon juice to brighten the flavors.
- Candied Bacon Perfection: The cold oven trick for candied bacon is a game-changer. It allows the fat to render slowly and the sugar to caramelize properly, giving you that ideal crispy-chewy, sweet-savory balance. Don’t rush this step!
- Garnish for Impact: A sprinkle of fresh herbs like parsley or cilantro not only adds a lovely pop of color but also a burst of fresh flavor that complements the richness of the dip. Don’t skip this simple but effective step!
- Consider Your Dippers: While toasted bread is fantastic, think about offering a variety of dippers to cater to all tastes. Crunchy tortilla chips, sturdy crackers, or even fresh vegetable sticks like cucumber slices, bell pepper strips, or carrot sticks are excellent choices.
Craving more irresistible dip recipes? Be sure to explore these other crowd-pleasers: Chipotle Chili Cheese Dip | Skillet Southwestern BBQ Chicken Dip | Avocado Ricotta Tomato Pesto Layer Dip | Spicy Lasagna Dip | Baked Goat Cheese Appetizer

Can You Whip Goat Cheese Without a Food Processor?
Absolutely! While a food processor is fantastic for achieving a silky-smooth consistency quickly, you can certainly whip goat cheese using an electric hand mixer. Just place the goat cheese, cream cheese, olive oil, and salt into a medium mixing bowl. Start on low speed to combine, then gradually increase to medium-high, beating until the mixture is light, fluffy, and well-combined. It might not achieve the exact same ultra-smooth, air-whipped texture that a food processor provides, but it will get you pretty darn close and still yield a delicious, spreadable dip. Ensure both cheeses are at room temperature for the best results when using a hand mixer, as this will prevent lumps and make the whipping process much easier.
Can I Make This Salsa Dip Ahead of Time?
Absolutely, and I highly recommend it for effortless entertaining! This dip is fantastic for meal prep or making ahead for parties. To ensure optimal freshness and presentation, I suggest preparing the whipped goat cheese base and the candied bacon separately. Store the whipped goat cheese in an airtight container in the refrigerator for up to 4 days. The candied bacon can also be stored in an airtight container at room temperature (or refrigerated for longer shelf life) for up to 3-4 days, keeping its crispness best if stored separately from the wet ingredients.
When you’re ready to serve, take the whipped goat cheese out of the refrigerator about 15-20 minutes beforehand to allow it to come closer to room temperature – this will make it more spreadable and enhance its creaminess. Give it a good stir to refresh the texture. Then, simply spread the goat cheese into your serving bowl, top with your chunky salsa, and sprinkle with the chopped candied bacon. Garnish with fresh cilantro or parsley, and serve! This method ensures that the salsa remains vibrant and the bacon stays crispy, providing the best possible experience for your guests.
What if I Don’t Have Time to Make Salsa?
Life gets busy, and sometimes shortcuts are essential! While homemade salsa truly elevates this dip, using store-bought salsa is a perfectly acceptable and convenient option. The key is to choose wisely to maintain the integrity of the dip. Look for high-quality, chunky store-bought salsa or, even better, a fresh pico de gallo from the refrigerated section of your grocery store. These options will provide the desired texture and robust flavor without watering down your creamy goat cheese base. Avoid thinner, restaurant-style salsas, as their higher liquid content can make the dip watery and less appealing. Many grocery stores offer excellent fresh salsa options that taste almost as good as homemade, saving you precious time without compromising on flavor.
Need some more inspiration for party apps? Check out my appetizer recipes page!
What to Serve with Whipped Goat Cheese Salsa Dip
This Whipped Goat Cheese Salsa Dip is a versatile and crowd-pleasing appetizer, making it a classic choice for almost any get-together, from casual summer BBQs to elegant cocktail parties. Its ease of preparation and make-ahead potential further enhance its appeal. Here are some fantastic recommendations for how to serve this dip and what to pair it with for a truly memorable gathering:
- Perfect Dippers:
- Toasted Bread: Crusty baguette slices, sourdough rounds, or even toasted pita bread are excellent for scooping up the creamy dip and chunky toppings.
- Crackers: A variety of crackers, from classic water crackers to hearty whole-grain options, provide a satisfying crunch.
- Vegetables: For a lighter and healthier option, offer an assortment of fresh crudités such as cucumber slices, bell pepper strips (various colors for visual appeal), carrot sticks, celery sticks, or even blanched asparagus spears.
- Tortilla Chips: Sturdy tortilla chips are perfect for a Tex-Mex twist, especially with the salsa component.
- Complementary Appetizers: If you’re building a full appetizer spread, consider dishes that offer contrasting flavors and textures:
- Sweet & Savory: Balance the tang and heat of the dip with something a little sweet, like these honey bbq grilled chicken wings.
- Spicy Kick: For those who love a bit of heat, these baked crispy buffalo cauliflower bites offer a delightful spicy crunch.
- Another Cold Dip: Offer variety with another cold dip, such as a smooth and flavorful Greek hummus, ensuring there’s something for everyone.
- Refreshing Cocktails: Pair your appetizers with refreshing beverages to complete the party experience:
- Fruity Batches: A fruity big-batch concoction like vodka strawberry lemonade is perfect for a summer gathering, easy to make for a crowd.
- Minty Refreshment: For a cool and invigorating option, a refreshing minty libation such as a dirty mojito would be an excellent choice.
How to Store This Delicious Dip
Proper storage is essential to keep your Whipped Goat Cheese Salsa Dip fresh and delicious. This dip can be stored and refrigerated for up to 4 to 5 days, making it perfect for preparing ahead of time or enjoying as leftovers.
If you’re planning to store leftovers, transfer any remaining dip to an airtight container. If the dip has already been fully assembled with salsa and bacon, try to gently scrape off as much salsa and bacon as possible from the top before covering, to help maintain the texture of the whipped goat cheese. However, if it’s already mixed, simply place it in the container.
When you’re ready to enjoy the dip again, I find that allowing the desired portion to rest at room temperature for about 15 minutes before eating significantly enhances its creamy texture and flavor. The cold can sometimes make the cheese a bit firm, so letting it soften slightly brings it back to its optimal consistency. If you stored the bacon separately, add fresh, crispy bacon bits right before serving for the best experience.
Finally, if you make this whipped goat cheese salsa dip, please be sure to give this recipe a rating or leave a comment! I absolutely love hearing about your culinary adventures and take the time to respond to every single comment. Feel free to drop any questions you might have below too, I’m here to help!
Oh, and don’t forget to tag me on Instagram if you share photos of your creation! Seeing these recipes come to life in your homes is truly my favorite thing, and it means the world to me. Happy cooking!

Whipped Goat Cheese Salsa Dip Recipe
Equipment
-
Non-Stick Aluminum Foil
-
Half Sheet Pan
-
9-Cup Food Processor
Ingredients
- 4 slices thick-cut bacon
- 1 1/2 Tbsp light brown sugar
- 10 oz creamy goat cheese at room temperature
- 4 oz cream cheese at room temperature
- 2 Tbsp extra virgin olive oil
- 1/4 tsp salt
- 1/2 cup chunky salsa
- Garnish: freshly chopped parsley or cilantro
- Toasted bread slices for serving
Instructions
-
Arrange bacon slices in a single layer on a baking rack set into an aluminum foil-lined rimmed baking sheet. Sprinkle the bacon evenly with brown sugar. Place the baking sheet into a cold oven.
-
Turn the oven to 425°F (220°C). Cook for approximately 20 to 35 minutes, allowing the bacon to candy as the oven preheats and cooks. Watch carefully, as cooking times may vary based on your oven. Remove when crispy and caramelized, then chop into small pieces. Set aside.
-
In the bowl of a food processor, combine the room-temperature goat cheese, softened cream cheese, extra virgin olive oil, and salt. Process on high speed until the mixture is completely smooth and creamy, stopping occasionally to scrape down the sides of the bowl. This whipped goat cheese mixture can be stored in an airtight container in the refrigerator for up to 4 days.
-
To assemble, spread the whipped goat cheese mixture evenly in your desired serving bowl. Top generously with the chunky salsa in the center, then sprinkle the chopped candied bacon over the salsa and around the edges of the dip. If desired, garnish with freshly chopped parsley or cilantro for a fresh finish.
-
Serve immediately with toasted bread slices, crackers, or fresh vegetables.
