Easy Homemade Caramel Apple Dip: Your Ultimate Fall Dessert Companion
Indulge in the irresistible sweetness of homemade caramel apple dip, a luscious, gooey, and utterly delicious creation perfectly crafted for dipping your favorite apple slices! With a mere five simple ingredients, you can effortlessly whip up this delightful dessert sauce right in your own kitchen. It’s a significantly simpler and quicker alternative to making traditional caramel apples, delivering all the flavor with none of the fuss. Get ready to transform your fall snacking experience!
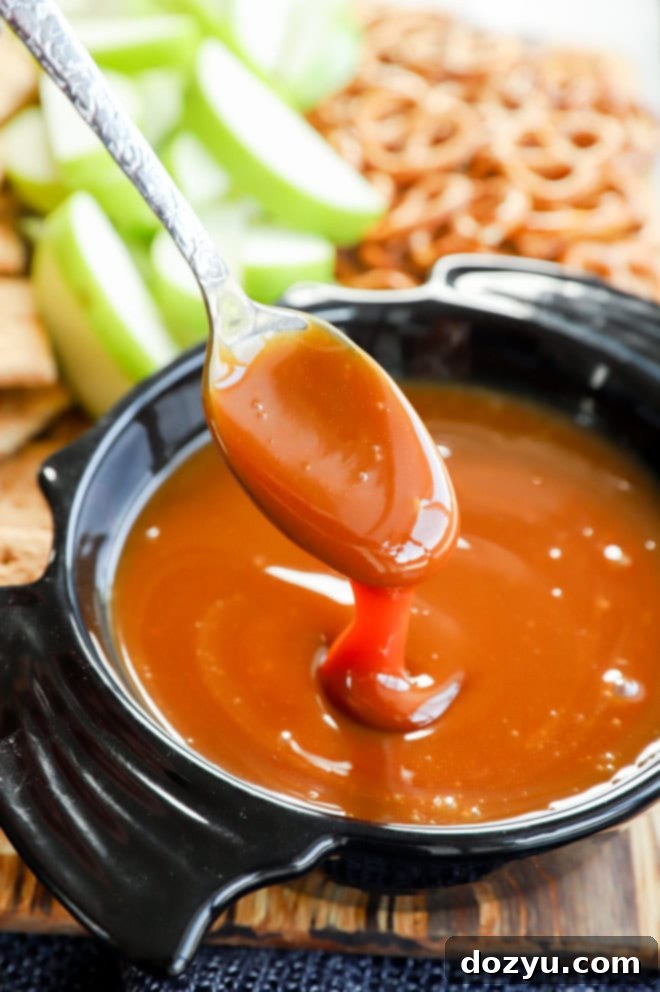
table of contents
Toggle
About This Homemade Caramel Apple Dip
Caramel apples are undeniably one of the most beloved and iconic treats of the fall season. The delightful combination of crisp, juicy apples and rich, chewy caramel creates a perfect harmony of textures and flavors that embodies autumn. However, anyone who has attempted to make caramel apples at home knows the challenges involved in achieving that perfect caramel coating. It’s often a delicate balance – too thin, and it slides right off; too thick or overcooked, and it becomes brittle, sticking stubbornly to your teeth and sometimes even tasting slightly burnt.
This homemade caramel apple dip recipe offers a brilliant solution to those frustrations. Instead of wrestling with whole apples and a tricky candy coating, we simplify the process by creating a luxurious, creamy, and wonderfully gooey caramel sauce specifically designed for dipping. Crafting a caramel that’s thick enough for satisfying dips, yet not intended to form a hard candy shell, is considerably easier and less prone to error. This makes it an ideal choice for both novice and experienced home cooks seeking a foolproof fall dessert.
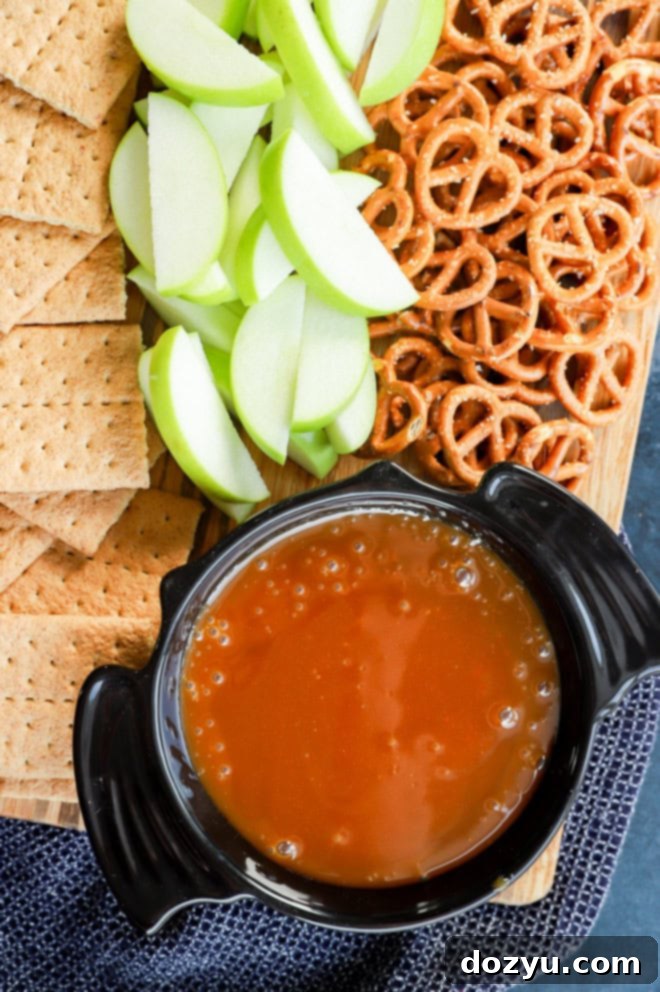
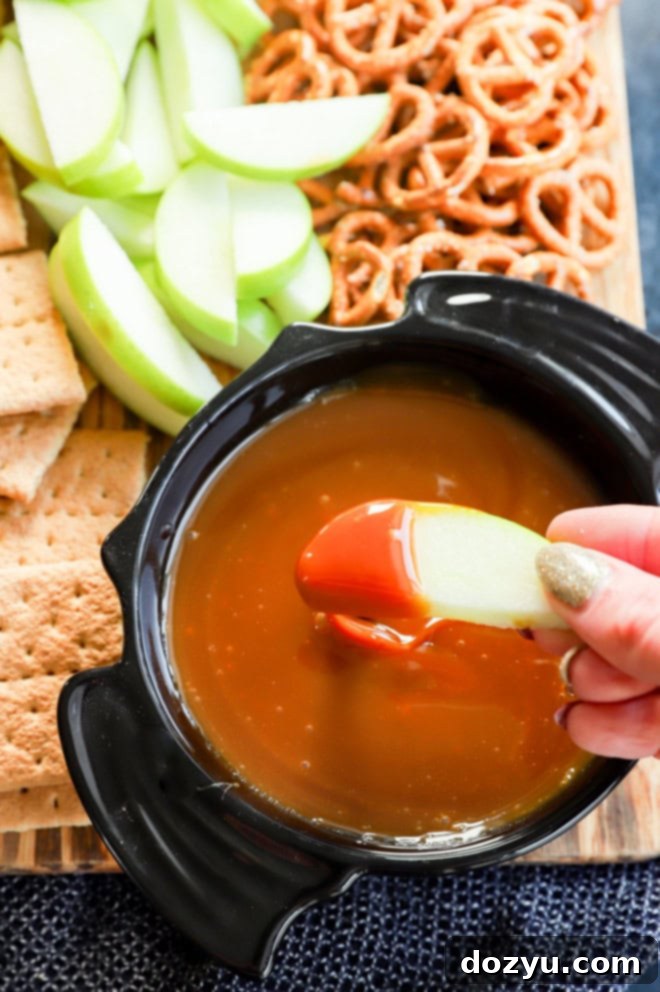
Our recipe for this indulgent dip calls for just a handful of straightforward ingredients, many of which you likely already have stocked in your pantry. It’s the quintessential dessert to bring out for autumn gatherings, cozy potlucks, or simply a fun family snack. Serve it alongside an abundant platter of crisp apple slices, crunchy graham crackers, salty pretzels, or any other dippables your heart desires. The versatility is endless, and the outcome is always a crowd-pleaser.
And let’s be honest, sometimes the best way to enjoy this delectable dip is simply by the spoonful – a perfectly acceptable and truly delicious indulgence!
Beyond its ease and incredible taste, this caramel dip is also a fantastic make-ahead option. It stores beautifully in the refrigerator for up to 10 days, allowing you to prepare it in advance and have a delightful treat ready whenever a craving strikes or unexpected guests arrive. It’s a convenient, flavorful, and incredibly satisfying way to celebrate the vibrant flavors of fall without the stress.
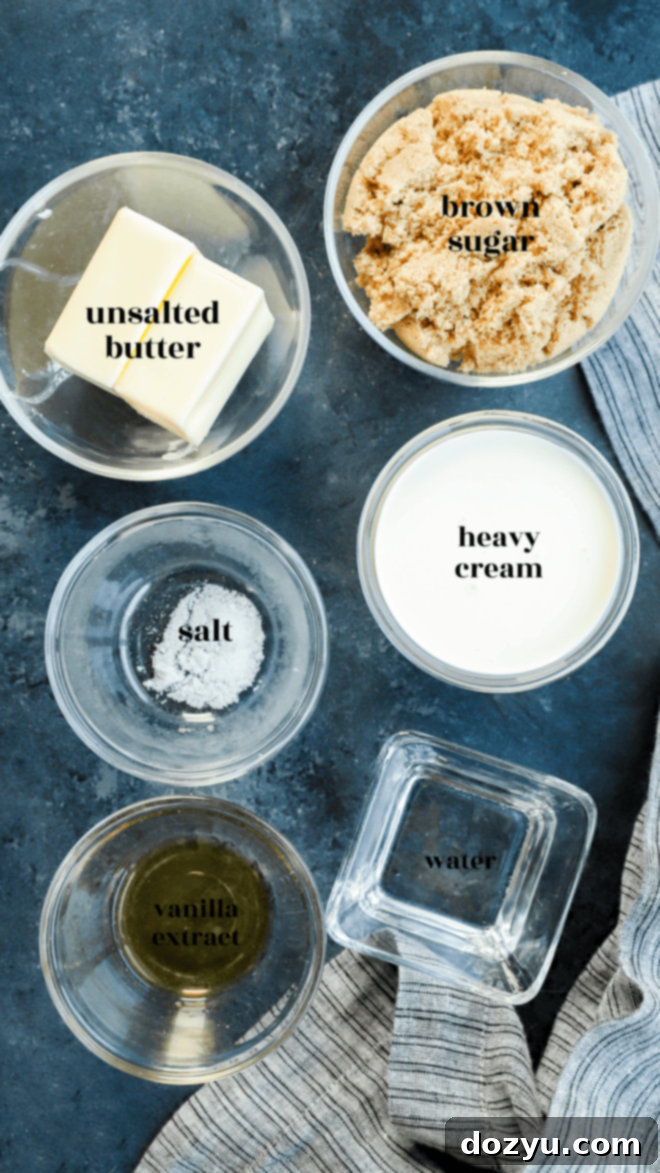
Key Ingredients for Perfect Caramel Dip
Creating this rich and smooth caramel apple dip relies on a few fundamental ingredients that, when combined correctly, yield an absolutely decadent result. Here’s a closer look at what you’ll need and why each component is important:
- Water: This acts as the initial solvent for the sugar, helping it dissolve evenly and prevent crystallization. While you can use tap water, filtered water is also perfectly fine as the mixture will come to a boil, ensuring any impurities are removed. The primary role here is to initiate the sugar dissolving process before the caramelization truly begins.
- Sugar: For the most nuanced and complex flavor profile in this dip, we highly recommend using **light brown sugar**. Its molasses content adds a deeper, richer taste compared to white sugar, which enhances the caramel’s natural warmth. The brown sugar also contributes to the beautiful golden hue of the finished dip. If you only have white sugar, it can be used, but the flavor will be less profound.
- Butter: Unsalted butter is the ideal choice for this recipe. Using unsalted butter gives you complete control over the saltiness of your caramel. If you opt for salted butter, be sure to omit the additional salt specified in the recipe to avoid an overly savory dip. The butter contributes to the caramel’s luxurious smoothness and rich texture, adding a delightful melt-in-your-mouth quality.
- Salt: A touch of fine sea salt is crucial for balancing the sweetness of the caramel. It enhances the overall flavor, preventing the dip from tasting cloyingly sweet. Fine sea salt is preferred because its smaller crystals dissolve quickly and evenly into the hot mixture, ensuring a consistent taste throughout. This small addition makes a significant difference, elevating the caramel from merely sweet to truly gourmet.
- Heavy Cream: This is the secret ingredient for achieving that wonderfully silky, creamy, and luscious texture characteristic of a perfect caramel dip. Heavy cream emulsifies with the sugar and butter, preventing the caramel from becoming too stiff or grainy. It also adds a rich, dairy depth that rounds out the flavors beautifully. Do not substitute with lighter creams or milk, as they will not yield the same luxurious consistency.
- Vanilla: A high-quality pure vanilla extract is essential for adding a warm, aromatic depth to the caramel sauce. Vanilla complements the other flavors, making the dip more complex and inviting. We love using our own homemade vanilla extract for an unparalleled taste, but a premium store-bought option like Madagascar Bourbon Pure Vanilla Extract will also deliver excellent results. Add it off the heat to preserve its delicate flavor.
Essential Tools for Making Caramel Apple Dip
While this caramel apple dip is incredibly simple to make, having the right kitchen tools can make the process even smoother and guarantee the best results. You don’t need a lot of fancy equipment, but a couple of key items will ensure your success:
- Heavy-Bottomed Saucepan: This is arguably the most important tool for making caramel. A heavy-bottomed saucepan distributes heat much more evenly than thinner pans. This even heat distribution is crucial because it helps prevent the sugar from burning in spots while other areas are still dissolving. It allows for a gradual and controlled caramelization process, minimizing the risk of scorching and ensuring your caramel develops a consistent, rich flavor and color. Look for a sturdy pot with a thick base for optimal results.
- Whisk: A good whisk is indispensable for this recipe. You’ll use it frequently during the initial stages to help dissolve the sugar and incorporate the butter smoothly. Consistent whisking ensures that the ingredients are thoroughly combined and prevents sugar crystals from forming on the sides of the pan, which can lead to grainy caramel. Choose a sturdy whisk that feels comfortable in your hand for effortless stirring.
- Heat-Proof Spatula (Optional but Recommended): While a whisk is essential for initial mixing, a heat-proof silicone spatula can be very helpful for scraping down the sides of the pan and ensuring every bit of caramel is incorporated. It’s also great for stirring once the caramel starts to thicken and you want to avoid air bubbles.
- Glass Jar or Dish for Storage: Once your delicious caramel dip is made, you’ll need a suitable container for cooling and storage. A glass jar with a tight-fitting lid or a glass dish works perfectly for this, keeping your dip fresh in the refrigerator.
How to Make Homemade Caramel Apple Dip: Step-by-Step
Creating this luscious homemade caramel apple dip is a rewarding process that comes together surprisingly quickly. Follow these steps carefully to achieve a perfectly smooth, rich, and gooey sauce every time:
Dissolve the Sugar
Begin by combining the water and light brown sugar in your chosen heavy-bottomed saucepan. Place the saucepan over medium heat. It’s crucial to whisk the mixture frequently during this stage. The goal is to fully dissolve the sugar crystals into the water, creating a smooth, clear syrup before it begins to caramelize. This step prevents a grainy texture in your final dip. Continue whisking until you no longer feel or see sugar granules at the bottom of the pan or clinging to the whisk.
Incorporate the Butter
Once the sugar is completely dissolved, reduce the butter into smaller pieces. This helps it melt more quickly and evenly into the hot sugar mixture. Add the butter pieces to the pan. Continue to whisk constantly until all the butter has fully melted and is smoothly incorporated into the syrup. The mixture should appear homogenous and glistening. The butter is essential for adding richness and a silky texture to the caramel.
Boil and Thicken for Perfection
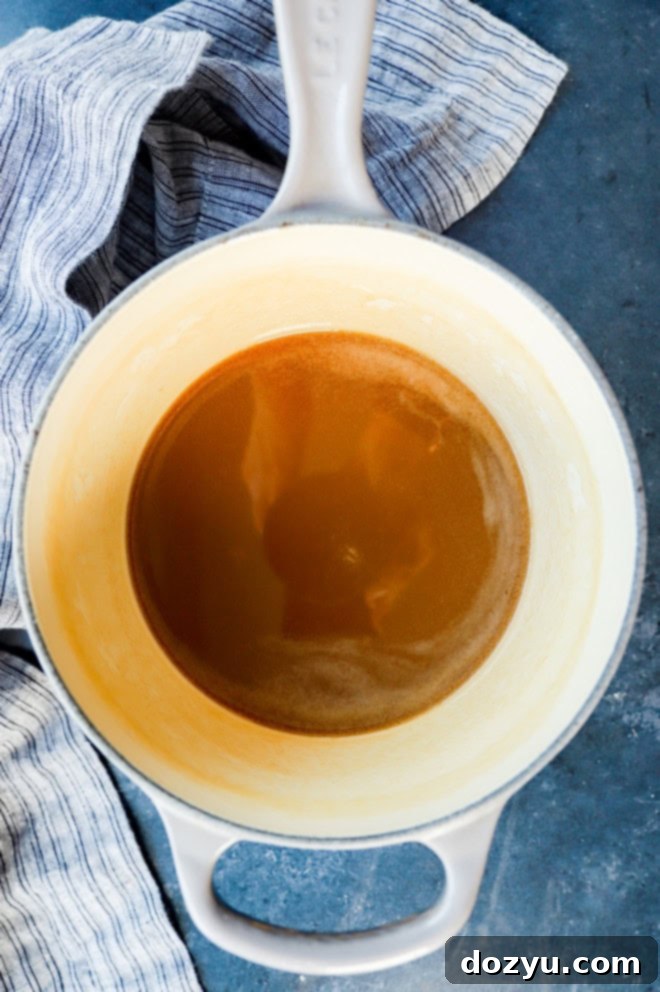
Now, bring the entire mixture to a rolling boil over medium heat. Once boiling, reduce the heat to medium-low. This is the stage where the caramel truly develops its flavor and thickens. Continue to cook, stirring occasionally to prevent sticking and ensure even cooking, until the mixture visibly thickens and takes on a beautiful, deep golden-brown color. A good indicator that it’s ready is when the caramel pulls away from the sides of the saucepan easily as you stir it with the whisk. This thickening process typically takes about 10 minutes, but it’s important to rely on visual cues and consistency rather than just the clock. The aroma will also become distinctly rich and sweet, signaling that it’s nearing perfection.
Finish the Silky Sauce
Carefully whisk in the heavy cream and fine sea salt. The mixture will likely bubble up and steam vigorously as the cold cream hits the hot caramel, so be cautious. Continue whisking until the cream is fully incorporated, and the sauce is smooth and creamy with no streaks. Bring the mixture back to a gentle boil for another 1 to 2 minutes to ensure everything is thoroughly combined and heated through. Immediately remove the pan from the heat and stir in the pure vanilla extract until it’s completely combined. Adding vanilla off the heat preserves its delicate flavor, which can dissipate if cooked at high temperatures.
Cool and Chill Before Serving
Carefully pour the hot caramel apple dip into a clean glass dish or jar. Allow it to cool completely at room temperature before serving or transferring to the refrigerator. It’s perfectly normal for the caramel sauce to appear a little runnier when it first comes off the heat. Don’t worry, as it cools, the mixture will thicken to the perfect, rich, dippable consistency you desire. For best results, chill it in the refrigerator for at least a few hours, or until thoroughly cold and thick.
Expert Tips and Tricks for the Best Caramel Dip
Making caramel can seem intimidating, but with a few key tips, you’ll master this gooey apple dip in no time. These pointers will help you achieve perfect results and avoid common pitfalls:
- Be Sure to Cook It Long Enough: The cooking time after adding the butter and cream is crucial for both flavor and consistency. Don’t rush this step. Allow the mixture to boil and simmer until it achieves a rich, deep golden-brown color and a visibly thickened texture. A reliable sign that it’s done is when the caramel easily pulls away from the sides of the saucepan as you stir. If it seems too thin when hot, remember it will thicken considerably as it cools. An undercooked caramel will be too runny, while an overcooked one can become brittle or burnt.
- Use a Heavy-Bottomed Pan: As mentioned, a heavy-bottomed saucepan is your best friend when making caramel. Its ability to distribute heat evenly is paramount, preventing hot spots that can scorch the sugar in one area while leaving it undercooked in another. This even heating allows for a consistent caramelization process, resulting in a perfectly smooth and flavorful dip.
- Give It Your Full Attention: Caramel-making is not a multitasking activity. It requires your undivided focus, especially during the boiling and thickening stages. Caramel can go from perfectly golden to burnt in a matter of seconds. Stay by the stove, keep an eye on the color, and stir as directed. This dedication will pay off with a superior caramel dip.
- Do Not Stir During Initial Caramelization: While you whisk to dissolve the sugar and incorporate butter, once the mixture starts to boil and color, avoid stirring excessively. Agitating the sugar can cause crystals to form, leading to a grainy texture. Swirling the pan gently is usually sufficient if you need to encourage even cooking.
- Prepare Your Ingredients Ahead of Time (Mise en Place): Have all your ingredients measured and ready before you start cooking. This includes cutting the butter into small pieces and having the heavy cream and vanilla extract easily accessible. Caramel moves quickly, and you won’t have time to measure ingredients once the cooking process is underway.
- Cool Completely for Optimal Thickness: Resist the urge to serve the caramel dip immediately after cooking. It will be much too thin. Pour it into a serving dish or jar and allow it to cool completely at room temperature, then transfer to the refrigerator. The chill time is essential for the dip to achieve its ideal thick, gooey, and dippable consistency.
- Reheating Leftover Dip: If your refrigerated caramel dip becomes too firm, you can easily reheat it. Gently warm it in a microwave-safe bowl in 15-second intervals, stirring between each, until it reaches your desired consistency. Alternatively, you can warm it gently on the stovetop over low heat, stirring constantly until smooth.
More apple recipes to enjoy: Apple Blackberry Crumble | Caramel Apple Molten Cakes | Apple Pie Infused Whiskey | BBQ Apple Cider Ribs
Selecting the Best Apples for Caramel Dipping
The beauty of a caramel apple dip lies in the delightful contrast between the sweet, rich caramel and the crisp, often tart, apple. While you can certainly use any apple variety you enjoy, some truly shine when paired with this gooey dip:
- Granny Smith: Our absolute favorite for dipping! The wonderfully tart and crisp flavor of Granny Smith apples provides a perfect counterpoint to the sweetness of the caramel. This classic pairing creates an exquisite balance that keeps you coming back for more. Their firm texture also holds up well to dipping.
- Honeycrisp: A popular choice for its incredible crispness and balanced sweet-tart flavor. Honeycrisp apples offer a satisfying crunch and a juicy bite that complements the creamy caramel beautifully.
- Gala: These apples are naturally sweet with a mild flavor and a crisp texture. They are a great all-rounder if you prefer a less tart apple, allowing the caramel to be the dominant flavor.
- Fuji: Known for their intense sweetness and juicy, crisp flesh. Fuji apples create a more intensely sweet treat when combined with caramel, perfect for those with a serious sweet tooth.
- Pink Lady (Cripps Pink): Offering a delightful balance of sweet and tart with a firm, crisp texture, Pink Lady apples are another excellent option that stands up well to dipping.
Ultimately, the best apple for your caramel dip is the one you love most! Feel free to create a platter with a variety of sliced apples to let everyone discover their favorite combination.
Storing Your Homemade Caramel Apple Dip
One of the fantastic benefits of this homemade caramel apple dip is its excellent shelf life, making it an ideal candidate for meal prepping or entertaining. Once prepared and cooled, the caramel dip should be stored in an airtight container in the refrigerator. When properly stored, it will maintain its delicious flavor and gooey texture for up to 10 days. This means you can whip up a batch well in advance of a party or enjoy it throughout the week for a convenient sweet treat.
While the dip lasts quite long in the fridge, we generally do not recommend freezing this specific caramel recipe. Freezing and thawing can sometimes alter the creamy texture, causing it to become grainy or separate due to the dairy content. For the best consistency and taste, stick to refrigerating and enjoying it within the recommended timeframe.
Preventing Apple Slices from Browning
When preparing a beautiful platter of sliced apples to serve with your homemade caramel dip, preventing them from browning is key to maintaining their fresh appearance and appealing presentation. Apples brown due to oxidation when exposed to air, but there are simple tricks to keep them crisp and vibrant:
- Lemon Juice Bath: The most common and effective method is to briefly dip your apple slices in fresh lemon juice. The acidity of the lemon juice acts as an antioxidant, inhibiting the enzymatic browning process. Simply slice your apples and immediately toss them gently in a bowl with a small amount of fresh lemon juice (about 1-2 tablespoons per apple). Drain any excess juice before arranging them on your platter. It’s important to use fresh lemon juice rather than store-bought concentrate, as fresh lemon juice typically has a better flavor profile and is less likely to impart an overly sour taste.
- Saltwater Solution (Minimal): A very diluted saltwater solution can also work. Mix about half a teaspoon of salt into one cup of cold water. Soak the apple slices for a few minutes, then rinse them thoroughly under cold water and pat dry. Be careful with this method, as too much salt can affect the apple’s flavor.
- Commercial Fruit Preservatives: You can find powdered fruit preservatives at most grocery stores, often near canning supplies. These typically contain ascorbic acid (Vitamin C) or citric acid and are very effective. Follow the package directions for dilution and use.
- Citrus Soda Soak: A quick dip in clear citrus-flavored soda (like Sprite or 7Up) can also prevent browning due to its citric acid content. Soak for a few minutes, then pat dry.
Regardless of the method you choose, make sure to pat the apple slices dry before serving to ensure the caramel adheres well and to avoid diluting the dip.
Need more inspiration for a sweet treat? Check out my dessert recipes page!

Delicious Ways to Serve Caramel Apple Dip
This versatile homemade caramel apple dip is not just for apples! Its rich, gooey texture and sweet flavor make it a fantastic companion for a wide array of dippers, transforming it into the ultimate fall dessert or festive appetizer. Here are some of our favorite serving suggestions to inspire your next gathering:
- Sliced Apples: Of course, our absolute favorite pairing is a generous assortment of sliced apples! As discussed, tart Granny Smiths are a classic choice, but Honeycrisp, Gala, Fuji, and even crisp red delicious varieties are all excellent. Offer a mix to cater to different preferences.
- Graham Crackers: The subtly sweet and crumbly texture of graham crackers makes them a perfect vehicle for scooping up abundant amounts of caramel. Their classic flavor pairs wonderfully with the rich dip.
- Pretzels: For a delightful sweet and salty contrast, crunchy pretzels are an absolute must. The savory saltiness against the sweet caramel is incredibly addictive and makes for a well-rounded flavor experience.
- Other Fruits: Don’t limit yourself to just apples! Pears, especially slightly firm varieties, are fantastic with caramel. Strawberries offer a juicy, fresh bite, and banana slices create a creamy, decadent combination.
- Cookies: Consider shortbread cookies, ginger snaps, or even vanilla wafers for a sweet and crunchy dipper.
- Brownie Bites or Cake Cubes: For an extra indulgent treat, small brownie bites or cubes of pound cake can be dipped into the warm or chilled caramel.
- Marshmallows: Toasted or untoasted, soft marshmallows create a delightful texture contrast.
- Top with Extras: Elevate your dip by sprinkling the top with various toppings. Toffee bits add a buttery crunch, chopped nuts (like pecans or walnuts) offer earthy notes, or even a sprinkle of sea salt flakes for an intensified sweet and salty kick.
- Caramel Apple Nachos: Arrange apple slices on a platter, drizzle generously with the caramel dip, and then sprinkle with mini chocolate chips, chopped nuts, or even whipped cream for a fun, deconstructed caramel apple experience.
- Dessert Charcuterie Board: For an impressive and interactive spread, add this caramel apple dip to a Halloween dessert charcuterie board. Surround it with all the dippers mentioned above, plus candies, cookies, and other fall-themed treats. It’s sure to wow a crowd at any party.
And if you’re craving even more caramel apple goodness, be sure to check out our candy apple slices – they’re not only fun to make but also an easy way to get the kids involved in the kitchen!
More Irresistible Fall Desserts to Savor
As the days grow shorter and the air becomes crisp, there’s nothing quite like indulging in the comforting flavors of fall. Beyond this delightful caramel apple dip, we have a collection of other seasonal treats perfect for cozy evenings or festive gatherings. Dive into these equally irresistible fall dessert recipes:
Pumpkin pie spice cookies are a true embodiment of autumn, offering a wonderfully chewy texture infused with the warm, aromatic blend of pumpkin pie spices. Each bite is further enhanced by a delicate, crunchy cinnamon sugar coating that adds an extra layer of texture and sweetness, making them an instant fall favorite.
For a lighter yet utterly decadent dessert, try this fluffy cranberry cheesecake mousse. Its airy, creamy texture is perfectly complemented by an easy-to-make graham cracker crumble, providing a delightful textural contrast. The tartness of the cranberries cuts through the richness, creating a beautifully balanced and refreshing fall treat that’s both elegant and simple.
If you’re a fan of the classic fall spice, you can also try our pumpkin spice cheesecake mousse. This light and airy dessert is bursting with the beloved flavors of pumpkin and warm spices, making it an excellent choice for a make-ahead treat. Its fluffy consistency and rich taste are sure to impress your guests, and the ease of preparation means less stress during busy holiday seasons.
For the ultimate fusion of classic comfort and sophisticated indulgence, this caramel apple crumble cheesecake is a showstopper. It brilliantly combines the creamy, tangy richness of cheesecake with the warm, spiced goodness of apple pie and a crunchy crumble topping. This dessert truly is the best of both worlds, offering layers of flavor and texture that will leave everyone craving another slice.

Finally, if you make this incredibly easy and delicious homemade caramel apple dip recipe, please be sure to give this recipe a star rating on the recipe card below and/or leave a thoughtful comment! I absolutely love hearing about your experiences in the kitchen and seeing your creations come to life. Your feedback is invaluable, and I genuinely take the time to respond to every single comment.
And if you have any questions along the way or need further clarification, don’t hesitate to drop them in the comments section below – I’m always happy to help!
Oh, and for an extra special treat, be sure to tag me on Instagram, Facebook, or Pinterest if you share photos of your caramel apple dip creation! Seeing these recipes come to life in your homes is truly my favorite thing, and it fills me with so much joy to look through those photos. It genuinely means the world to me to connect with you all!
Want to be the first to know when I release a new recipe or share the latest culinary news? Sign up for my exclusive newsletter to stay updated and get all the delicious details straight to your inbox!

Caramel Apple Dip Recipe Card
Ingredients
- 1/4 cup water
- 1 cup light brown sugar
- 1/2 cup unsalted butter
- 1/2 tsp fine sea salt
- 3/4 cup heavy cream
- 1 tsp pure vanilla extract
Instructions
-
In a heavy-bottomed saucepan, combine the water and light brown sugar. Place over medium heat and whisk frequently until all the sugar crystals are completely dissolved, forming a smooth syrup.
-
Cut the unsalted butter into smaller pieces. Add the butter to the saucepan and whisk continuously until it is entirely melted and smoothly incorporated into the sugar mixture, creating a homogenous liquid.
-
Increase the heat slightly to bring the mixture to a full boil. Once boiling, reduce the heat to medium-low. Continue to cook, stirring occasionally, until the caramel visibly thickens and achieves a rich, deep golden-brown color. It should easily pull away from the sides of the pan when stirred. This thickening process will take approximately 10 minutes.
-
Carefully whisk in the heavy cream and fine sea salt until fully combined and the sauce is smooth and creamy. Bring the mixture back to a boil for another 1 to 2 minutes. Then, remove the pan from the heat and whisk in the pure vanilla extract until it’s thoroughly integrated.
-
Pour the finished caramel apple dip into a clean glass dish or jar. Allow it to cool completely at room temperature before serving or refrigerating. The caramel sauce will thicken considerably as it cools, reaching its ideal gooey consistency.
