Milk Chocolate Dipped Shortbread Cookies: The Ultimate Holiday Treat Recipe
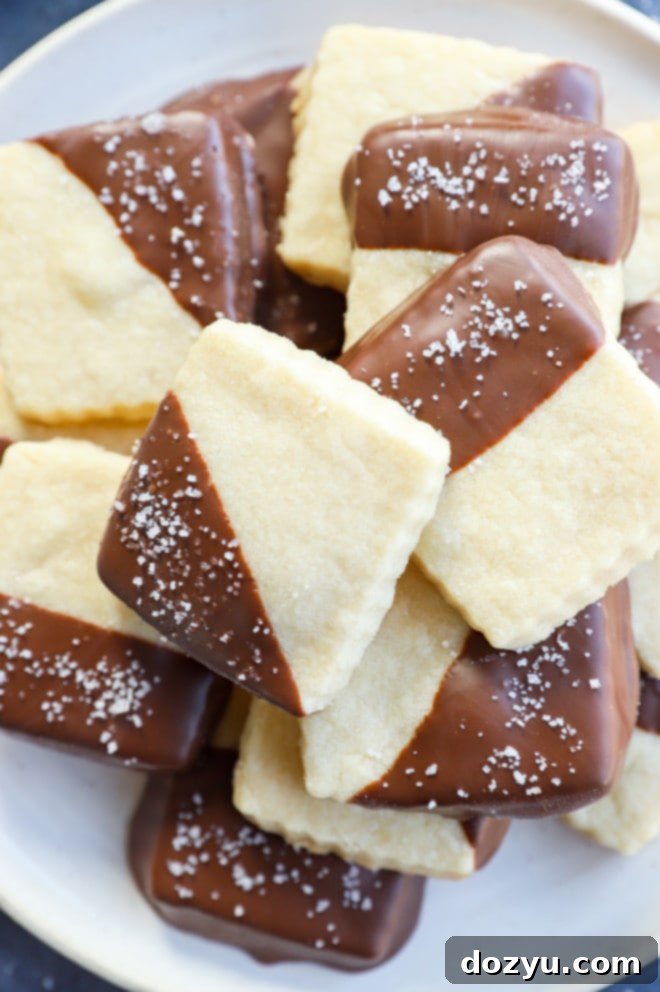
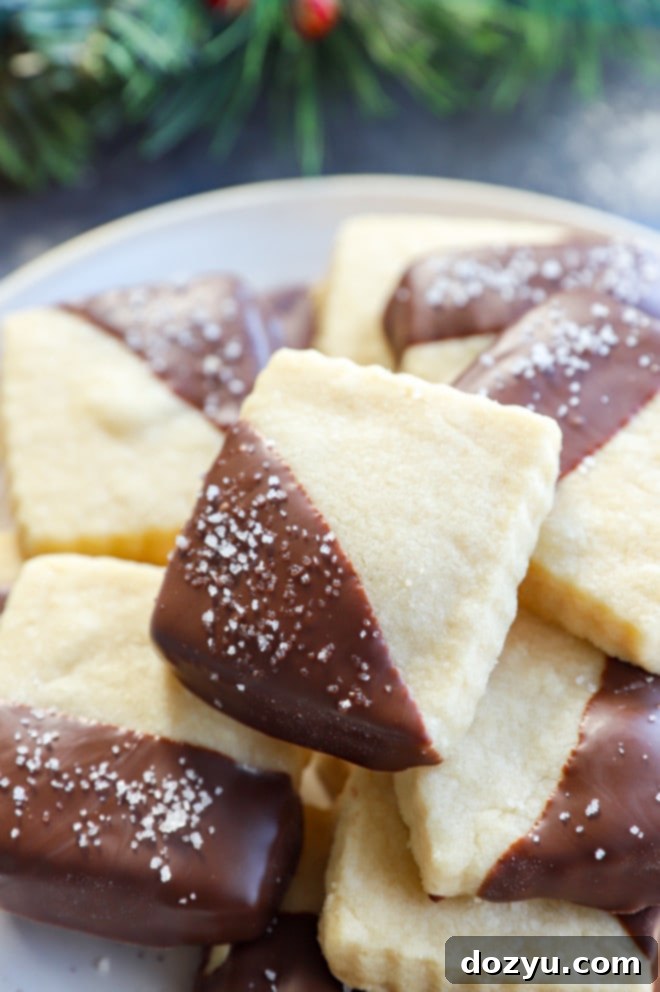
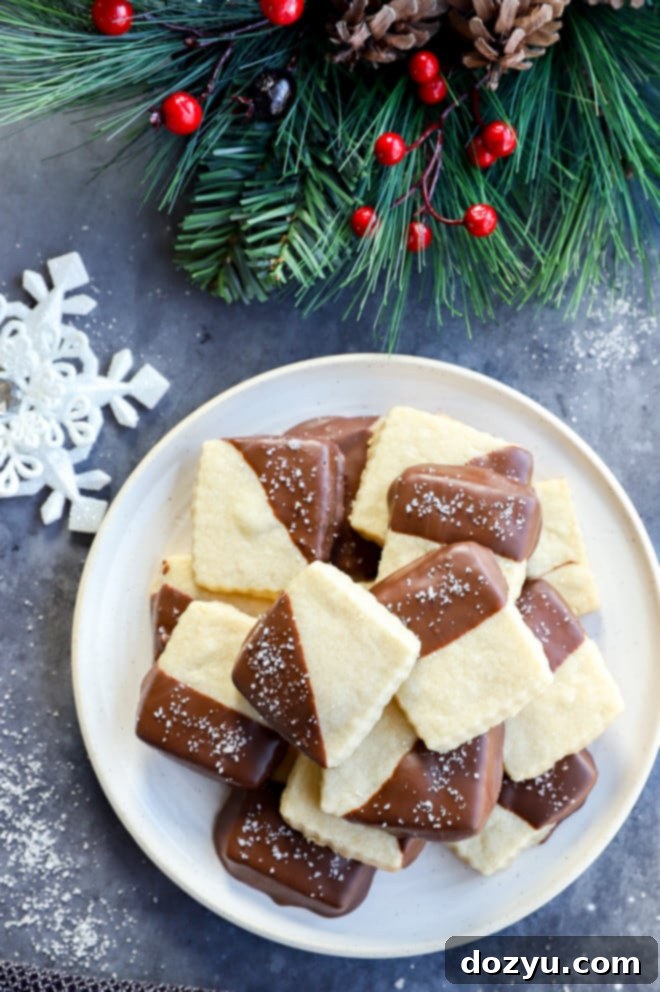
These Milk Chocolate Dipped Shortbread cookies are a true delight, combining a rich, buttery, and soft texture with the irresistible sweetness of milk chocolate and a hint of flaky sea salt. They are not only incredibly simple to prepare but also a joy to decorate, making them an ideal treat for the festive holiday season. You’ll fall in love with the classic, crumbly European-style shortbread, perfectly complemented by a luxurious milk chocolate coating and a sprinkle of gourmet sea salt that elevates every bite.
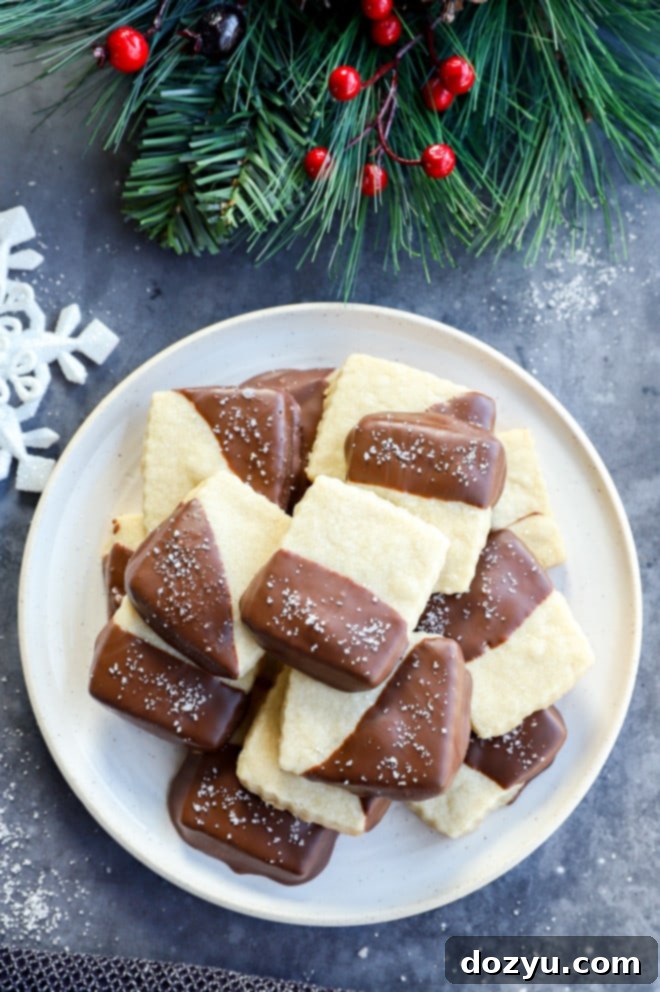
Table of Contents
About These Milk Chocolate Dipped Shortbread Cookies
There’s a unique magic to shortbread cookies that evokes feelings of warmth and nostalgia. Their distinct crumbly yet tender texture, coupled with that irresistible buttery flavor, creates a comfort food like no other. When you elevate this classic by dipping it in luscious milk chocolate and sprinkling it with delicate flaky sea salt, you’ve achieved a cookie masterpiece. The combination of sweet, salty, and rich textures is simply divine, making these shortbread cookies an absolute must-have.
This isn’t just any shortbread; it’s designed to capture that authentic European style—rich, dense, and melt-in-your-mouth perfection. Dipping them in chocolate transforms a humble cookie into a gourmet treat, perfect for any special occasion or simply to brighten an ordinary day. Whether you’re planning a holiday cookie swap, preparing a thoughtful gift box for friends and family, or just indulging yourself, these chocolate shortbread cookies are robust enough to travel well and delightful enough to impress even the most discerning palates.
They make an excellent offering for Santa Claus (if you believe in such things!) and are a fantastic addition to any festive spread. This particular recipe is an updated version, refined over time to ensure maximum flavor and the perfect texture. Get ready to experience a cookie that truly stands out!

Ingredients for Perfect Shortbread
Creating exquisite shortbread relies on a few key, high-quality ingredients. Each plays a vital role in achieving that signature buttery, tender, and crumbly texture. Here’s a closer look at what you’ll need:
- All-Purpose Flour: This forms the foundational structure of your cookies. It’s crucial to measure flour correctly to avoid tough cookies. The best method is to spoon the flour into your measuring cup and then level it off with a straight edge. This prevents over-packing, which can lead to too much flour and a dry, dense dough.
- Granulated Sugar: Standard white granulated sugar provides the perfect level of sweetness without overpowering the rich butter flavor. It also contributes to the cookie’s delicate crispness.
- Unsalted Butter: This is arguably the most important ingredient in shortbread. Always use unsalted butter, and ensure it is well chilled and cut into small chunks. Cold butter is key to preventing the cookies from spreading too much during baking and helps create that desirable tender, crumbly texture. If you only have salted butter on hand, you can use it, but be sure to omit the additional salt called for in the recipe to prevent the cookies from becoming too salty. High-quality butter will significantly enhance the overall flavor.
- Fine Kosher Salt: A small amount of fine kosher salt is essential to balance the sweetness and amplify the rich, buttery notes. It brings out the best in the other flavors, making the cookies taste more complex and satisfying. Flaky sea salt is then used as a topping for an extra pop of flavor and texture.
- Milk Chocolate Chips: While this recipe specifically calls for milk chocolate, feel free to get creative! You can certainly substitute with dark chocolate for a more intense cocoa flavor, or white chocolate for a creamier, sweeter profile. Whether you choose chocolate chips, chunks, or melting wafers, ensure it’s a brand you enjoy eating on its own, as its flavor will shine through in the dipping.
Essential Tools for This Recipe
Having the right kitchen tools makes the shortbread baking process smooth and enjoyable. Here are the must-haves:
- Food Processor: This is the hero tool for shortbread dough. It quickly combines the ingredients and cuts the cold butter into the flour without overworking the dough, which is crucial for a tender shortbread. Its speed prevents the butter from warming up too much, ensuring a perfect crumbly texture.
- Measuring Cups and Spoons: Accurate measurements are fundamental in baking. A reliable set of measuring cups and spoons will ensure your ingredient ratios are spot-on every time.
- Rolling Pin: To achieve uniformly thick cookies, a good rolling pin is indispensable. Consistency in thickness ensures even baking.
- Cookie Cutters: While simple biscuit cutters are perfect, feel free to use square, round, or festive holiday-themed cookie cutters to add a personal touch to your shortbread.
- Baking Sheets: You’ll need two baking sheets to accommodate all the cookies.
- Parchment Paper or Silicone Mats: These are essential for lining your baking sheets, preventing sticking, and ensuring easy cleanup. They also contribute to even heat distribution.
- Wire Rack: For cooling the cookies completely after baking, allowing air to circulate around them and prevent them from becoming soggy.
- Microwave-Safe Bowl (or Double Boiler): For melting the chocolate smoothly and easily.
Step-by-Step: How to Make Milk Chocolate Dipped Shortbread
Creating these delightful milk chocolate dipped shortbread cookies is a straightforward process that yields impressive results. Follow these detailed steps to ensure perfection:
Preparing the Dough
- Combine Dry Ingredients and Butter: In the bowl of your food processor, add the all-purpose flour, granulated sugar, chilled unsalted butter chunks, and fine kosher salt.
- Pulse to Crumbs: Pulse the food processor in short bursts until the mixture resembles fine crumbs, similar to coarse sand. This ensures the butter is evenly distributed without being overprocessed.
- Form Dough: Continue processing on low speed. The mixture will gradually come together, clumping into a cohesive dough. Be careful not to overmix; stop as soon as it forms a ball.
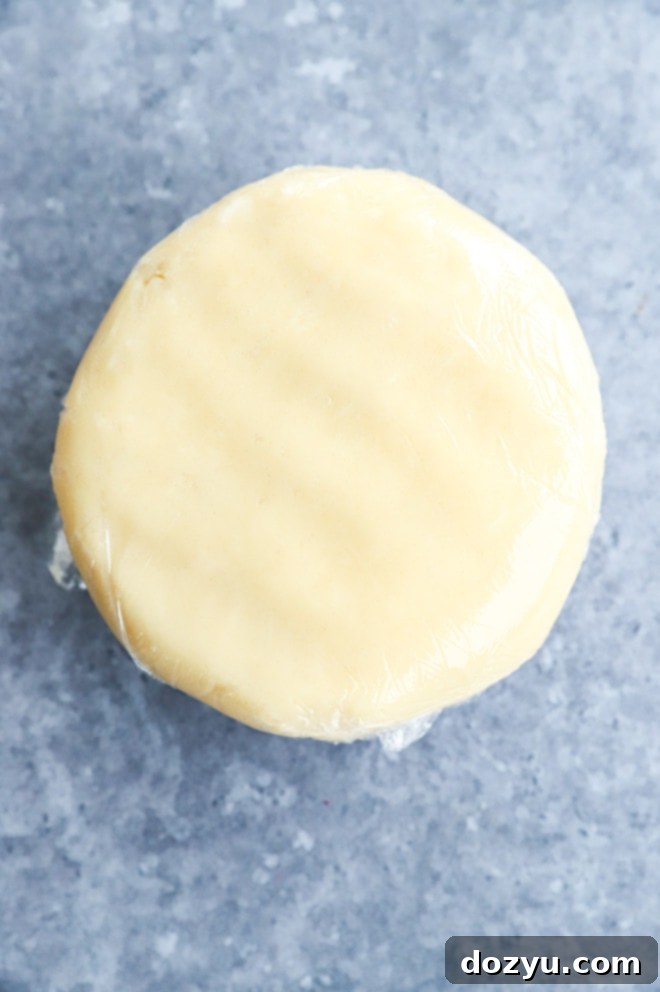
- Chill the Dough: Remove the dough from the food processor and gently form it into a thick disc. Wrap it tightly in plastic wrap to prevent it from drying out. Refrigerate for at least 1 hour. This chilling step is absolutely crucial – it allows the butter to firm up, preventing the cookies from spreading excessively during baking and ensuring that classic shortbread texture. You can chill the dough for up to 3 days, making it perfect for advance preparation.
Rolling and Cutting Your Cookies
- Prepare Work Surface: Unwrap the chilled dough and place it on a lightly floured work surface.
- Lightly Knead (if needed): Gently knead the dough for just a few minutes until it becomes smooth and pliable. If your dough feels particularly dry, especially in high altitudes or very dry climates, you can add 1 teaspoon of heavy cream to help it come together. Avoid excessive kneading, as this can develop the gluten in the flour and make the shortbread tough.
- Roll Out Dough: Using a rolling pin, roll the dough until it is about 1/2-inch thick. Aim for consistent thickness across the entire sheet of dough for even baking.
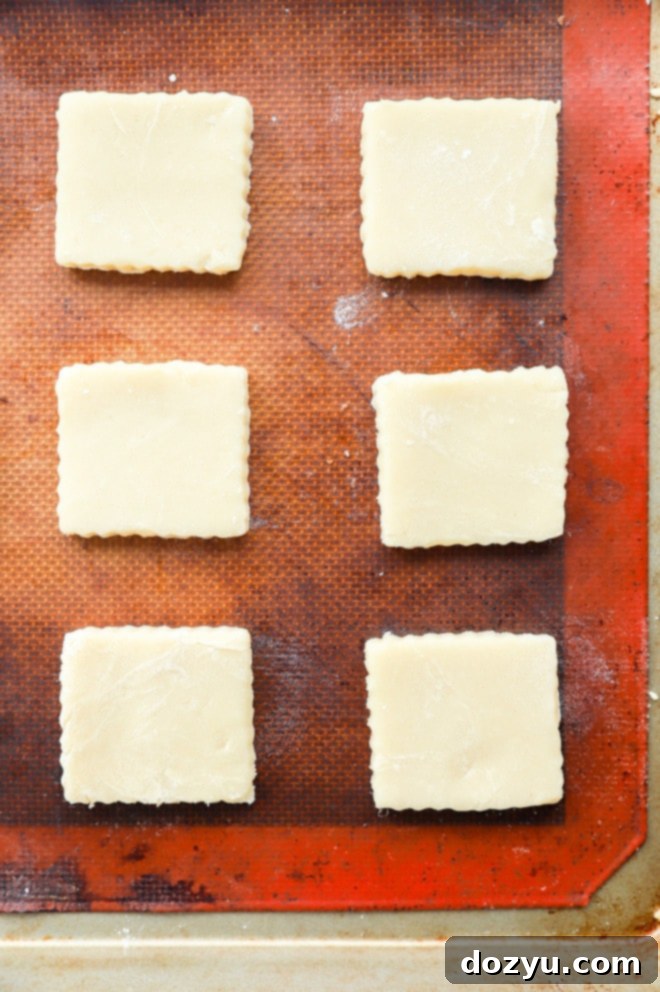
- Cut Cookies: Use your preferred cookie cutters (biscuit, square, or holiday shapes) to cut out individual cookies.
- Re-roll Scraps: Gather any dough scraps, gently press them together, re-roll, and cut out more cookies. Repeat this process until all the dough has been used, being mindful not to overwork the dough with each re-roll.
Baking to Golden Perfection
- Preheat Oven & Prepare Sheets: Preheat your oven to 325°F (160°C). Line two baking sheets with silicone mats or parchment paper.
- Arrange Cookies: Place the cut-out cookies on the prepared baking sheets, leaving a little space between each.
- Bake: Bake for approximately 20-25 minutes. The key is to watch for the edges to JUST begin turning golden. The centers will still feel soft to the touch, and this is perfectly normal. Shortbread is meant to be pale.
- Cool: Remove the baking sheets from the oven and allow the cookies to cool on the sheets for at least 10 minutes. This allows them to firm up slightly. After 10 minutes, carefully transfer them to a wire rack to cool completely before dipping. This step is crucial to prevent breakage and ensure the chocolate sets properly.
Dipping and Finishing Touches
- Melt Chocolate: Place the milk chocolate chips in a microwave-safe bowl. Microwave on high for 30 seconds. Stir thoroughly. Continue microwaving in 15-second increments, stirring vigorously after each, until the chocolate is completely melted and smooth. Be extremely careful not to overheat the chocolate, as it can seize. Alternatively, you can melt the chocolate using a double boiler for a more controlled process.
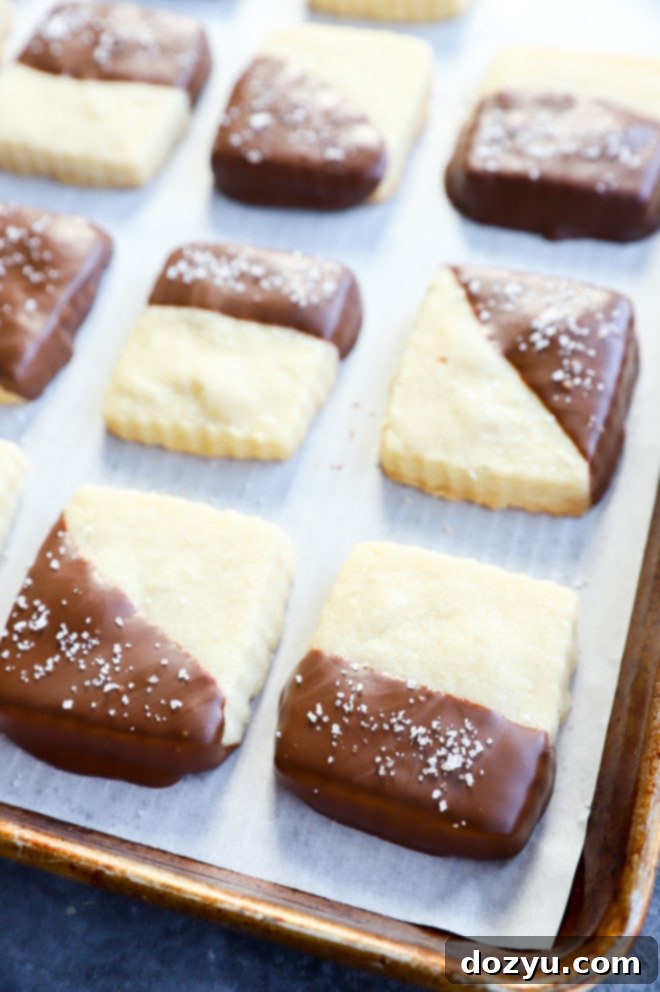
- Dip Cookies: Once the cookies are completely cool, dip them into the melted chocolate. You can dip them halfway for a classic look, or fully immerse them for a more indulgent treat. Use a fork or a dipping tool to gently remove excess chocolate.
- Sprinkle Sea Salt: Immediately after dipping, sprinkle the wet chocolate with flaky sea salt. The salt will adhere as the chocolate sets, providing that wonderful sweet-and-salty contrast.
- Set: Place the dipped cookies back on parchment-lined baking sheets or wax paper to allow the chocolate to set completely. You can speed up this process by placing them in the refrigerator for 10-15 minutes.
Pro Tips and Tricks for Shortbread Success
Achieving perfect shortbread cookies every time is easy with a few expert tips:
- Melt Chocolate Without Burning: Chocolate can be finicky. The best methods are either the microwave or a double boiler. If using the microwave, always use short intervals (15-30 seconds) and stir thoroughly between each. Residual heat will continue to melt the chocolate, so stop when there are still a few small lumps and stir until smooth. For a double boiler, ensure the water in the bottom pot never touches the bottom of the bowl holding the chocolate, and stir constantly over low to medium heat.
- Chill That Dough! (Seriously): This cannot be stressed enough. Chilling the dough is paramount for shortbread. It firms up the butter, which prevents the cookies from spreading too much in the oven, ensuring they hold their shape beautifully. It also contributes significantly to that tender, crumbly texture that defines good shortbread. Don’t skip this step!
- Use Your Favorite Chocolate: While milk chocolate is specified, don’t hesitate to experiment. Dark chocolate offers a sophisticated contrast, while white chocolate provides a creamier, sweeter note. Choose a high-quality chocolate that you genuinely enjoy eating, as it will make a big difference in the final taste. You can also add other toppings like chopped nuts, sprinkles, or a drizzle of contrasting chocolate.
- Don’t Overwork the Dough: Shortbread is known for its tenderness. Overworking the dough develops gluten, leading to tough, chewy cookies. Use the food processor only until the dough clumps, and if kneading by hand, do so minimally until just combined.
- Ensure Uniform Thickness: When rolling out the dough, aim for consistent 1/2-inch thickness. This ensures that all cookies bake evenly and have a similar texture.
- Proper Cooling is Key: Allow cookies to cool completely on a wire rack before dipping. Warm cookies will cause the chocolate to melt and slide off.
More tasty holiday cookies to bake: Christmas Shortbread Cookies | Chocolate Covered Oreos | Mini Chocolate Chip Cookies | Snowball Cookies | Lemon Shortbread Cookies
What is the Secret to Making Truly Good Shortbread?
The secret to exceptional shortbread lies in three fundamental principles, all revolving around a key ingredient: butter.
- High-Quality Butter is Paramount: Shortbread is a celebration of butter. Using real, high-quality unsalted butter makes an enormous difference in flavor. European-style butters, with their higher fat content, can yield an even richer taste and more tender crumb. The better your butter, the more delicious and profound the flavor of your cookies will be.
- Do Not Overwork the Dough: This is a critical rule for shortbread. Unlike yeast breads, you want to minimize gluten development in shortbread dough. Over-kneading or over-mixing will result in tough, chewy cookies instead of the desired tender, crumbly texture. Mix just until the ingredients are combined and the dough comes together. Once it forms a cohesive mass, stop.
- Chill the Dough Extensively: The third, and perhaps most crucial, secret is chilling the dough. This step is non-negotiable. Cold butter in the dough prevents excessive spreading during baking, helping the cookies maintain their shape and thickness. More importantly, it contributes to the signature crumbly, “short” texture by keeping the butter solid until it melts slowly in the oven, creating pockets of air and steam that result in tenderness. A minimum of one hour is good, but longer chilling (up to 3 days) can even enhance the flavor and texture.
No Food Processor? No Problem!
While a food processor is highly recommended for its efficiency in cutting cold butter into flour without overworking the dough, you can absolutely make this shortbread without one.
- Using a Stand Mixer: If you have a stand mixer, use the paddle attachment. Add the chilled, cubed butter to the flour, sugar, and salt. Mix on low speed until the mixture resembles coarse crumbs. Then, continue mixing on low until the dough comes together. Make sure to stop periodically and scrape down the sides of the bowl with a spatula to ensure everything is evenly incorporated.
- By Hand (Pastry Blender or Fingers): For those who enjoy a more hands-on approach, you can use a pastry blender or even your fingertips. Cut the cold butter into small pieces and add it to the dry ingredients in a large bowl. Use the pastry blender to cut the butter into the flour until the mixture resembles coarse crumbs. If using your fingers, work quickly to rub the butter into the flour, minimizing contact time to prevent the butter from warming up too much. Once the mixture is crumbly, you can then gently bring it together into a dough with your hands. Remember, minimal handling is key to keep the butter cold.
Should You Chill Shortbread Dough Before Baking? Always!
Yes, absolutely. Chilling shortbread dough before baking is a non-negotiable and fundamental step to achieve the desired results. Skipping this step can lead to disappointing cookies that spread too much, lose their shape, and lack that characteristic tender, crumbly texture.
Here’s why it’s so important:
- Prevents Spreading: The butter in the dough needs to be very cold and firm when it enters the oven. Chilling solidifies the butter, which then slowly melts during baking, creating steam that helps the cookies rise slightly and maintain their defined shape. If the butter is too warm, it will melt too quickly, causing the cookies to spread into thin, greasy puddles.
- Improves Texture: Cold butter contributes to the “short” (meaning crumbly and tender) texture of shortbread. The small pockets of butter melt slowly, creating a delicate crumb that is distinct from chewier cookies.
- Enhances Flavor: Chilling also allows the flavors in the dough to meld and deepen, resulting in a more complex and satisfying taste.
Aim for at least one hour of refrigeration, but up to three days is perfectly fine, and even beneficial for flavor development.
My Shortbread Spread Out and Burnt! What Went Wrong?
If your shortbread cookies spread excessively and perhaps even burnt around the edges, there are a few common culprits:
- Butter Temperature: The most frequent reason for spreading is butter that was too soft or warm when the dough was made, or insufficient chilling time. The butter needs to be cold and firm when it goes into the oven to help the cookies hold their shape. If your kitchen is warm, your butter might soften quickly, so work efficiently and ensure adequate chilling.
- Insufficient Chilling: As emphasized, skipping or cutting short the chilling period will almost certainly lead to spreading. The cold butter solidifies the dough, creating a stable structure that can withstand the oven’s heat.
- Overworked Dough: Overworking the dough develops gluten, which can make the dough more elastic and prone to spreading. Mix just enough until the dough comes together.
- Oven Temperature: An oven that is too hot can cause the butter to melt too rapidly, resulting in spreading before the cookie has a chance to set. An oven that is too cool might mean the cookies take too long to bake, also potentially leading to excessive spreading and uneven browning (or burning if left too long). Using an oven thermometer can help verify your oven’s accuracy.
- Cookie Thickness: If the cookies were rolled too thin, they are more susceptible to spreading and burning quickly. Aim for the recommended 1/2-inch thickness.
Don’t be discouraged! Adjusting these factors will help you achieve perfectly shaped, beautifully baked shortbread next time.
When is Shortbread Perfectly Baked?
Knowing when shortbread is done requires a bit of observation, as it’s not meant to be deeply golden brown like some other cookies. Here’s what to look for:
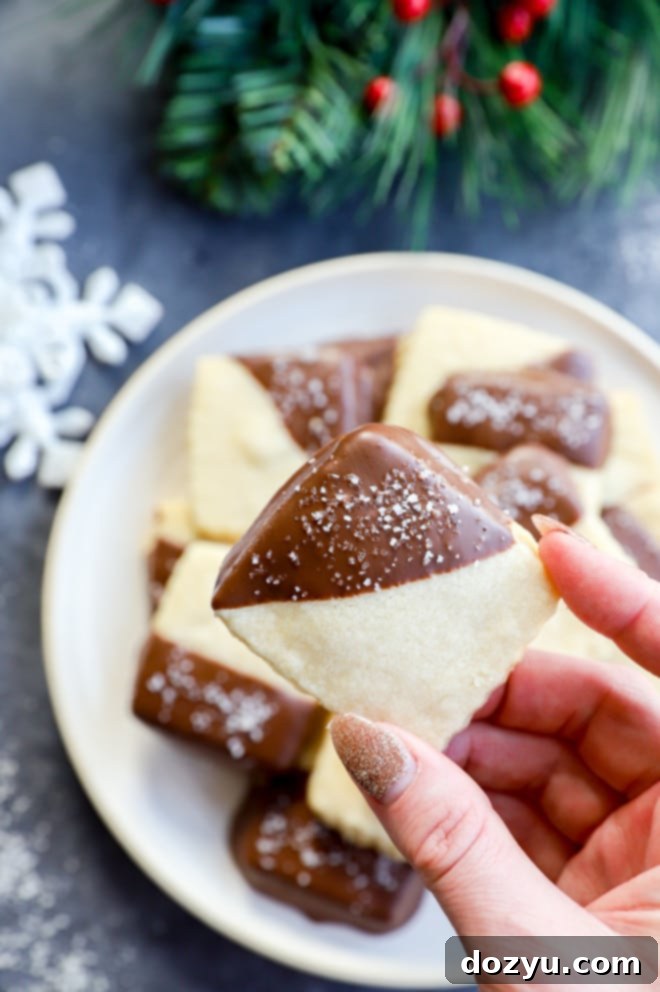
- Edges Just Turning Golden: The most reliable indicator is when the edges of the cookies just start to show a very light, delicate golden-brown color. This indicates they are baked through and beginning to crisp up.
- Centers Still Soft: When you gently touch the center of the cookies, they will likely still feel slightly soft. This is perfectly normal and desired. Shortbread continues to cook and firm up as it cools on the baking sheet due to residual heat.
- Pale Appearance: Overall, shortbread should maintain a relatively pale, almost ivory color. Dark browning usually means it’s overbaked, which can result in a drier, tougher cookie.
Always allow the cookies to cool on the baking sheet for at least 10 minutes before transferring to a wire rack. This period is crucial for them to fully set and prevent breakage.
Do I Have to Use Milk Chocolate? Get Creative!
While the recipe highlights milk chocolate, you absolutely do not have to stick to it! This is where you can truly personalize your shortbread cookies and cater to different preferences. The versatility of shortbread makes it an excellent canvas for various chocolate pairings:
- Dark Chocolate: For a more sophisticated and less sweet flavor profile, dark chocolate is an excellent choice. Its slight bitterness beautifully contrasts with the buttery sweetness of the shortbread.
- White Chocolate: If you prefer a sweeter, creamier, and milder chocolate experience, white chocolate is a wonderful alternative. It creates a beautiful visual contrast as well.
- Semi-Sweet or Bittersweet Chocolate: These offer a middle ground between milk and dark, providing a good balance of sweetness and cocoa intensity.
Beyond the type of chocolate, consider adding other toppings too! A sprinkle of chopped pistachios, toasted almonds, colorful sprinkles for a festive touch, or even a drizzle of a second type of chocolate can make your cookies truly unique.
Can I Prepare the Dough in Advance?
Yes, this shortbread dough is wonderfully forgiving and perfect for making ahead of time, which is a huge advantage, especially during busy holiday seasons. Preparing the dough in advance can significantly reduce your baking day workload!
- Refrigerating the Dough:
- As a Disc: After making the dough, form it into a disc and wrap it tightly in plastic wrap. It can be stored in the refrigerator for up to 3 days. When ready to bake, simply let it sit at room temperature for 10-15 minutes to soften slightly, then roll and cut as directed.
- Cut-Out Cookies: For even greater convenience, you can roll out the dough and cut out the individual cookies. Place the cut cookies in an airtight container, layered between sheets of parchment or wax paper, and refrigerate for up to 3 days. When ready, bake directly from the refrigerator.
- Freezing the Dough or Cut-Out Cookies:
- Dough Disc: Wrap the dough disc tightly in plastic wrap, then an additional layer of aluminum foil, and freeze for up to 3 months. Thaw in the refrigerator overnight before rolling and cutting.
- Cut-Out Cookies: This is a fantastic option for grab-and-bake convenience. Place the cut-out cookies on a baking sheet and freeze for 2 to 3 hours until they are solid. Once frozen solid, transfer them to a freezer-safe bag or airtight container, again layering with parchment paper to prevent sticking. They can be stored for up to 3 months.
- Baking from Frozen: When baking frozen cut-out cookies, there’s no need to thaw them. Simply place them on your prepared baking sheets and add a few extra minutes (typically 5-10 minutes) to the total baking time, monitoring closely for the golden edges.
Need more inspiration for cookies? Check out my cookies recipe page!
Perfect Pairings: What to Serve with Your Cookies
These Milk Chocolate Dipped Shortbread Cookies are delightful on their own, but pairing them with the right beverage or meal can elevate the experience even further. Here are some ideas for what to serve alongside these buttery treats:
Beverage Pairings:
- Classic Milk: Nothing beats the timeless combination of cookies and a cold glass of milk. The milk chocolate and buttery shortbread are a natural match.
- Homemade Egg Nog: For a festive holiday touch, serve them with a creamy glass of homemade egg nog. The rich spices complement the chocolate beautifully.
- Coquito: Experience a taste of Puerto Rican tradition with a chilled glass of coquito, a coconut-based eggnog-like drink that offers a unique tropical twist.
- Warm Beverages:
- Hot Mulled Apple Cider: The aromatic spices and warm apple flavor of mulled apple cider provide a cozy contrast.
- Mulled Wine: For an adult pairing, mulled wine offers complex spiced notes that complement the chocolate.
- Coffee or Tea: A simple cup of freshly brewed coffee or your favorite herbal tea makes for a sophisticated and comforting accompaniment.
- Hot Cocoa: Double down on the chocolate goodness with a mug of rich hot cocoa!
Holiday Meal Suggestions:
If you’re planning a full holiday meal and these cookies are for dessert, here are some hearty main course ideas that your family and friends will adore before enjoying these sweet treats:
- Rigatoni al Forno: A cheesy, meaty, and utterly delicious rigatoni al forno offers satisfying comfort. Pair it with some crunchy air fryer garlic bread for a complete Italian-inspired feast.
- Instant Pot Short Rib Ragu: For a flavorful dish with minimal fuss, Instant Pot short rib ragu delivers tender meat and rich sauce in a fraction of the traditional cooking time.
- Herb Crusted Rack of Lamb: A classic and elegant herb-crusted rack of lamb is always a showstopper and pairs beautifully with a variety of festive side dishes.
And if you’re craving more shortbread creations, these buttery and sweet raspberry thumbprint cookies are another delightful option!
Storing Your Delicious Shortbread Cookies
Proper storage ensures your Milk Chocolate Dipped Shortbread Cookies remain fresh and delicious for as long as possible.
- At Room Temperature: Once the chocolate has fully set, store the cookies in an airtight container at room temperature. They will remain fresh and flavorful for up to one week. Placing parchment paper between layers of cookies can prevent them from sticking together.
- In the Refrigerator: Some people actually prefer their shortbread cookies chilled! If you do, or if your kitchen is particularly warm, you can store them in an airtight container in the refrigerator for up to two weeks. The chocolate will be firmer when chilled.
- Dough Storage: Remember, the unbaked dough can be stored wrapped tightly in plastic wrap in the refrigerator for up to 3 days, or frozen for up to 3 months.
More Irresistible Holiday Dessert Recipes
If you’re looking to expand your holiday baking repertoire beyond these incredible shortbread cookies, here are some other festive treats that are sure to impress and satisfy any sweet tooth:
- Chocolate Dipped Candied Orange Slices: These elegant chocolate dipped candied orange slices are surprisingly simple to make and add a sophisticated, citrusy twist to any Christmas cookie box.
- Baileys Fudge: With just four ingredients, Baileys fudge is a decadent, creamy, and effortlessly easy treat, perfect for a last-minute addition to a dessert platter.
- Pecan Pie Cheesecake: If you’re a fan of both classic pecan pie and rich cheesecake, you’ll absolutely adore a slice of this indulgent pecan pie cheesecake. It’s a showstopper dessert that combines two beloved favorites.
- Triple Chocolate Brownies: For the ultimate chocolate lover, these triple chocolate brownies deliver a super fudgy, rich, and intensely chocolatey experience that’s hard to resist.
Finally, if you whip up this delightful milk chocolate dipped shortbread cookie recipe, please be sure to give this recipe a rating and/or leave a comment! I absolutely love hearing about your baking adventures and take the time to respond to every single comment. Your feedback is invaluable!
Feel free to drop any questions below if you have them – I’m always happy to help!
Oh, and be sure to tag me on Instagram if you make the recipe! It’s truly my favorite thing to see these recipes come to life in your homes – those photos mean the world to me!
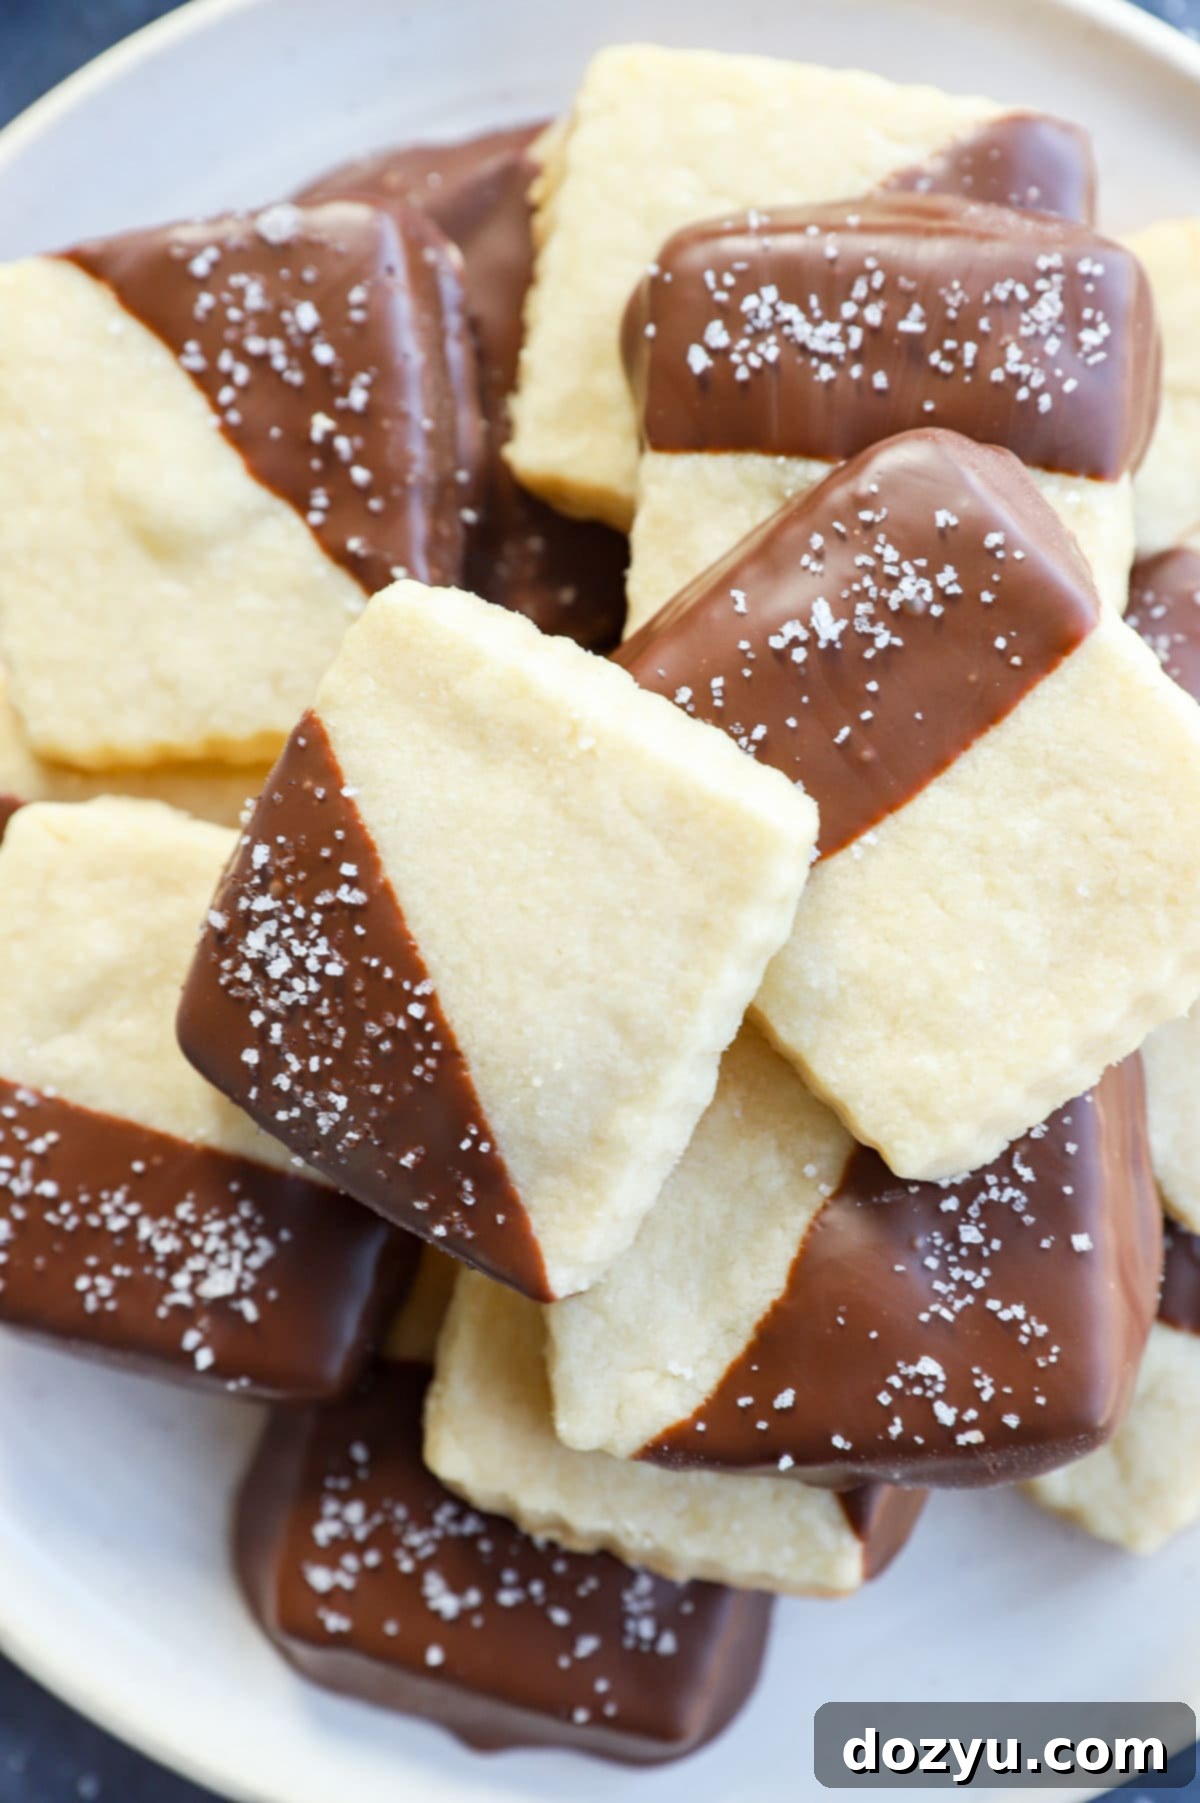
Milk Chocolate Dipped Shortbread
These holiday cookies are great for cookie swaps, parties and also for shipping to out of state friends and family.
Prep Time: 15 mins
Cook Time: 25 mins
Additional Time: 1 hr (for chilling)
Total Time: 1 hr 40 mins
Servings: 24 cookies
Rating: 5 out of 5 stars from 31 votes
Equipment Needed
- Measuring Spoons
- Measuring Cups
- 9-Cup Food Processor
- Rolling Pin
- Biscuit Cutter Set
Ingredients List
- 2 1/2 cups all-purpose flour
- 2/3 cup granulated white sugar
- 1 cup unsalted butter, chilled and cut up into chunks
- 1/4 tsp salt
- 4 oz milk chocolate chips
- Flaky sea salt (for sprinkling)
Detailed Instructions
- Preheat oven to 325˚F (160°C). Line two baking sheets with silicone mats or parchment paper.
- Add flour, sugar, chilled butter chunks, and salt to the bowl of a food processor. Pulse until the mixture resembles fine crumbs. Process on low speed until the mixture clumps together into a dough.
- Remove dough from the processor and knead on a lightly floured surface until the dough is smooth, approximately 3 minutes. If the dough is too dry (common at higher altitudes or drier climates), you can add a dash of heavy cream (1 tsp) to help it come together. Form dough into a disc and wrap tightly in plastic wrap. Chill for at least 1 hour in the refrigerator, or up to 3 days.
- Roll out the chilled dough until it is 1/2″ thick. Use a 1 1/2″ round cutter (or your preferred cookie cutter) to cut out disks of the dough. Gather any scraps, gently press together, and re-roll/cut until all dough is used.
- Place cookies on the prepared baking sheets. Bake for 20 to 25 minutes, or until the edges are just turning a light golden brown. The centers will still be soft.
- Allow cookies to cool on the baking sheets for at least 10 minutes, then transfer to a wire rack to cool completely.
- Once cookies are completely cool, melt the milk chocolate chips. Place them in a microwave-safe bowl and microwave on high for 30 seconds. Stir well, then microwave in 15-second increments, stirring thoroughly after each, until the chocolate is smooth and fully melted.
- Dip each cooled cookie either halfway or completely into the melted chocolate, depending on your preference. Place the dipped cookies on parchment paper-lined baking trays to set. Immediately sprinkle the wet chocolate with flaky sea salt, if desired. Allow chocolate to set completely at room temperature or chill briefly in the refrigerator to speed up the process.
Watch the Recipe Video
Nutritional Information
Calories: 160 kcal | Carbohydrates: 19g | Protein: 1g | Fat: 9g | Saturated Fat: 6g | Polyunsaturated Fat: 0.3g | Monounsaturated Fat: 2g | Trans Fat: 0.3g | Cholesterol: 20mg | Sodium: 26mg | Potassium: 30mg | Fiber: 0.4g | Sugar: 8g | Vitamin A: 236IU | Calcium: 8mg | Iron: 1mg
Category: Cookies
