Chiles en Nogada: A Regal Mexican Culinary Masterpiece
Prepare yourself for a culinary revelation. There are dishes that surprise you, and then there’s Chiles en Nogada. For an avid home cook or a seasoned food enthusiast, it’s rare to encounter a recipe that genuinely defies expectations. Often, merely glancing at a list of ingredients allows one to mentally construct the probable flavor profile. You think, “Ah yes, these elements will harmonize beautifully.” Yet, with Chiles en Nogada, the ingredients alone tell only part of the story. The unexpected fusion of savory meats, sweet fruits, aromatic spices, and a rich, creamy sauce creates an experience that words struggle to capture. It’s a dish that puzzles, then enchants, leaving an indelible mark on your palate.
The Unforgettable First Taste: A Symphony of Flavors
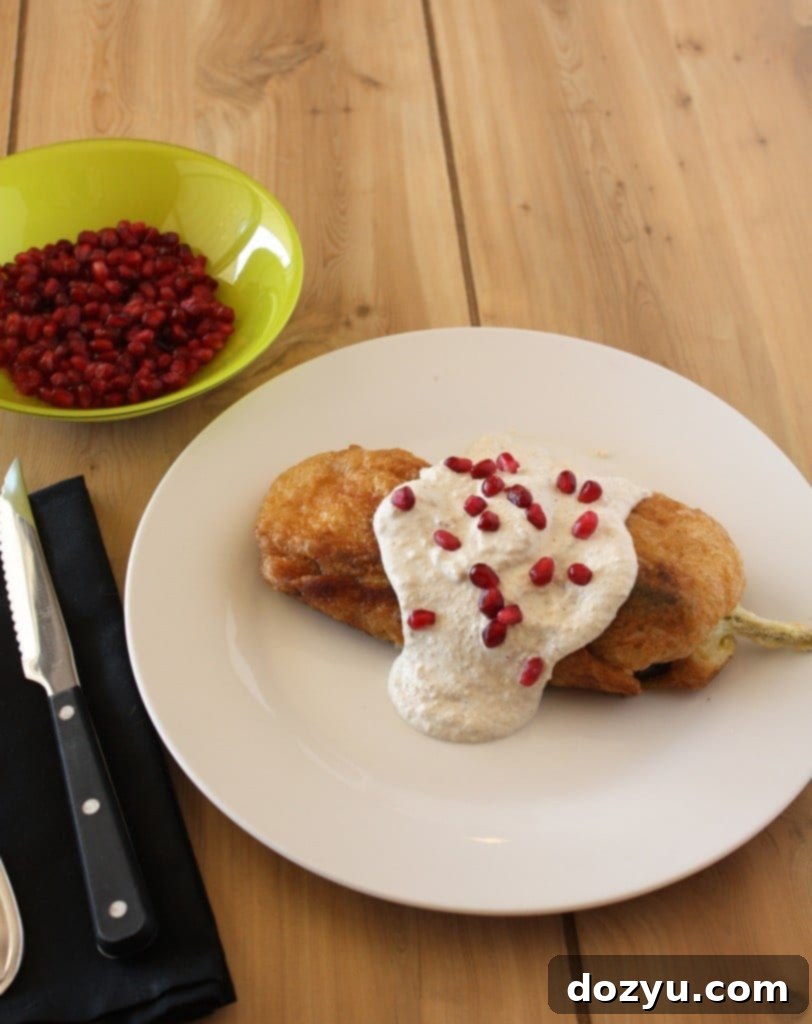
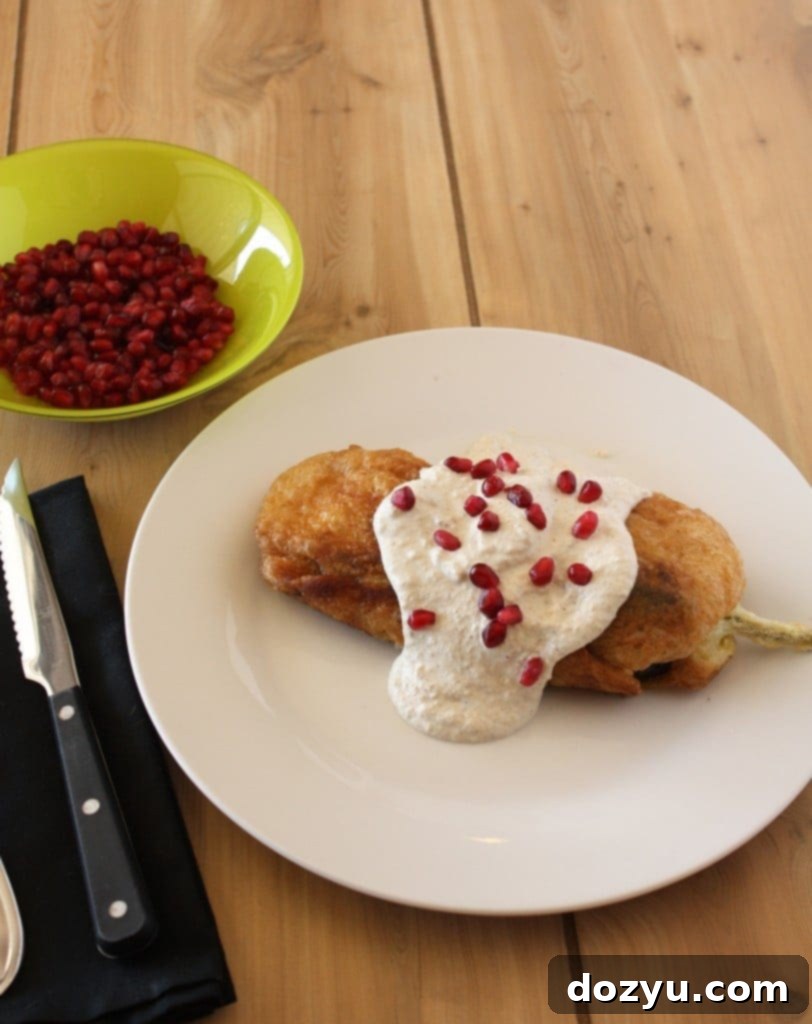
My initial encounter with Chiles en Nogada was nothing short of astonishing. The moment those complex flavors danced across my tongue, I understood why this dish is so revered. It wasn’t just good; it was a profound culinary experience that transcended the sum of its parts. The roasted poblano pepper, subtly smoky with a mild heat, encases a picadillo filling that is a masterclass in balance. Imagine tender, seasoned meats mingling with the unexpected sweetness of apples, pears, peaches, raisins, and candied pineapple, all brightened by a hint of spice. This filling alone is a triumph, but then it’s generously draped in the velvety, ivory-hued nogada sauce—a luscious blend of walnuts, goat cheese, and milk, often with a hint of sherry or sugar. Finally, a sprinkle of vibrant pomegranate seeds and fresh parsley adds bursts of color and freshness, completing a truly remarkable dish.
A Symbol of National Pride: The Rich History of Chiles en Nogada
Chiles en Nogada isn’t merely a meal; it’s an edible symbol of Mexican history and patriotism. This exquisite dish originated in Puebla, Mexico, in 1821, prepared by the Augustinian nuns of the Santa Monica convent to celebrate Agustín de Iturbide’s visit after he signed the Treaty of Córdoba, which granted Mexico independence from Spain. The nuns ingeniously incorporated ingredients available in season during late summer (August and September) and, most significantly, designed the dish to reflect the colors of the newly formed Mexican flag: green from the poblano peppers and parsley, white from the creamy nogada sauce, and red from the glistening pomegranate seeds. This tri-color presentation immediately established its place as a dish of profound national significance, particularly enjoyed around Mexican Independence Day on September 16th.
What makes Chiles en Nogada even more fascinating is its enduring tradition. Despite two centuries passing, the essence of the dish remains largely unchanged. While modern kitchens benefit from appliances like food processors and blenders, the core techniques and the careful layering of flavors hark back to its colonial origins. It’s a testament to the dish’s timeless appeal and the meticulous culinary heritage passed down through generations. Enjoying Chiles en Nogada is not just tasting a meal; it’s experiencing a piece of Mexico’s vibrant past.
Mastering the Art: A Rewarding Culinary Journey
Embarking on the preparation of Chiles en Nogada is undeniably a commitment, but it’s a deeply rewarding one. While it might seem intimidating at first, particularly the process of roasting and peeling the poblano peppers or perfecting the delicate egg batter for frying, it’s far from unachievable for the home cook. The key to success lies in patience and, crucially, in embracing the concept of “mise en place”—having all your ingredients prepped, chopped, and measured before you begin the actual cooking. When every component is ready, the assembly becomes a meditative and enjoyable dance rather than a rushed scramble.
The journey involves several distinct stages, each contributing its unique character to the final masterpiece. First, the vibrant poblano peppers must be charred, peeled, and deseeded with care to ensure they remain intact for stuffing. Next, the picadillo filling is meticulously prepared, allowing the complex blend of savory meats, dried fruits, nuts, and spices to simmer and meld into a rich, aromatic mixture. Then comes the art of coating and frying the stuffed peppers in a light, fluffy egg batter, creating a delicate, golden crust. Finally, the elegant nogada sauce is blended to a smooth, creamy consistency, ready to be poured generously over the fried chiles. While each step requires attention, none are overly complex, making it a perfect project for those looking to expand their culinary repertoire and create something truly spectacular.
A Food Lover’s Dream: Unlocking Unique Flavors and Traditions
For a true food enthusiast, this recipe is a treasure. It’s more than just following instructions; it’s an immersive experience that connects you to the heart of Mexican culture. The blend of ingredients—sweet peaches and apples with savory pork and beef, combined with the earthy notes of walnuts and the subtle kick of poblano—is a testament to culinary ingenuity. It’s a combination I would never have conceived on my own, which is precisely what makes it so exciting. It challenges your preconceptions about flavor pairings and opens up a new world of taste sensations. The historical significance woven into every bite only adds to its allure, transforming a meal into a storytelling event.
Whether you’re celebrating Mexican Independence Day or simply seeking an extraordinary dish to impress your guests, Chiles en Nogada is an unparalleled choice. It speaks of tradition, celebration, and the rich tapestry of Mexican gastronomy. The vibrant presentation, the complex aroma, and the unforgettable taste make it a true showstopper. Don’t let the multi-step process deter you; the reward of tasting this bright, rich, and truly unique dish is immeasurable. Trust me on this one: dive into this recipe, embrace the journey, and prepare to be amazed by the magic of Chiles en Nogada!

table of contents
Toggle
Chiles en Nogada
ingredients
- 1 to 2 tablespoons olive oil
- 1 medium onion chopped
- 2 garlic cloves minced
- 12 oz pork loin chopped
- 12 oz beef rump roast chopped
- 1 lb. charred tomatoes feel free to use the fire-roasted canned tomatoes if you don’t want to char your own tomatoes
- 1/2 cup raisins
- 8 oz peaches approximately 2 large peaches, peeled, cored and chopped
- 9 oz apples approximately 4 small, I used Gala apples, peeled, cored and chopped
- 8 oz pears you can use Mexican pears if you can find them, however I used Bosc pear and it tasted great
- 1/2 cup sliced almonds
- 1/2 cup pine nuts
- 3/4 cup candied pineapple chopped
- 1/4 teaspoon dried thyme
- 1/2 teaspoon oregano
- 3/4 teaspoon ground cinnamon
- 1/2 teaspoon ground clove
- 12 poblano peppers
- 3/4 to 1 cup flour
- 8 eggs separated
- Salt
- 1 bottle vegetable oil
- 4 cups whole peeled walnuts
- 3.5 oz goat cheese
- 1/2 cup plus 2 tablespoons milk
- 2 tablespoon sherry
- 2 tablespoons sugar
- 1/2 cup whole or chopped parsley leaves
- 1 cup pomegranate seeds
instructions
-
Start by making the filling. Heat the olive oil in a medium saucepan over medium heat. Add the chopped onion to the pan and cook until softened, approximately 3 to 4 minutes. Stir in the pork and beef and continue to cook until the meat is browned and almost cooked through. Add the tomato sauce and bring the mixture to a boil. Once it is boiling, stir in the raisins, fruit, nuts, dried pineapple, and spices. Make sure you taste the mixture at this point and add salt if needed. Bring everything back to a boil, then reduce the heat to low, cover the pot, and simmer for approximately 30 minutes. I took the advice of the original recipe and made this filling the day before and stored it in the refrigerator until I was ready to make the rest of the dish. If you do this, make sure you warm up the filling before you start assembling the rest of the recipe.
-
To char the poblano peppers, turn your broiler on high. Line a baking sheet with aluminum foil and place the peppers on the sheet. Char under the broiler for about 5 minutes per side – you will see the skin start to turn dark and bubble. Remove from your oven and let the peppers rest until they are no longer too hot to touch. To remove the skin, gently (I stress gently) rub the skin off with your thumbs or using a paper towel. Try to be as delicate as you can in this process so you don’t rip them apart. Don’t worry if you have a few pieces of skin still lingering on the peppers (it’s difficult to get it all off, I certainly haven’t mastered that art yet!).
-
Cut into one side of the pepper from the top to bottom, making sure that you leave a little space on either side so the pepper doesn’t split open while frying. Using a spoon or your fingers, remove the seeds gently (no scraping!).
-
Grab your filling and stuff each pepper with the filling until they are full but you can still close the opening. Then cover them all in a light coating of flour. Set those aside for a minute while you prepare the egg batter.
-
A key part of this recipe is timing. If you let the egg batter rest for too long, the texture will be off and you won’t get the right result. It’s a good idea to have everything in place, ready to fry, before you make the egg batter. While you are making the batter, go ahead and start heating up your oil in a medium skillet over medium-high heat. To make sure you are using enough oil (and not too much), pour in enough oil to cover the base of your skillet and be about 1/2 inch deep.
-
To make the egg batter, beat the egg whites with an electric mixer until they form firm peaks. Stir in the egg yolks one at a time just until they are incorporated into the egg whites.
-
Line a baking sheet with paper towels for the peppers to rest on once they have been removed from the oil. Now comes the trickier part of the recipe. Take one pepper and hold it on either end. Dip the pepper into the batter until it is covered in the batter. Carefully place the chile in the hot oil. If some of the pepper is still showing on the top, spoon some extra batter on top so it is completely covered.
-
Fry the pepper until it is golden brown, which happens fast, approximately 10-15 seconds. Using two spatulas or large spoons (whatever tool you have to do the job), roll the pepper over to cook on the other side. I ended up also enlisting the side of the skillet to push the pepper up against – it helped a lot! Fry for an additional 10-15 seconds and remove from heat to the lined baking sheet to drain. Repeat with the remaining peppers, you may need to add more oil to keep the same level in the skillet.
-
Last step! Prepare the sauce. Add walnuts, goat cheese, milk, and sugar to a food processor or blender. Note: if your blender or food processor is on the smaller side, you may need to split the ingredients and make the sauce in two batches. Puree/blend until the mixture is smooth. If the sauce is too thick, add one tablespoon of milk at a time until you reach a more sauce-like consistency. Add the sherry and puree/blend until combined.
-
Serve each pepper immediately with a good helping of the nogada sauce and top with pomegranate seeds and parsley.
