Mastering Roasted Garlic Aioli: The Ultimate Creamy, Flavorful Sauce
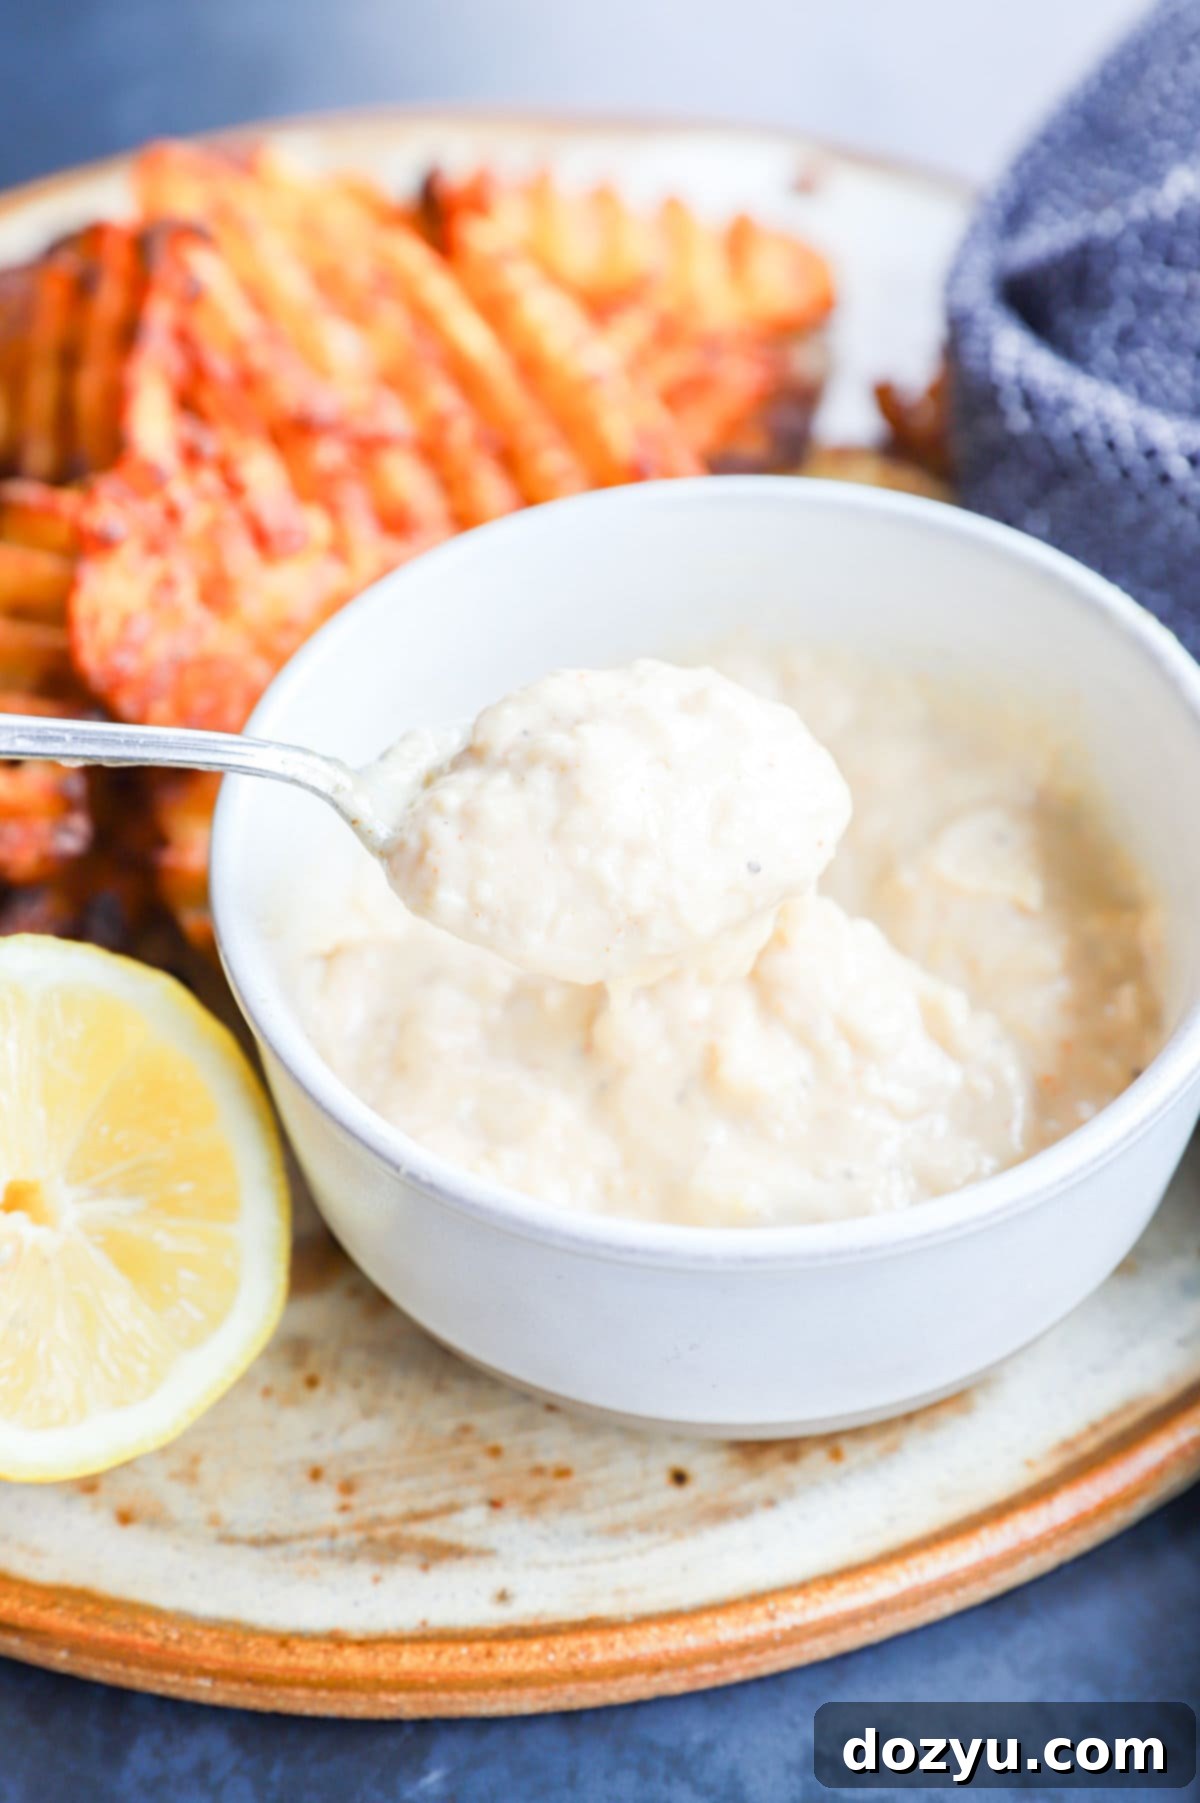
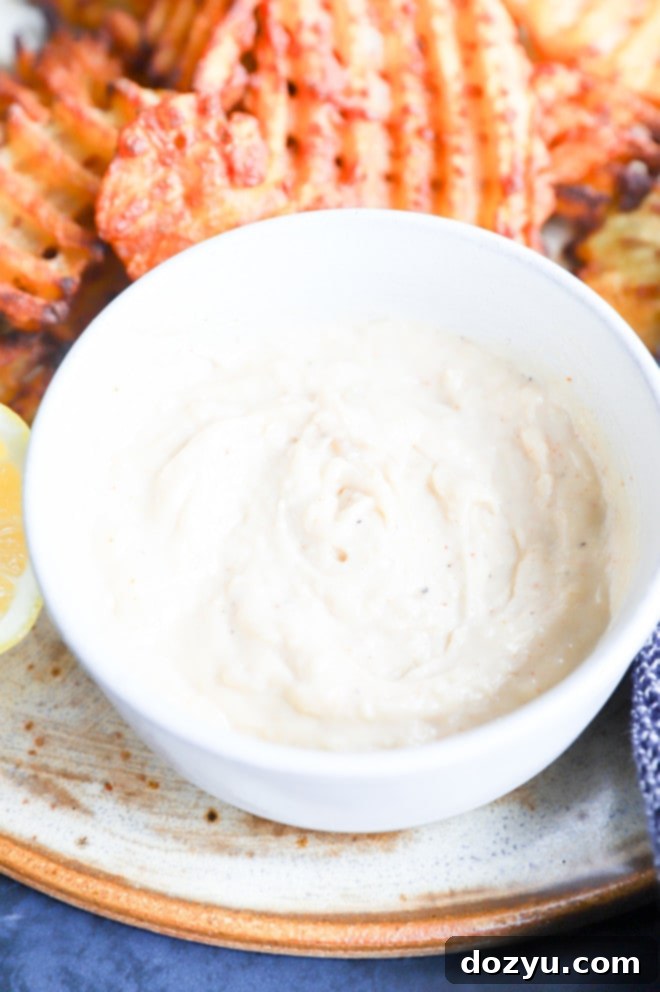
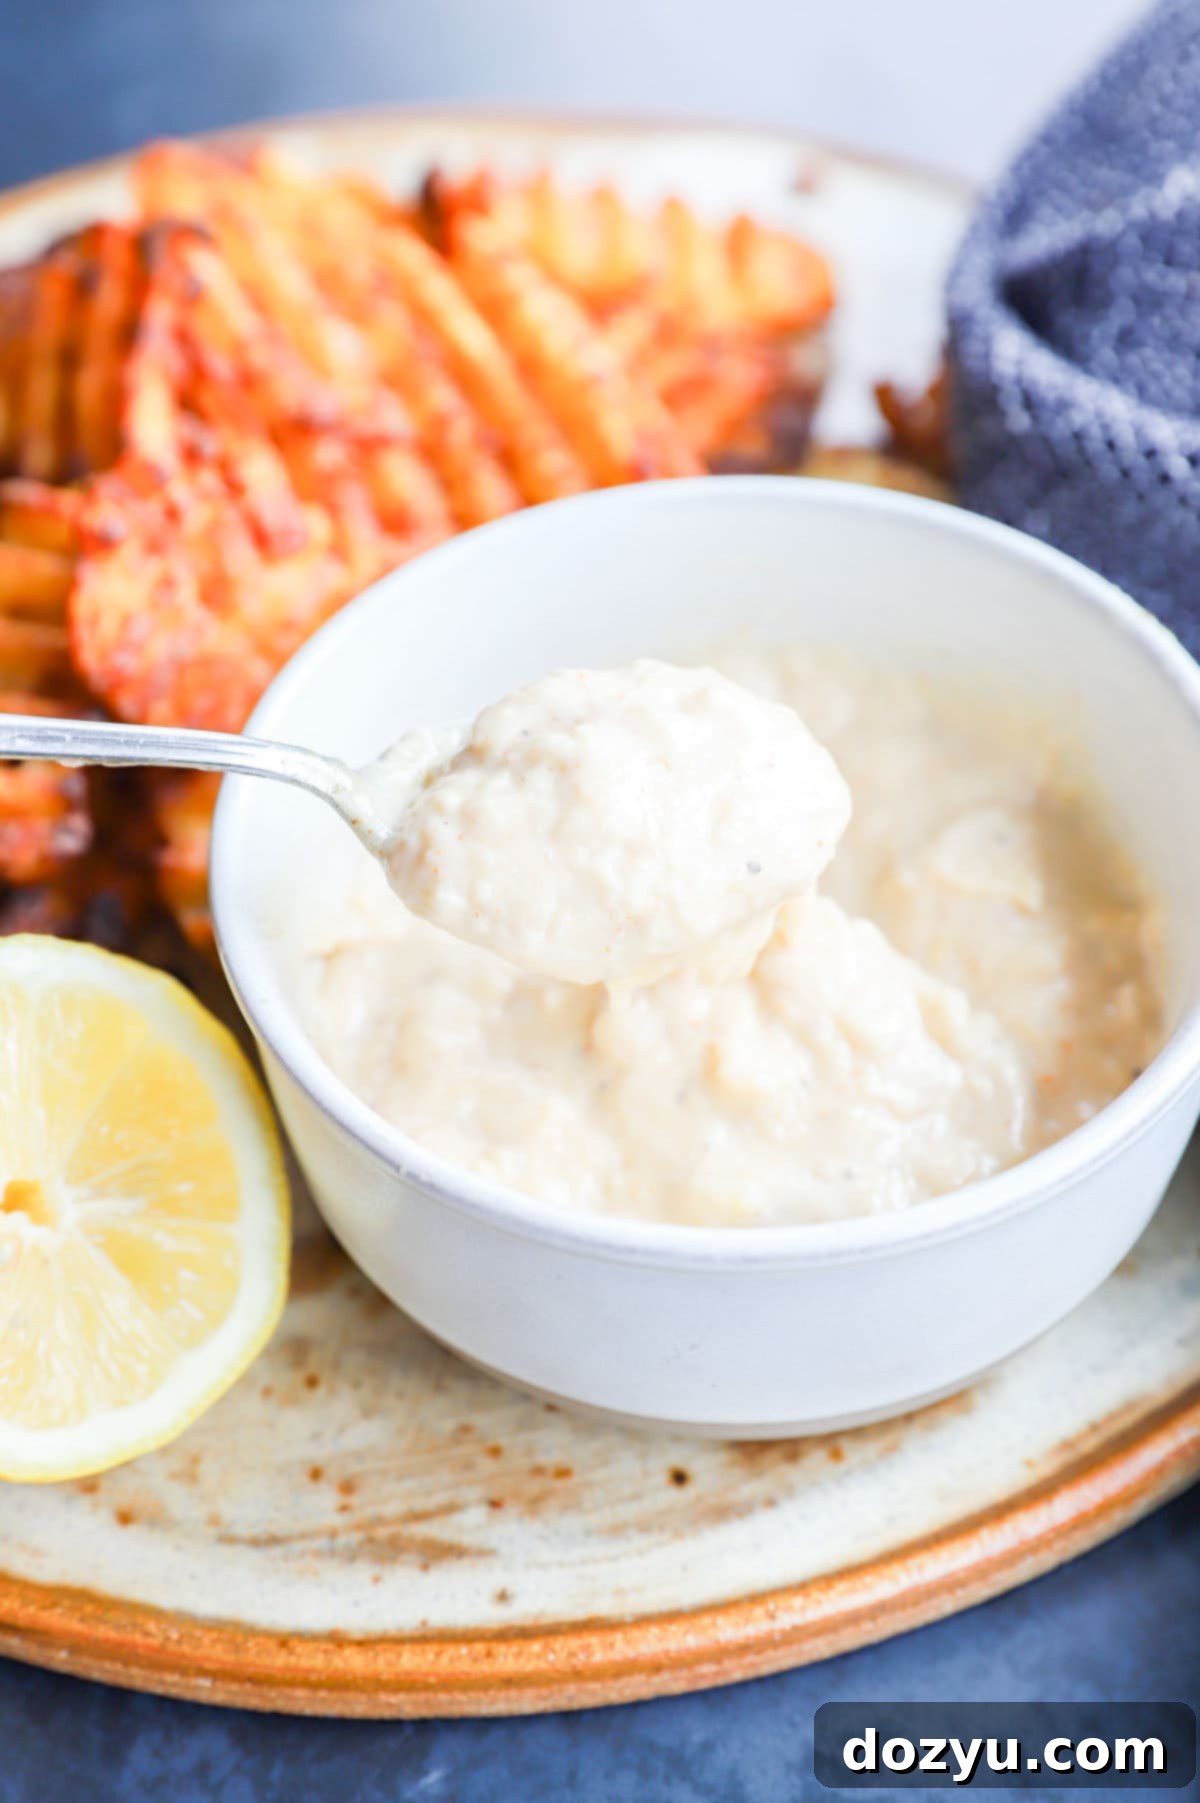
Experience an explosion of savory, tangy, and bright flavors with this incredible creamy roasted garlic aioli! Far more than just a dip, this versatile sauce combines the rich, mellow sweetness of roasted garlic with the zesty brightness of lemon juice, the familiar creaminess of mayonnaise, the umami depth of Worcestershire sauce, and a touch of salt. For those who love a hint of warmth, a whisper of cayenne pepper can be added to elevate the profile even further. Simple to prepare, wonderfully smooth, and utterly addictive, this roasted garlic aioli is guaranteed to become a staple in your refrigerator. Get ready to transform your meals with this unparalleled condiment!
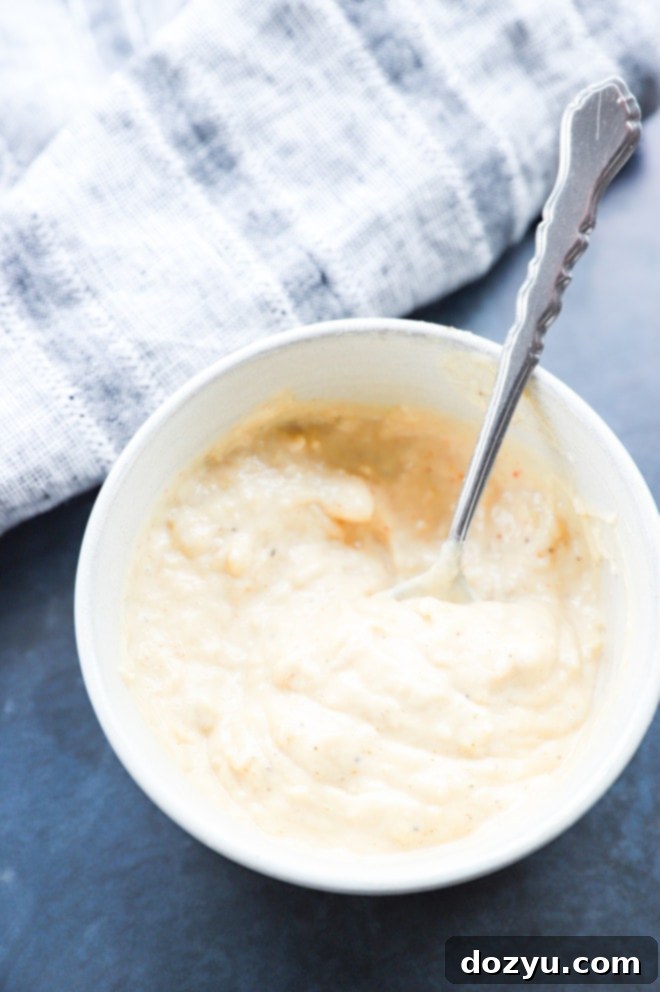
table of contents
Toggle
About This Roasted Garlic Aioli
Imagine having a secret weapon in your fridge that instantly elevates any dish from ordinary to extraordinary. That’s exactly what this creamy roasted garlic aioli is! While my culinary aspirations might include always having an array of gourmet sauces on hand, this roasted garlic aioli is one I truly can’t live without. Its rich, nuanced flavor profile makes it a standout condiment that you’ll want to incorporate into every meal.
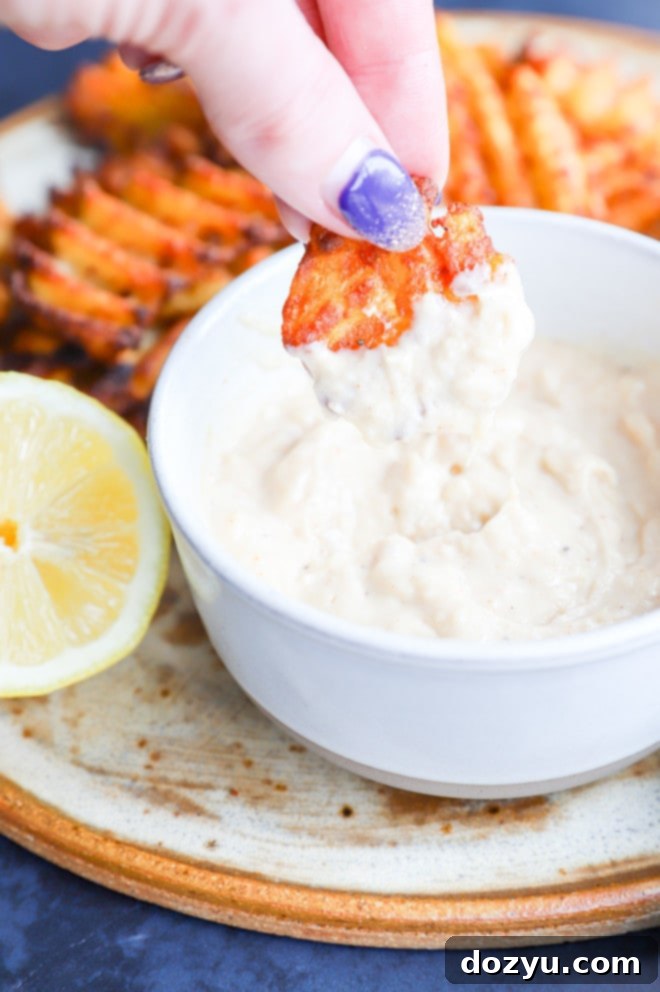
The magic truly begins with the garlic. Roasting garlic transforms its pungent, sharp bite into a wonderfully sweet, earthy, and mellow flavor. When this deeply caramelized garlic is blended into a creamy base, it creates a sauce that is both savory and slightly sweet, with a delightful tang from fresh lemon juice. The result is an incredibly versatile dip and spread, perfect for everything from dipping crispy french fries to enhancing your favorite sandwich or even as a flavorful foundation for avocado toast. Its smooth texture and irresistible taste make it the ultimate upgrade to any meal. This isn’t just a sauce; it’s an experience, and the slight effort of roasting the garlic is undeniably worth every savory bite.
Short on time but still craving that garlic goodness? You can make a quick and easy garlic aioli in just 5 minutes without the roasting step!
What is Aioli?
At its heart, aioli is a sauce that hails from the sun-drenched regions of the Mediterranean. Traditionally, the word “aioli” literally translates to “garlic and oil” (from “ail” for garlic and “oli” for oil). A classic aioli is an emulsion made by painstakingly pounding raw garlic cloves with a mortar and pestle, then slowly drizzling in olive oil until a thick, creamy, mayonnaise-like consistency is achieved. Some traditional recipes also incorporate raw egg yolk to help stabilize the emulsion and add richness.
However, when we talk about aioli in a modern context, especially in places like the United States, it often refers to a flavored mayonnaise. While true traditional aioli and mayonnaise are both emulsions—creamy mixtures of oil and water that wouldn’t normally mix, stabilized by an emulsifying agent—they differ in their base and method. Mayonnaise typically uses egg yolk as its primary emulsifier and a neutral oil, whereas traditional aioli relies on the garlic itself and olive oil. For the sake of convenience, and to create a consistently creamy and delicious sauce without the intensive labor of a traditional emulsion from scratch, many modern recipes, including this one, use high-quality store-bought mayonnaise as a shortcut. This approach provides all the velvety texture and flavor-carrying capacity of a traditional aioli, infused with the exquisite taste of roasted garlic, making it accessible for any home cook. So, to all the purists out there, rest assured, this mayonnaise-based aioli is a delightfully practical and equally delicious homage to the classic!
Ingredients for the Perfect Roasted Garlic Aioli
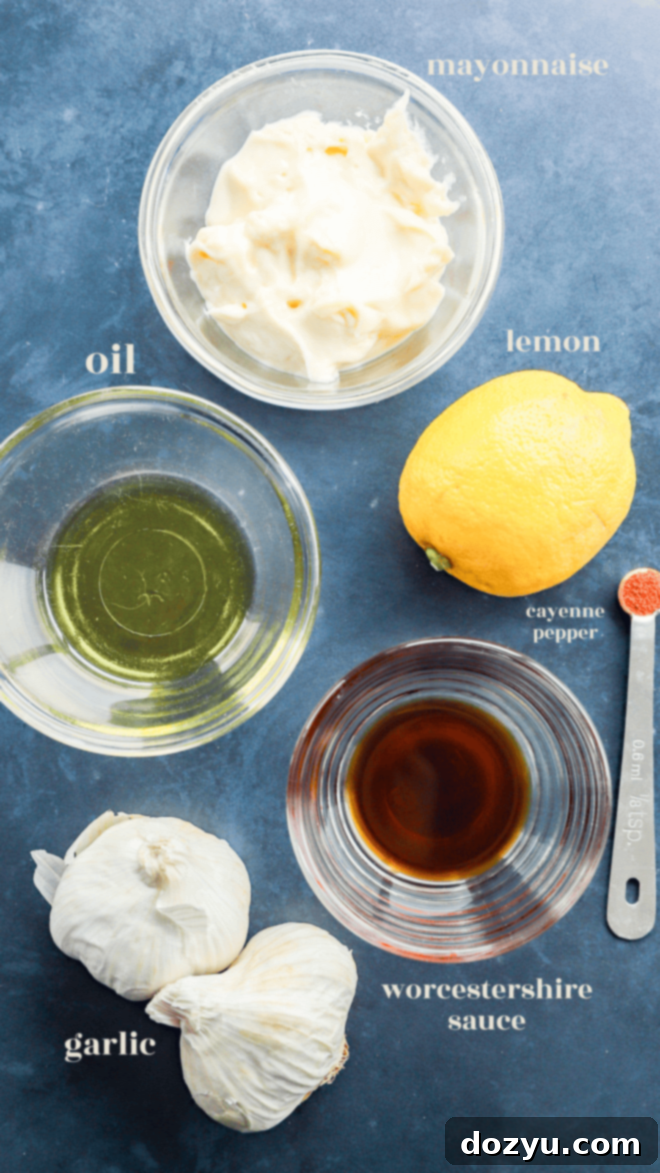
Crafting this phenomenal roasted garlic aioli requires just a handful of simple ingredients, each playing a crucial role in building its complex flavor profile:
- Garlic: The star of the show! We use two whole heads of garlic for this recipe. While it might seem like a generous amount, the roasting process transforms raw garlic’s sharp pungency into a wonderfully sweet, mellow, and intensely flavorful experience. Look for firm, unblemished garlic heads without any squishy spots or cracks for the best results. If you prefer a slightly milder garlic flavor, one head will also work beautifully.
- Oil: A drizzle of oil is essential for roasting the garlic, helping it caramelize beautifully and infusing it with extra richness. Extra virgin olive oil is my preferred choice for its robust flavor, but you can also use other mild-flavored oils like avocado oil, grapeseed oil, or even a good quality vegetable oil.
- Mayonnaise: This forms the creamy base of our shortcut aioli. Feel free to use your favorite store-bought brand – whether you prefer full-fat for maximum richness or a low-fat option. For those following a plant-based diet, a good quality vegan mayonnaise works perfectly, making this recipe accessible to everyone. While store-bought mayo offers convenience, you could also use homemade mayonnaise for an even fresher, scratch-made touch.
- Lemon Juice: Freshly squeezed lemon juice is non-negotiable here! It adds a crucial bright, tangy counterpoint that cuts through the richness of the mayonnaise and complements the sweetness of the roasted garlic. Bottled lemon juice simply won’t deliver the same vibrant flavor.
- Worcestershire Sauce: This ingredient adds an incredible depth of umami and a subtle savory complexity that ties all the flavors together. Its unique blend of sweet, sour, and savory notes enhances the overall profile. If you’re aiming for a vegetarian or vegan aioli, readily available substitutes like soy sauce or liquid aminos offer a similar savory punch.
- Cayenne Pepper: This is an optional but highly recommended ingredient. Just a touch of cayenne pepper introduces a gentle, background warmth that subtly elevates the aioli without making it overtly spicy. It creates an exciting layer of flavor that keeps you coming back for more.
- Salt: Essential for seasoning the aioli to perfection. I recommend using kosher fine salt, adding it gradually and tasting as you go to achieve your desired balance.
Essential Tools: This Recipe’s Must-Haves
You don’t need a professional kitchen to whip up this amazing roasted garlic aioli. The primary tools required are quite basic and likely already in your kitchen:
- Chef’s Knife: A sharp chef’s knife is essential for safely and efficiently trimming the tops off your garlic heads, ensuring all the cloves are exposed for optimal roasting.
- Cutting Board: A sturdy cutting board provides a stable surface for preparing your garlic.
Beyond these, you’ll also need:
- Aluminum Foil: A large piece of aluminum foil is crucial for wrapping the garlic heads, creating a steamy environment in the oven that tenderizes the cloves and helps them caramelize without burning.
- Mixing Bowl: Any medium-sized bowl will do for mashing the roasted garlic and mixing all the aioli ingredients.
- Spoon or Fork: A simple spoon or fork is perfect for mashing the soft roasted garlic cloves and stirring everything together until beautifully combined.
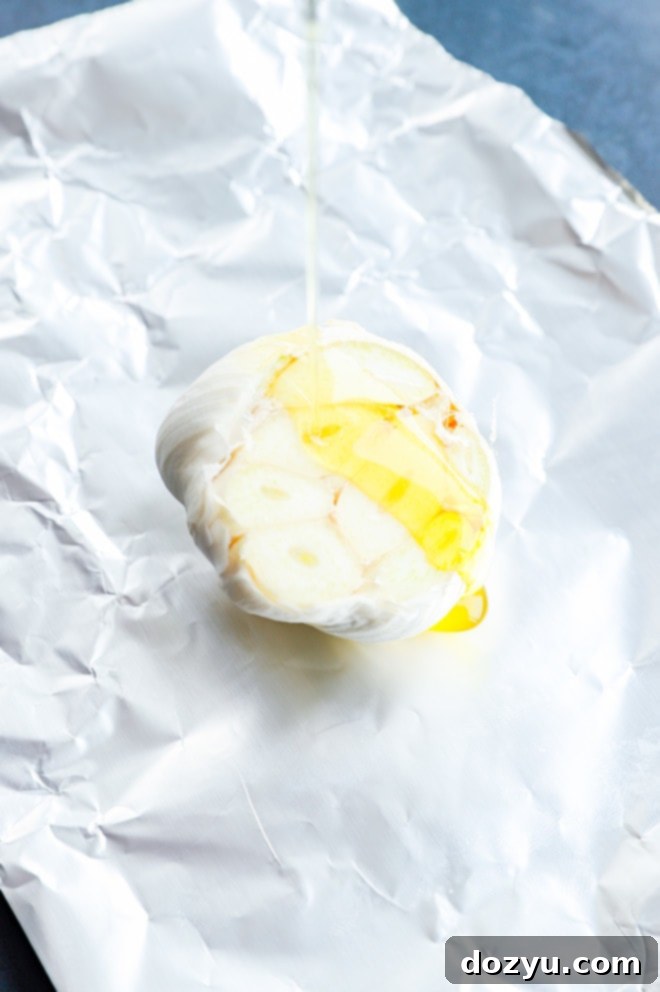
Here’s How to Make Creamy Roasted Garlic Aioli
Making this flavorful aioli is a straightforward process, broken down into three simple steps:
Step 1: Roast the Garlic
Preheat your oven to 400˚F (200˚C). Begin by preparing your garlic heads. Using a sharp chef’s knife, carefully trim about a quarter to a half-inch off the top of each garlic head, exposing the individual cloves beneath. This allows the oil and seasonings to penetrate and helps the cloves soften and caramelize evenly. Next, place each trimmed garlic head on its own piece of aluminum foil. Drizzle each head with about 1 teaspoon of olive oil, ensuring the exposed cloves are lightly coated. Sprinkle generously with salt and a pinch of black pepper.
Carefully wrap each whole head of garlic individually in its aluminum foil package, sealing it tightly to create a small pouch. This traps the moisture and steam, ensuring the garlic becomes incredibly tender. You can place these foil-wrapped garlic heads directly on the oven rack or in a small baking dish for easier handling. Bake for approximately 50 to 60 minutes. The garlic is ready when the cloves are incredibly soft, deeply golden brown, and have a sweet, nutty aroma. Once baked, remove them from the oven and let them cool in their foil packets for about 5 to 10 minutes, or until they are cool enough to handle comfortably. If you’re in a hurry, you can pop them in the refrigerator for a few minutes to speed up the cooling process.
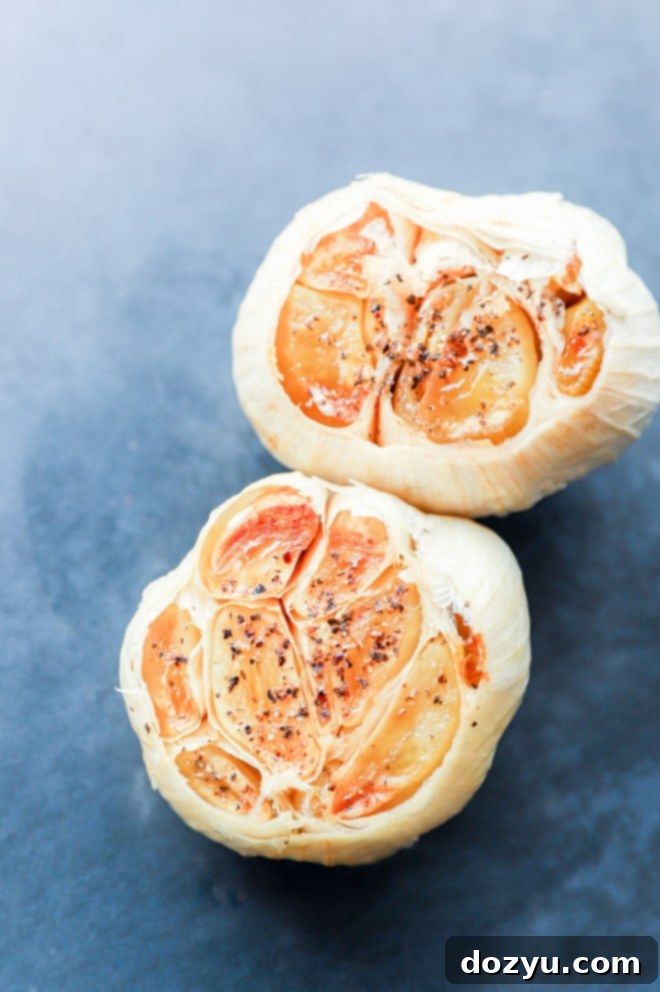
Step 2: Mash the Roasted Garlic
Once the roasted garlic heads are cool enough to touch, gently squeeze the base of each head. The incredibly soft, caramelized garlic cloves should easily pop out into a medium-sized mixing bowl. You’ll be amazed at how creamy and spreadable they are! Using a fork, mash the roasted garlic cloves until they form a smooth paste. It’s important to achieve a very smooth consistency here to ensure your aioli is velvety. If you encounter any small, harder pieces that resist mashing, simply remove and discard them to maintain the aioli’s luxurious texture.
Step 3: Combine and Mix
To the mashed roasted garlic, add the mayonnaise, fresh lemon juice, Worcestershire sauce, and the optional cayenne pepper. Stir all the ingredients together thoroughly until they are well combined and the aioli has a uniform, creamy consistency. Give it a taste and adjust the seasoning with additional salt, lemon juice, or cayenne as needed to suit your preference. For the best flavor development, cover the bowl and refrigerate the aioli for at least 30 minutes before serving. This chilling time allows all the wonderful flavors to meld and deepen, resulting in an even more delicious and harmonious sauce. The longer it sits, the more pronounced and incredible the flavors become!
Tips and Variations for Your Roasted Garlic Aioli
This roasted garlic aioli recipe is fantastic as written, but a few tips and variations can make it even better or tailor it to your specific tastes:
- Let it Chill for Maximum Flavor: While it’s tempting to dive right in, allowing the aioli to chill in the refrigerator for at least 30 minutes (or even a few hours) is crucial. This resting period gives the flavors time to meld and deepen, resulting in a more harmonious and delicious sauce. The cold also helps the aioli thicken slightly, making it even creamier.
- Speed Up Roasting with an Air Fryer: If you’re short on time and need that roasted garlic goodness quickly, your air fryer is a fantastic tool! You can make air fryer roasted garlic in significantly less time than traditional oven roasting. Just follow the same preparation steps for the garlic heads, then air fry according to your appliance’s instructions until tender and caramelized.
- Customize Your Seasoning: This recipe offers a balanced base, but don’t hesitate to adjust it to your liking.
- For More Heat: Increase the amount of cayenne pepper, or add a pinch of smoked paprika for a smoky warmth. A tiny dash of your favorite hot sauce can also add a fiery kick.
- For Extra Tang: A bit more fresh lemon juice will brighten the aioli further.
- For Deeper Umami: Add a touch more Worcestershire sauce, or even a very small amount of finely grated Parmesan cheese if you’re not keeping it vegan/vegetarian.
- Herbal Infusion: Stir in finely chopped fresh herbs like chives, parsley, dill, or tarragon just before serving for an extra layer of freshness.
- Make it Vegan: As mentioned in the ingredients section, simply swap out regular mayonnaise for your favorite high-quality vegan mayonnaise and use soy sauce or liquid aminos instead of Worcestershire sauce (most Worcestershire sauces contain anchovies).
More tasty dips to dive into: Spinach and Artichoke Goat Cheese Dip | Spicy Lasagna Dip | Avocado Chimichurri Salsa | Veggie Guacamole
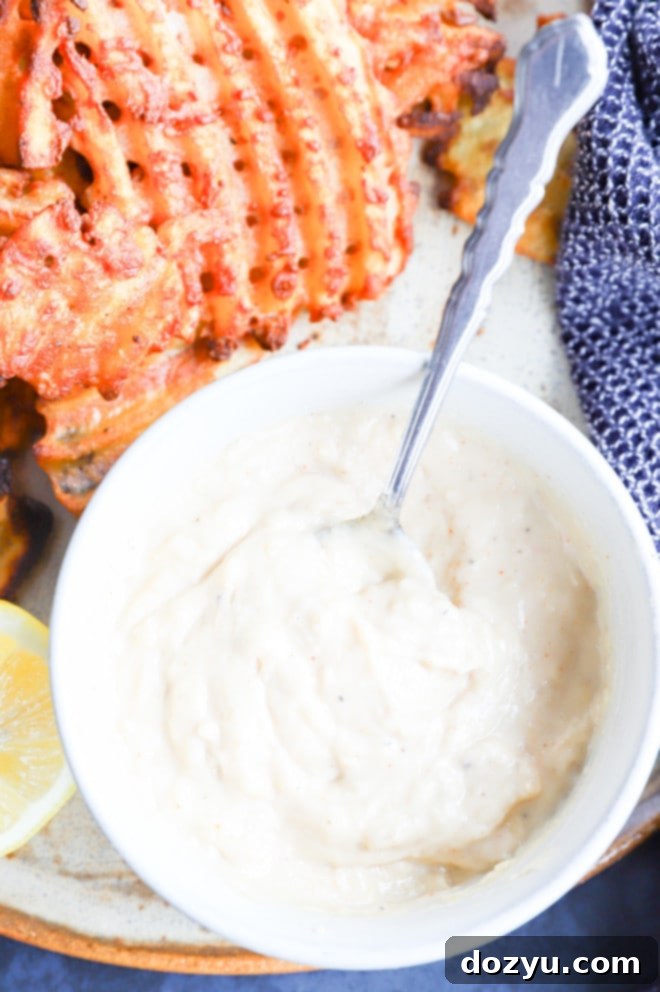
Can I Use Roasted Garlic Aioli Instead of Mayonnaise?
Absolutely, and I highly encourage it! This roasted garlic aioli is not just a substitute for plain mayonnaise; it’s a significant upgrade. Imagine the depth of flavor it brings compared to a bland spread. The creamy texture, combined with the sweet, savory, and tangy notes of roasted garlic, elevates any dish where you’d typically use mayo. Spread it generously on sandwiches, slather it in wraps, dollop it onto burgers, or mix it into creamy salads. Its complex flavor profile truly packs a punch, making your meals far more exciting and satisfying. Once you try it, you’ll likely find yourself reaching for this aioli over regular mayonnaise every single time!
Do I Have to Roast the Garlic?
While you certainly *can* make a garlic aioli with raw garlic, I truly believe that the roasted garlic is the secret ingredient that makes this particular aioli recipe stand out and gives it its signature deliciousness. Raw garlic has a very sharp, pungent, and sometimes spicy flavor, which can be overpowering in a sauce. Roasting, on the other hand, transforms the garlic, mellowing its intensity and developing incredible sweetness and depth. This caramelization process creates a complex, nutty flavor that is simply irresistible and forms the heart of this aioli’s unique appeal.
If you absolutely prefer to use raw garlic or are pressed for time and can’t roast it, I recommend adjusting the quantity significantly. Instead of two whole heads of roasted garlic, you would likely only need about 2 to 3 cloves of raw garlic, very finely minced or grated. Remember, raw garlic is far more potent, so always start with less and add more to taste.
Need some inspiration for appetizers? Check out my appetizer recipes page!
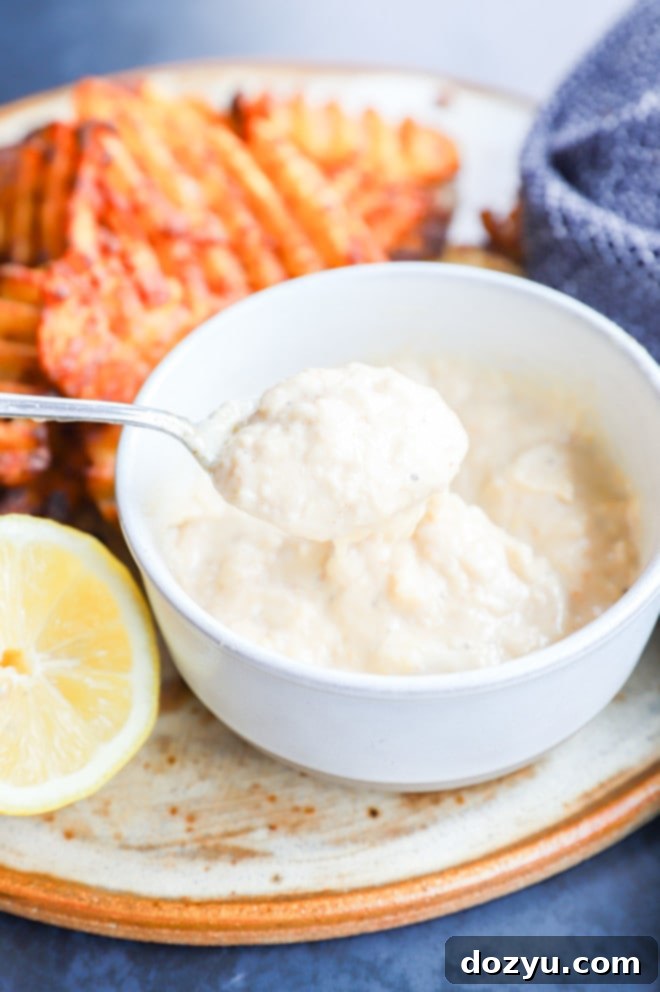
How to Use Roasted Garlic Aioli
The versatility of this roasted garlic aioli is truly endless, making it a star player in any kitchen. It’s more than just a condiment; it’s a flavor enhancer that can transform a multitude of dishes. Here are just some of the myriad ways you can enjoy this creamy, savory goodness:
- The Ultimate Dipping Sauce: This aioli is, without a doubt, the best dipping sauce you’ll ever make. Its rich, creamy, and savory profile makes it perfect for:
- Crispy french fries (regular, sweet potato, waffle, curly)
- Onion rings, tater tots, or potato wedges
- Chicken nuggets, tenders, or crispy chicken strips
- Fresh vegetable sticks (carrots, celery, bell peppers, cucumber)
- Warm pita bread or crusty bread
- Potato cheese balls or other fried appetizers
- Kettle chips or homemade potato chips
- Elevate Your Sandwiches and Burgers: Forget plain mayonnaise! Spread a generous layer of this aioli on:
- Any type of sandwich (turkey club, roast beef, veggie, BLT)
- Hamburgers (beef, chicken, turkey, or plant-based burgers)
- Wraps and pitas
- Toasted bread for a flavorful base to avocado toast
- Drizzle Over Roasted Vegetables: The sweet and savory notes of the aioli beautifully complement roasted vegetables. Drizzle it over:
- Crispy oven-roasted potatoes and onions
- Roasted broccoli, asparagus, Brussels sprouts, or carrots
- Grilled corn on the cob
- Enhance Proteins and Seafood: Add a burst of flavor to your main courses:
- Serve alongside grilled chicken, steak, or pork chops
- Dollop over baked or grilled salmon, cod, or white fish
- Use as a dressing for shrimp or fish tacos
- Mix into crab cakes or fish patties
- Stir into Salads: Incorporate it into your favorite creamy salads:
- Potato salad
- Pasta salad
- Coleslaw
Truly, anything that pairs well with the comforting taste of roasted garlic will be magnificently enhanced by this creamy, flavorful sauce. It’s an essential condiment that brings sophisticated taste to everyday dishes!
How to Store Your Roasted Garlic Aioli
Proper storage ensures your delicious roasted garlic aioli stays fresh and flavorful for longer. Store the aioli in an airtight container in the refrigerator. When stored correctly, your homemade aioli will maintain its quality and taste for up to 2 weeks. This makes it a fantastic condiment to prepare in advance and have on hand for various meals throughout the week!
More Tasty Dip Recipes You’ll Love
If you love creamy, flavorful dips as much as we do, you’ll want to explore these other fantastic recipes:
- This savory and spicy Chipotle Chili Cheese Dip is incredibly easy to make and ready in just 10 minutes, perfect for last-minute gatherings.
- For a classic that never disappoints, our Chunky Salsa is ideal for dipping your favorite tortilla chips, or adding a fresh burst of flavor to tacos, burritos, and more.
- If you’re a guacamole enthusiast, you absolutely must try this unique BLT Guacamole, featuring the irresistible additions of crispy bacon, fresh lettuce, and ripe tomatoes mixed right in.
- And if you’re hooked on the aioli trend, don’t miss out on this smoky and spicy Chipotle Aioli! It delivers a delightful kick that you’ll quickly become obsessed with.
Finally, if you make this incredible roasted garlic aioli recipe, please be sure to give this recipe a star rating on the recipe card and/or leave a comment below! Your feedback means the world to us, and we love to hear about your culinary creations. We read and respond to every single comment, so don’t hesitate to share your thoughts or drop any questions you might have.
Oh, and make sure to tag us on Instagram if you whip up this delicious aioli! Seeing our recipes come to life in your homes is truly our favorite thing. Your photos inspire us and genuinely make our day!
Roasted Garlic Aioli
Equipment
-
8-Inch Chef’s Knife
-
Utility Cutting Board
-
Stainless Steel Mixing Bowls
Ingredients
- 2 large whole heads of garlic
- 2 tsp extra virgin olive oil
- 1/2 cup mayonnaise full fat or low fat, or vegan mayo
- 1 Tbsp fresh lemon juice from about 1/2 a lemon
- 1 tsp Worcestershire Sauce use soy sauce or liquid aminos for vegetarian/vegan
- 1/8 tsp cayenne pepper optional, for a subtle kick
- Salt to taste, preferably kosher fine salt
Instructions
-
Preheat the oven to 400˚F (200˚C).
-
Trim about 1/4 inch off the tops of each head of garlic so all cloves are exposed. Drizzle each head with 1 tsp olive oil, then sprinkle with salt and pepper.
-
Wrap the garlic heads individually in aluminum foil, sealing tightly. You can place them in a small baking dish or directly on the oven rack.
-
Bake for 50 to 60 minutes, or until the cloves are very soft and golden brown. Let them cool in their foil for about 5 to 10 minutes until you can handle them without burning yourself. Unwrap each whole head of garlic.
-
Squeeze out the soft roasted garlic cloves into a medium bowl. Mash with a fork until very smooth, discarding any hard pieces.
-
Stir in the mayonnaise, fresh lemon juice, Worcestershire sauce, and cayenne pepper (if using) until well combined and creamy.
-
Taste and adjust seasoning as needed. Refrigerate for at least 30 minutes before using to allow flavors to meld. Serve and enjoy!
