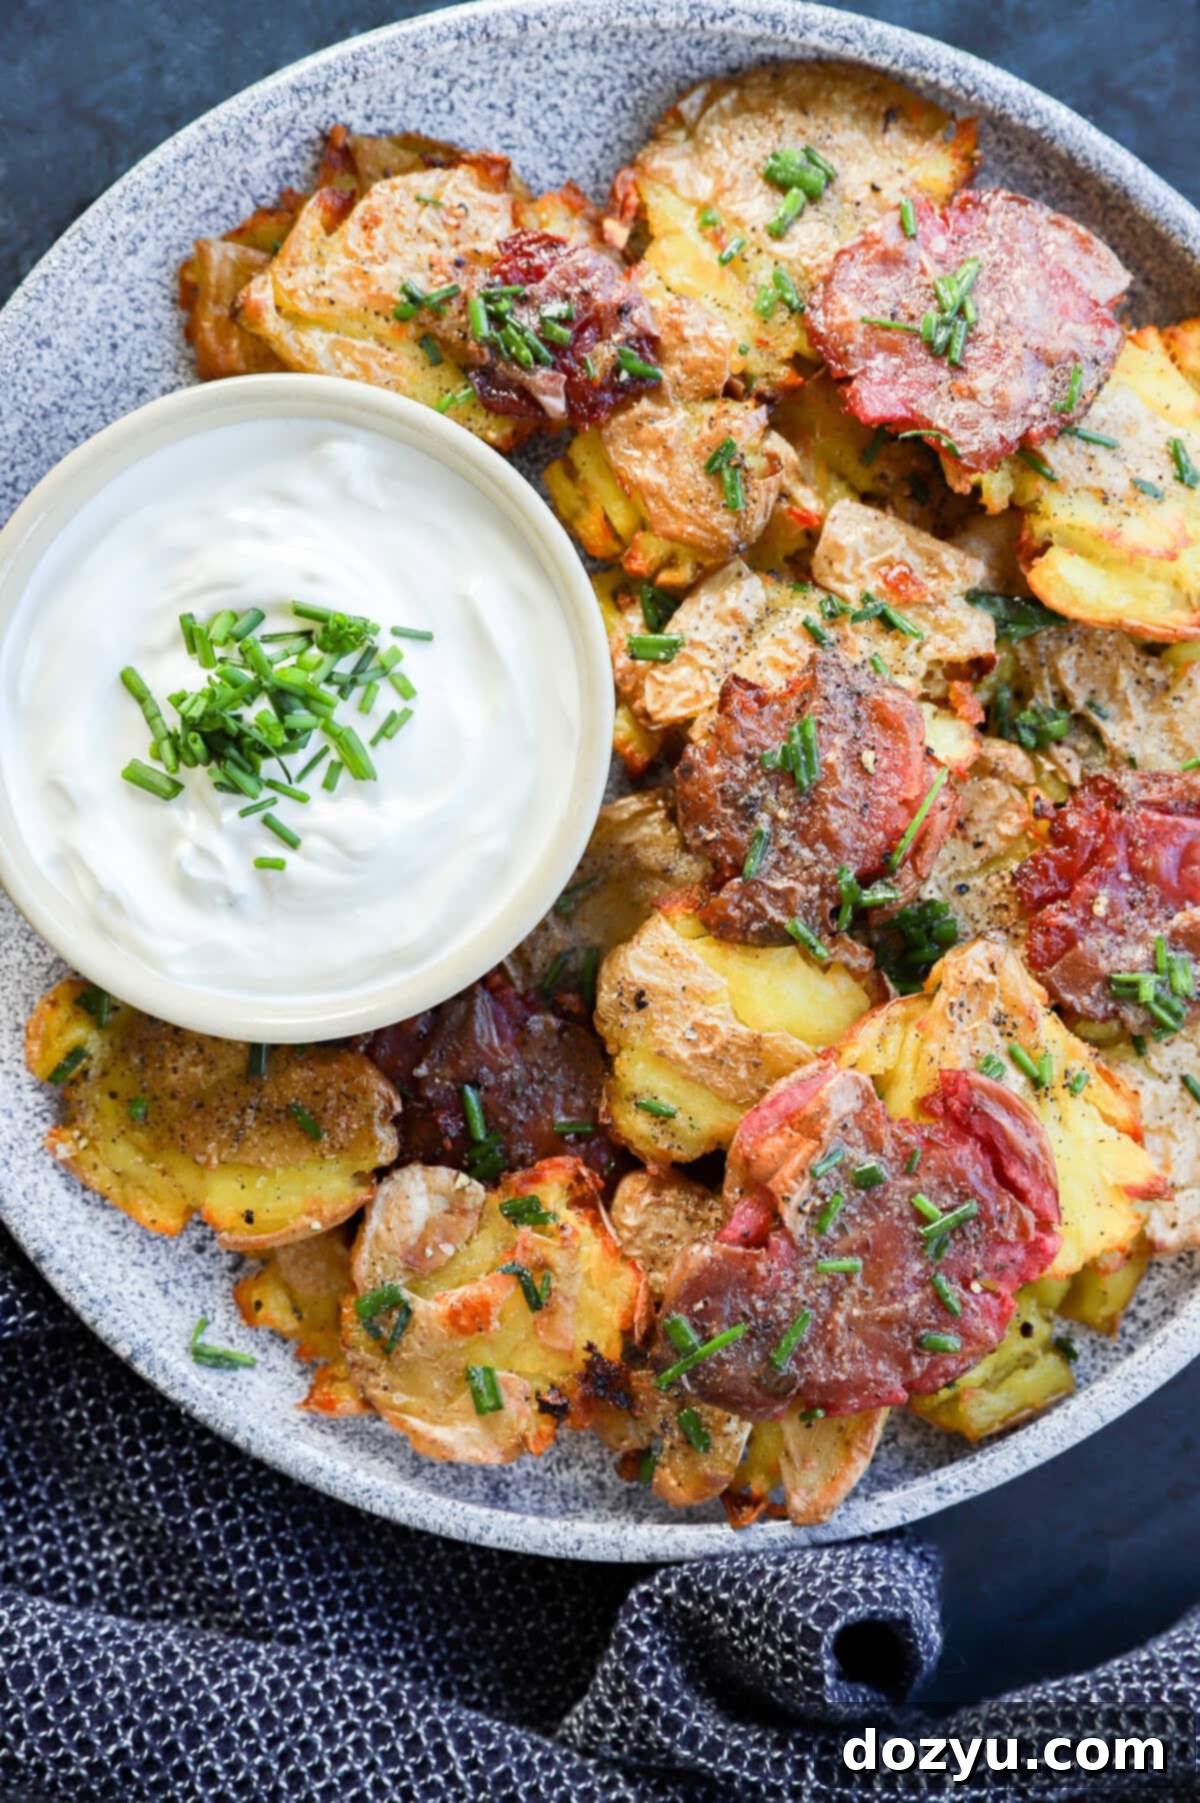
Perfectly Crispy Smashed Fingerling Potatoes with Garlic Herb Butter: An Irresistible Side Dish Recipe
Get ready to discover your new favorite potato dish! These Crispy Smashed Fingerling Potatoes are a true culinary delight, effortlessly combining a wonderfully crunchy, golden exterior with a luxuriously soft and creamy interior. This recipe is a game-changer for any potato enthusiast, transforming humble fingerling potatoes into an extraordinary side dish or appetizer that’s guaranteed to be a hit with family and friends alike.
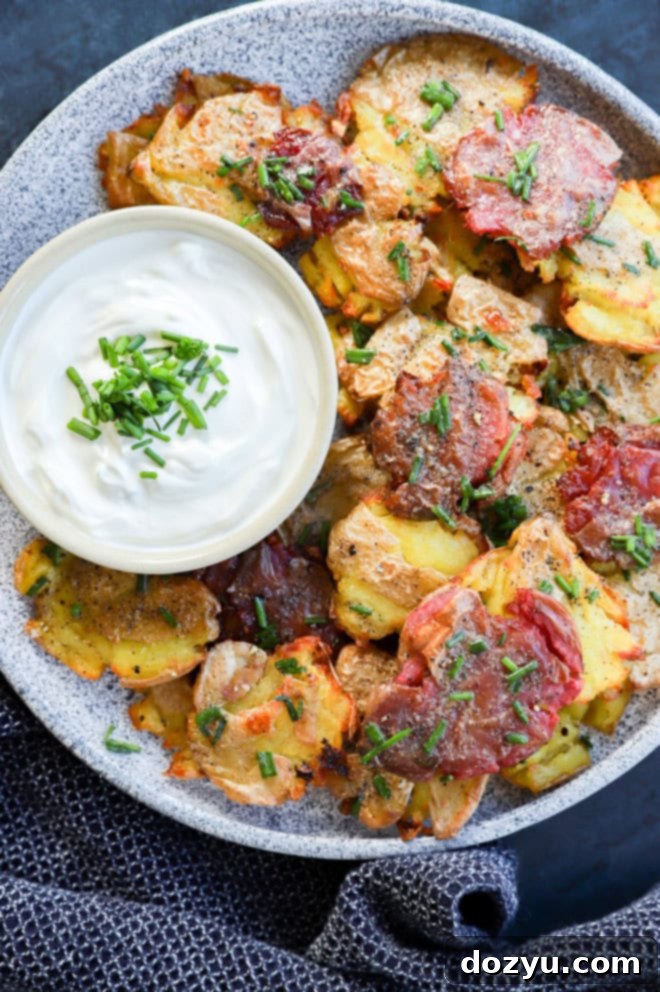
table of contents
Toggle
About This Smashed Fingerling Potatoes Recipe
What truly sets these smashed potatoes apart is the simplicity of their preparation coupled with the incredible flavor payoff. We start with perfectly boiled fingerlings, gently “smash” them to create those irresistible craggy edges, and then roast them to golden perfection. The result is a symphony of textures that’s both satisfying and utterly addictive. But we don’t stop there! A decadent drizzle of fresh garlic herb butter is the secret weapon, permeating every crispy crevice and infusing each bite with an aromatic, savory richness that will leave you craving more.
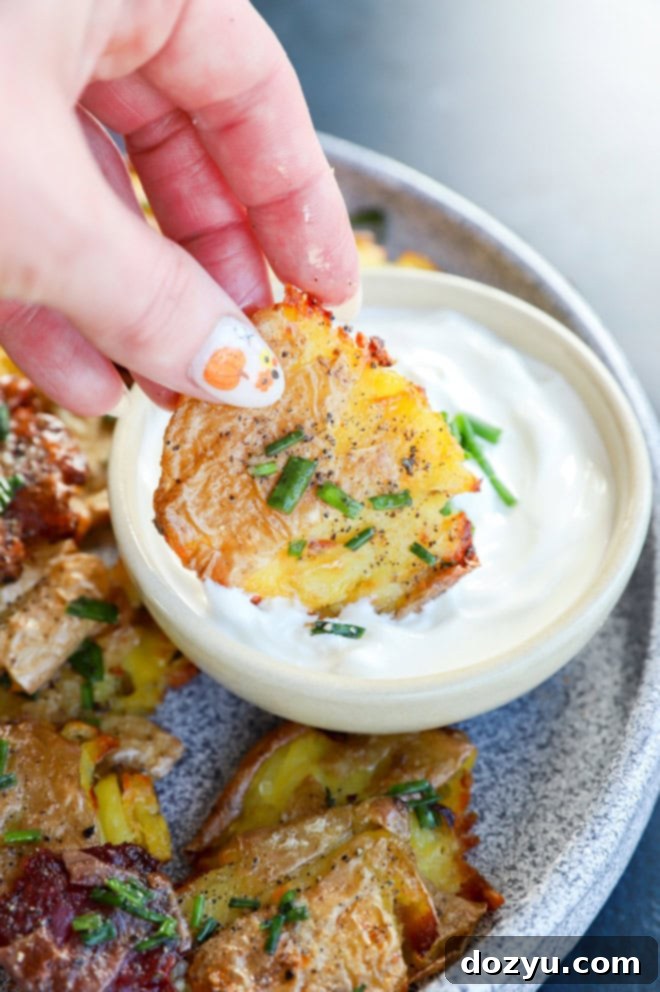
Forget spending hours slaving away in the kitchen for an impressive side. This recipe is designed for ease and efficiency, proving that you don’t need complicated techniques to achieve gourmet results. From a quick boil to a gentle press and a final roast, these potatoes are ready to grace your table with minimal fuss. They are incredibly versatile, perfect as an elegant accompaniment to a hearty steak dinner, roasted chicken, or any main course. Beyond that, they shine as a sophisticated yet approachable appetizer. Imagine them artfully arranged on a platter, ready to be dipped into a dollop of cool sour cream, a vibrant pesto, or your favorite aioli. Their convenient “finger food” nature makes them ideal for any gathering, be it a casual backyard barbecue, a festive holiday dinner, a lively birthday celebration, or even a relaxed brunch. Once you try these, you’ll understand why they quickly become a staple in your recipe rotation.
Essential Ingredients for Crispy Smashed Potatoes
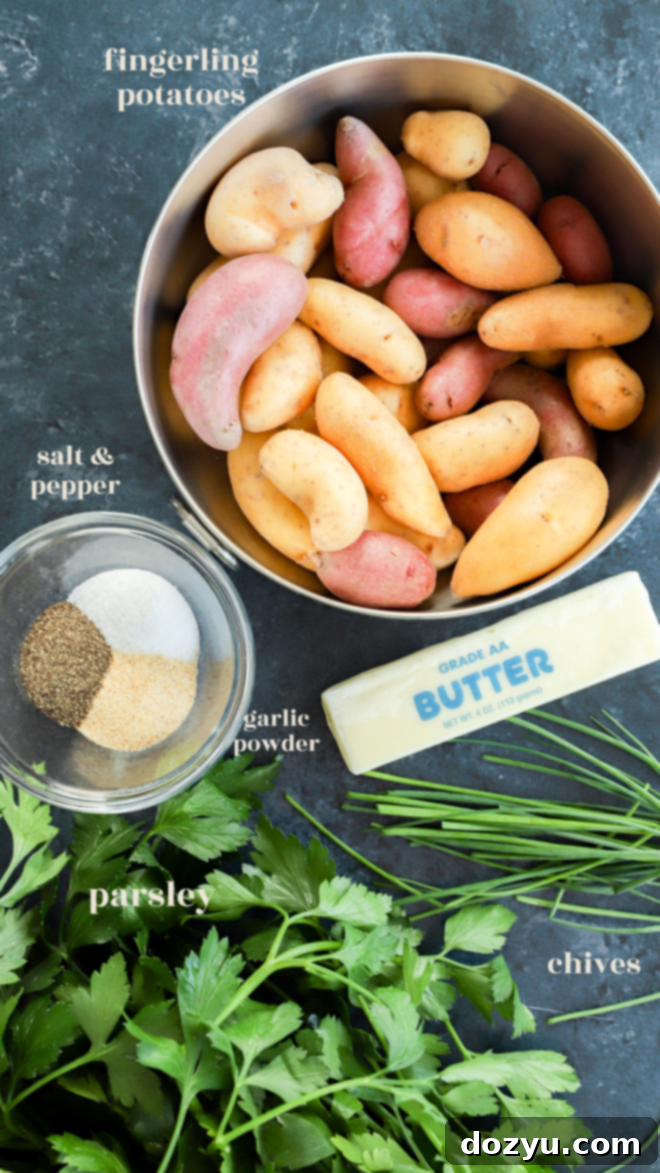
Crafting the perfect batch of crispy smashed fingerling potatoes requires just a handful of quality ingredients. Here’s what you’ll need to create this incredibly flavorful and satisfying dish:
Fingerling Potatoes: These slender, small potatoes are the star of our recipe. Their thin skin and waxy texture make them ideal for smashing, as they hold their shape beautifully while still becoming incredibly creamy inside. Crucially, try to select fingerling potatoes that are uniform in size. This ensures that they cook evenly during both the boiling and roasting stages, preventing some from being undercooked or overcooked. If fingerlings are unavailable, small new potatoes, creamer potatoes, or even small Yukon Gold potatoes (about 1-2 inches in diameter) can be a good substitute. The key is to choose smaller, waxy varieties that will boil quickly and smash easily. Avoid larger, starchy potatoes like Russets, as they tend to fall apart when smashed and won’t achieve the same desirable creamy-crispy texture.
Unsalted Butter: Butter is key for achieving that rich, golden crispness and adding a depth of flavor. We recommend using unsalted butter for both the initial coating and the herb drizzle. This gives you complete control over the total salt content of your dish. If you only have salted butter on hand, simply reduce or omit the additional salt called for in the recipe to prevent over-seasoning.
Extra Virgin Olive Oil: A good quality extra virgin olive oil not only helps in achieving that beautiful crisp exterior but also imparts a wonderful Mediterranean aroma and delicate flavor to the potatoes. Its fruity notes complement the earthy potatoes and fresh herbs beautifully. While other oils can work, EVOO truly enhances the overall taste profile and contributes to the overall golden hue.
Sea Salt, Freshly Cracked Black Pepper & Garlic Powder: These foundational seasonings are indispensable. Sea salt provides a clean, briny flavor that enhances the natural taste of the potatoes, while freshly cracked black pepper adds a subtle kick and aromatic warmth. Garlic powder provides a consistent and mellow garlic flavor that distributes evenly throughout the butter drizzle, offering that beloved essence without the sharpness of raw garlic.
Fresh Chives: Bright, delicate, and subtly oniony, fresh chives are the perfect herb to finish these potatoes. They add a vibrant green color and a burst of fresh flavor that cuts through the richness of the butter. If chives aren’t available, thinly sliced green onions (scallions) make an excellent substitute, offering a similar mild oniony note and appealing texture. Alternatively, consider parsley or a mix of fresh herbs for a different twist.
Kitchen Essentials for Smashed Fingerling Potatoes
One of the beauties of this recipe is that it doesn’t require any specialized kitchen gadgets. You likely already have everything you need to create these delicious smashed potatoes. Here are the simple tools that will help you along the way:
-
Large Stockpot or Dutch Oven: Essential for boiling the fingerling potatoes. A large pot ensures there’s ample room for the potatoes to cook evenly and prevents overcrowding, which can lead to unevenly cooked results. A Dutch oven is particularly good for heat retention.
-
Colander or Fine Mesh Strainer: You’ll need this to efficiently drain the boiled potatoes. A fine mesh strainer can be particularly useful for smaller fingerlings, ensuring none escape!
-
Heavy-Bottomed Glass or Mason Jar: This is your secret weapon for “smashing” the potatoes. The flat, sturdy bottom of a pint glass or a mason jar is perfect for applying even pressure without tearing the potatoes apart, creating those beautiful, craggy surfaces that get incredibly crispy when roasted. Avoid using a potato masher, as it will break the potatoes down too much.
-
Large Rimmed Baking Sheet (Half Sheet Pan): A half sheet pan provides ample space for the smashed potatoes to spread out in a single layer, which is crucial for achieving maximum crispiness. Overcrowding the pan will steam the potatoes instead of roasting them.
-
Parchment Paper or Silicone Mats: Lining your baking sheet with parchment paper or a silicone mat prevents sticking and makes cleanup a breeze. Plus, it helps ensure that the bottom of the potatoes gets just as crispy as the top, creating that all-around satisfying crunch.
How to Make Perfectly Crispy Smashed Fingerling Potatoes
Creating these irresistible smashed fingerling potatoes is a straightforward process that yields impressive results. Follow these simple steps for a side dish or appetizer that will truly stand out:
Step 1: Boil the Potatoes to Tender Perfection
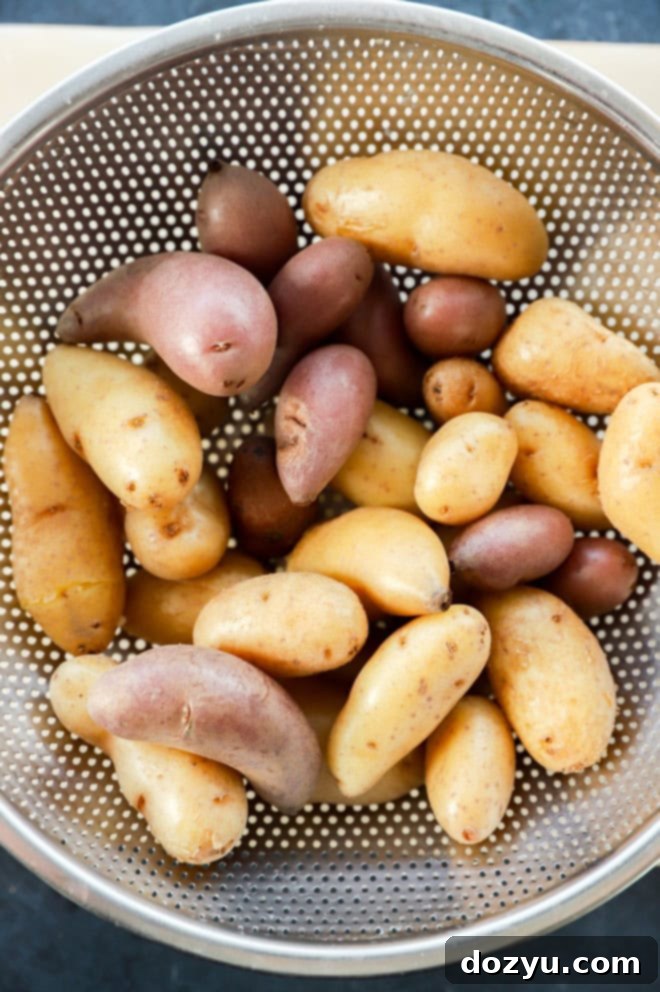
Begin by filling a large stockpot or Dutch oven with salted water. The salt in the water is important not just for seasoning the potatoes from the inside out, but also for raising the boiling point slightly, which can lead to more even cooking. Bring this water to a rolling boil over high heat. Carefully add your washed fingerling potatoes to the boiling water. Boil them for approximately 20 to 25 minutes, or until they are completely soft and easily pierced with a fork. It’s crucial they are fork-tender at this stage; this ensures a wonderfully creamy interior after roasting. If your potatoes are on the larger side, you may need to extend the boiling time a few extra minutes. Check the largest potato in the batch to ensure consistent doneness.
Step 2: Dry and Gently Smash
Once the potatoes are perfectly tender, drain them thoroughly in a colander. Allow them to sit and air-dry in the colander for about 5 minutes. This critical step helps to remove excess moisture from the surface of the potatoes, which is key to achieving that desirable maximum crispiness in the oven. While they dry, preheat your oven to 425˚F (220˚C) and line a large, rimmed baking sheet with parchment paper or a silicone mat to prevent sticking.
Transfer the slightly dried potatoes to the prepared baking sheet, ensuring they are spread out in a single layer without overcrowding. Now comes the fun part: the smash! Using the bottom of a sturdy glass or a mason jar, gently but firmly press down on each potato until it flattens into an approximately ½-inch thick disc. Be careful not to smash them too thin or too vigorously, as you want to keep the potato mostly intact with those beautiful, craggy edges. Avoid using a traditional potato masher, which would turn them into a mush rather than creating distinct smashed potatoes.
After smashing, drizzle the potatoes generously with extra virgin olive oil and melted unsalted butter. These fats are essential for the browning and crisping process. Season them liberally with sea salt and freshly cracked black pepper. Ensure each potato is well coated for maximum flavor and crunch.


Step 3: Bake to Golden Crispy Perfection
Transfer the baking sheet with the smashed and seasoned potatoes to your preheated oven. Bake for approximately 35 to 45 minutes. The exact baking time can vary slightly depending on your oven and the thickness of your potatoes. During this time, the potatoes will transform, developing beautiful golden-brown edges and a satisfyingly crispy texture. Keep an eye on them towards the end of the baking time to prevent burning. While the potatoes are roasting, take this opportunity to prepare your aromatic garlic herb butter.
Step 4: Drizzle and Serve Immediately
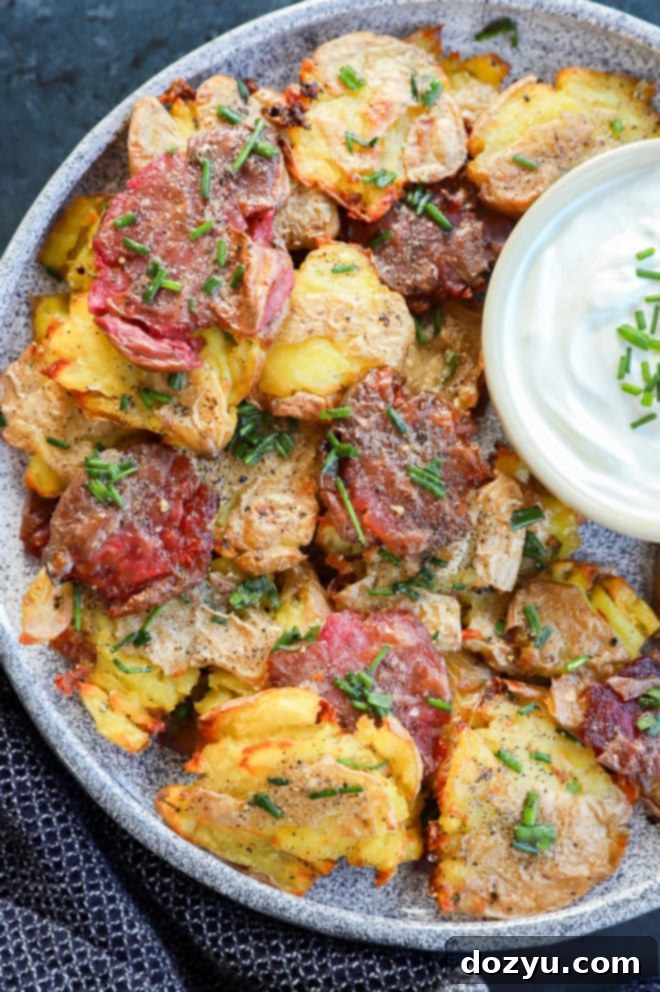
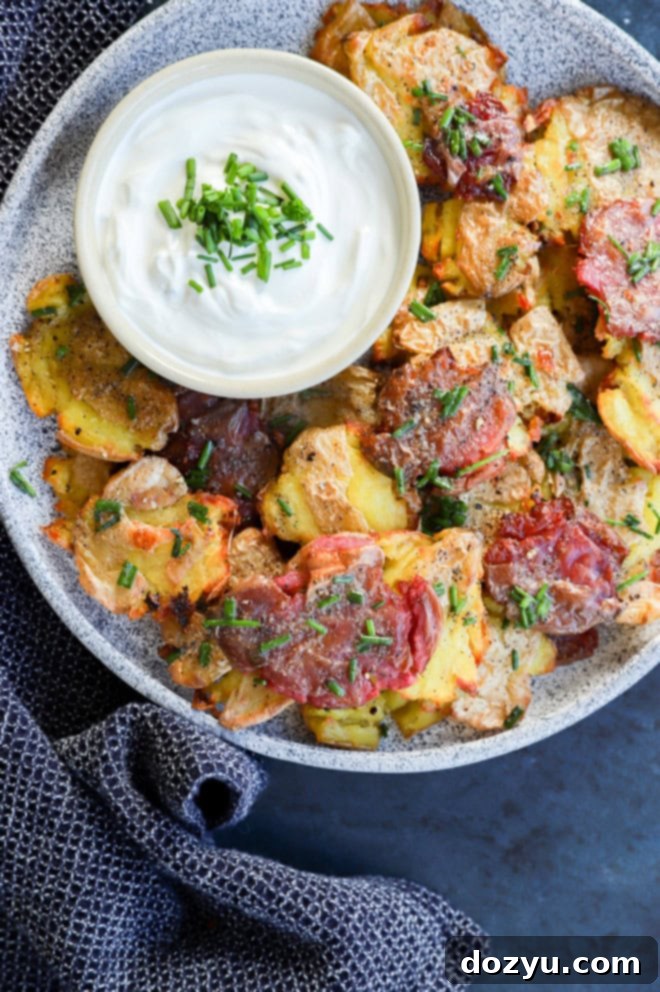
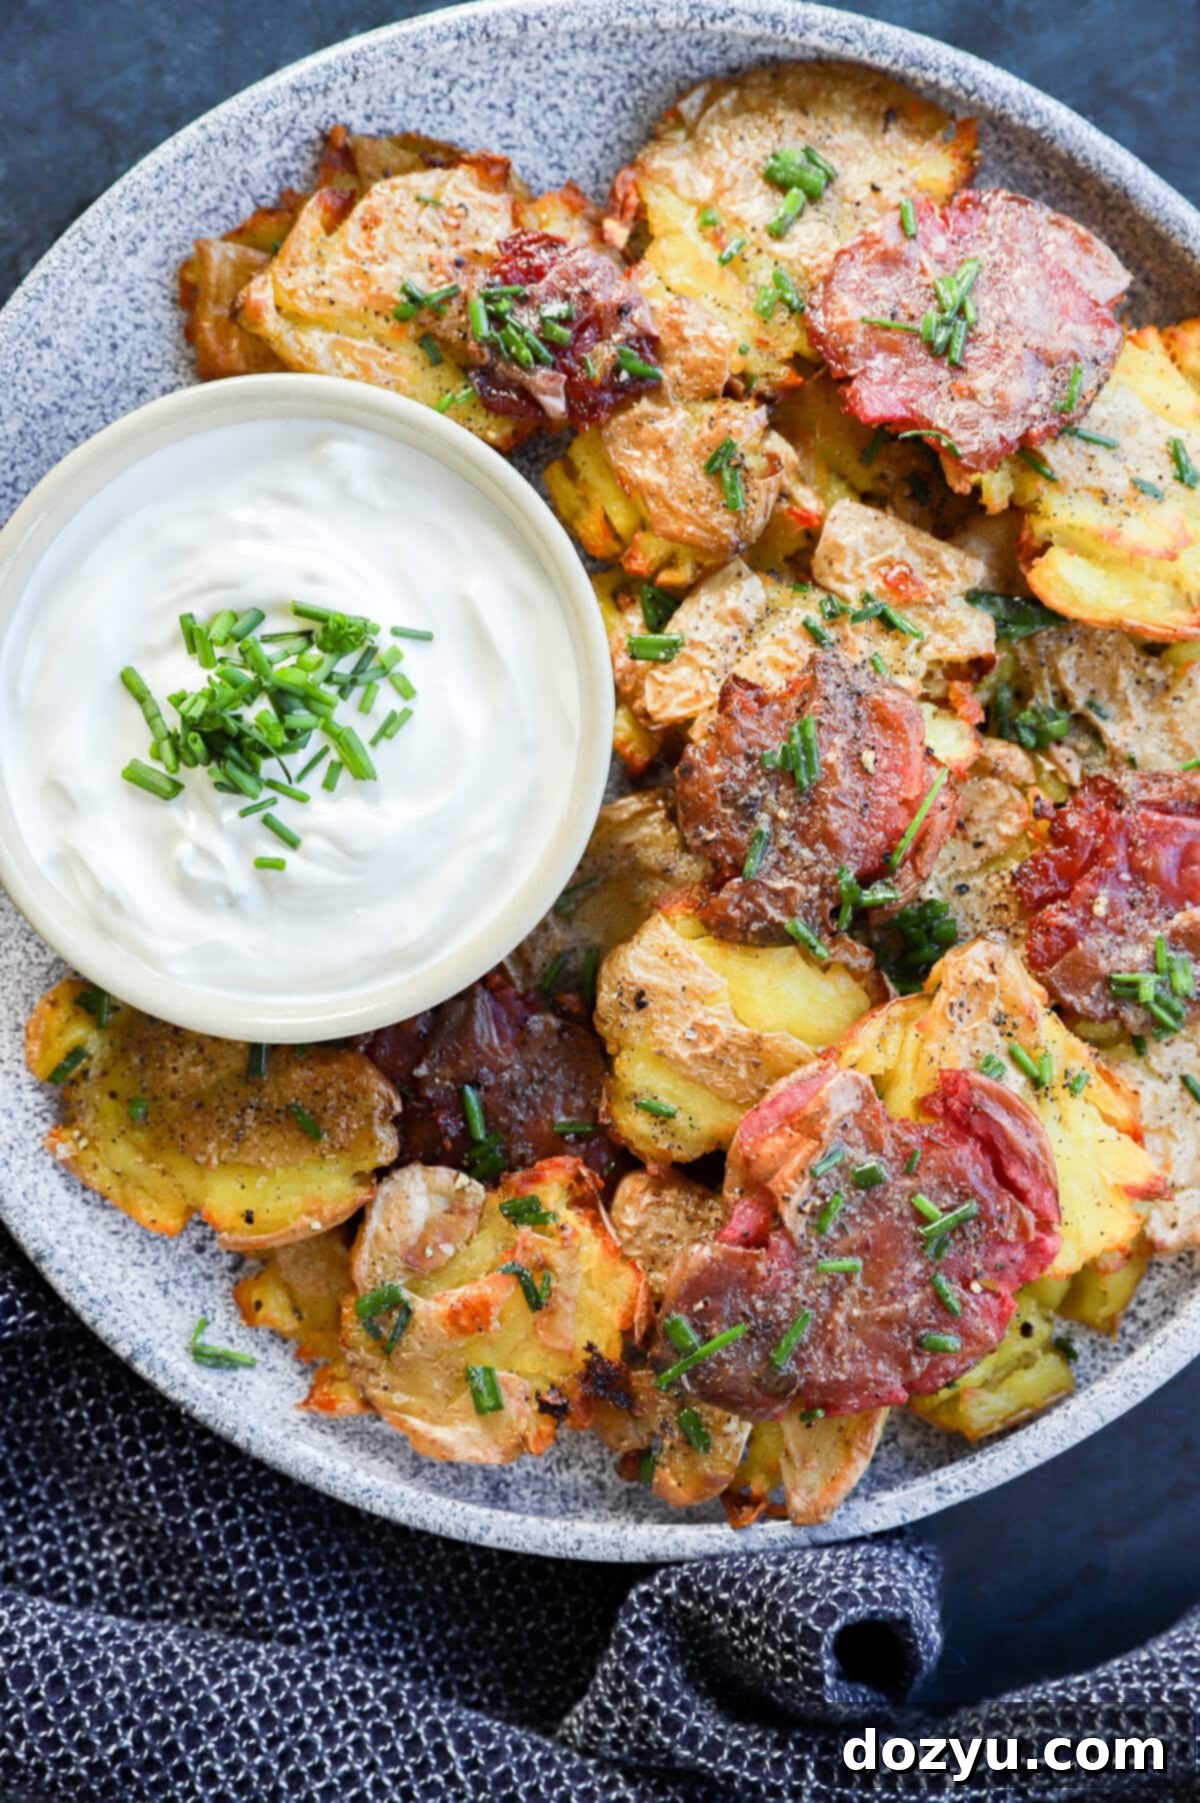
Once baked to perfection, carefully remove the crispy smashed potatoes from the oven. Arrange them artfully on a serving platter. Now, for the final touch: generously drizzle the melted garlic herb butter over all the potatoes. The warm butter will seep into every nook and cranny, enhancing their flavor and aroma. Serve these delectable potatoes immediately, while they are at their crispiest and warmest. They are fantastic as a standalone side dish or as an impressive appetizer. For an extra flourish, consider sprinkling with additional fresh chopped chives, a touch of flaky sea salt, or even some grated Parmesan cheese for an added layer of savory goodness. A side of cool sour cream or a tangy aioli makes for an excellent dipping companion.
Expert Tips for Perfect Crispy Smashed Fingerling Potatoes
Achieving the ultimate crispy smashed potatoes is simple, but a few key tips and tricks can elevate your results from good to absolutely outstanding. Keep these pointers in mind for a consistently perfect batch:
-
Uniform Potato Size is Key: Whenever possible, select fingerling potatoes that are similar in size. This seemingly small detail is incredibly important for even cooking. Potatoes of varying sizes will cook at different rates during both the boiling and roasting phases, leading to some being perfectly tender while others are still firm or, conversely, overcooked. Consistency ensures every potato achieves that ideal crispy exterior and creamy interior.
-
Smash with Gentle Precision: The “smash” is critical to this recipe. While it might be tempting to press aggressively, a gentle but firm approach is best. Use the bottom of a heavy glass or mason jar to carefully flatten each potato to about ½-inch thickness. The goal is to create craggy, uneven surfaces that maximize crispiness, rather than pulverizing the potato. Be mindful not to split the potatoes entirely or tear off the skin, as the skin contributes to texture and flavor.
-
Ensure Maximum Crispiness: If your potatoes aren’t reaching your desired level of crispness by the end of the baking time, don’t fret! The broiler is your best friend. Pop the baking sheet under a preheated broiler for just 1 to 2 minutes. Watch them very closely, as they can go from golden to burnt in a flash. This quick blast of intense heat will give them that extra irresistible crunch.
-
Don’t Overcrowd the Pan: For optimal crispiness, arrange your smashed potatoes in a single layer on the baking sheet, ensuring there’s plenty of space between each one. Overcrowding the pan will cause the potatoes to steam rather than roast, preventing them from achieving that beautiful golden-brown crust. If you’re making a larger batch, use two baking sheets.
-
Preheat Your Baking Sheet: For an extra boost of crispiness, place your empty baking sheet in the oven while it preheats. When you add the smashed potatoes to the hot sheet, the immediate sizzle will help start the crisping process right away, leading to a crunchier result. Just be careful when handling the hot pan!
-
Thorough Drying is Essential: After boiling, make sure to let the potatoes air dry in the colander for a good 5 minutes. Any lingering moisture will inhibit crisping during roasting. The dryer the surface, the crispier the final product will be.
Understanding the Crispiness Factor: The incredible crispiness of smashed potatoes isn’t magic, it’s science! It comes from a combination of crucial steps. First, boiling the potatoes until very tender gelatinizes the starches, which then form a crisp crust when roasted. Second, the “smashing” process itself is vital; it creates a significantly increased surface area with many irregular nooks and crannies. These textured surfaces are exposed to direct, high heat in the oven, allowing them to brown and crisp up far more effectively than a whole roasted potato. Third, the thorough drying step after boiling removes surface moisture, which is absolutely essential because moisture actively prevents browning and crisping. Finally, the generous coating of olive oil and melted butter facilitates excellent heat transfer and effectively “fries” the potato surfaces in the hot oven, locking in that irresistible crunch with every bite.
More potato side dish recipes to try out: Sweet Potato Souffle | Instant Pot Mashed Potatoes | Oven Fried Potatoes and Onions | Garlic Butter Roasted Carrots and Potatoes

How Long Should I Boil Fingerling Potatoes for Smashed Potatoes?
The ideal boiling time for fingerling potatoes destined for smashing is typically 20 to 25 minutes. This timeframe is crucial for ensuring the potatoes are fork-tender and soft all the way through, which is essential for creating that creamy interior after they’re roasted. The exact duration can vary based on the size of your fingerling potatoes; larger potatoes will naturally require a few extra minutes. To test for doneness, simply pierce the largest potato in the pot with a fork. If it slides in with minimal resistance and the potato feels tender, they are ready to be drained. Don’t undercook them, as firm potatoes will not smash well or achieve the desired creamy texture inside.
What Can I Use to “Smash” the Potatoes?
For the perfect smash, we recommend using a tool with a flat, wide, and sturdy bottom. A mason jar or a pint glass works exceptionally well! The key is to find something heavy enough to apply even pressure without the risk of breaking. Ensure the glass or jar has a wide base to cover a good portion of the potato, making the smashing process efficient and effective. Some people even use a potato masher, but we advise against it as it can break down the potato too much, leading to a mushy texture rather than distinct, craggy smashed potatoes. The goal is a gentle flattening that creates more surface area for crisping, not a complete mash.
Can I Use Different Fresh Herbs for the Garlic Herb Butter?
Absolutely! While fresh chives offer a delightful, mild oniony flavor and vibrant color, the beauty of the garlic herb butter is its adaptability. Feel free to customize the herb blend to suit your taste preferences or to utilize whatever fresh herbs you have on hand. Excellent alternatives or additions include finely chopped fresh parsley, basil, oregano, rosemary, or thyme. A mix of complementary herbs like rosemary and thyme can create a more robust, earthy flavor profile, while parsley adds a fresh, clean note. Experiment with different combinations to find your favorite, ensuring the herbs are finely chopped to release their aromatic oils fully into the melted butter.
Can I Make These Smashed Potatoes Ahead of Time?
Yes, these smashed potatoes are wonderfully accommodating and can certainly be prepared ahead of time, making them a fantastic option for meal prep or for busy entertaining days like Thanksgiving or other holidays. To prepare them in advance, follow the initial steps: boil the potatoes until fork-tender, then drain them and allow them to air dry as instructed. Once slightly cooled, gently smash them into their flat discs. At this point, arrange the smashed potatoes on a baking sheet, cover tightly with plastic wrap, and store them in the refrigerator for up to 24 hours. When you’re ready to bake, simply remove them from the fridge, drizzle generously with the olive oil and melted butter, season, and then proceed with the baking instructions below. They will crisp up beautifully, ensuring you have a delicious side dish with less last-minute effort.
Need some inspiration for side dishes? Check out my side dish recipes page!
What to Serve with Crispy Smashed Potatoes
The versatility of these oven-roasted Crispy Smashed Fingerling Potatoes makes them an ideal companion for almost any main course. Their rich flavor and satisfying texture allow them to seamlessly complement a wide array of proteins and meals, from casual weeknight dinners to elegant holiday feasts. Here are some of our favorite pairings that transform a simple meal into an unforgettable experience:
-
Roasted Chicken: Pair these potatoes with a succulent Roasted Chicken with White Wine and Fresh Herbs. The tender, aromatic chicken perfectly balances the crispy potatoes, creating a harmonious and comforting meal that’s surprisingly easy to achieve, even on a busy weeknight. Breaking down the chicken before roasting ensures it cooks faster, getting dinner on the table sooner.
-
Holiday Turkeys: For those special occasion meals, especially Thanksgiving or Christmas, these smashed potatoes are an elevated alternative to traditional mashed potatoes. They’re absolutely divine when served alongside our famous Smoked Beer Brined Turkey. The robust flavors of the turkey are beautifully complemented by the garlicky, herby potatoes, making your holiday spread truly memorable.
-
Grilled Meats: When summer grilling season arrives, these potatoes are a must-have. Their crispy texture provides a delightful contrast to juicy grilled meats. Serve them alongside a perfectly charred Grilled Full Chicken or an impressive Grilled New York Strip Steak. The smoky notes from the grill and the savory potatoes create a feast for the senses.
-
Elegant Beef Dishes: For a more refined meal, these potatoes shine next to richer beef cuts. Elevate your dinner by pairing them with a decadent BBQ Beef Tenderloin. The potatoes add a comforting yet sophisticated element, soaking up any delicious pan juices.
-
Brunch or Appetizer: Don’t limit these to dinner! They make a fantastic addition to a brunch spread or as a standalone appetizer. Serve them on a large platter with various dipping sauces like sour cream, a spicy aioli, or a vibrant pesto. Their finger-food friendly nature makes them perfect for parties, tailgates, or even a casual get-together with friends.
How to Store and Reheat Crispy Smashed Potatoes
While these crispy smashed potatoes are best enjoyed fresh from the oven, you can certainly store and reheat any leftovers. Proper storage and reheating techniques are key to bringing back as much of that delightful crispiness as possible:
-
Storage: Allow any leftover smashed potatoes to cool completely to room temperature before storing. This prevents condensation from forming, which can make them soggy. Once cooled, transfer them to an airtight container and refrigerate for up to 2 to 3 days. While they won’t be quite as crispy as when freshly made, the flavor remains delicious.
-
Reheating in the Oven (Recommended for Crispiness): To best restore their crisp texture, reheating in the oven is your go-to method. Preheat your oven to 375˚F (190˚C). Arrange the chilled smashed potatoes in a single layer on a lined baking sheet. Bake for about 10-15 minutes, or until they are thoroughly warmed through and the edges have crisped up again. A slightly higher temperature helps to quickly re-crisp the exteriors.
-
Reheating in a Skillet: For a quicker reheating option, especially for smaller batches, use a skillet. Add a tablespoon of olive oil or butter to a non-stick skillet and heat it over medium heat. Once hot, add the leftover smashed potatoes in a single layer. Cook for a few minutes per side, turning occasionally, until they are golden brown, warmed through, and have regained some of their crispiness. This method is great for adding back that desirable crunch quickly.
Explore More Delicious Potato Recipes
If you’re a true potato aficionado, the culinary possibilities are endless! Beyond these incredible crispy smashed fingerling potatoes, there’s a world of delightful potato dishes waiting to be explored. Here are a few more easy and comforting potato recipes to inspire your next meal:
-
Crispy Mashed Potato Fritters: Don’t let leftover mashed potatoes go to waste! Transform them into irresistible mashed potato fritters. They’re golden and crunchy on the outside with a perfectly creamy, flavorful center, making them an excellent appetizer or a unique side dish.
-
Loaded Mashed Potato Egg Rolls: For a creative and incredibly satisfying twist, try these loaded mashed potato egg rolls. They capture all the beloved flavors of a loaded baked potato—cheddar, bacon, chives—but wrapped in a crispy egg roll wrapper. A guaranteed crowd-pleaser!
-
Gooey Potato Cheese Balls: These gooey potato cheese balls are the ultimate party snack. Easy to whip up and packed with cheesy goodness, they’re perfect for any casual gathering or game day.
-
Chili Crisp Smashed Potato Salad: If you love the concept of smashed potatoes, take them to the next level with this unique chili crisp smashed potato salad. It offers a fantastic blend of textures and a spicy, umami-rich kick that will surprise and delight your palate.
-
Holiday Side Dish Inspiration: Looking for more inspiration for your festive meals? Explore our collection of Christmas side dishes and discover new favorites to complement your holiday spread.
Finally, if you’ve tried this fantastic Crispy Smashed Fingerling Potatoes recipe, we’d absolutely love to hear from you! Please take a moment to give this recipe a star rating on the recipe card below and leave a comment. Your feedback truly makes our day and helps other home cooks discover delicious dishes. We read and respond to every single comment, so don’t hesitate to share your experience or ask any questions you might have!
And if you share your culinary creations on social media, be sure to tag us on Instagram, Facebook, or Pinterest! Seeing these recipes come to life in your kitchens is our absolute favorite thing. For the latest recipes, tips, and culinary news straight to your inbox, don’t forget to sign up for our newsletter.
Smashed Fingerling Potatoes
Equipment
-
Dutch Oven
-
Fine Mesh Strainers
-
Half Sheet Pan
Ingredients
- 1 1/2 lbs fingerling potatoes
- 3 Tbsp unsalted butter melted
- 2 Tbsp extra virgin olive oil
- 1 tsp salt
- 1/2 tsp pepper
- 3 Tbsp unsalted butter melted
- 1/2 tsp garlic powder
- 1/2 tsp kosher salt
- 1/4 tsp black pepper
- 1 Tbsp chopped chives
Instructions
-
Bring a large pot of salted water to a boil. Add potatoes and boil for 20-25 minutes until fork-tender. Adjust time for larger potatoes.
-
Drain potatoes and let dry for about 5 minutes in a colander to remove excess moisture for crispiness.
-
Preheat oven to 425˚F (220˚C). Line a large rimmed baking sheet with parchment paper or a silicone mat.
-
Place potatoes on the baking sheet. Gently press each one with the bottom of a glass to smash into a flat, ½-inch layer, creating craggy edges. Do not use a potato masher.
-
Drizzle potatoes with extra virgin olive oil and melted butter. Season generously with salt and pepper.
-
Bake for 35 to 45 minutes at 425˚F, until golden brown and crispy. For extra crispiness, broil for 1-2 minutes at the end, watching carefully.
-
While potatoes bake, combine melted butter, garlic powder, kosher salt, black pepper, and chopped chives in a small bowl for the garlic herb butter. Stir well.
-
Transfer finished potatoes to a platter. Drizzle generously with the prepared melted herb butter and serve immediately. Garnish with extra fresh herbs or Parmesan if desired.
