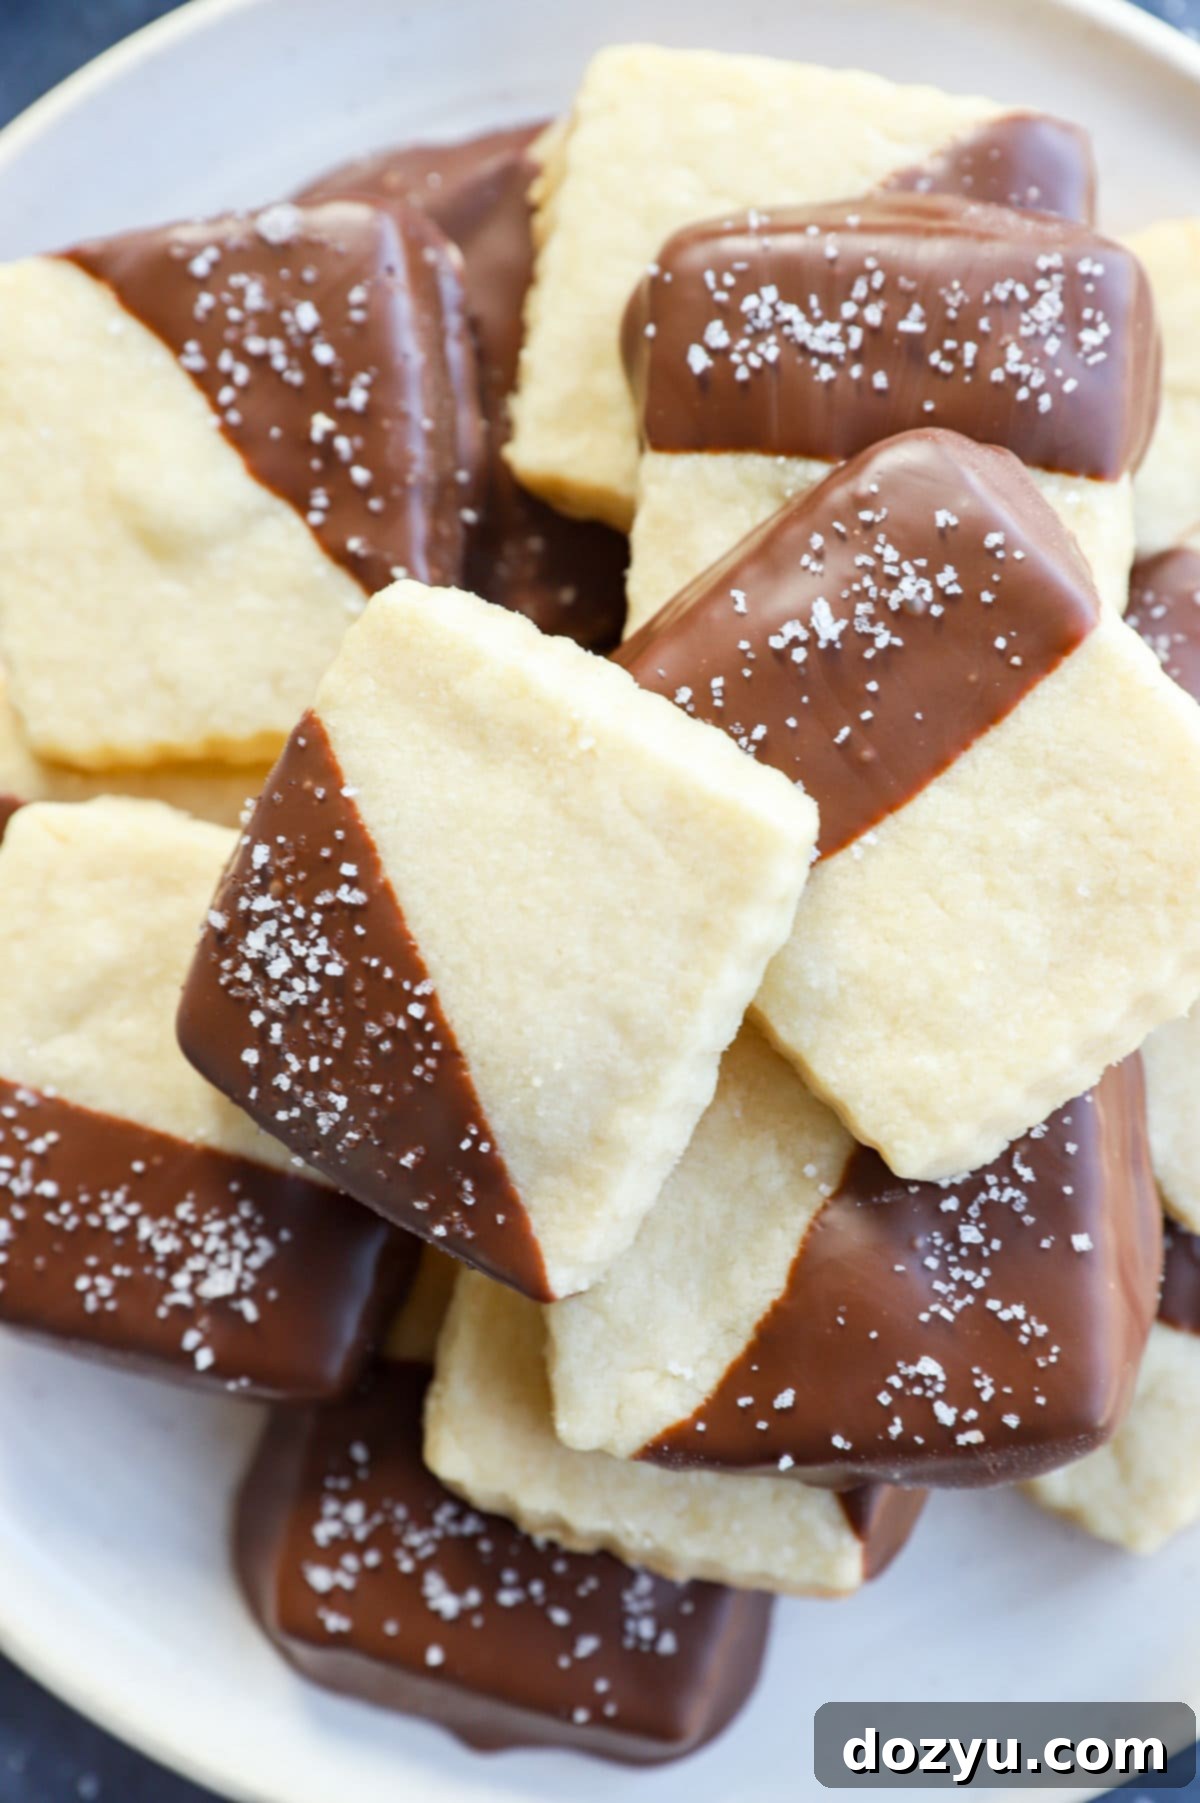
Irresistible Milk Chocolate Dipped Shortbread Cookies: Your Go-To Holiday Recipe Guide
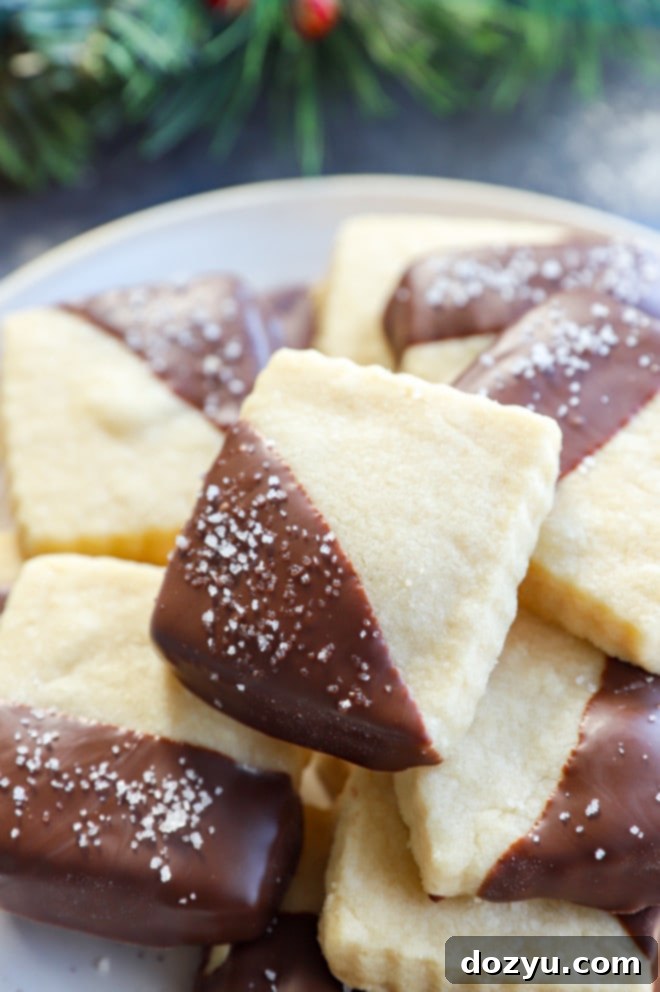
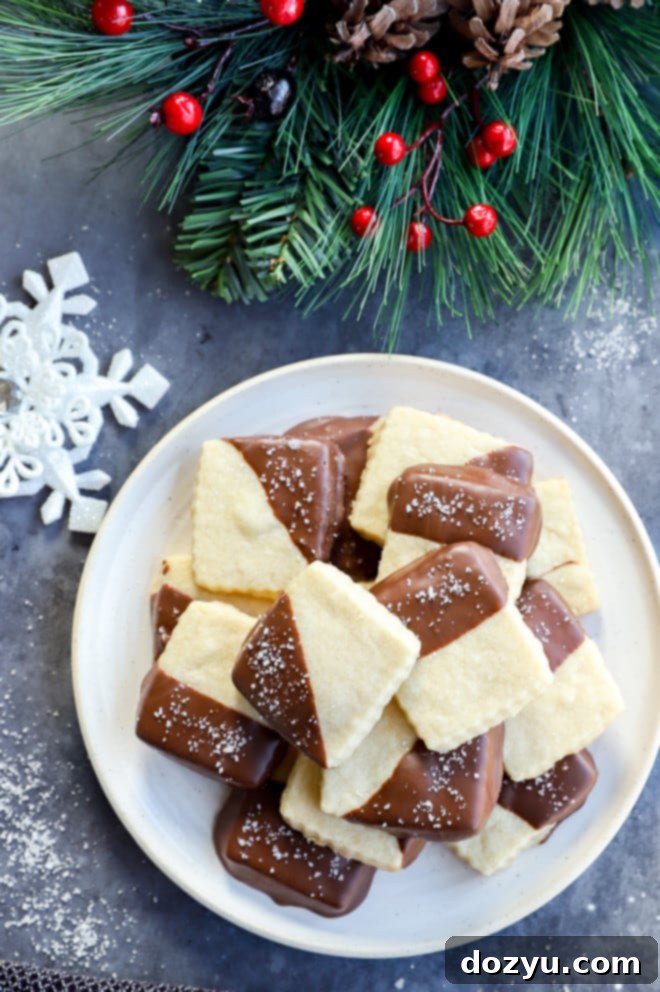
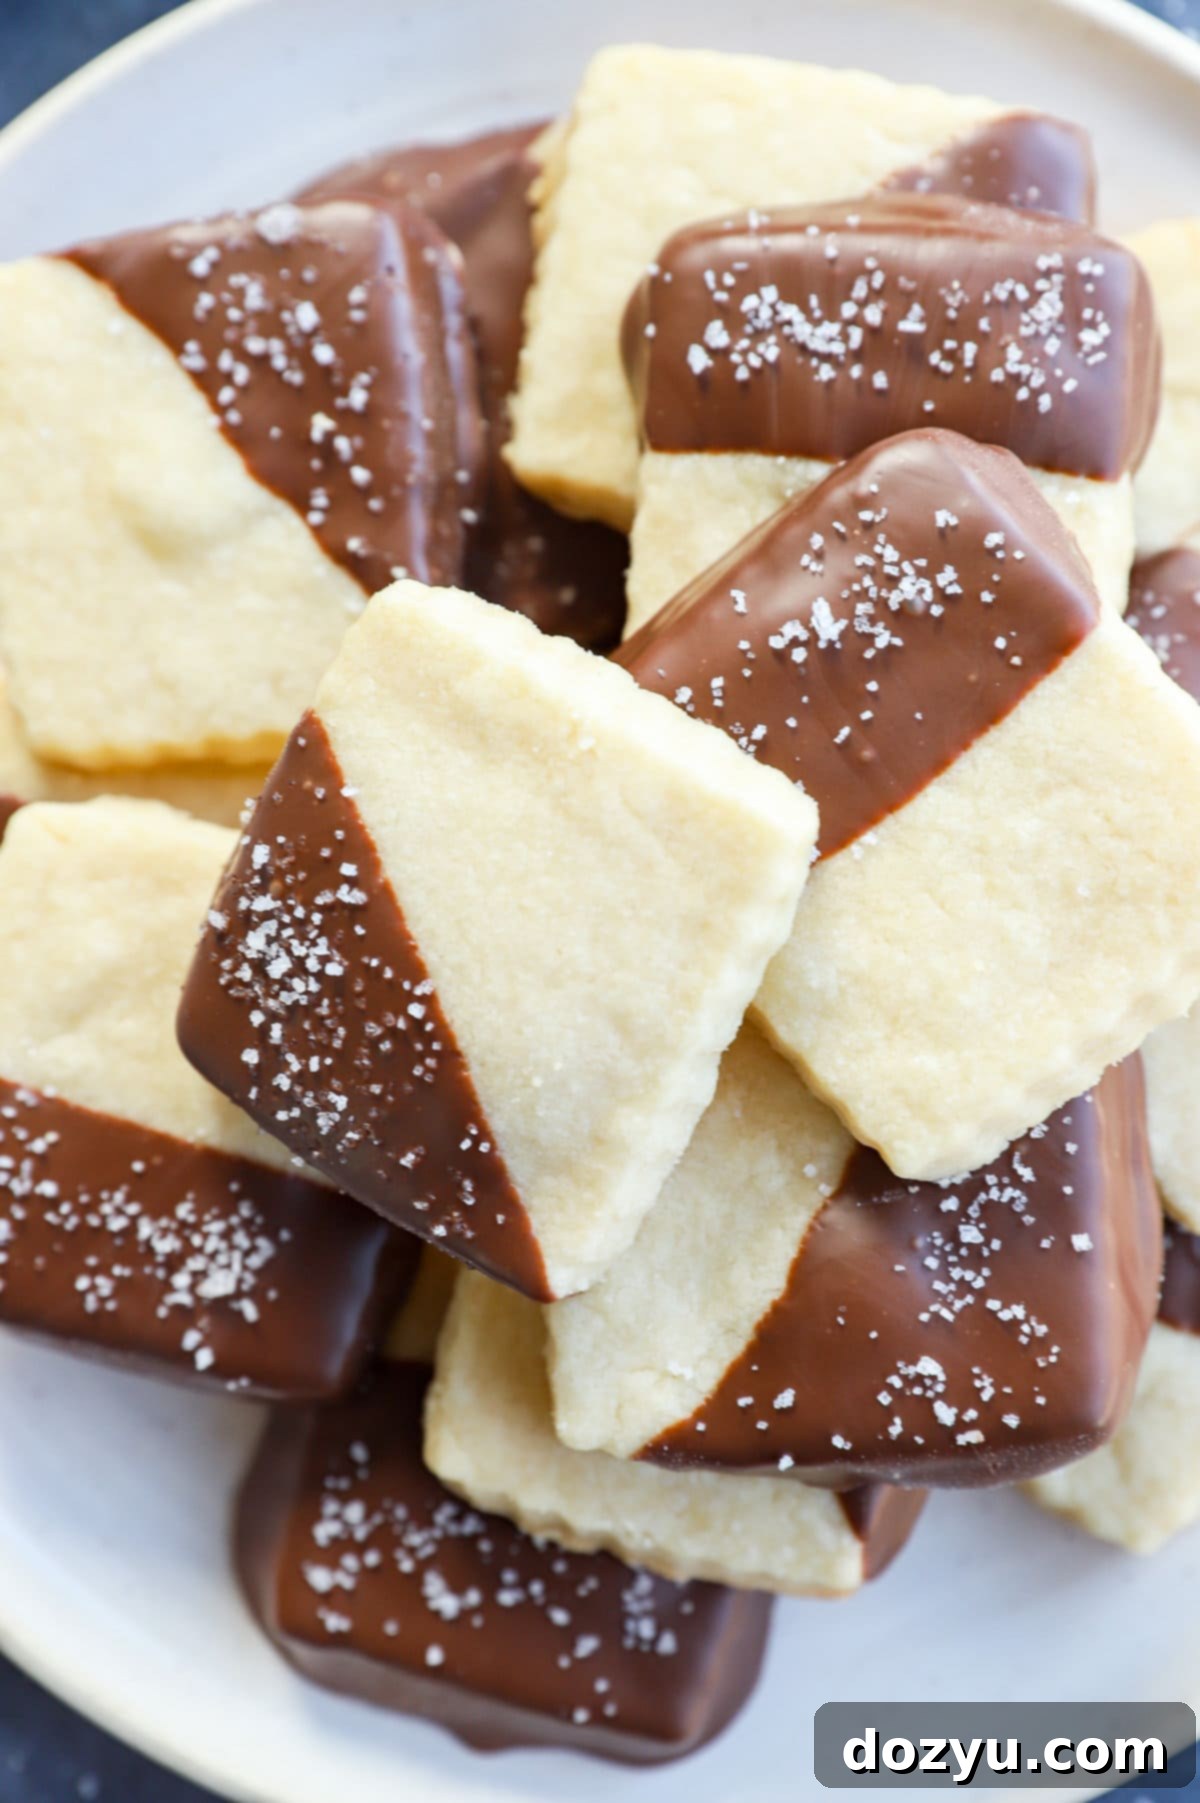
Indulge in the magic of homemade Milk Chocolate Dipped Shortbread cookies this holiday season. These delightful treats are incredibly buttery, wonderfully soft, and feature that classic crumbly texture reminiscent of European shortbread. Not only are they incredibly simple to prepare, but decorating them is also a joy. Imagine the rich flavor of perfectly baked shortbread, generously dipped in creamy milk chocolate, and finished with a delicate sprinkle of flaky sea salt – it’s a combination that promises pure bliss in every bite. Whether you’re baking for family, friends, or a festive gathering, this recipe will quickly become a cherished favorite.
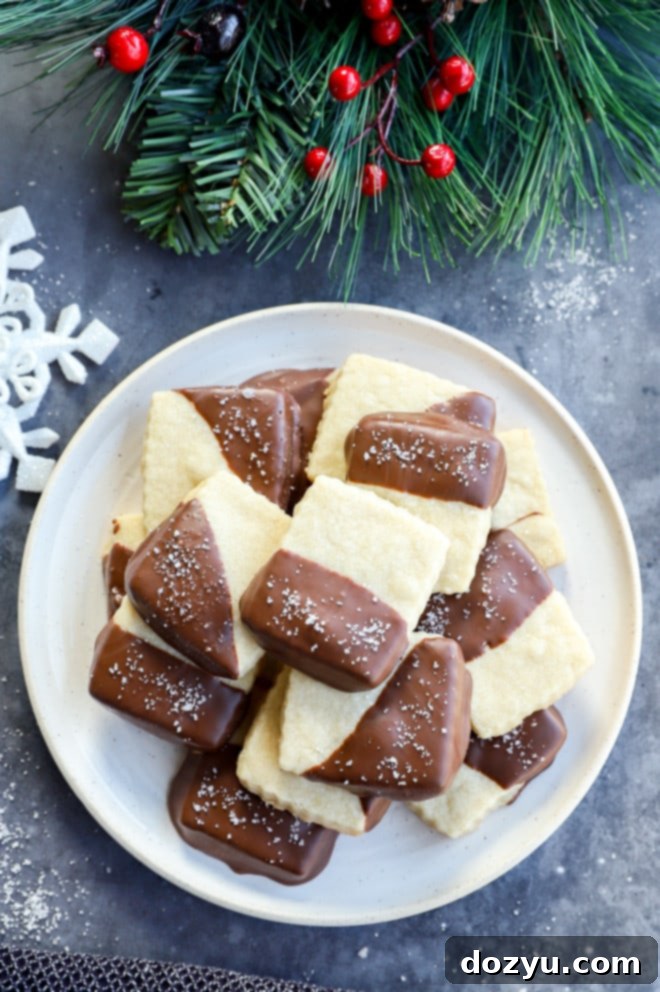
Table of Contents
Toggle
About These Milk Chocolate Dipped Shortbread Cookies
There’s a special kind of comfort and joy that only a perfectly baked shortbread cookie can bring. It’s the unique combination of its delicately crumbly yet moist texture, paired with that unmistakable rich, buttery flavor. And when you elevate this classic by dipping it into smooth, luscious milk chocolate and finishing it with a delicate sprinkle of flaky sea salt? That, my friends, is truly as good as a cookie gets. This isn’t just any shortbread; it’s an experience.
The shortbread cookie is a timeless confection, cherished for centuries. But transforming it into a luxurious milk chocolate shortbread cookie by adding a generous coating of premium chocolate takes this humble treat to extraordinary new heights. This simple addition introduces a delightful layer of sweetness and a contrasting texture that makes each bite an absolute delight. The flaky sea salt cuts through the sweetness beautifully, creating a harmonious balance that will leave you craving more.
These Milk Chocolate Dipped Shortbread Cookies are more than just a dessert; they are a festive staple. They’re the ideal treat to leave out for Santa, durable enough to withstand shipping for a thoughtful cookie box gift to friends and family, and elegant enough to grace any holiday dessert table. Their beautiful appearance and irresistible taste make them perfect for cookie swaps, festive parties, or simply enjoying with a warm cup of coffee on a chilly evening. Prepare to make memories and spread joy with this truly special recipe.
Note: This recipe is an updated and enhanced version of the original post, first published on December 11, 2013, bringing you even more tips and deliciousness!
Ingredients for Perfect Shortbread
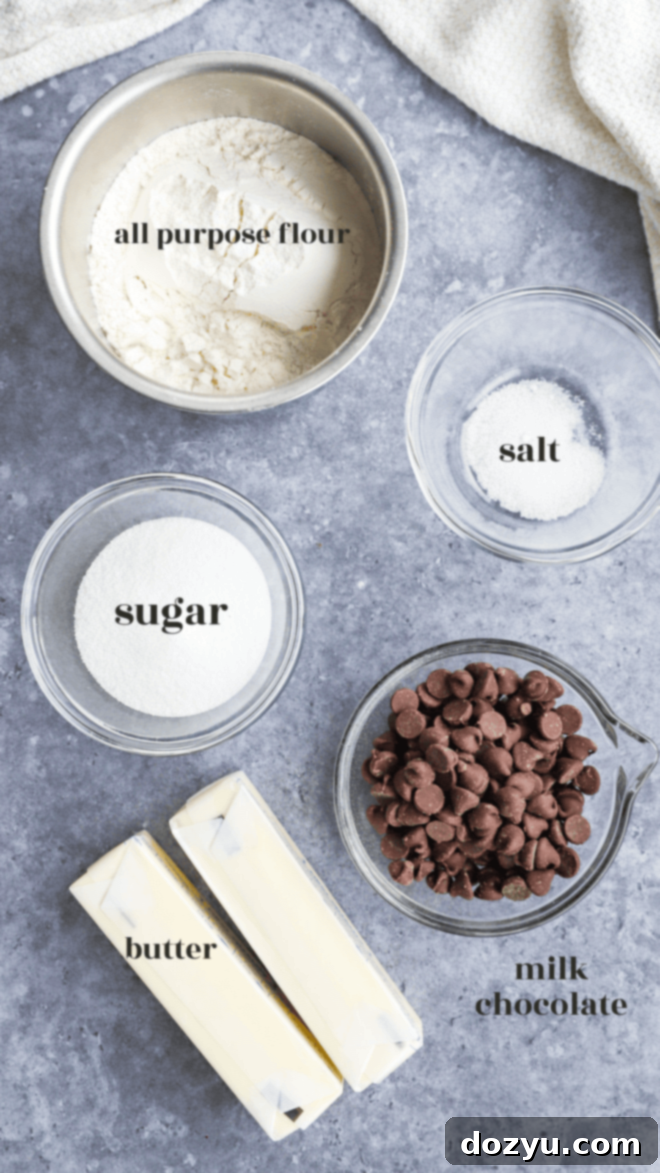
Crafting perfect shortbread requires a few key, high-quality ingredients. Each plays a vital role in achieving that classic, buttery, crumbly texture that makes these cookies so irresistible. Here’s a closer look at what you’ll need:
- All-Purpose Flour: The foundation of our shortbread. For accurate measurement, remember to spoon and level your flour into the measuring cup rather than scooping directly from the bag. This prevents compacting the flour and adding too much, which can result in a tough cookie instead of a tender one.
- Granulated Sugar: This provides the perfect touch of sweetness and contributes to the cookie’s delicate crumb. Unlike powdered sugar, granulated sugar offers a subtle crunch without making the cookies overly sweet or dense.
- Unsalted Butter: The star of shortbread! Always use unsalted butter so you can control the salt content in your recipe. It’s crucial that your butter is well-chilled and cut into small chunks. Cold butter is essential for preventing the dough from spreading too much during baking, ensuring your shortbread maintains its shape and signature texture. If you only have salted butter, you can use it, but be sure to omit the additional salt called for in the recipe.
- Fine Kosher Salt: A small amount of salt enhances all the flavors, balancing the sweetness of the sugar and the richness of the butter. Fine kosher salt dissolves evenly and distributes well throughout the dough, making it ideal for baking.
- Milk Chocolate Chips (or your preference): For dipping, I love the creamy, sweet profile of milk chocolate, which complements the buttery shortbread beautifully. However, feel free to personalize! Dark chocolate offers a sophisticated bittersweet contrast, while white chocolate provides a sweeter, creamier coating. You can use high-quality chocolate chips, chocolate chunks, or even melting wafers for ease. Choose your favorite brand for the best results!
- Flaky Sea Salt: This is an optional but highly recommended finishing touch. A sprinkle of flaky sea salt on top of the melted chocolate adds a delightful textural contrast and a pop of savory flavor that brilliantly enhances the sweetness of the chocolate.
Essential Equipment for This Recipe
To make these delicious milk chocolate dipped shortbread cookies, having the right tools can make all the difference, especially when it comes to achieving that perfect crumbly texture with minimal effort. Here’s what you’ll need:
- Food Processor: This is the secret weapon for creating the perfect shortbread dough with minimal handling. It quickly cuts the cold butter into the flour and sugar, ensuring a tender dough without overworking it. This rapid mixing process is key to preventing gluten development, which can lead to tough cookies.
- Measuring Cups and Spoons: Essential for accurate ingredient measurements, which is crucial in baking. Precision ensures consistent results every time you make these cookies.
- Rolling Pin: You’ll use this to roll out the chilled dough to a consistent 1/2-inch thickness. A uniform thickness ensures even baking across all your cookies.
- Cookie Cutters: While a classic round biscuit cutter or a square cookie cutter works wonderfully for traditional shortbread shapes, feel free to get creative! Holiday-themed cookie cutters (stars, trees, snowflakes) can add an extra festive touch, making these cookies even more special for the season.
- Baking Sheets: For baking your shortbread. Ensure you have at least two to manage batches efficiently.
- Parchment Paper or Silicone Baking Mats: To line your baking sheets. This prevents sticking and ensures even browning on the bottom of your cookies, making for easy cleanup.
- Microwave-Safe Bowl (or Double Boiler setup): For melting the chocolate. A microwave is convenient, but a double boiler offers more precise temperature control if you’re concerned about scorching the chocolate.
- Wire Cooling Rack: For cooling your baked cookies completely before dipping them. This allows air to circulate, preventing sogginess and ensuring a crisp exterior.
Step-by-Step: How to Make Milk Chocolate Dipped Shortbread
Prepare the Shortbread Dough
Creating the perfect shortbread dough is surprisingly simple, especially with the help of a food processor. This method ensures your butter is perfectly incorporated without overworking the dough, leading to that coveted tender crumb.
- Combine Dry Ingredients and Butter: In the bowl of your food processor, add the all-purpose flour, granulated sugar, chilled and cubed unsalted butter, and fine kosher salt.
- Pulse to Crumbs: Pulse the ingredients a few times until the mixture resembles fine crumbs, similar to coarse sand or pea-sized pieces. This ensures the butter is evenly distributed throughout the flour.
- Form the Dough: Continue to process on low speed. The mixture will gradually come together, first looking like wet sand, then clumping into larger pieces, and finally forming a cohesive dough ball. Stop immediately once the dough clumps; over-processing can develop gluten and make the cookies tough.
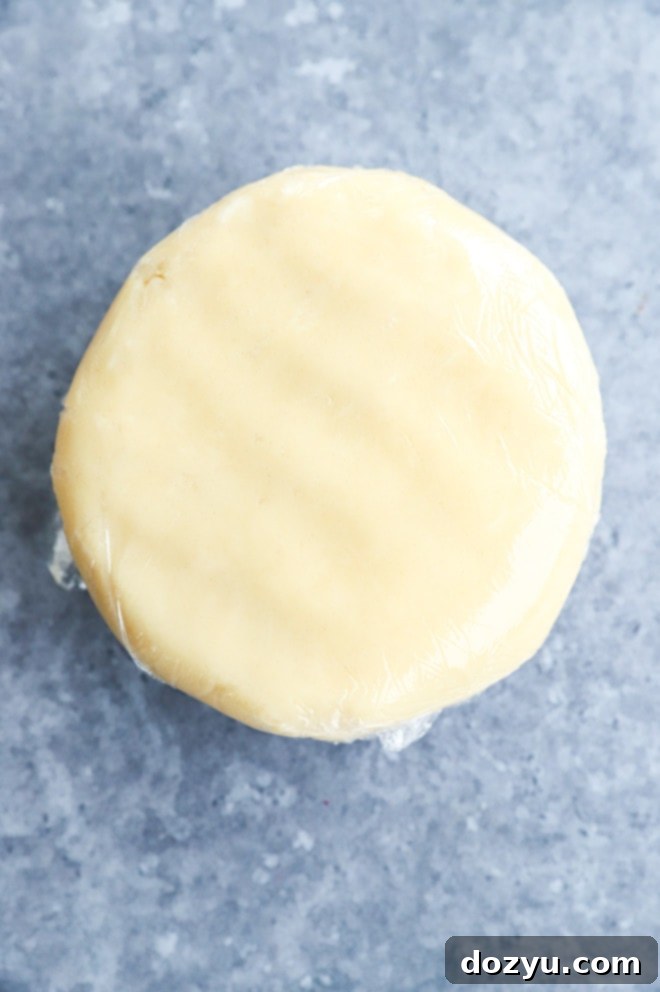
- Chill: Remove the dough from the food processor and gently form it into a thick disc on a clean surface. Wrap it tightly in plastic wrap, ensuring no air can get in. Refrigerate for a minimum of 1 hour, or up to 3 days. This crucial chilling step allows the butter to firm up and the flavors to meld, which is essential for preventing the cookies from spreading during baking and achieving that perfect shortbread texture.
Roll, Cut & Shape
Once your dough is perfectly chilled, it’s time to bring your shortbread cookies to life! This stage is where you get to decide their shape and prepare them for baking.
- Prepare Work Surface: Unwrap the chilled dough and place it on a lightly floured work surface.
- Knead Briefly: Knead the dough gently for a few minutes until it becomes smooth and pliable. This brief kneading warms the butter slightly, making the dough easier to roll without it cracking. If your dough feels particularly dry (which can sometimes happen in high altitudes or very dry climates), add 1 teaspoon of heavy cream at a time and knead it in until the dough reaches a more workable consistency. Be careful not to add too much!
- Roll Out Dough: Using a rolling pin, roll the dough until it is uniformly about 1/2-inch thick. This thickness is ideal for classic shortbread, providing a satisfying bite and ensuring they don’t become too crisp.
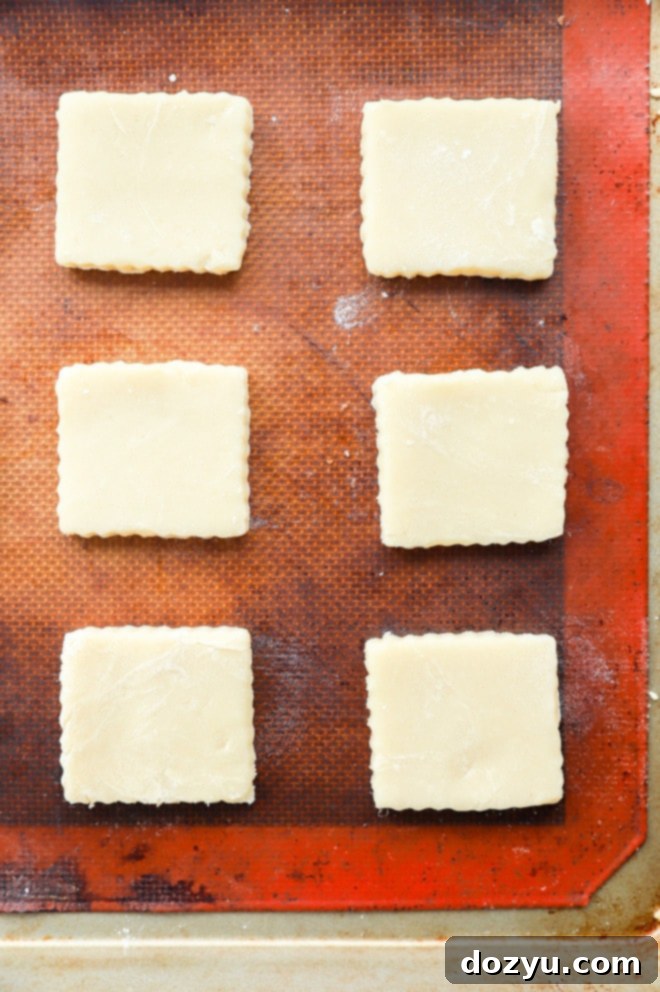
- Cut Cookies: Use your chosen cookie cutters—be it a simple biscuit cutter, a square shape, or festive holiday designs—to cut out the dough. Dip your cutter in a little flour between cuts to prevent sticking.
- Re-roll Scraps: Carefully gather any dough scraps, gently press them together, and re-roll to cut out more cookies. Continue this process until all the dough has been used. Avoid overworking the scraps, as this can make the subsequent cookies tougher.
Bake to Golden Perfection
Baking shortbread is a delicate balance, aiming for a pale, golden edge while keeping the center tender. Proper baking ensures that rich, buttery flavor shines through.
- Prepare for Baking: Carefully transfer your cut-out shortbread cookies onto baking sheets lined with silicone mats or parchment paper. Leave a little space between each cookie. Preheat your oven to 325°F (160°C).
- Bake Evenly: Bake for approximately 20-25 minutes. The key is to watch them closely. You want the edges to just begin turning a very light golden brown. The centers of the cookies will still feel soft to the touch when gently pressed. This is normal; they will firm up as they cool.
- Cooling is Key: Once baked, remove the baking sheets from the oven. Allow the cookies to cool on the baking sheets for at least 10 minutes. This allows them to finish baking gently from residual heat and become more structurally sound before handling. After 10 minutes, carefully transfer them to a wire rack to cool completely. They must be entirely cool before you proceed to the dipping step, otherwise, the chocolate will not set properly.
Dip in Decadent Chocolate
Now for the most delicious part – dipping your perfectly baked shortbread into melted milk chocolate! This step adds a layer of indulgence and allows for a beautiful finish with flaky sea salt.
- Melt the Chocolate: Place your milk chocolate chips (or chosen chocolate) in a microwave-safe bowl. Microwave on high for 30 seconds. Remove and stir thoroughly with a spatula. Continue to microwave in 15-second increments, stirring vigorously after each interval, until the chocolate is smooth and fully melted. Stirring frequently is crucial to prevent scorching and ensure even melting. Alternatively, use a double boiler for a gentler melting process.
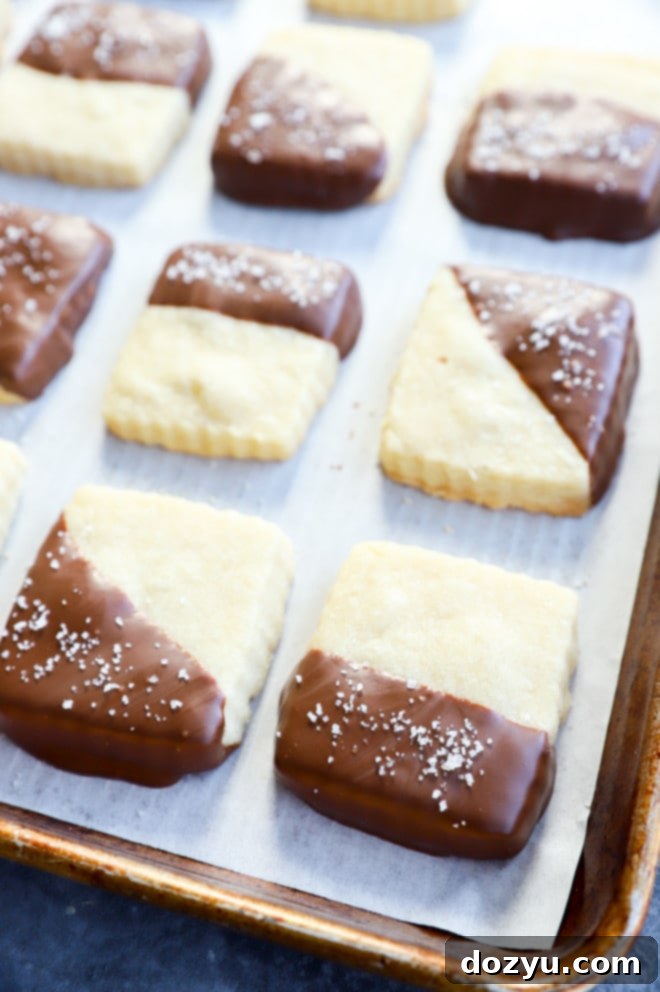
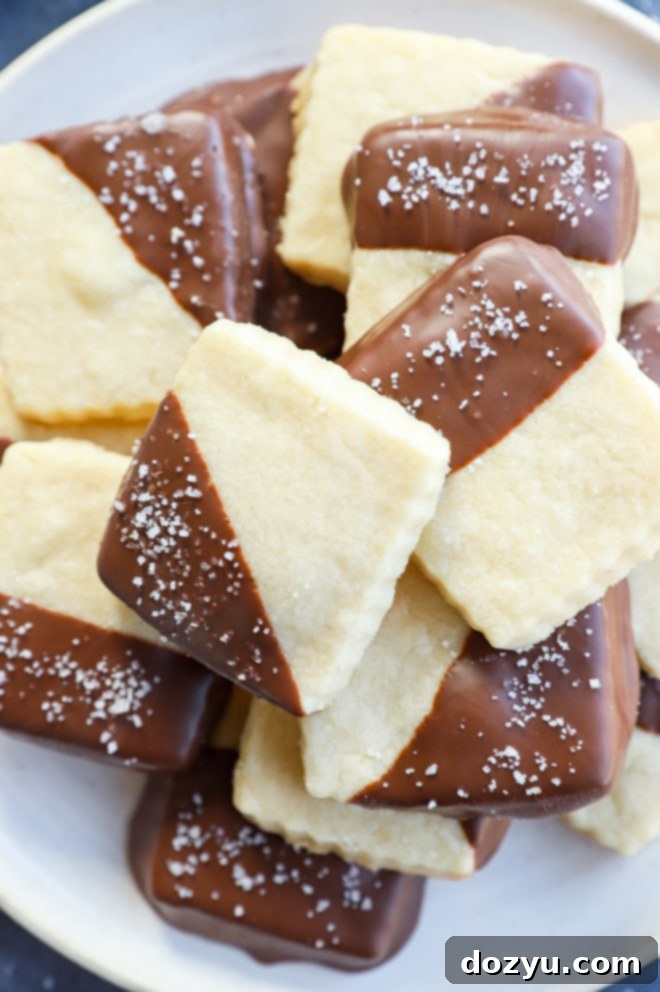
- Dip the Cookies: Once the chocolate is melted and smooth, take your completely cooled shortbread cookies. Dip each cookie either halfway, or fully immerse it, depending on your preference. You can use a fork or your fingers for dipping. Allow any excess chocolate to drip off back into the bowl.
- Sprinkle with Sea Salt: Immediately after dipping, place the chocolate-coated cookie back onto a sheet of parchment paper. While the chocolate is still wet, sprinkle a pinch of flaky sea salt over the chocolate. The sea salt will adhere as the chocolate sets.
- Allow to Set: Let the dipped cookies sit at room temperature or in the refrigerator for a few minutes until the chocolate has fully set and hardened. Once set, they are ready to enjoy!
Expert Tips and Tricks for Shortbread Success
Even though shortbread cookies are relatively simple, a few expert tips can elevate your baking from good to absolutely outstanding. Pay attention to these details for consistently perfect results:
- Melt Chocolate Without Burning It: Chocolate can be finicky. The best methods are either in the microwave or over a double boiler. If using the microwave, always use short intervals (30 seconds initially, then 15-second bursts) and stir thoroughly after each one. Chocolate retains its shape even when melted, so it might not look ready until you stir it. Overheating will cause it to seize and become unusable. For a double boiler, place a heatproof bowl over a pot of simmering water, ensuring the bowl doesn’t touch the water. Stir continuously until smooth.
- Chill Your Dough – No Exceptions! I cannot stress this enough – chilling the dough is absolutely critical. This step allows the butter to firm up, preventing the cookies from spreading excessively in the oven and helping them maintain their perfect shape and tender texture. It also gives the gluten a chance to relax, contributing to a more delicate crumb. Do not skip or shorten this step!
- Choose Your Favorite Chocolate: While milk chocolate offers a classic, creamy sweetness, feel free to experiment! Dark chocolate provides a lovely bittersweet contrast that sophisticated palates will adore, while white chocolate adds a rich, vanilla-infused sweetness. High-quality chocolate makes a noticeable difference in flavor, so opt for a brand you enjoy eating on its own.
- Measure Flour Accurately: Use the spoon and level method for measuring flour. Scooping directly from the bag can compact the flour, leading to up to 25% more flour than needed, which will make your shortbread tough and dry.
- Don’t Overwork the Dough: Whether using a food processor or a stand mixer, mix just until the dough comes together. Overmixing develops gluten, which is desirable in bread but detrimental to tender shortbread.
- Even Thickness for Even Baking: When rolling out the dough, aim for a consistent 1/2-inch thickness. This ensures all your cookies bake evenly and finish at the same time, preventing some from being undercooked or overbaked.
- Add Flaky Sea Salt Immediately: For the best adherence and visual appeal, sprinkle the flaky sea salt onto the melted chocolate immediately after dipping, while the chocolate is still wet. This way, the salt crystals embed perfectly into the chocolate as it sets.
More tasty holiday cookies to bake: Christmas Shortbread Cookies | Chocolate Covered Oreos | Mini Chocolate Chip Cookies | Snowball Cookies | Lemon Shortbread Cookies
Secrets to Baking the Best Shortbread
Achieving that iconic, melt-in-your-mouth shortbread texture and rich flavor isn’t difficult when you know the core principles. Here are the secrets to making truly exceptional shortbread:
- High-Quality Butter is Non-Negotiable: Shortbread is essentially a celebration of butter. Its flavor and texture are paramount. Therefore, the first and most important secret is to use real, high-quality unsalted butter. European-style butters, with their higher fat content, often yield an even more luxurious result. The better the butter, the more exquisite your cookies will taste. Make sure it’s cold!
- Do Not Overwork the Dough: This is a golden rule for shortbread. The goal is a tender, crumbly cookie, not a chewy one. Overworking the dough develops gluten, which leads to toughness. Whether you’re using a food processor or mixing by hand, incorporate the ingredients just until they come together. When kneading, only do so for a few minutes until the dough forms a smooth, pliable ball. If the dough gets too warm and soft in your hands, stop and get it back in the refrigerator to chill.
- Chilling the Dough is Crucial: We’ve mentioned it before, and we’ll mention it again because it’s *that* important! Chilling the dough serves several vital purposes. It allows the butter to firm up, which prevents the cookies from spreading too much in the oven, ensuring they hold their crisp, defined shape. It also gives the flour time to fully hydrate, and the gluten to relax, which contributes significantly to the shortbread’s signature tender, crumbly texture. Don’t skip this step for the best results!
No Food Processor? No Problem!
While a food processor makes quick work of shortbread dough, you absolutely don’t need one to achieve delicious results. Many traditional shortbread recipes are made without this appliance. Here are a couple of alternatives:
- Stand Mixer Method: If you have a stand mixer, you can use it with the paddle attachment. Cut your cold butter into small cubes. Add the flour, sugar, and salt to the mixer bowl. On low speed, gradually add the cold butter pieces, mixing until the mixture resembles coarse crumbs. Then, increase the speed slightly and mix until the dough just comes together and forms clumps. Be sure to scrape down the sides of the bowl with a spatula periodically to ensure everything is evenly incorporated.
- By Hand (Pastry Blender or Fingers): For a truly traditional approach, you can mix the dough by hand. In a large bowl, combine the flour, sugar, and salt. Add the cold, cubed butter. Using a pastry blender, two knives, or even your fingertips, cut the butter into the dry ingredients until the mixture resembles coarse meal with some pea-sized pieces of butter remaining. Then, use your hands to gently press and bring the dough together. This method requires a bit more effort and care to avoid overworking the dough with the warmth of your hands, but it’s definitely achievable and yields wonderful results.
Regardless of the method, remember the key is to keep the butter cold and to mix only until the dough just comes together.
The Importance of Chilling Shortbread Dough
Yes, chilling the shortbread dough before baking is not just a suggestion – it’s a non-negotiable step for truly perfect shortbread. This period of refrigeration, typically for at least an hour, plays a crucial role in the cookie’s final texture and appearance:
- Prevents Spreading: The primary reason for chilling is to re-solidify the butter within the dough. When cold butter hits the hot oven, it slowly melts, creating steam that helps give the shortbread its signature crumbly yet tender texture. If the butter is too warm, it melts too quickly, causing the cookies to spread out thin and lose their shape.
- Enhances Texture: Chilling allows the flour to fully hydrate, which creates a more uniform and tender crumb. It also gives the gluten a chance to relax, preventing the cookies from becoming tough.
- Deepens Flavor: Like many baked goods, a period of chilling allows the flavors of the ingredients to meld and deepen, resulting in a more complex and delicious cookie.
Skipping this step will almost certainly lead to cookies that spread too much, are greasy, and lack that delicate crumbly texture that defines great shortbread. So, be patient – it’s worth the wait!
Troubleshooting: Shortbread Spreading or Burning
If your shortbread cookies spread out too much, lost their shape, or even burnt around the edges, don’t worry – these are common issues, and often easy to fix! Here’s what might have gone wrong and how to avoid it next time:
- Warm Butter/Insufficient Chilling: This is the most common culprit for spreading. If the butter in your dough was too soft when you started mixing, or if you didn’t chill the dough for a long enough period (or at all!), the butter melts too quickly in the oven. Cold butter is key because it holds its shape longer, creating steam that contributes to the cookie’s structure before fully melting. Ensure your butter is rock-hard cold when you begin, and don’t skimp on the refrigeration time.
- Overworked Dough: As discussed, overworking the dough generates heat and develops gluten, which can make the cookies tough and also prone to spreading. Mix just until the ingredients come together.
- Oven Temperature Too High: An oven that is too hot can cause the butter to melt too rapidly before the cookie structure has a chance to set, leading to spreading. It can also cause the cookies to burn before they are cooked through. Double-check your oven temperature with an oven thermometer, and preheat thoroughly. Shortbread is typically baked at a lower temperature (around 325°F/160°C) for a longer period to ensure a gentle bake.
- Too Much Butter/Not Enough Flour: While shortbread is butter-rich, an incorrect ratio can lead to excessive spreading. Always measure your ingredients precisely, especially the flour using the spoon and level method.
- Too Thinly Rolled: If your dough is rolled too thin, the cookies will naturally be more prone to spreading and burning quickly due to less volume. Aim for a consistent 1/2-inch thickness.
By paying close attention to these factors, you can ensure your next batch of shortbread is perfectly shaped and beautifully baked!
Knowing When Your Shortbread is Perfectly Baked
Unlike some cookies that get deeply golden all over, shortbread is often best when it’s just lightly colored, preserving its tender, buttery quality. Knowing when it’s done is crucial for achieving the perfect texture.
Here are the key indicators:
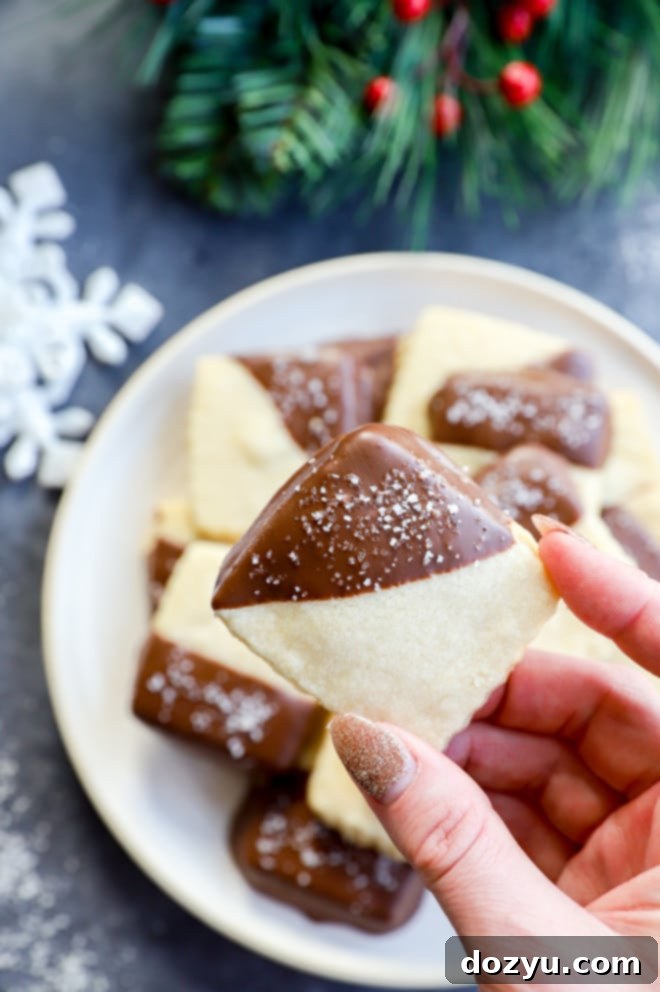
- Golden Edges: The most important visual cue is that the very edges of the shortbread cookies should just begin to turn a very light, delicate golden brown. This indicates that they’ve baked through and developed a subtle crispness on the exterior.
- Pale Center: The center of the cookies should remain pale or only very faintly golden. You don’t want deep browning across the entire surface.
- Slightly Soft to the Touch: When you gently touch the center of a cookie while it’s still on the baking sheet, it should still feel a little soft. Don’t worry, this is correct! Shortbread continues to firm up significantly as it cools from the residual heat on the baking sheet. If you wait for them to feel firm in the oven, they will likely be overbaked and dry once cooled.
- Approximate Baking Time: Follow the recipe’s recommended baking time (typically 20-25 minutes at 325°F/160°C) as a guideline, but always rely on visual cues, as oven temperatures can vary.
Once you see those lightly golden edges, it’s time to remove them from the oven. Let them rest on the hot baking sheets for the first 10 minutes to allow for carry-over cooking before transferring them to a wire rack to cool completely.
Can I Use Different Types of Chocolate?
Absolutely! While milk chocolate offers a delightful sweetness that perfectly complements the rich, buttery shortbread, feel free to let your personal preferences and creativity guide your choice of chocolate for dipping. The beauty of these cookies is their versatility!
- Dark Chocolate: For those who prefer a less sweet and more sophisticated flavor, dark chocolate is an excellent choice. Its slight bitterness provides a wonderful contrast to the sweet shortbread, creating a more complex and intensely chocolatey experience. Choose a dark chocolate with a cocoa content of 60% or higher for the best results.
- White Chocolate: If you’re looking for an extra creamy and sweet coating, white chocolate is a fantastic option. Its vanilla notes and smooth texture pair beautifully with the shortbread. You can also tint white chocolate with food coloring to create festive, colorful cookies for special occasions.
- Semi-Sweet Chocolate: This is a popular and versatile choice, offering a middle ground between milk and dark chocolate. It’s often found in chocolate chip form and melts beautifully.
- Flavored Chocolates: Don’t limit yourself to just plain chocolate! You could use a flavored chocolate, like peppermint white chocolate for a holiday twist, or even an orange-infused dark chocolate for a gourmet touch.
No matter which chocolate you choose, ensure it’s high-quality and melts smoothly for the best dipping experience. The shortbread itself is a wonderful blank canvas, ready to be adorned with your favorite chocolate coating!
Make-Ahead Tips for Shortbread Dough
One of the many advantages of shortbread dough is how well it holds up to being made ahead of time. This makes it a fantastic recipe for busy holiday seasons or when you want to get a head start on your baking. Preparing the dough in advance is a great way to streamline your baking process, allowing you to enjoy fresh-baked cookies with minimal last-minute effort!
- Chilling the Dough (Refrigeration): The dough itself can be made and chilled, tightly wrapped in plastic wrap (either as a disc or already rolled and cut), in the refrigerator for up to 3 days. This is perfect if you want to prepare the dough on a Monday and bake fresh cookies on Wednesday or Thursday.
- Freezing Unbaked Dough: For longer storage, you can freeze the dough.
- As a Disc: Wrap the dough disc tightly in several layers of plastic wrap, then an additional layer of aluminum foil. Label and freeze for up to 3 months. Thaw overnight in the refrigerator before rolling and cutting.
- Cut-Out Cookies: This is my preferred method for convenience! Roll out the dough and cut out your cookie shapes. Place the cut-out cookies on a baking sheet lined with parchment paper, ensuring they don’t touch. Freeze for 2 to 3 hours, or until solid. Once solid, transfer the frozen cookies to an airtight freezer bag or container, separating layers with parchment or wax paper to prevent sticking. Store in the freezer for up to 3 months.
- Baking from Chilled or Frozen:
- From Refrigerated: If your dough or cut-out cookies have been chilled in the refrigerator, you can bake them as directed in the recipe, no adjustments needed.
- From Frozen: For cookies baked directly from frozen, there’s no need to thaw! Simply place them on your lined baking sheets and bake. You will need to add a handful more minutes (typically 3-7 minutes) to the total baking time, as they need to come to temperature before they start to bake through. Watch for those golden edges!
Need more inspiration for cookies? Check out my cookies recipe page!
Perfect Pairings: What to Serve with Your Shortbread
These Milk Chocolate Dipped Shortbread Cookies are delightful on their own, but they truly shine when paired with the right beverage or as a sweet ending to a comforting meal. Here are some ideas to elevate your cookie experience:
Beverage Pairings:
- Classic Milk: What could be more comforting than a classic glass of cold milk with a freshly baked cookie? It’s a timeless pairing that appeals to all ages.
- Festive Egg Nog or Coquito: For a truly seasonal treat, pair your shortbread with a creamy glass of homemade egg nog or its Puerto Rican cousin, coquito. The rich, spiced flavors complement the buttery shortbread beautifully.
- Warm Drinks: On a chilly day, a warm mug is ideal. Try them with:
- Mulled Apple Cider: The sweet and spiced notes of cider are a perfect match.
- Mulled Wine: For an adult pairing, the aromatic spices of mulled wine offer a cozy embrace.
- Coffee or Tea: A classic cup of coffee or your favorite tea (especially a robust black tea or a calming herbal blend) is always a fantastic companion for dipping and savoring shortbread.
Holiday Meal Ideas:
If you’re planning a full holiday meal for family and friends, here are some hearty and comforting main dishes that would perfectly lead up to these delectable shortbread cookies:
- Homemade Rigatoni al Forno: This cheesy, meaty, and utterly delicious baked pasta dish is a crowd-pleaser and offers satisfying flavors that transition wonderfully to a sweet dessert. Pair it with some crunchy Air Fryer Garlic Bread.
- Instant Pot Short Rib Ragu: For an easy yet incredibly flavorful meal, this ragu is rich and hearty. The Instant Pot makes preparing this slow-cooked dish surprisingly fast, leaving you more time for cookies!
- Classic Herb Crusted Rack of Lamb with Red Wine Sauce: An elegant and impressive dish that always delights. It pairs beautifully with a variety of classic holiday side dishes and makes for a memorable feast.
And if you simply can’t get enough shortbread, also try these buttery and sweet Raspberry Thumbprint Cookies for another delightful variation!
How to Store Your Delicious Cookies
Proper storage is key to keeping your Milk Chocolate Dipped Shortbread Cookies fresh and delicious for as long as possible. Whether you prefer them at room temperature or chilled, here’s how to best store them:
- Storing Baked Cookies:
- At Room Temperature: Once the chocolate has fully set, store the cookies in an airtight container at room temperature. They will remain fresh and delightful for up to one week. To prevent the chocolate from sticking or smudging, you can layer the cookies between sheets of parchment or wax paper.
- In the Refrigerator: Some people actually prefer their shortbread cookies chilled! If this is your preference, or if your home is particularly warm, you can store them in an airtight container in the refrigerator for up to two weeks. The chocolate will be firmer, and the shortbread will have a delightful coolness.
- Storing Unbaked Dough:
- Refrigerated Dough: As mentioned in our make-ahead tips, the unbaked shortbread dough can be tightly wrapped in plastic wrap and chilled in the refrigerator for up to 3 days before baking.
- Frozen Dough: Unbaked, cut-out cookies can be frozen solid on a baking sheet, then transferred to an airtight freezer bag or container (with parchment between layers) for up to 3 months. Bake directly from frozen, adding a few extra minutes to the baking time.
No matter how you store them, these cookies are a wonderful treat that can be enjoyed for days after baking!
More Delectable Holiday Dessert Recipes
Looking to expand your holiday baking repertoire beyond these irresistible shortbreads? The festive season is the perfect time to explore new and exciting dessert ideas that will impress your guests and bring joy to your table. Here are some more delightful recipes to inspire your holiday baking:
- Chocolate Dipped Candied Orange Slices: If you need a beautifully festive treat that’s both simple and elegant to liven up your Christmas cookie box, these are perfect. The zesty candied orange peel paired with rich chocolate is a gourmet delight.
- Baileys Fudge: With just four ingredients, this incredibly easy and decadent Baileys fudge is a lovely last-minute treat for gifting or serving. It’s rich, creamy, and infused with the delightful flavor of Irish cream.
- Pecan Pie Cheesecake: For those who adore the rich, nutty flavors of pecan pie and the creamy indulgence of cheesecake, this fusion dessert is an absolute must-try. It’s a showstopper that combines the best of both worlds.
- Triple Chocolate Brownies: If you’re craving the ultimate chocolate fix, these triple chocolate brownies deliver! They are intensely fudgy, incredibly rich, and packed with multiple forms of chocolate for a truly satisfying dessert experience.
Experiment with these recipes to make your holiday dessert spread truly unforgettable!
Finally, if you make this milk chocolate dipped shortbread cookie recipe, please be sure to give this recipe a rating and/or leave a comment! I love to hear when you all make recipes, and I do take the time to respond to every single comment.
Feel free to drop questions below too, if you have them!
Oh and be sure to tag me on Instagram if you make the recipe! I love being able to see these recipes come to life in your homes – it’s my favorite thing to look through those photos. It really means the world to me!
Milk Chocolate Dipped Shortbread
Equipment
-
Measuring Spoons
-
Measuring Cups
-
9-Cup Food Processor
-
Rolling Pin
-
Biscuit Cutter Set
-
Baking Sheets
-
Parchment Paper or Silicone Baking Mats
-
Wire Cooling Rack
Ingredients
- 2 1/2 cups all-purpose flour
- 2/3 cup granulated white sugar
- 1 cup unsalted butter chilled and cut into chunks
- 1/4 tsp fine kosher salt
- 4 oz milk chocolate chips (or your preferred chocolate)
- Flaky sea salt (for sprinkling, optional)
- 1 tsp heavy cream (optional, for dry dough)
Instructions
-
1. Preheat your oven to 325˚F (160°C). Line two large baking sheets with silicone mats or parchment paper. Set aside.
-
2. In the bowl of a food processor, combine the all-purpose flour, granulated sugar, chilled and cubed unsalted butter, and fine kosher salt. Pulse in short bursts until the mixture resembles fine crumbs, like coarse sand.
-
3. Process on low speed continuously until the mixture clumps together and forms a cohesive dough. Be careful not to over-process. Remove the dough from the processor and gently knead it on a lightly floured surface for about 3 minutes until it’s smooth and pliable. If the dough seems too dry (common in dry climates or at high altitudes), add 1 teaspoon of heavy cream and knead until incorporated. Form the dough into a thick disc, wrap it tightly in plastic wrap, and chill in the refrigerator for at least 1 hour, or up to 3 days.
-
4. On a lightly floured surface, roll out the chilled dough until it is uniformly 1/2-inch thick. Use a 1 1/2-inch round (or desired shape) cookie cutter to cut out discs of the dough. Gather any scraps, gently press them together, and re-roll to cut out additional cookies until all dough is used.
-
5. Place the cut-out cookies on your prepared baking sheets. Bake for 20 to 25 minutes, or until the edges are just starting to turn a light golden brown. The centers will still feel soft to the touch. Remove from the oven and let them cool on the baking sheets for at least 10 minutes before transferring them to a wire rack to cool completely. Ensure cookies are entirely cool before dipping.
-
6. Melt the milk chocolate chips in a microwave-safe bowl. Microwave for 30 seconds, then stir well. Continue to microwave in 15-second increments, stirring thoroughly after each, until the chocolate is smooth and fully melted. Dip each cooled cookie halfway or completely into the melted chocolate, allowing any excess to drip off. Place the chocolate-dipped cookies back onto parchment paper-lined baking trays. If desired, immediately sprinkle flaky sea salt over the wet chocolate. Let the chocolate set at room temperature or in the refrigerator until firm.
Video
Nutrition
