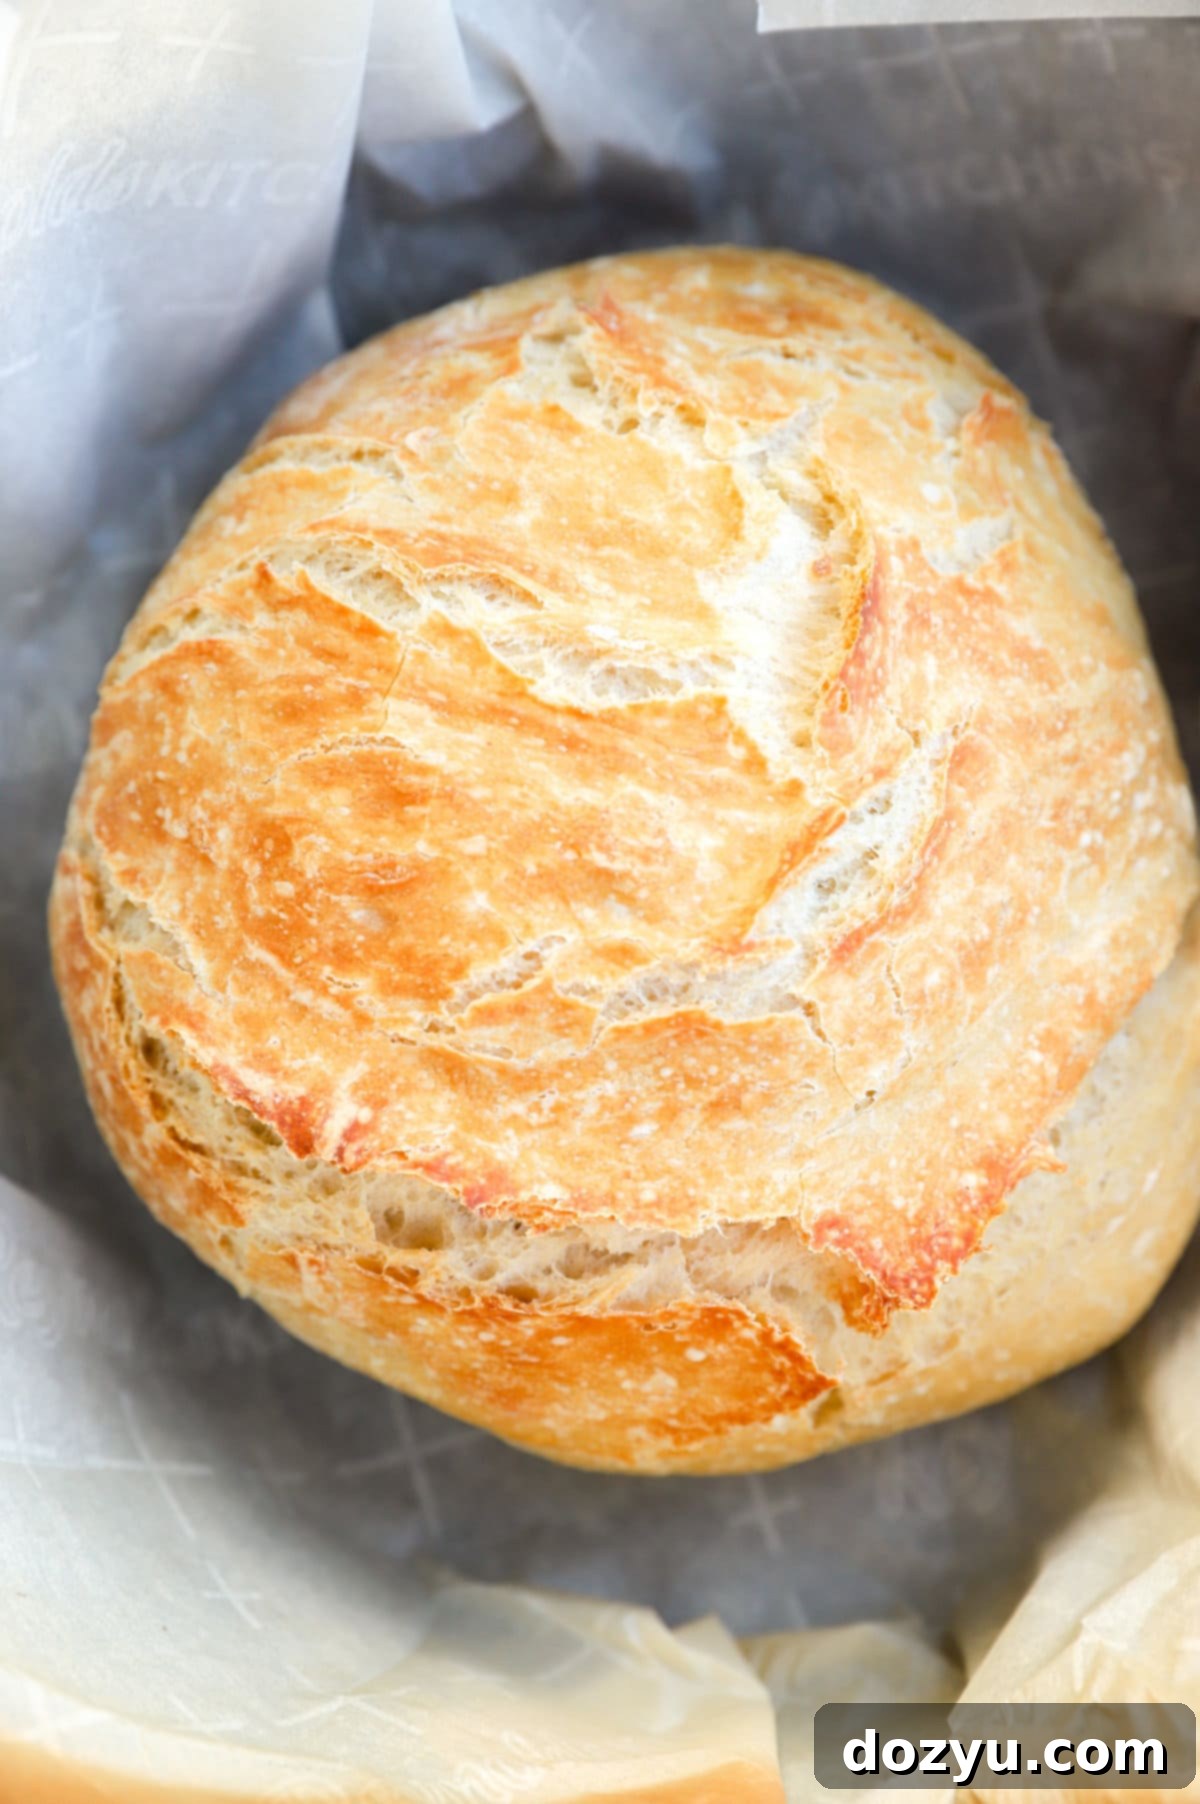
Easy No-Knead Overnight Bread: Bake Delicious Homemade Artisan Loaves with Minimal Effort
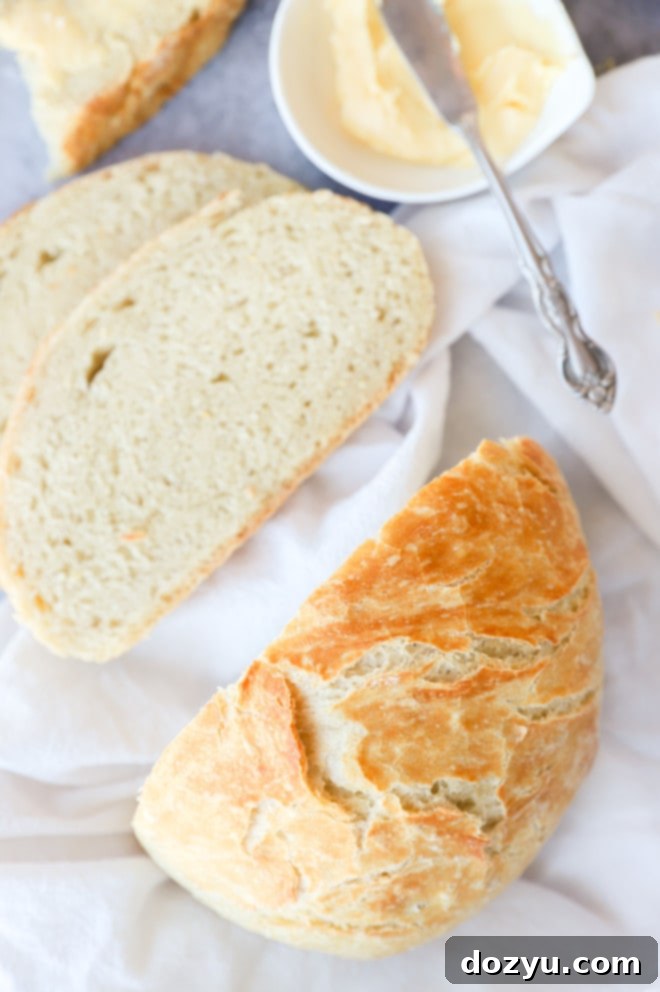
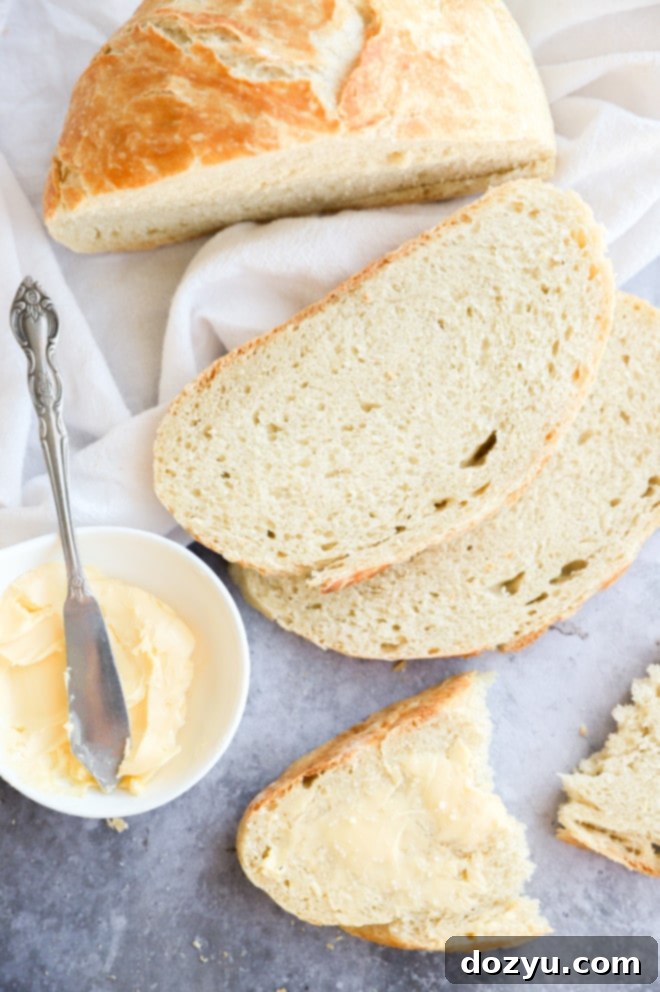
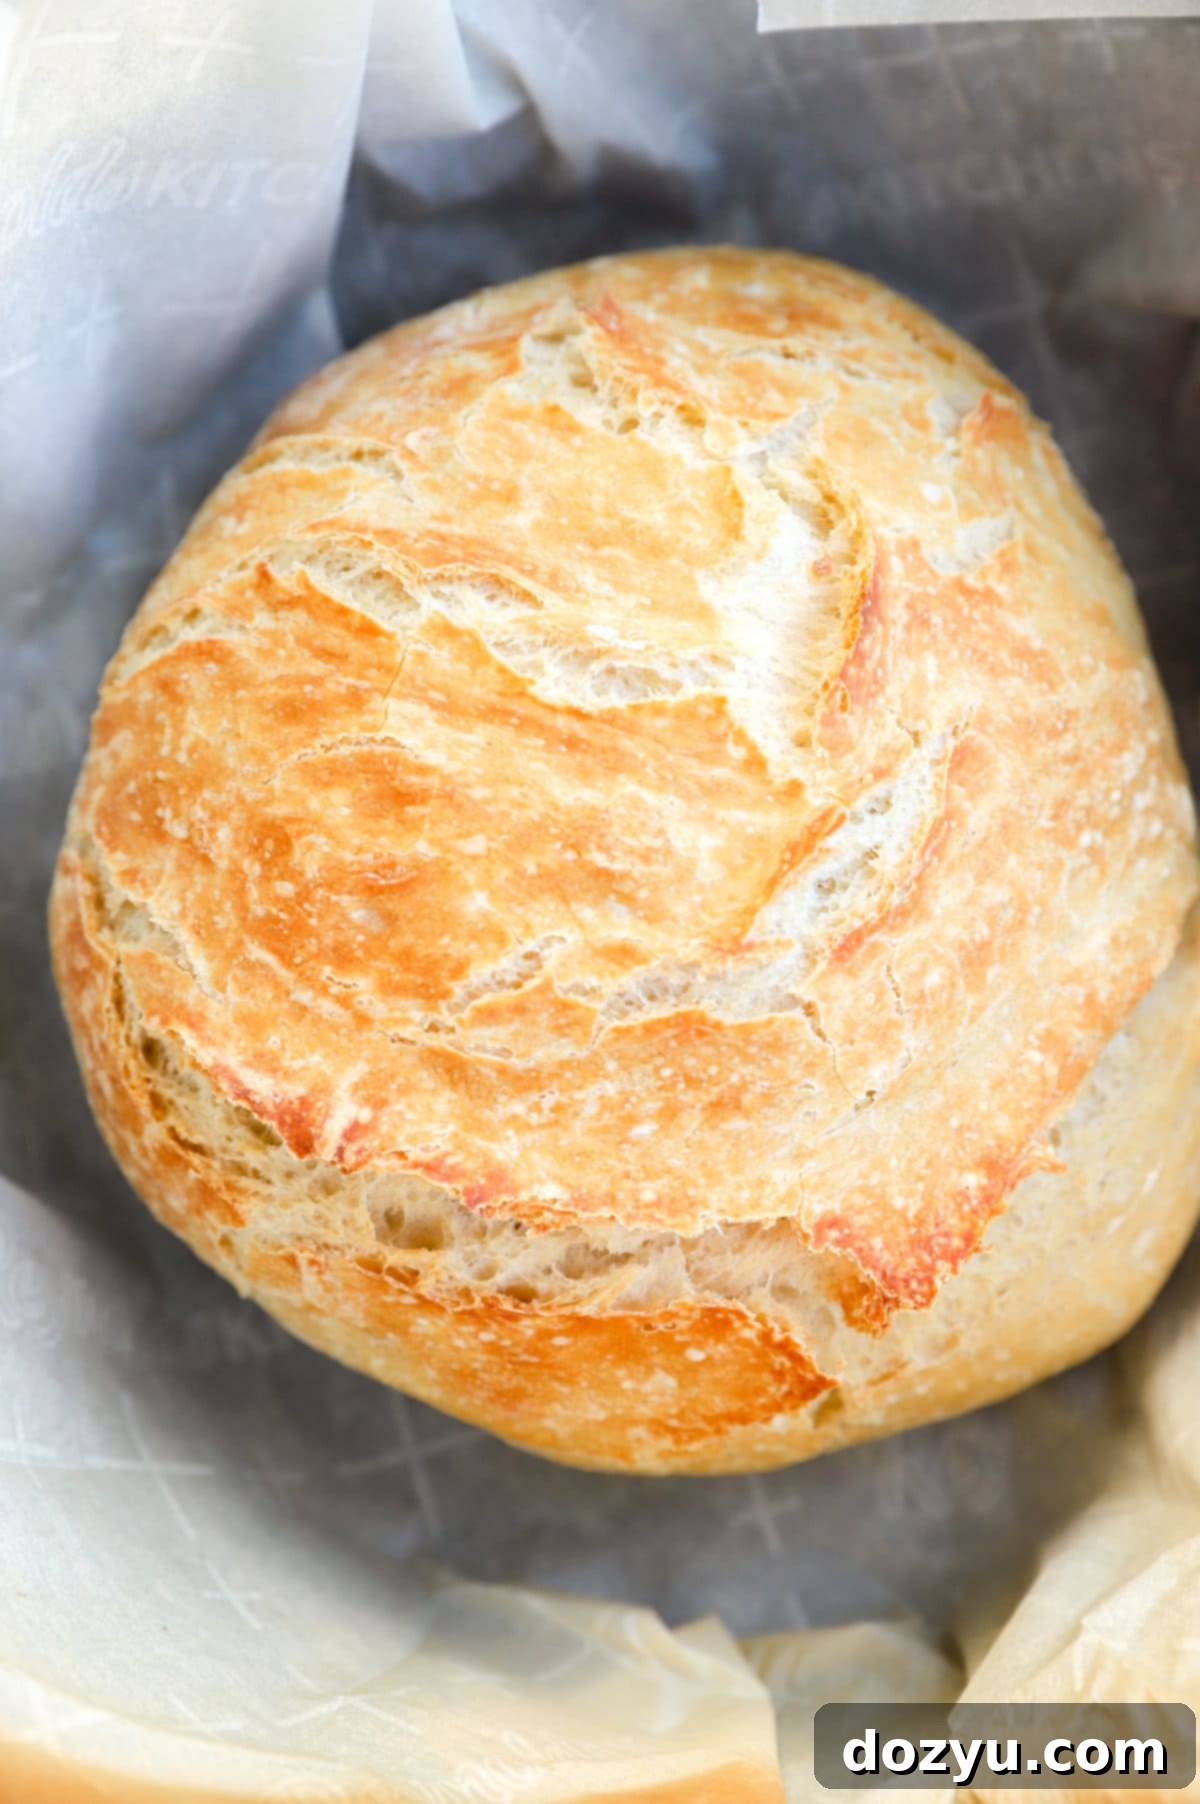
Get ready to experience the incredible aroma and fresh, delicious taste of homemade artisan bread without the fuss! This no-knead overnight bread recipe is a game-changer for anyone who loves the idea of baking their own loaf but is intimidated by complex techniques or a demanding sourdough starter. You don’t need to be a seasoned baker to master this – just a few simple ingredients, a quick mix, an overnight rest, and then straight into the oven. The result? A perfectly golden, crusty loaf with a tender, airy crumb that tastes like it came from a professional bakery.
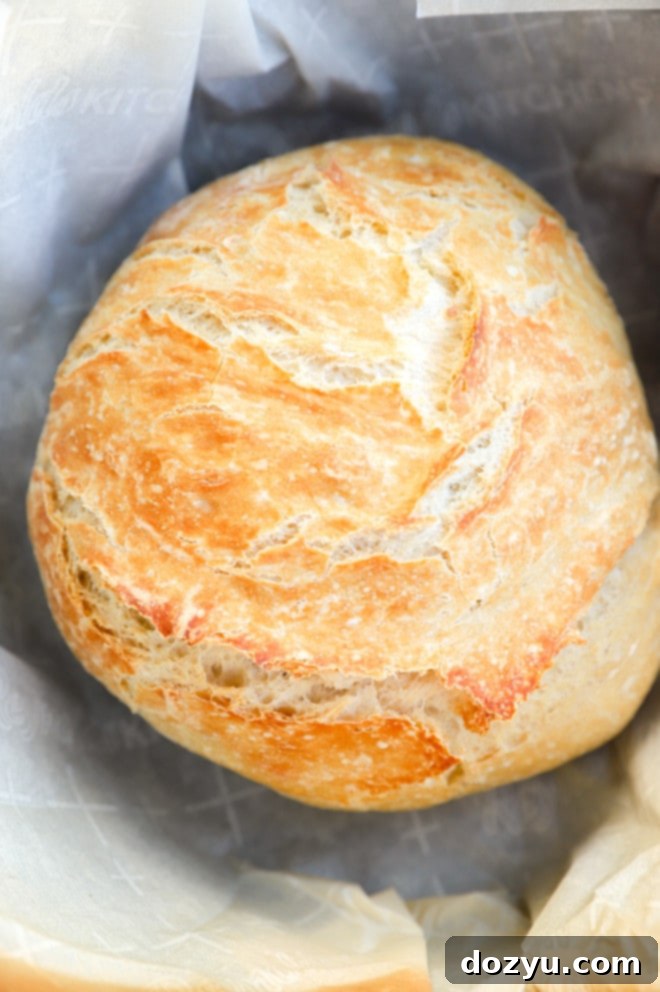
Table of Contents
Toggle
About This No-Knead Overnight Bread
Few things compare to the simple pleasure of a fresh-baked loaf of bread. Its comforting, reliable presence evokes deep-seated emotions and cherished memories for so many of us. From the nostalgia of childhood PB&J sandwiches to tearing into a crusty loaf alongside a hearty bowl of soup, bread is far more than just a kitchen staple. It’s an invitation for connection, a vessel for comfort, and a celebration of simple joys.
Imagine waking up to the irresistible scent of warm bread filling your home. This no-knead overnight bread makes that dream a reality with minimal effort. While I’d love to maintain a sourdough starter and delve into traditional artisan bread recipes, my busy schedule often doesn’t allow for such time commitments. That’s why I’ve embraced this easy, four-ingredient recipe, designed to seamlessly integrate delicious homemade bread into our weekly routine.
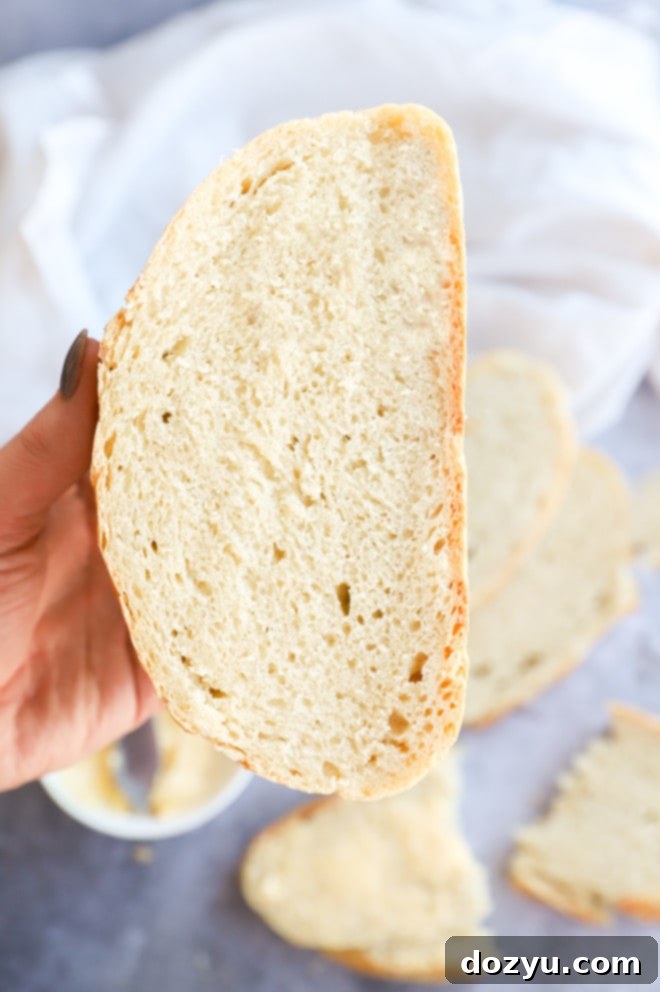
This recipe is incredibly basic, utilizing just flour, water, yeast, and salt. Yet, it delivers an impressive, flavorful loaf that will make your home smell absolutely glorious. The beauty of this recipe lies in its simplicity – you don’t need years of baking experience to achieve professional-level results. It’s perfect for beginners and seasoned bakers alike, offering the unparalleled satisfaction of fresh bread with an overnight rise that does most of the work for you. The wait for the dough to rise is truly well worth it when you pull that golden-brown loaf from the oven first thing in the morning.
Whether you crave a crisp slice of toast with your morning coffee, a gooey grilled cheese for lunch, or a thick hunk to sop up your favorite stew, this overnight bread is your quick and easy ticket to elevating everyday meals with a touch of homemade goodness. Get ready to impress yourself and your loved ones with this effortlessly delicious artisan creation!
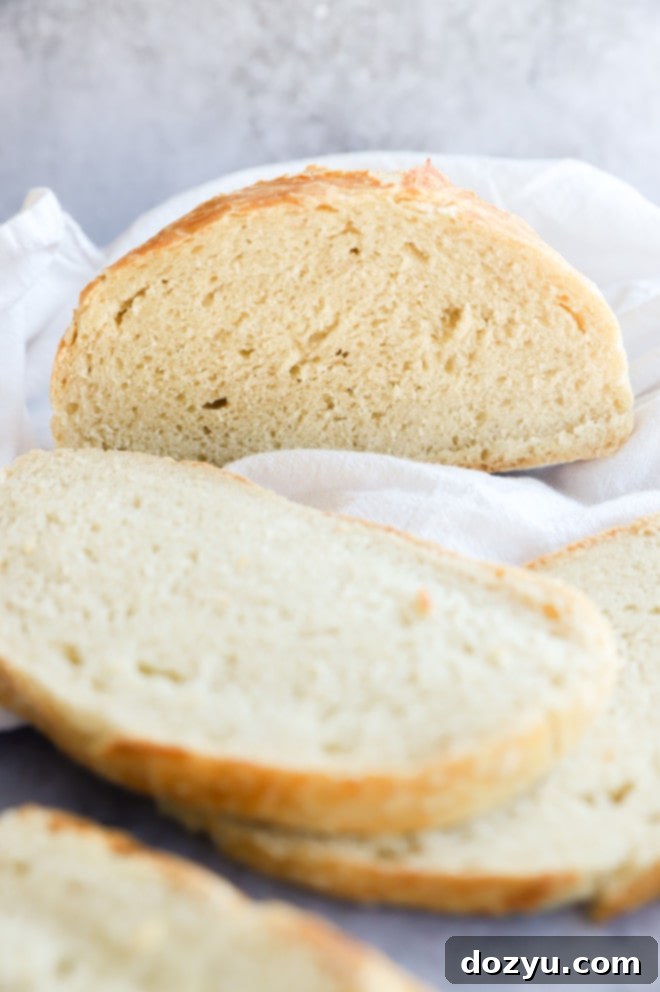
Ingredients for the Perfect Loaf
This simple no-knead bread recipe relies on just four core ingredients, but the quality and proper handling of each can make a significant difference in your final loaf. Let’s break down what you’ll need:
Bread Flour (or All-Purpose Flour)
I personally prefer using **bread flour** for my baking endeavors, as it consistently yields superior results in terms of texture and chewiness. Bread flour has a higher protein content than all-purpose flour, which means it develops more gluten during the long, slow fermentation process. This gluten network is what gives artisan bread its characteristic chewy texture and open, airy crumb. However, if you only have **all-purpose flour** on hand, it will still work wonderfully for this recipe. You’ll still get a delicious loaf, perhaps with a slightly less chewy interior. When measuring your flour, always use the spoon-and-level method: gently spoon the flour into your measuring cup until it overflows, then level it off with a straight edge. This prevents over-packing the flour and ensures an accurate measurement, which is crucial for bread baking.
Instant Yeast
For this recipe, **instant yeast** is my recommendation because it can be mixed directly with the dry ingredients without needing to be proofed first. Its quick action is perfect for the overnight rise. If you only have active dry yeast, don’t worry – you can absolutely use it! Just be sure to check the “Frequently Asked Questions” section below for specific instructions on how to properly activate active dry yeast before incorporating it into your dough mixture.
Salt
Salt isn’t just for flavor; it plays a vital role in controlling yeast activity and strengthening the gluten structure. I typically reach for **fine kosher salt** or **sea salt** when baking, as their crystals dissolve easily and distribute evenly throughout the dough. Avoid table salt, which often contains anti-caking agents that can slightly alter the taste and interaction with yeast.
Warm Water
The temperature of your water is critical for activating the yeast. Aim for water that is around **110˚F (43˚C)**. You can easily achieve this by heating water gently on the stovetop or using warm water directly from your tap. It’s highly recommended to use a cooking thermometer to verify the water temperature before adding it to your other ingredients. Water that is too hot can kill the yeast, while water that is too cold won’t activate it properly, leading to a dough that won’t rise.
Essential Tools for No-Knead Bread
While this recipe is wonderfully simple, having the right tools on hand will ensure your baking process is smooth and successful. Here are the must-haves for your perfect no-knead loaf:
- Large Mixing Bowl: You’ll need a spacious bowl to give your dough ample room to rise overnight. Yeast fermentation creates a lot of gas, causing the dough to significantly expand, often doubling or even tripling in size. Using a bowl that is too small could lead to an overflowing mess!
- Wooden Spoon or Sturdy Spatula: A simple wooden spoon or a robust rubber spatula is all you need to mix the shaggy dough. No electric mixers or dough hooks required, keeping cleanup to a minimum.
- Plastic Wrap: Essential for covering the bowl during the long fermentation period. Plastic wrap creates an airtight seal that prevents the dough from drying out and maintains a consistent environment for the yeast to work its magic.
- Large Dutch Oven with a Lid: This is arguably the most crucial piece of equipment for achieving that signature artisan crust and moist interior. The Dutch oven acts like a miniature steam oven, trapping moisture released from the dough during the initial baking phase. This steam prevents the crust from hardening too quickly, allowing the bread to fully expand and creating a thin, crisp crust. A 5 to 7-quart cast iron or enameled cast iron Dutch oven is ideal.
- Parchment Paper: A large piece of parchment paper makes transferring the sticky dough into a scorching hot Dutch oven incredibly easy and safe. It also prevents the bread from sticking to the bottom of the pot.
- Wire Cooling Rack: Once your bread is baked, it needs to cool completely on a wire rack to allow air circulation around all sides. This prevents the bottom from becoming soggy and helps maintain a perfectly crisp crust.
- Bread Knife: For slicing into your beautiful, crusty loaf once it’s fully cooled. A serrated bread knife will cut through the hard crust and soft interior cleanly without squishing the bread.
Our Baking Favorites
Enhance your baking experience with these highly recommended tools:
Dutch Oven
Buy Now →
Mixing Bowls
Buy Now →
Measuring Cups
Buy Now →
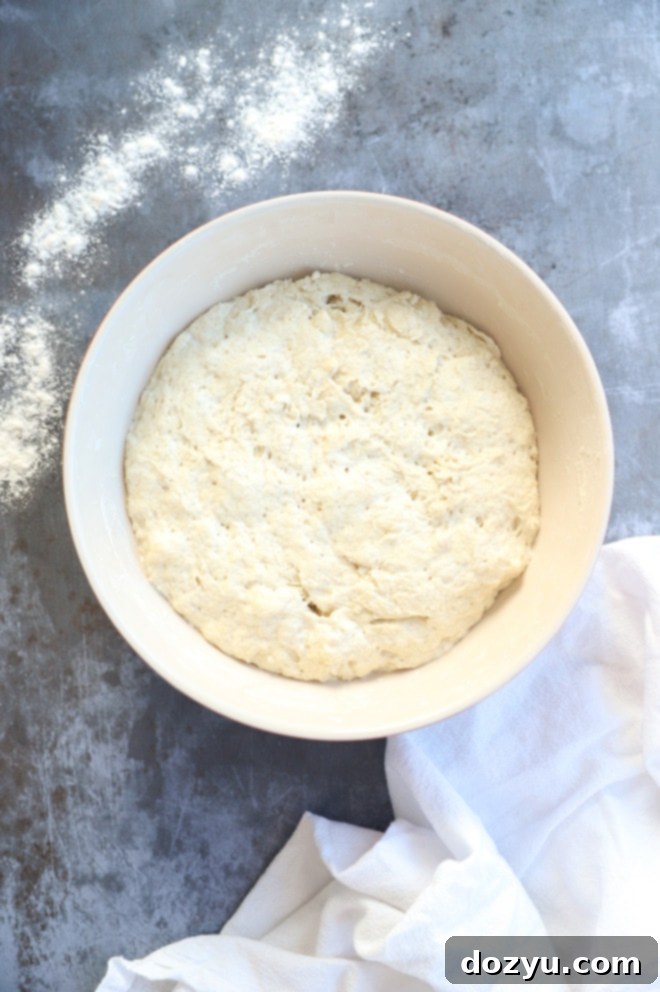
How to Make Overnight Artisan Bread
The beauty of this recipe lies in its simplicity. With just a few minutes of active prep time, you’ll set yourself up for a delicious, fresh loaf of bread the next day. Follow these steps for perfect results every time:
Step 1: Mixing the Dough
In your largest mixing bowl, combine the flour, salt, and instant yeast. Use a wooden spoon or sturdy spatula to stir these dry ingredients together thoroughly. Once combined, add the warm water (remember, around 110˚F is ideal). Continue to stir until all the flour is hydrated and no dry patches remain. At this point, the dough will look shaggy, wet, and quite sticky – this is exactly what you want! Resist the urge to add more flour; the high hydration is key to the no-knead method and the eventual airy crumb.
Step 2: The Overnight Rest
Once your dough is mixed, cover the bowl tightly with plastic wrap. This tight seal is important to prevent the dough from drying out and to create a consistent environment for fermentation. Let the dough rest at room temperature for at least 12 hours, but no more than 18 hours. During this long, slow fermentation, the yeast will work its magic, developing deep flavors and creating a beautiful network of gluten, eliminating the need for traditional kneading. You’ll know the dough is ready when its surface is dotted generously with bubbles, indicating active yeast and a successful rise. It should also have significantly increased in volume.
Step 3: Form and Preheat
After its long rest, gently remove the risen dough from the bowl and place it onto a lightly floured work surface. Sprinkle a little more flour over the dough, and with floured hands, carefully fold the dough over itself a couple of times. This helps to create some tension and shape. Cover it loosely again with plastic wrap and let it rest for another 15 minutes. While this second rest is happening, preheat your oven to a blazing 450˚F (232˚C). Crucially, place your empty Dutch oven (uncovered) into the oven as it preheats. Allow the Dutch oven to preheat for a full 20 to 30 minutes to ensure it is scorching hot. This preheating is vital for achieving that perfect crispy crust. After the 15-minute rest, turn your dough over onto a large piece of parchment paper so the smooth side is facing up. Gently form the dough into a round ball. Lightly flour the top of the dough ball, cover loosely with plastic wrap once more, and let it rest on the parchment paper while the oven and Dutch oven continue to preheat.
Step 4: Bake to Perfection
Once the oven and Dutch oven are fully preheated, carefully remove the hot Dutch oven from the oven using sturdy oven mitts – it will be extremely hot! Grasp the edges of the parchment paper and gently lift the dough ball, lowering it into the preheated Dutch oven. Cover the Dutch oven with its lid and place it back in the oven to bake for 30 minutes. The lid traps steam, allowing the bread to fully expand and creating a tender interior. After 30 minutes, carefully remove the lid (again, use mitts, as steam will escape). Continue baking for another 10 to 20 minutes, or until the crust reaches your desired level of golden brown perfection. Some prefer a lighter, golden crust, while others love a deep, rich brown. Trust your eyes!
Once baked, carefully remove the bread from the Dutch oven by lifting the parchment paper. Transfer the loaf to a wire rack and let it cool for at least 30 minutes (preferably longer, up to an hour) before slicing and serving. This cooling time is essential; it allows the internal structure of the bread to set and prevents a gummy texture. Patience is key for that perfect slice!
Discover Our Everyday Seasonal Cookbook
Looking for more culinary inspiration? Our Everyday Seasonal Cookbook is packed with mouth-watering recipes, comprehensive seasonal produce guides, and a wealth of tips to help you make the most of fresh ingredients throughout the year. It’s filled with seasonal food ideas for every occasion, from quick weeknight meals to festive gatherings.
Delicious Variations for Your No-Knead Loaf
This basic no-knead bread recipe is a fantastic canvas for your creativity! There are countless ways to customize your loaf and explore different flavor profiles. Here are some of our favorite additions to mix into the dry ingredients in Step 1 of the recipe, before adding the water:
- Herbal Infusion: Elevate your bread with fresh or dried herbs. Incorporate 1-2 tablespoons of finely chopped fresh rosemary, thyme, oregano, or sage. For a more subtle flavor, use 1-2 teaspoons of dried herbs or herb blends like Herbes de Provence or Italian seasoning. The warmth of baking will release their aromatic essences.
- Spicy Kick: For those who love a bit of heat, add 1 to 2 teaspoons of freshly cracked black pepper to the dry ingredients. The amount can be adjusted to your preference, giving each slice an exciting, peppery finish.
- Garlic Lover’s Dream: Mix in 2-3 cloves of finely minced fresh garlic, or for a sweeter, more mellow flavor, use minced roasted garlic. This transforms your simple loaf into a fragrant garlic bread, perfect for serving with pasta or as a side with almost any meal.
- Cheesy Goodness: Stir in ½ cup of shredded cheese like sharp cheddar, Gruyère, Parmesan, or a blend of Italian cheeses. The cheese will melt into pockets of savory deliciousness throughout the crumb.
- Seed Sensation: Add 2-3 tablespoons of your favorite seeds for added texture and nutrients. Sesame seeds, poppy seeds, sunflower seeds, flax seeds, or a mixed blend are excellent choices. You can also sprinkle some on top before baking.
- Olive Delight: For a Mediterranean twist, fold in ½ cup of pitted and chopped Kalamata or green olives with a tablespoon of olive oil. The briny olives add a wonderful depth of flavor.
- Sweet & Savory: For a unique loaf, consider adding 1/4 cup of chopped dried cranberries and 1/4 cup of chopped walnuts along with a pinch of cinnamon. This makes a delightful bread for breakfast or with cheese.
Craving more delicious bread? Explore these tasty recipes: Harvest Pumpkin Seed Bread | Jalapeño Cheddar Biscuits | No Yeast Bread (Soda Bread) | Garlic Bread Bites
Frequently Asked Questions About No-Knead Bread
Here are answers to some common questions you might have about baking this easy no-knead bread:
Will the parchment paper burn in the oven?
It’s a common concern, but rest assured, your parchment paper should be perfectly fine! Most parchment paper brands are designed to withstand temperatures up to 425˚F to 450˚F (218˚C to 232˚C). Always check the specific temperature limit on your parchment paper’s packaging for confirmation, as some brands may vary. I’ve personally used parchment paper for baking at high temperatures for many years and have never encountered an issue with it burning or catching fire. The high heat for this recipe is within safe limits for standard parchment paper.
Can I use an enameled Dutch oven?
Absolutely! An enameled Dutch oven works just as well as a raw cast iron Dutch oven for this recipe. The enamel coating will not affect the baking process. In fact, many bakers prefer them because they are easier to clean and don’t require seasoning like traditional cast iron. Just be sure to give your enameled Dutch oven a very thorough cleaning beforehand to ensure there’s no lingering grease or food residue, which could potentially cause staining or uneven heat. Personally, I love using my classic cast iron Dutch oven from Lodge for its robust performance and durability.
Can I use active dry yeast instead of instant yeast?
Yes, you can definitely substitute active dry yeast for instant yeast in this recipe if that’s what you have on hand. The main difference is that active dry yeast needs to be “proofed” or activated in warm water before being mixed with the other ingredients. To do this, simply add the active dry yeast along with a small pinch of granulated sugar (the sugar helps feed the yeast) to your warm water (around 110˚F). Let this mixture sit for about 5 to 10 minutes. You’ll know it’s ready when the surface becomes foamy and bubbly, indicating that the yeast is alive and active. Once proofed, proceed to add this yeast water mixture to your flour and salt, then continue with Step 2 of the recipe as directed. Make sure to use granulated sugar for proofing, as honey or other sweeteners can be too dense and inhibit yeast activation.
Can I use whole wheat flour instead?
This recipe has primarily been tested with all-purpose flour and bread flour, which yield predictable and delicious results. Whole wheat flour behaves differently due to its higher fiber content and presence of wheat germ, which can interfere with gluten development and absorb more liquid. If you’d like to incorporate whole wheat flour, I recommend starting with a blend: use half whole wheat flour and half bread flour (or all-purpose flour). This will give you a heartier loaf with more nutritional value while still maintaining a good crumb structure. You might also find that you need to add a tiny bit more water, as whole wheat flour tends to absorb more liquid. If you experiment with whole wheat or any other flour substitute, please share your results in the comments below – I’d love to hear how it turns out!
Seeking further inspiration? Dive into my comprehensive bread recipes page for more delightful creations!
Perfect Pairings: What to Serve with Freshly Baked Bread
A fresh, warm loaf of this no-knead bread is a culinary delight on its own, but it truly shines when paired with other delicious foods. Its crusty exterior and soft, airy interior make it incredibly versatile. Here are some of my ultimate go-to serving suggestions:
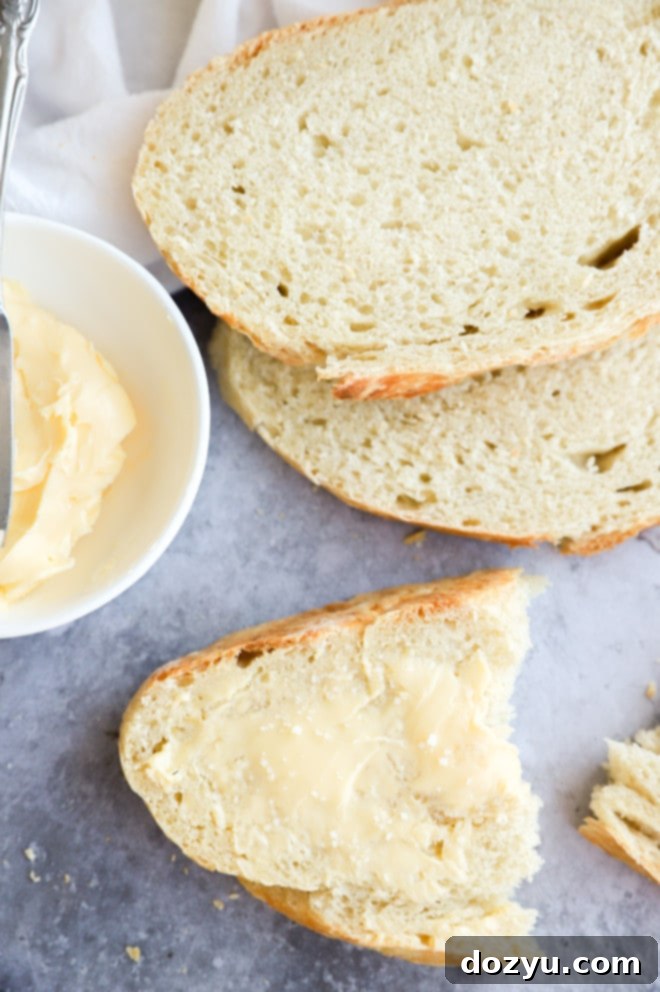
- Butter & Salt: My absolute favorite way to enjoy a slice of crusty bread is with a generous slather of high-quality Irish butter (Kerrygold is simply divine!) and a sprinkle of flaky sea salt (fleur de sel adds a delicate crunch and burst of flavor). It’s simple perfection.
- Garlic Herb Butter: Take it up a notch with homemade garlic herb butter. You can spread it on thick slices and toast them for an instant, incredibly flavorful garlic toast – just as good as sourdough garlic toast, even without the sourdough!
- Sandwich King: This bread is ideal for making sandwiches. Its sturdy crumb holds up beautifully. A grilled cheese made with this bread is an absolute must-try! For a gourmet lunch, use a toasted slice to make an open-faced classic Waldorf salad sandwich.
- Soup’s Best Friend: There’s nothing quite like tearing off hunks of warm bread to dunk into your favorite soup or stew. It holds up so well and soaks up every drop of delicious broth. Try it with:
- Instant Pot Tomato Soup
- Creamy Pumpkin and Sweet Potato Soup
- Tuscan White Bean Soup
- Instant Pot Chicken Stew
- Roasted Butternut Squash Soup with Bacon Croutons
- Breakfast Delight: Enjoy slices slathered with your favorite jam, marmalade, or honey alongside your morning coffee or tea.
- Dipping into Oils & Dips:
- Dip it into fragrant basil oil for a simple appetizer.
- Toast up slices to pair with creamy dips like this cold spinach dip, light and airy whipped ricotta, or a hot, decadent Maryland crab dip!
- Homemade Croutons: Don’t let any leftover bread go to waste! Chop any stale pieces into cubes, toss with olive oil and your favorite seasonings (garlic powder, Italian herbs), and toast in the oven until crispy for homemade croutons.
- Pasta Partner: Slice and toast with garlic butter to serve alongside an easy 20-minute pasta napolitana, or any of your favorite pasta dishes.
Let your imagination guide you – the possibilities are truly endless with a fresh loaf of homemade bread!
How to Store and Reheat Your Homemade Bread
To keep your delicious no-knead bread fresh and enjoyable for as long as possible, proper storage is key. Here’s how to do it:
Storing at Room Temperature:
Once your bread has completely cooled (this is crucial to prevent condensation and sogginess), store it wrapped tightly in aluminum foil or plastic wrap. You can also place it in a large, airtight container or a bread box. Stored this way, it will maintain its quality for 2 to 4 days. For optimal crust texture, it’s best to consume the bread within the first day or two. If the crust softens over time, a quick toast can revive it.
Refrigerating for Longer Freshness:
If you need to extend its shelf life beyond a few days, wrap the bread securely and store it in the refrigerator. This can keep it fresh for up to 7 to 10 days. Be aware that refrigeration can sometimes alter the texture of bread, making it a bit tougher, but it’s great for preventing mold.
Freezing for Future Enjoyment:
For long-term storage, this bread freezes beautifully for up to 3 months. To freeze, ensure the bread is completely cool. Wrap the entire loaf (or individual slices for convenience) tightly in a layer of plastic wrap, then follow with a layer of heavy-duty aluminum foil. This double wrapping helps prevent freezer burn. Label with the date. When you’re ready to enjoy it, simply thaw the bread at room temperature. For a revitalized crust, you can then pop the whole loaf (unwrapped) into a preheated 350˚F (175˚C) oven for about 10-15 minutes, or individual slices in a toaster.
Finally, if you make this incredible no-knead overnight bread recipe, please be sure to give it a rating or leave a comment below! I absolutely love hearing when you all try out my recipes and I always make time to respond to every single comment. Feel free to drop any questions you might have about the process too!
Oh, and don’t forget to tag me on Instagram if you share your beautiful homemade loaf! It brings me so much joy to see these recipes come to life in your kitchens – looking through your photos is truly my favorite thing to do. It means the world to me to be a part of your baking journey!
Overnight Bread (No-Knead)
Equipment
-
Measuring Spoons
-
Measuring Cups
-
Long Wooden Spoon
-
Mixing Bowls
-
Dutch Oven
Ingredients
- 3 1/3 cups all-purpose or bread flour plus more for dusting
- 1/2 tsp instant yeast
- 2 tsp kosher salt
- 1 1/2 cups warm water about 110˚F
Instructions
-
In a large bowl, stir together flour, yeast, and salt until combined.
-
Add warm water and stir until evenly mixed. The dough will be sticky and shaggy. Cover tightly with plastic wrap and let sit overnight at room temperature (at least 12 hours, up to 18 hours).
-
When the dough’s surface is dotted with bubbles, it’s ready! Place dough on a lightly floured surface and fold it over on itself a couple of times. Cover loosely with plastic wrap and let rest for 15 minutes.
-
Turn dough onto a large piece of parchment paper, smooth side up. Use your hands to form the dough into a circle. Sprinkle the top lightly with flour and loosely cover again with plastic wrap to rest while oven preheats.
-
Place Dutch oven in the oven and preheat to 450˚F (232˚C). Let the oven preheat for at least 20 to 30 minutes.
-
Carefully remove the Dutch oven from the oven using oven mitts. Lift the edges of parchment and place the dough into the preheated pan. Cover and bake for 30 minutes.
-
Remove lid carefully and bake for an additional 10 to 20 minutes until the crust is as golden and crisp as you like it.
-
Cool for at least 30 minutes on a wire rack before slicing and serving.
Video
Nutrition
