Crispy, Gooey Potato Cheese Balls: The Ultimate Irresistible Party Snack
Craving a delicious and incredibly easy snack that disappears fast at any gathering? These easy potato cheese balls are the answer! Perfectly crispy on the outside and wonderfully gooey on the inside, they are truly the ultimate party snack. Imagine sinking your teeth into a golden-brown shell to reveal a creamy, cheesy, and utterly satisfying filling – that’s the magic of these homemade delights. Get ready to impress your guests or simply treat yourself to a savory sensation!

table of contents
Toggle
About These Potato Cheese Balls
Prepare to fall in love with these crispy, golden spheres of pure potato and cheese bliss! As someone who deeply appreciates potatoes in all their forms (and might even joke about needing them at every meal!), I can confidently say that these potato cheese balls are a revelation, especially when cheese is involved.
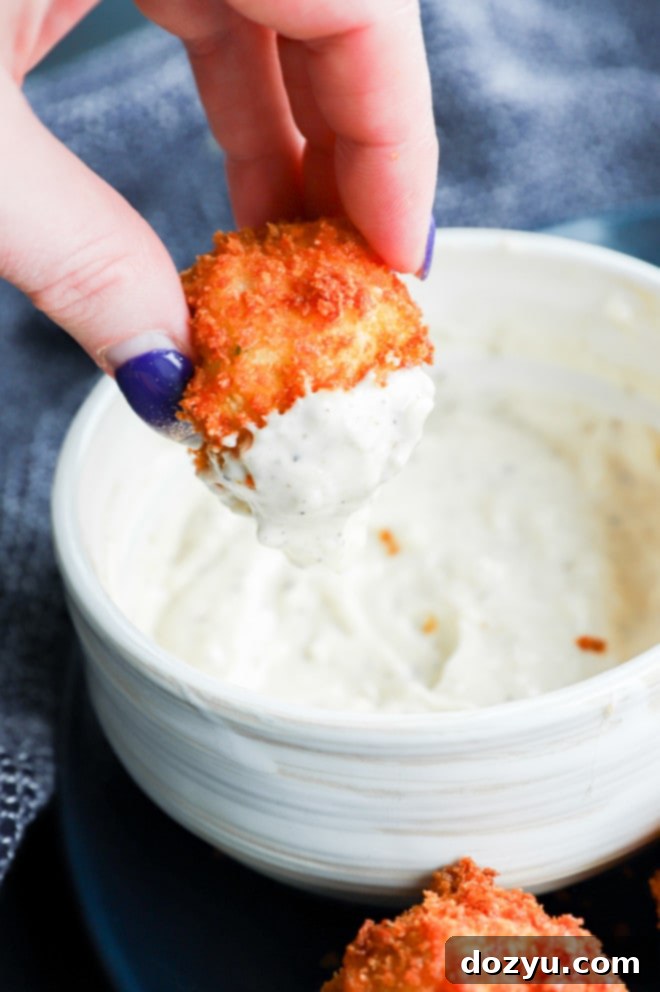
Imagine the best elements of a stretchy, savory mozzarella stick combined with the comforting creaminess of a perfectly mashed potato croquette. That’s exactly what you get with this recipe! Each bite delivers a delightful contrast: a satisfying crunch from the golden-brown exterior, followed by a warm, soft, and incredibly cheesy interior that offers that irresistible “cheese pull” everyone loves. The rich flavor profile is not just about potatoes and cheese; a hint of garlic powder and fresh chives elevates these balls, adding an herbaceous freshness that makes them truly addictive.

These versatile little golden bites are an absolute must-have for any occasion. Whether you’re hosting a casual get-together, a holiday party, a game day, or simply looking for a delightful snack on a cozy evening, they fit the bill perfectly. They’re not just an appetizer; they’re a crowd-pleaser that will have everyone asking for the recipe.
Unlike some recipes that suggest stuffing a cube of cheese into the center (which can be finicky and messy), our recipe simplifies the process. We use shredded cheese mixed throughout the potato base, ensuring every part of the ball is infused with cheesy goodness. This method not only makes preparation much easier but also guarantees a consistent, gooey texture in every single potato cheese ball.
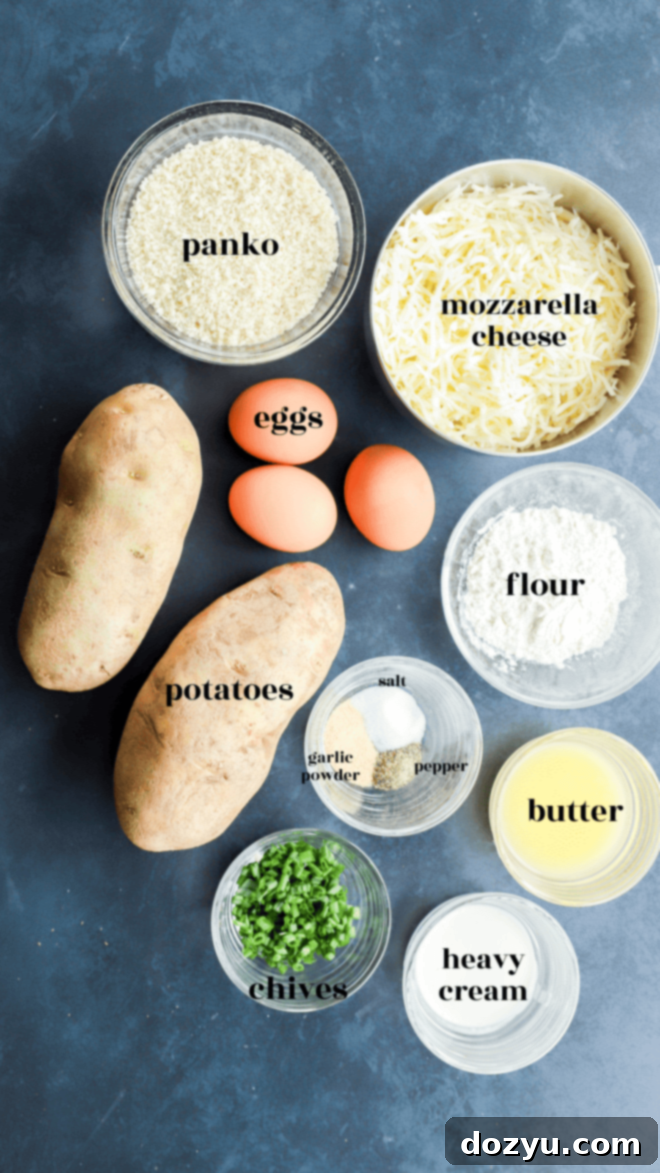
Essential Ingredients for Perfect Potato Cheese Balls
To achieve the perfect balance of crispy exterior and creamy, cheesy interior, selecting the right ingredients is key. Here’s a breakdown of what you’ll need and why:
- Potatoes: For the best texture in these potato cheese balls, Russet potatoes are your top choice. Their high starch content makes them light and fluffy when mashed, which is ideal for forming balls that won’t become dense or gummy. Avoid waxy potatoes like red or Yukon Gold, as they hold more moisture and can make your mixture too sticky.
- Butter: Use unsalted butter to maintain control over the overall saltiness of the dish. If you only have salted butter on hand, simply reduce or omit the additional salt called for in the recipe to prevent it from becoming overly seasoned. Butter adds richness and contributes to the creamy texture of the potato mixture.
- Spices: A simple yet effective blend of salt, black pepper, and garlic powder forms the savory base for our potato mixture. The garlic powder adds a subtle warmth and depth, complementing the cheese beautifully without overpowering the natural potato flavor.
- Cream: A touch of heavy cream is essential for creating that luxuriously smooth and creamy filling. It enriches the mashed potatoes, ensuring they are tender and moist. For a lighter alternative, you could try whole milk, but heavy cream offers the best richness.
- Egg: A large egg acts as a crucial binder for the potato and cheese mixture. Without it, the balls might struggle to hold their shape during the frying process, leading to a messy (though still tasty) result. It helps everything stay together for that perfect ball formation.
- Chives: Freshly chopped chives introduce a delicate, oniony, and herbaceous flavor that brightens the entire dish. Their mild taste is a perfect counterpoint to the rich potatoes and cheese. While fresh is best, if you can’t find them, you could experiment with a tiny pinch of dried chives or finely minced green onion whites.
- Cheese: Shredded mozzarella cheese is my go-to for its exceptional meltiness and classic cheese pull. However, feel free to get creative with your cheese choice to customize the flavor! Sharp cheddar cheese offers a more robust, tangy profile; pepper jack cheese adds a spicy kick; and Monterey Jack cheese provides a milder, buttery creaminess. A blend of two cheeses can also create a fantastic flavor dimension.
- Flour: All-purpose flour is used for the initial dredge. It helps create a dry surface on the potato balls, allowing the egg wash to adhere better, which in turn helps the breadcrumbs stick for that ultimate crispy coating.
- Panko Breadcrumbs: This is a non-negotiable for achieving that incredibly crispy, light, and airy coating. Panko breadcrumbs are coarser and flakier than traditional breadcrumbs, resulting in a superior crunch that makes these potato cheese balls stand out. While regular breadcrumbs can be used in a pinch, panko provides a much better texture.
- Oil: For deep frying, always opt for a neutral oil with a high smoke point. Canola oil is highly recommended due to its neutral flavor and stability at high temperatures. Other excellent choices include vegetable oil, peanut oil (if no allergies), or avocado oil. A high smoke point prevents the oil from breaking down and imparting off-flavors to your delicious snacks.
Kitchen Tools You’ll Need
Having the right tools can make all the difference in the kitchen, especially when preparing something as delightful as these potato cheese balls. Here are the must-have items for a smooth cooking experience:
- Chef’s Knife and Cutting Board: Essential for peeling and uniformly dicing your potatoes. Consistent potato cube sizes ensure even cooking.
- Peeler: A good quality peeler will make quick work of preparing your Russet potatoes.
- Potato Masher or Fork: To achieve that perfectly smooth and creamy mashed potato base, a potato masher is ideal. If you don’t have one, a sturdy fork will also do the trick, just be prepared for a bit more arm work to eliminate lumps.
- Set of Mixing Bowls: You’ll need several bowls – one large bowl for mixing the potato and cheese mixture, and three separate bowls for setting up your dredging station (flour, egg wash, panko).
- Heavy-Bottomed Pot or Dutch Oven: This is crucial for safe and even deep frying. A Dutch oven or a heavy-bottomed pot maintains a consistent oil temperature, which is key for crispy, non-greasy results.
- Spider Strainer: My absolute go-to tool for frying! A spider strainer allows you to safely lower the potato balls into hot oil and retrieve them with ease, draining excess oil as you go. It’s much safer and more efficient than a slotted spoon.
- Thermometer (Optional but Recommended): An oil thermometer ensures your frying oil reaches and maintains the ideal temperature (350°F or 175°C), crucial for perfectly cooked, crispy, and non-oily potato balls.
- Cookie Scoop (Optional): A cookie scoop can help you portion out the potato mixture consistently, leading to uniformly sized balls that cook evenly.
Step-by-Step: How to Make Crispy Potato Cheese Balls
Making these delicious potato cheese balls is a straightforward process, but a few key steps ensure perfection. Follow these instructions for the best crispy, gooey results:
Perfectly Cook Your Potatoes
The foundation of great potato cheese balls is perfectly cooked potatoes. You have two convenient options:
- Stovetop Method: Begin by peeling and cutting your Russet potatoes into uniform 1/2-inch cubes. This ensures they cook evenly. Place the potato cubes in a saucepan, cover them with cold, salted water, and bring to a rolling boil over high heat. Cook for approximately 8 to 10 minutes, or until the potatoes are easily pierced with a fork (fork-tender). Drain them thoroughly in a colander.
- Microwave Method: If you’re short on time, chop the potatoes as above and place them in a microwave-safe bowl. Add about 2-3 tablespoons of water, cover the bowl tightly with microwave-safe plastic wrap (or a lid), and pierce the film a few times to vent. Microwave on high for 8-10 minutes, or until fork-tender.
Once cooked, let the potatoes cool for about 10 minutes. This allows some steam to escape, which is important for a less watery mixture.
Create the Creamy Potato and Cheese Mix
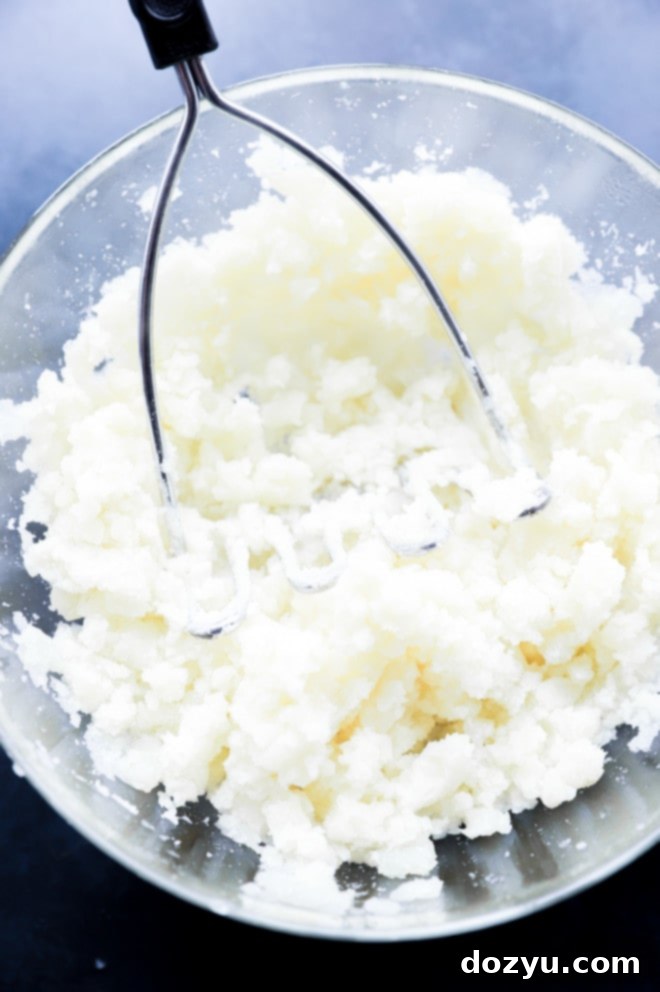
Transfer the cooled, cooked potatoes to a large mixing bowl. Mash them thoroughly using a potato masher or a sturdy fork until they are smooth with no large lumps. The smoother the mash, the creamier your cheese balls will be. Next, add the melted butter, salt, garlic powder, black pepper, heavy cream, the whole egg (which acts as your binder!), fresh chopped chives, and all of your shredded mozzarella cheese. Stir all the ingredients together until they are well combined and evenly distributed. The mixture should be thick and cohesive.
Chill for Firmness
This step is absolutely critical for the success of your potato cheese balls! Place the entire potato and cheese mixture in the refrigerator. Allow it to chill until it’s thoroughly cold and firm, which typically takes about 1 hour. If you’re in a hurry, you can speed up the process by placing the mixture in the freezer for about 30 minutes. Chilling prevents the balls from falling apart during the dredging and frying stages, ensuring they hold their perfect round shape.
The Dredging Process for Ultimate Crispness
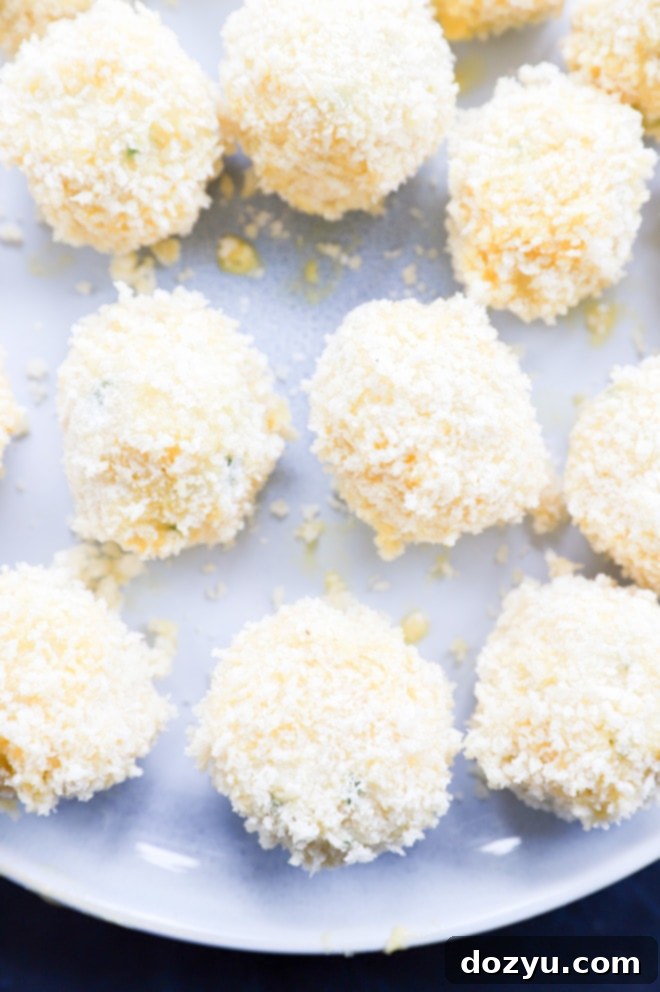
Once your potato mixture is perfectly chilled, it’s time to form and coat the balls. Scoop out portions of the mixture, about 2 tablespoons each. A cookie scoop is incredibly helpful here for consistent sizing. Roll each portion firmly between your palms to form smooth, compact balls. The firmer they are, the better they will hold together.
Set up your dredging station: prepare three separate shallow bowls. In the first bowl, place the all-purpose flour. In the second bowl, beat the two whole eggs lightly with a fork to create an egg wash. In the third bowl, add the panko breadcrumbs (and a pinch of salt, if desired, for extra seasoning).
Now, coat each ball meticulously. First, dip a potato ball into the flour, ensuring it’s fully covered, then gently shake off any excess flour. Next, transfer it to the beaten egg, coating it completely, and again, allow any excess egg to drip off. Finally, roll the egg-coated ball generously in the panko breadcrumbs, pressing gently to make sure the panko adheres well to all sides. This triple coating creates the ultimate crispy crust!
Fry to Golden Perfection
Pour your chosen neutral oil (like canola or vegetable oil) into a large, heavy-bottomed pot or deep skillet, ensuring there’s enough oil to submerge the potato balls. Heat the oil over medium-high heat until it reaches 350°F (175°C). An oil thermometer is highly recommended to maintain this temperature, as consistent heat is vital for crispy, non-greasy results.
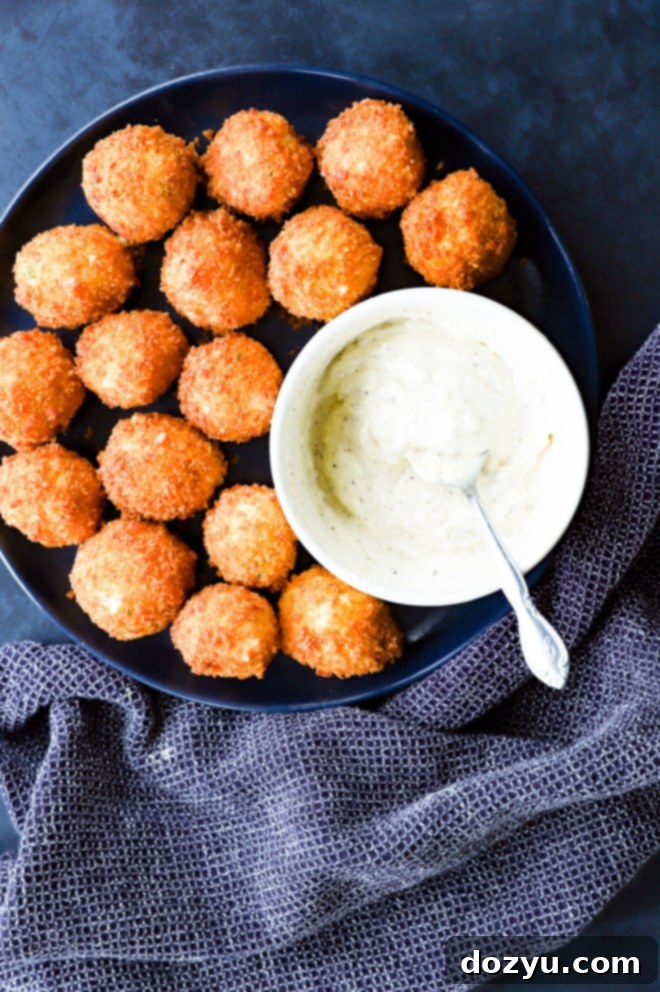
Carefully lower the coated potato balls into the hot oil in small batches. Avoid overcrowding the pot, as this will lower the oil temperature and result in soggy, rather than crispy, balls. Fry each batch for about 2 to 3 minutes, turning them occasionally with a spider strainer or slotted spoon, until they are beautifully golden brown and crispy on all sides. Once fried, use your spider strainer to transfer the potato cheese balls to a plate lined with paper towels to drain any excess oil. Immediately sprinkle them with a touch of flaky sea salt for an extra pop of flavor. Serve hot and enjoy that incredible cheese pull!
Tips, Variations, and Troubleshooting
To ensure your potato cheese balls are nothing short of perfect every time, and to give you ideas for customizing them, here are some invaluable tips and variations:
- Always Chill the Potatoes Thoroughly: This cannot be stressed enough! A well-chilled potato and cheese mixture is firm and easy to handle, preventing it from falling apart when you form the balls or when they hit the hot oil. If the mixture feels soft, pop it back in the fridge or freezer until it’s firm.
- Utilize Leftover Mashed Potatoes: This recipe is fantastic for transforming day-old mashed potatoes into something new and exciting. If using leftover mashed potatoes, you might need to adjust the amount of flour. Mashed potatoes typically contain milk and butter already, so the mixture might be stickier. Add a tablespoon or two of extra flour to the potato mixture until it reaches a consistency that’s easy to roll into balls. Taste and adjust seasonings as needed.
- Avoid Overcrowding the Frying Pot: Resist the urge to fry too many potato balls at once. Overcrowding significantly drops the oil temperature, leading to greasy, soggy results instead of that desired golden crispness. Fry in small batches to maintain optimal oil temperature.
- Flavor Variations:
- Spicy Kick: Add a pinch of cayenne pepper, red chili flakes, or a dash of hot sauce to the potato mixture for a fiery twist.
- Herbaceous Delight: Incorporate other fresh herbs like finely chopped parsley, cilantro, or even a hint of rosemary for different aromatic notes.
- Onion & Garlic Boost: For more savory depth, sauté a small amount of finely minced onion or shallots until translucent before adding them to the potato mixture. A little onion powder can also amplify the flavor.
- Cheese Blends: Experiment with combining different cheeses! A mix of mozzarella and sharp cheddar, or mozzarella and provolone, can create a more complex flavor profile.
- Bacon Bits: For a “loaded potato” flavor, fold in some crispy, cooked bacon bits (vegetarian or regular) into the potato mixture.
- Ensure Even Coating: Take your time during the dredging process. A complete and even coating of flour, egg, and especially panko is what guarantees that beautiful, crunchy exterior. Don’t rush this step.
- Season After Frying: A sprinkle of flaky sea salt immediately after the balls come out of the hot oil enhances their flavor and helps draw out any remaining moisture, contributing to crispiness.
More crunchy appetizers to try out: Crispy Baked Cauliflower | Cheese Corn Balls | Mashed Potato Fritters | Jalapeño Popper Wontons

Can You Air Fry Potato Cheese Balls?
Absolutely! For a slightly lighter (but still delicious) alternative to deep frying, these potato cheese balls can be successfully air-fried. The method is simple:
After you’ve formed and breaded your potato cheese balls, lightly grease the basket of your air fryer with cooking spray to prevent sticking. Arrange the balls in a single layer in the air fryer basket, ensuring they are not touching. This allows for even air circulation and crisping. Air fry at 425°F (218°C) for approximately 10-15 minutes, flipping them halfway through, until they are beautifully golden brown and crispy on the outside. Keep an eye on them, as air fryer models can vary in cooking times. Enjoy the same great taste with less oil!
Can You Freeze Potato Cheese Balls for Later?
Yes, these potato cheese balls are excellent for meal prepping and can be frozen for future enjoyment! The key is to freeze them before frying. Here’s how:
After you’ve formed and fully dredged the potato balls in panko, arrange them in a single layer on a baking sheet lined with parchment paper. Place the baking sheet in the freezer and freeze until the balls are solid, which usually takes about 3 to 4 hours. Once completely frozen, transfer the solid potato cheese balls to a freezer-safe airtight container or a heavy-duty freezer bag. They can be stored in the freezer for up to 2 months.
When you’re ready to cook them, you can fry them directly from frozen. You may need to fry them for a minute or two longer (around 4-5 minutes) at a slightly lower temperature (e.g., 325-335°F / 160-168°C) to ensure they cook through to the center without the exterior burning.
Troubleshooting: My Potato Mixture is Falling Apart!
If you find your potato mixture is too loose or crumbles when you try to form balls, don’t worry, this is a common issue with a simple solution. The most likely culprit is insufficient chilling or too much moisture.
First and foremost, the potato mixture needs to be thoroughly chilled for it to hold its shape properly. If it feels warm or soft, it will be difficult to work with and more prone to breaking apart. Ensure you leave the potato mixture in the freezer for at least 30 minutes, or the fridge for a minimum of 1 hour, until it is firm to the touch.
If chilling doesn’t fully resolve the issue, or if your potatoes were particularly moist, you can add a little extra binder. Gently mix in an additional tablespoon or two of all-purpose flour or even a small amount of panko breadcrumbs into the potato mixture until it reaches a consistency that’s easier to shape. Re-chill briefly if adding more ingredients warms it up. Taking your time with the chilling step and ensuring the mixture is firm will save you a lot of frustration!
Choosing the Best Potatoes for This Recipe
The type of potato you choose significantly impacts the texture of your cheese balls. For this recipe, we highly recommend Russet potatoes (also known as Idaho potatoes).
Here’s why Russets are superior for this application:
- High Starch Content: Russets are “starchy” potatoes. When cooked and mashed, their starch cells break apart, resulting in a light, fluffy, and dry texture. This is ideal for absorbing flavors and creating a smooth, creamy interior that won’t be gummy.
- Low Moisture: Compared to waxy potatoes, Russets have lower moisture content. This prevents the potato mixture from becoming watery or too sticky, making it easier to form into balls that hold their shape.
- Excellent for Frying: Their fluffy interior and ability to absorb a crispy coating make them perfect for deep-fried applications like these cheese balls or french fries.
Conversely, it’s best to avoid waxy potatoes like red potatoes or Yukon Gold potatoes for this recipe. While delicious for roasting or salads, their high moisture and lower starch content make them denser and gummier when mashed, and they don’t form firm balls as easily. Stick with Russets for the ultimate potato cheese ball experience!
Can I Bake Potato Cheese Balls Instead of Frying?
While the recipe is designed for deep frying to achieve peak crispiness and gooeyness, you can certainly try baking these potato cheese balls as a healthier alternative! While I haven’t personally tested baking them, here are my recommendations for how to proceed to get the best possible results:
To prevent the cheese from oozing out and to ensure a nice, firm crust, I would highly recommend doing a double coating of the egg and panko mixture. This means after the first flour-egg-panko dredge, you would dip the ball into the egg wash again, and then roll it in panko a second time. This creates a more robust barrier.
Preheat your oven to 400°F (200°C). Line a baking sheet with a silicone mat or parchment paper. For an extra crispy bottom, you could even preheat the baking sheet in the oven before placing the balls on it. Arrange the double-coated potato cheese balls in a single layer on the prepared baking sheet.
Bake for approximately 13 to 18 minutes, or until they are beautifully golden brown and crispy. Keep a close eye on them, as baking times can vary between ovens. They might not achieve the exact same deep-fried crispness and uniform color, but they will still be deliciously cheesy and satisfying!
Need some inspiration for appetizers? Check out my appetizer recipes page!

What to Serve with Your Potato Cheese Balls
These crispy potato cheese balls are fantastic on their own, but they truly shine when paired with the right dipping sauce or complementary beverage. Here are some ideas to elevate your serving experience:
Dipping Sauces:
- Classic Ketchup: A timeless and universally loved choice.
- Aiolis: Creamy aiolis add a touch of gourmet flavor. Try a roasted garlic aioli for a rich, savory kick, a spicy chipotle aioli for some heat, or a quick homemade garlic aioli for simplicity.
- Mustards: Honey mustard provides a sweet and tangy contrast, while a classic Dijon mustard offers a sharp, sophisticated bite.
- Cheese Dips: For the ultimate cheese lover, serve them with a warm queso or a creamy cheddar cheese dip.
- Ranch or Sour Cream & Chive Dip: These creamy, herby dips complement the potato and cheese flavors beautifully.
- Sriracha Mayo: A simple mix of sriracha and mayonnaise offers a spicy, creamy dip that’s incredibly popular.
- Marinara Sauce: For a twist, treat them like a savory arancini and serve with a warm, flavorful marinara.
Beverage Pairings:
- Party Cocktails: If serving these at a gathering, a festive drink like a spiced rum punch is an easy and delicious crowd-pleaser. For something tart and spicy that cuts through the richness, a chili salty dog cocktail makes an excellent complement.
- Beer: A crisp lager, a refreshing pale ale, or even a robust porter (depending on additional seasonings) can pair wonderfully with fried, cheesy snacks.
- Wine: Consider a light-bodied, crisp white wine like Sauvignon Blanc or a sparkling wine (Prosecco, Cava) to balance the richness.
- Non-Alcoholic Options: Sparkling lemonade, iced tea, or a ginger ale are refreshing choices that work well.
Storage and Reheating Guide
While these potato cheese balls are best enjoyed fresh, you can certainly store and reheat them to savor their deliciousness later. Here’s how:
How to Store:
Allow any leftover potato cheese balls to cool completely to room temperature. This is important to prevent condensation from forming inside the container, which can lead to sogginess. Once cooled, place them in an airtight container and store them in the refrigerator. They will remain fresh and tasty for up to 4 days.
How to Reheat:
To bring back that crispy exterior and gooey interior, reheating in an oven or air fryer is recommended over a microwave:
- Oven Method: Preheat your oven to 400°F (200°C). Arrange the potato cheese balls in a single layer on a baking sheet. Reheat for 10 to 20 minutes, or until they are thoroughly warmed through and have regained their desired crispiness. The exact time will depend on your oven and the size of the balls.
- Air Fryer Method: Preheat your air fryer to 375°F (190°C). Place the potato cheese balls in a single layer in the basket. Air fry for 5-8 minutes, checking periodically, until they are hot and crispy. This method is often quicker and very effective at restoring crispness.
Avoid reheating in the microwave if possible, as it can make the exterior soft and chewy rather than crispy. If you must use a microwave, use short bursts and finish them quickly in a hot pan or toaster oven for a little crispness.
More Delicious Loaded Potato Recipes
If you’re a potato lover like me and can’t get enough of rich, cheesy, and satisfying potato dishes, then you’ll love these other loaded potato recipes from my kitchen:
- Loaded Baked Potato Fries: These aren’t just any fries! Crispy fries piled high with melted cheese, savory bacon bits, and fresh chives, making them the ultimate indulgent side dish or appetizer.
- Loaded Bacon Potato Skewers: Perfect for grilling season, these skewers feature tender grilled potatoes and crispy bacon, often drizzled with cheese or a creamy sauce. A fantastic grilled side dish or a unique appetizer for your next BBQ.
- Loaded Mashed Potato Egg Rolls: A creative and delicious fusion! Crispy egg roll wrappers are stuffed with all the classic flavors of a loaded baked potato – creamy mashed potatoes, cheese, bacon, and chives – then fried to perfection.
If you take the plunge and make this incredibly satisfying potato cheese balls recipe, please be sure to give it a star rating on the recipe card below and/or leave a comment! I absolutely adore hearing about your cooking adventures and I make it a point to respond to every single comment. Your feedback truly means the world to me!
And if any questions pop up during your cooking process, don’t hesitate to drop them in the comments section below – I’m here to help!
Oh, and don’t forget to tag me on Instagram if you share your culinary creations! Seeing these recipes come to life in your homes is truly my favorite thing, and I love scrolling through all your wonderful photos!

Potato Cheese Balls (Full Recipe)
Equipment
-
8-Inch Chef’s Knife
-
Utility Cutting Board
-
Spider Strainer
-
Dutch Oven
Ingredients
- 1 lb russet potatoes peeled and cut into 1/2-inch cubes
- 1/4 cup unsalted butter melted
- 1/2 tsp salt
- 1/2 tsp garlic powder
- 1 Tbsp heavy whipping cream
- 1/4 tsp black pepper
- 1 whole egg
- 2 Tbsp fresh chopped chives
- 8 oz shredded mozzarella cheese
- 1/2 cup all-purpose flour
- 1 cup panko breadcrumb
- 1/2 tsp salt
- 2 whole eggs lightly beaten
- 2 cups vegetable or canola oil
Instructions
-
Bring a large saucepan of salted water to a boil over high heat. Add chopped potatoes and cook for about 8 to 10 minutes, until fork tender. Let cool for 10 minutes.
-
Add the cooked potatoes to a large bowl. Mash well until creamy and there are no more lumps. Add butter, salt, garlic powder, pepper, heavy cream, egg, chives, and cheese. Stir until well combined.
-
Place in the refrigerator until cold, about 1 hour. You can also speed up the process by placing it in the freezer for 30 minutes.
-
Scoop out the chilled mixture in balls, about 2 Tbsp in size each. Form them into balls.
-
Place flour in one bowl. Add eggs to a second bowl and beat lightly with a fork. Add panko to a third bowl.
-
Dip the balls in the flour, shaking off the excess. Dip in the beaten egg, shaking off the excess. Finally, roll in the panko, making sure the balls are coated well all over. Shake off any excess.
-
Heat oil in a deep skillet or pot. Bring oil to 350˚F. Cook the balls in batches for about 2 to 3 minutes per batch, until browned on all sides. Transfer to a plate lined with paper towels to drain.
-
Sprinkle with flaky salt and serve.
Video
Nutrition
