The Ultimate Leftover Halloween Candy Cake: A Sweet Solution for Your Spooky Stash
As Halloween draws to a close, many of us face the same delightful dilemma: what to do with the mountain of leftover candy? After the trick-or-treaters have gone home and the costumes are put away, those overflowing bowls of sweets can linger in our kitchens for weeks, even months. Often, this sugary bounty becomes a constant temptation, picked at until the guilt sets in, eventually leading to a disheartening clear-out around New Year’s, alongside those well-intentioned resolutions to eat healthier. But what if there was a way to transform this surplus into something truly spectacular and satisfying?
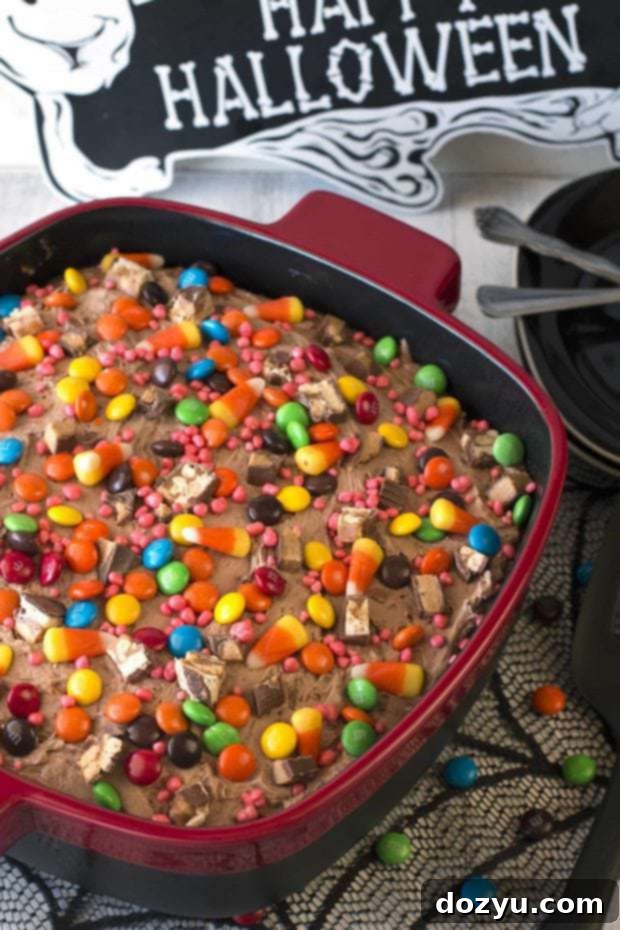
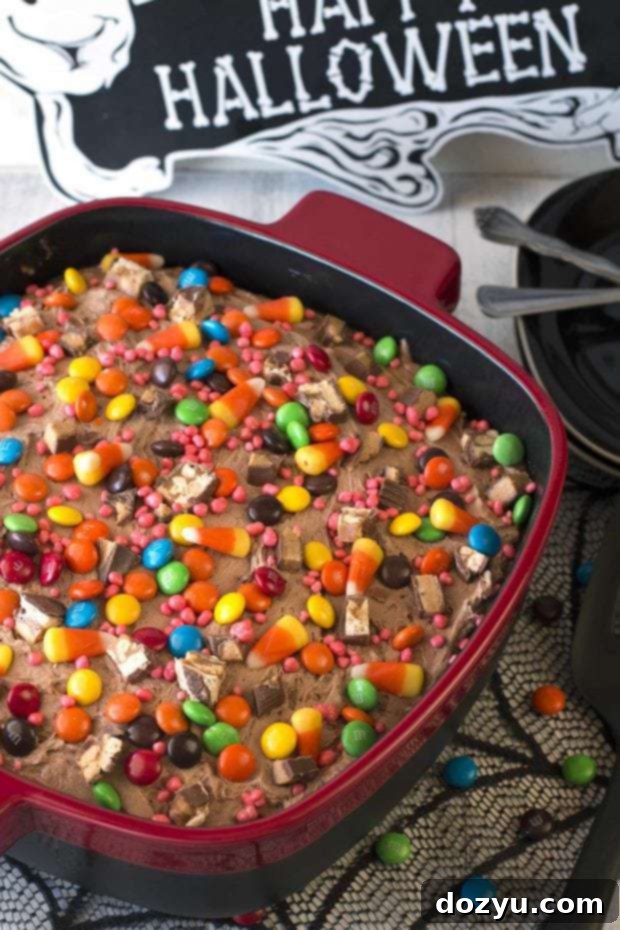
Instead of letting that precious Halloween haul become a forgotten relic, why not give it a glorious second life? Imagine a decadent, moist cake generously studded and topped with all your favorite candies. This isn’t just any cake; it’s a creative and incredibly delicious solution to the post-Halloween candy problem. No one can resist a slice of rich cake, especially when it’s adorned with a vibrant assortment of chocolates, gummies, and more! And for this magical transformation, we’re relying on the superior performance of the KitchenAid® Streamline Ceramic baking dish, a true kitchen hero.
Embrace the Sweet Chaos: Crafting Your Perfect Candy Cake
You might initially think that combining a medley of candies into one cake sounds a bit outlandish, perhaps even bordering on confectionery madness. However, I assure you, the result is nothing short of addictively delicious. The beauty of this Leftover Halloween Candy Cake lies in what I affectionately call “the glorious layer of surprise.” With every forkful, you embark on a delightful adventure, never quite knowing which sweet treasure you’ll encounter next. Will it be the satisfying crunch of an M&M, the chewy delight of a nougat bar, or the creamy bliss of a peanut butter cup? Each bite is a unique experience, a symphony of textures and flavors that will transport you straight into Willy Wonka’s legendary Chocolate Room. Prepare to hear Gene Wilder’s iconic voice singing “Pure Imagination” in your head as you savor this whimsical creation!
This Halloween dessert is not just about clearing out your candy stash; it’s about creating a memorable and fun culinary experience. It turns ordinary leftovers into an extraordinary centerpiece, perfect for a post-Halloween party or simply enjoying with family. The vibrant colors and varied shapes of the candies make this cake visually stunning, appealing to both kids and adults alike. It’s a fantastic way to extend the festive spirit beyond the single night of trick-or-treating, transforming excess into pure joy.
The Essential Baking Partner: KitchenAid® Streamline Ceramic
While this Halloween Candy Cake itself is a marvel, I must take a moment to rave about the incredible KitchenAid® Streamline Ceramic baking dish it was baked in. Beyond its stunning aesthetic—the black and red design perfectly complements my kitchen, which is already a shrine to my red KitchenAid® appliances—the true magic lies in its ceramic properties. This isn’t just a pretty dish; it’s engineered for performance and durability, making it an indispensable tool for any home baker.
One of the most impressive features of this KitchenAid® ceramic dish is its remarkable resistance to cracking, chipping, and staining. For someone as prone to kitchen mishaps as myself, this is an absolute godsend! No more worrying about accidental knocks damaging your bakeware or colorful ingredients leaving stubborn marks. This robust construction ensures that your dish will maintain its pristine appearance and structural integrity through countless baking adventures, from sweet treats to savory casseroles. Its resilience makes it a reliable workhorse in the kitchen, simplifying both cooking and cleanup.
But the benefits don’t stop there. You can bake virtually anything in this gorgeous dish, confident in its even heat distribution for perfectly cooked results every time. And here’s where it gets truly amazing: if you have leftovers (which is unlikely with this delicious candy cake, but happens with other dishes!), you can save yourself the hassle of transferring food to another container. Simply cover and refrigerate your dish, and then, prepare to be amazed—you can microwave it later! GAH, how incredibly convenient is that?! This seamless transition from oven to fridge to microwave streamlines your meal prep and storage, making it ideal for busy weeknights or entertaining.
Furthermore, I absolutely adore that this ceramic dish doesn’t pick up any lingering odors or tastes from previous dishes. I baked this delightful Halloween Candy Cake, and immediately afterward, I made a test batch of Thanksgiving stuffing (because it’s never too early to prep for the holidays, right?!). There was absolutely no flavor carryover whatsoever, ensuring that each dish tastes exactly as it should—pure and untainted. This feature alone makes the KitchenAid® Streamline Ceramic baking dish a versatile and hygienic choice for all your culinary endeavors, eliminating the need for multiple specialized dishes and saving valuable cabinet space.
Tips for Your Best Leftover Candy Cake Ever
To truly elevate your Leftover Halloween Candy Cake, consider these expert tips:
- Candy Selection: Don’t be afraid to mix and match! Chocolates like Snickers, Reese’s, M&Ms, and Kit Kats work wonderfully for a rich, gooey interior. Add a handful of fruity candies like Skittles or Starbursts (chopped small) for pops of color and tang. Chewy candies can add a delightful textural contrast.
- Preparation is Key: For larger candy bars, chop them into bite-sized pieces so they distribute evenly throughout the batter and frosting. Smaller candies can be left whole.
- Layering for Surprise: When adding candies to the cake batter, gently fold them in to avoid crushing. For the “glorious layer of surprise” on top, press some candies into the frosting, and artfully arrange others on the surface for a truly eye-catching finish.
- Frosting Variations: While a classic chocolate buttercream is irresistible, don’t hesitate to experiment. A vanilla buttercream or even a cream cheese frosting can provide a delightful contrast to the sweet and varied candies.
- Serving Suggestions: This cake is fantastic on its own, but for an extra indulgence, serve it with a scoop of vanilla ice cream, a dollop of whipped cream, or a drizzle of chocolate sauce.
- Storage: Store any leftover cake in an airtight container at room temperature for up to 3 days, or in the refrigerator for up to a week.
Now, go ahead and lose yourself in a generous slice of this incredible Halloween Candy Cake! And when Thanksgiving rolls around, you’ll be incredibly thankful to have your versatile KitchenAid® Streamline Ceramic baking dish ready to tackle all your holiday baking needs. It’s truly a game-changer for any kitchen!
Disclosure: Thank you to KitchenAid® for the opportunity to provide a product review. While I have been compensated with the product, all opinions written are purely my own.

table of contents
Toggle
Leftover Halloween Candy Cake
ingredients
- 2 1/2 cups all purpose flour sifted
- 3 tsp baking powder
- 1/4 tsp salt
- 1 1/4 cups granulated sugar
- 3/4 cup unsalted butter
- 8 egg yolks beaten
- 3/4 cup milk
- 2 tsp vanilla
- 3 cups confectioners sugar
- 1 cup butter
- 2 Tbsp cocoa powder
- 1-2 Tbsp heavy whipping cream
- 1 Snickers bar chopped
- 2 Reese’s peanut butter cups chopped
- 1 package M&Ms
- 1 package Reese’s Pieces
- 1 package Nerds
- 1/4 cup candy corn
instructions
-
To make the cake, preheat oven to 350 degrees F (175 C). Lightly spray the KitchenAid® Streamline Ceramic (4.2 qt) baking dish with cooking spray.
-
In a medium bowl, combine the sifted all-purpose flour, baking powder, and salt. Whisk briefly to combine and set aside.
-
In the bowl of a stand mixer fitted with the paddle attachment, cream together the softened unsalted butter and granulated sugar until light and fluffy. Beat in the beaten egg yolks until just combined, scraping down the sides of the bowl as needed. Gradually add the dry ingredients to the wet ingredients in small increments, alternating with the milk, mixing on low speed until the batter is just well combined. Finally, add the vanilla extract and mix until fully incorporated.
-
Pour the prepared cake batter into the greased KitchenAid® ceramic baking dish. Bake for approximately 20-25 minutes, or until a wooden toothpick inserted into the center of the cake comes out clean. Remove the cake from the oven and place it on a wire rack to cool completely.
-
While the cake cools, prepare the frosting. In the clean bowl of a stand mixer fitted with the whisk attachment, combine the confectioners’ sugar and butter. Mix on low speed until they are just combined and smooth. Increase the speed to medium and beat for an additional 3 minutes until light and fluffy. Add the cocoa powder and heavy whipping cream, then continue to beat on medium speed for 1 minute until the frosting is smooth, creamy, and spreadable. Adjust cream quantity as needed for desired consistency.
-
Once the cake is completely cool, spread a generous layer of the chocolate frosting evenly over the top. Then, lavishly decorate the frosted cake with your chopped and whole leftover Halloween candies. Feel free to create a festive pattern or simply sprinkle them haphazardly for a delightful, colorful look. Serve with a big glass of cold milk for the ultimate sweet treat!
