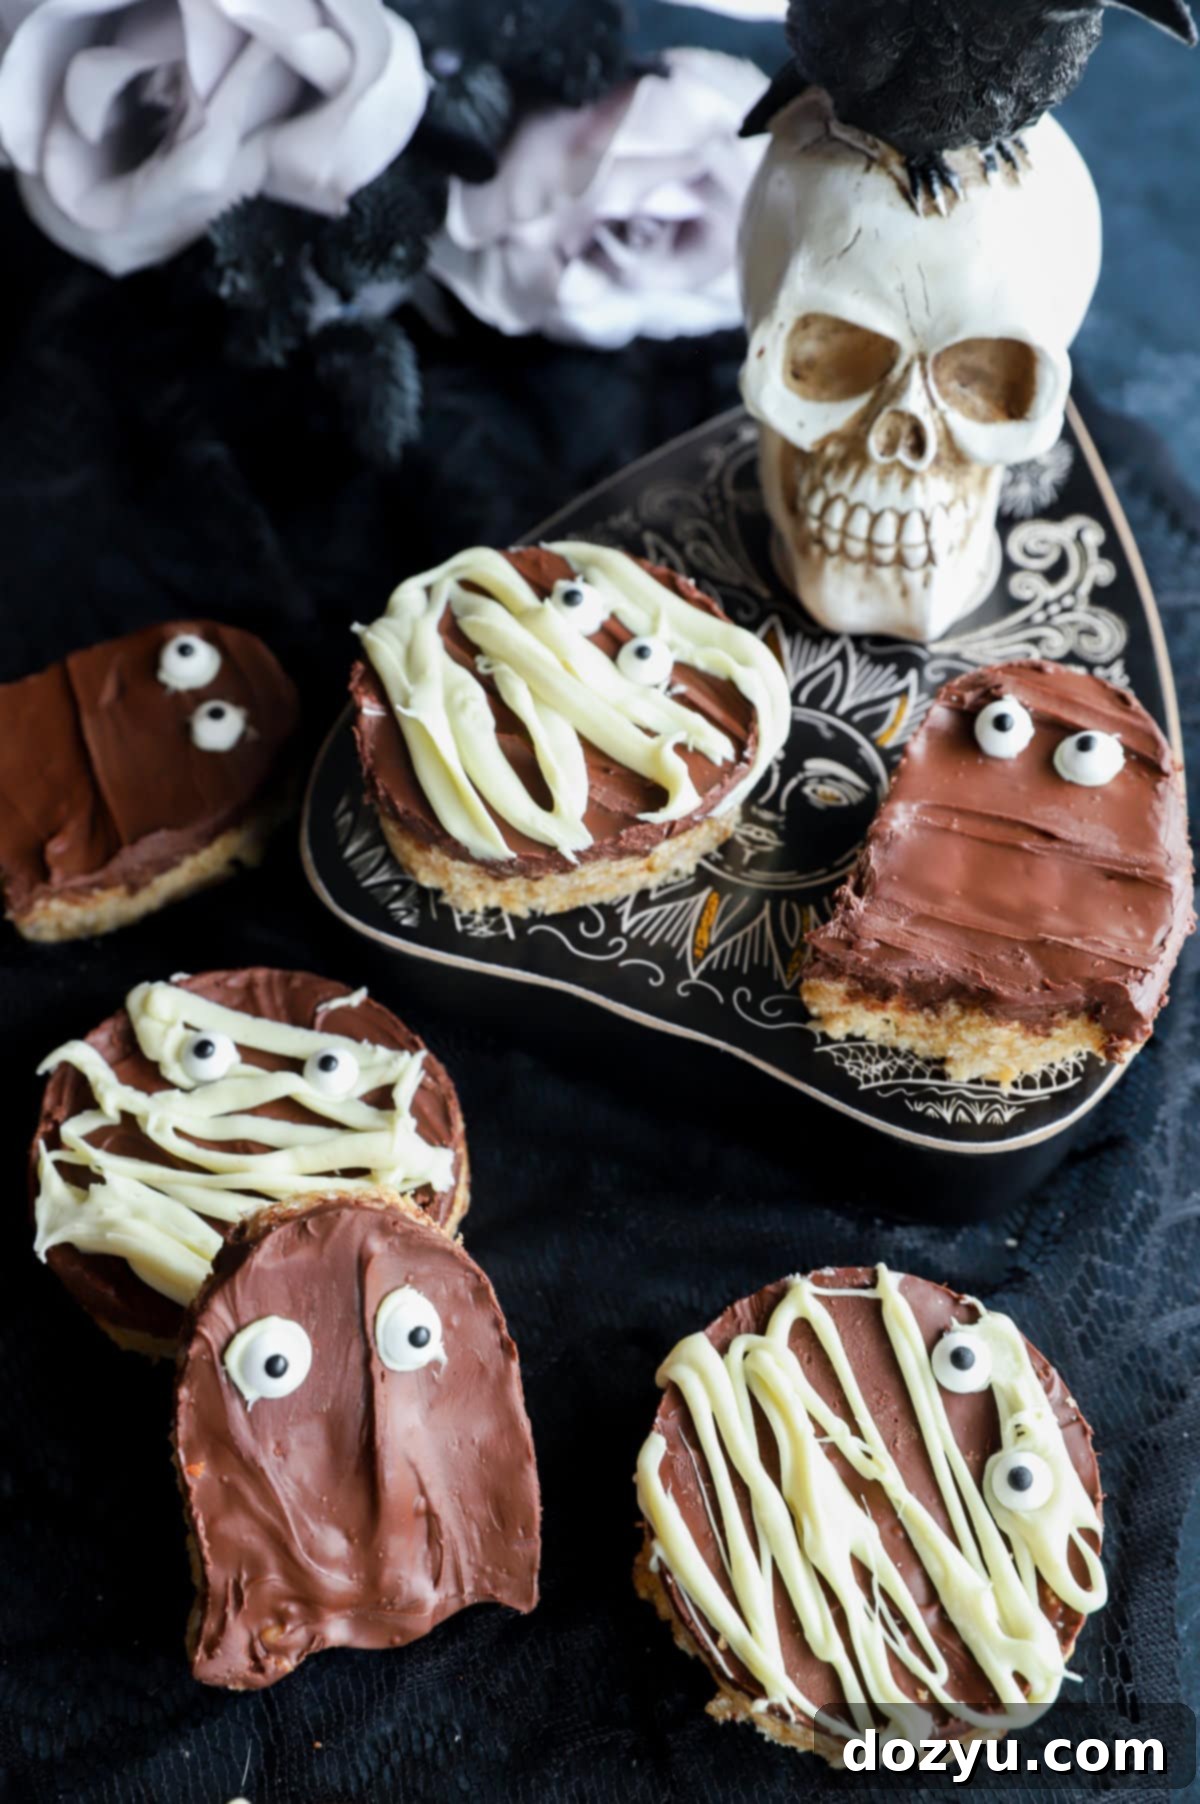
Spooky Chocolate Peanut Butter Rice Krispie Treats: The Ultimate No-Bake Halloween Dessert
Get ready to whip up some frightfully delicious fun with these Spooky Chocolate Peanut Butter Rice Krispie Treats! This incredibly easy, no-bake recipe is a Halloween must-have, combining the irresistible duo of rich chocolate and creamy peanut butter with crispy rice cereal. With just a handful of ingredients, you can transform a simple classic into a festive, family-friendly activity. Whether you decorate them as charming mummies, ghostly figures, or mischievous monsters, these treats are sure to be a hit at any Halloween gathering or a delightful project for a spooky night in. Let’s dive into making these nostalgic, gooey, and crunchy Halloween delights!
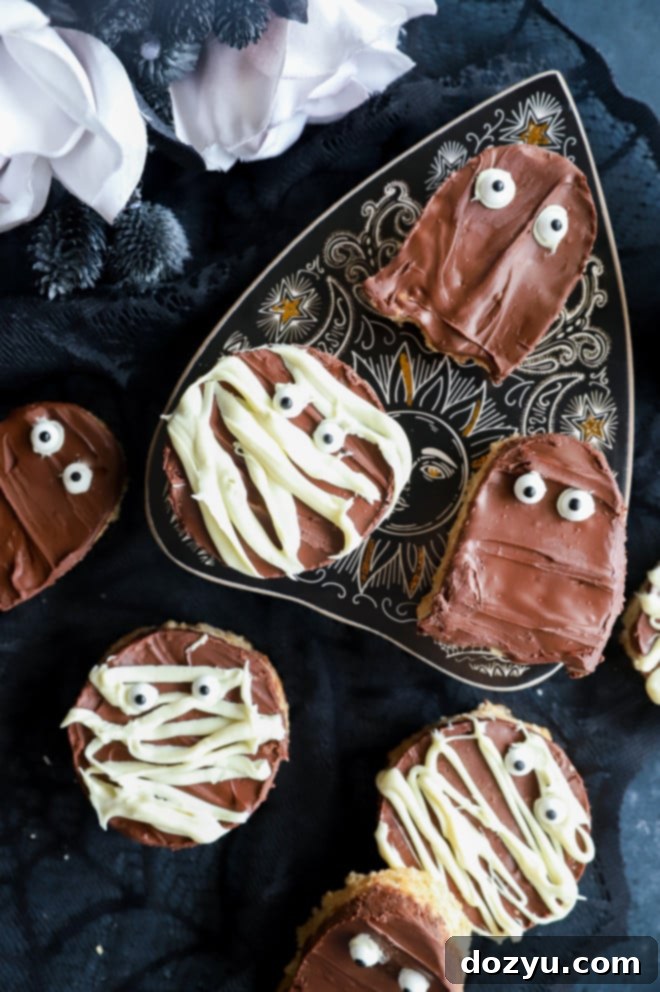
Table of Contents
Toggle
About These Spooky Chocolate Peanut Butter Rice Krispie Treats
These particular chocolate peanut butter rice krispie treats transport me straight back to childhood, conjuring images of elementary school Halloween parties and after-school snacks. While my family might have leaned more towards buckeyes, this delightful variation was a cherished favorite made by my best friend’s mom. The moment I tasted them, I was hooked, and the memory of that perfect combination of flavors has stayed with me ever since.
What makes these treats truly special is the incredible texture and flavor profile. With every bite, you experience a delightful medley: the satisfying crunch of the cereal, the comforting sweetness of the marshmallows, a hint of savory saltiness from the peanut butter, and the irresistible gooeyness that ties it all together. Plus, they’re a fantastic no-bake dessert, which means less time in the kitchen and more time enjoying the festive season!
The classic peanut butter and chocolate pairing is, frankly, hard to beat. It’s a match made in culinary heaven, delivering a rich and balanced taste that appeals to almost everyone. While you can certainly enjoy these delectable bars any time of year, transforming them into spooky Halloween treats adds an extra layer of fun and creativity. It’s incredibly simple to cut these bars into various festive shapes – think ghosts, pumpkins, or even Frankenstein’s monster – making them perfectly suited for the upcoming spooky holiday. This recipe isn’t just about making a treat; it’s about creating memories and embracing the spirit of Halloween with a delicious, homemade touch.
Key Ingredients for Peanut Butter Chocolate Rice Krispie Treats
Making these spooky peanut butter chocolate crispy treats requires only a few simple, accessible ingredients. Here’s what you’ll need to create this irresistible no-bake Halloween dessert:
- Unsalted Butter: Using unsalted butter is crucial for this recipe. It allows you to control the overall saltiness of the treats, ensuring the perfect balance of sweet and savory without an overpowering salty taste. If you only have salted butter, you can use it, but consider reducing any additional salt in the recipe if you’re adding it.
- Peanut Butter: For the best texture and consistency, I highly recommend using a smooth, creamy peanut butter. Brands like Jif or Skippy work wonderfully. Natural peanut butter, which often separates, or chunky peanut butter, which can disrupt the smooth chewiness of the treats, are generally not recommended (more on this below!). If you or your guests have a peanut allergy, feel free to substitute with another creamy nut butter like almond butter or cashew butter for equally delicious results.
- Mini Marshmallows: These are the magical binding agent that gives Rice Krispie treats their signature gooey texture. Mini marshmallows melt more quickly and evenly than larger ones, ensuring a smooth, consistent base for your cereal.
- Rice Krispie Cereal: The star of the show! You can use the classic Kellogg’s Rice Krispies cereal or any store-brand crispy rice cereal. Just make sure it’s fresh and crispy for that satisfying crunch.
- Chocolate Chips: I prefer semi-sweet chocolate chips for a balanced sweetness that complements the peanut butter. However, feel free to experiment with milk chocolate chips for a sweeter treat or dark chocolate chips for a richer, more intense chocolate flavor. The choice is yours to customize your perfect chocolate peanut butter treats.
- Vegetable Oil: A small amount of vegetable oil is mixed with the melted chocolate to create a smooth, glossy topping that hardens nicely but isn’t brittle. It helps achieve that perfect snap without making the chocolate too hard to cut or bite into.
- Decorations: For that extra spooky touch, gather mini marshmallows, various candy eyes, and extra melted white chocolate. These simple additions are key to transforming your treats into cute or creepy Halloween characters.
Essential Tools for No-Bake Halloween Treats
One of the many joys of making these easy Halloween treats is that you don’t need any fancy equipment. Just a few basic kitchen tools will get the job done efficiently and effectively:
- Large Saucepan: This is where you’ll create the warm, gooey marshmallow and peanut butter mixture. A large saucepan ensures enough space to melt the ingredients slowly and thoroughly without overflowing, providing an even heat distribution to prevent burning.
- Largest Mixing Bowl: Once your marshmallow mixture is ready, you’ll need a spacious bowl to combine it with the crispy rice cereal. Using your largest mixing bowl ensures ample room for stirring without making a mess, allowing you to coat every piece of cereal evenly.
- Sturdy Spatula: A good silicone spatula is invaluable for gently stirring the melting ingredients, scraping the sides of the pan, and most importantly, for mixing the sticky cereal mixture. A spatula sprayed lightly with cooking spray will make handling the sticky cereal mixture much easier.
- 9×13-inch Baking Pan: This standard-sized pan is perfect for creating a nice, even layer of treats. It provides a good surface area for spreading and ensures your bars are the right thickness. Lightly greasing it will make removal and cutting much simpler.
- Spooky Cookie Cutters: To truly embrace the “spooky” theme, these are a must-have! Cookie cutters in shapes like ghosts, bats, pumpkins, or even simple circles will elevate your treats from ordinary bars to festive Halloween delights, making them incredibly fun for decorating.
Step-by-Step: How to Make Spooky Chocolate Peanut Butter Rice Krispie Treats
Making these no-bake chocolate peanut butter Rice Krispie treats is incredibly straightforward, perfect for a fun family activity. Follow these simple steps for a guaranteed delicious outcome:
1. Melt the Gooey Base
Begin by greasing your 9×13-inch baking pan with cooking spray or lining it with parchment paper for easy removal later. Set this aside. In a large saucepan, combine the unsalted butter, creamy peanut butter, and mini marshmallows. Heat this mixture over low heat, stirring gently and consistently. The key here is low and slow heat to ensure the marshmallows melt smoothly and evenly without burning. Burnt marshmallows will result in hard, unappealing treats, so patience is key! Continue stirring until the mixture is completely melted and homogenous.
2. Mix in the Crispy Cereal
Once your marshmallow-peanut butter mixture is silky smooth, it’s time to incorporate the crispy rice cereal. Lightly grease a large mixing bowl with cooking spray, then add all 6 cups of Rice Krispie cereal. Pour the warm, melted mixture over the cereal. Using a spatula (which you can also spray with cooking spray to prevent sticking), gently fold and stir until the cereal is thoroughly coated. Work quickly but carefully. Then, transfer the combined mixture into your prepared 9×13-inch pan. Using the back of the greased spatula or your greased hands, press the mixture down firmly and evenly into the bottom of the pan to create a compact, uniform layer. Set this aside to cool slightly.
3. Top with Decadent Chocolate
Next, it’s time for the chocolate topping. Place your chocolate chips in a medium-sized microwave-safe bowl. Microwave the chocolate in 45-second intervals, stirring diligently after each burst. This gradual melting process prevents the chocolate from seizing or burning. Continue until the chocolate is completely smooth and melted. Once melted, stir in the vegetable oil until fully combined; this will give the chocolate a beautiful sheen and help it set without becoming too hard. Pour the melted chocolate evenly over the cereal bars in the pan and use your spatula to spread it into a smooth, even layer across the entire surface.
4. Set and Decorate
To set the chocolate, place the pan in the refrigerator for about 30 minutes. You want the chocolate to firm up enough to cut cleanly, but not become so hard that it cracks when sliced. The ideal consistency is firm but still slightly pliable. Once set, remove the pan and use your spooky cookie cutters to cut out fun shapes, or simply cut them into squares or rectangles. This is where the Halloween magic truly happens! Decorate your treats as desired with candy eyes, drizzles of white chocolate, or mini marshmallows to create mummies, ghosts, or your own unique monsters. Store your finished spooky treats in an airtight container at room temperature to maintain their perfect texture.
Tips for Perfect Halloween Rice Krispie Treats
To ensure your chocolate peanut butter Rice Krispie treats turn out absolutely perfect every time, keep these essential tips in mind:
- Avoid Refrigerating for Storage: While chilling helps set the chocolate initially, avoid storing these treats in the refrigerator long-term. The cold temperature will cause the treats to become too hard and lose their signature gooey, chewy texture, making them difficult and less enjoyable to eat. Always store them at room temperature.
- Mastering the Marshmallow Melt: The key to perfectly chewy (not hard!) treats lies in how you melt the marshmallows. Always use low heat and stir gently and continuously. High heat can cause the marshmallows to caramelize and become brittle, resulting in hard treats. If the marshmallows burn even slightly, it can change the texture of the entire batch. Be patient, let them melt slowly, and remove from heat as soon as they are smooth.
- Achieving the Right Firmness: To prevent your treats from being too soft and falling apart, ensure you firmly (but gently!) press the cereal mixture into the prepared pan. This compacts the mixture and helps it hold its shape once set. Use a greased spatula or your hands to press down evenly across the entire surface.
- Fresh Ingredients Matter: Always use fresh marshmallows and cereal. Stale marshmallows won’t melt as smoothly, and old cereal will lack that satisfying crunch.
- Grease Everything: Marshmallow mixture is notoriously sticky! Lightly grease your saucepan, mixing bowl, spatula, and even your hands (if pressing by hand) with cooking spray. This simple trick makes cleanup significantly easier and prevents frustrating sticking.
- Don’t Overmix the Cereal: Once the cereal is added to the marshmallow mixture, mix just until combined. Overmixing can crush the cereal, leading to a denser, less crispy treat.
- Even Chocolate Layer: When pouring the melted chocolate, aim for an even layer. This ensures every piece gets a good chocolate topping and helps with uniform hardening and cutting.
More tasty Halloween treats to check out:
Peanut Butter Oatmeal Chocolate Chip Cookies |
Halloween Cheesecake Brownies |
Spooky Halloween Meringue Swirls |
Peanut Butter Spiderweb Cookies |
Candy Apple Slices
Can I Use Natural or Chunky Peanut Butter in This Recipe?
This is a common question, and for best results with these particular crispy treats, I generally don’t recommend using natural peanut butter. Natural peanut butters tend to separate more easily, with the oil rising to the top. This separation can prevent the treats from fully setting and hardening properly, resulting in a greasy or overly soft consistency that just won’t hold its shape as well as desired. The emulsifiers in conventional creamy peanut butter are key to achieving that perfectly stable and chewy texture.
As for chunky peanut butter, while you certainly *can* use it, I personally feel it alters the classic texture of Rice Krispie treats. The small peanut pieces introduce a different kind of crunch and can make the bars less uniformly chewy. For that smooth, melt-in-your-mouth experience combined with the cereal’s crispiness, creamy peanut butter is the superior choice. However, if you’re a big fan of chunky peanut butter and don’t mind the textural variation, feel free to give it a try – it’s all about personal preference!
Creative Decorating Ideas for Spooky Rice Krispie Treats
The fun truly begins when it’s time to decorate your Spooky Chocolate Peanut Butter Rice Krispie Treats! Here are some creative ideas to turn your delicious bars into Halloween masterpieces:
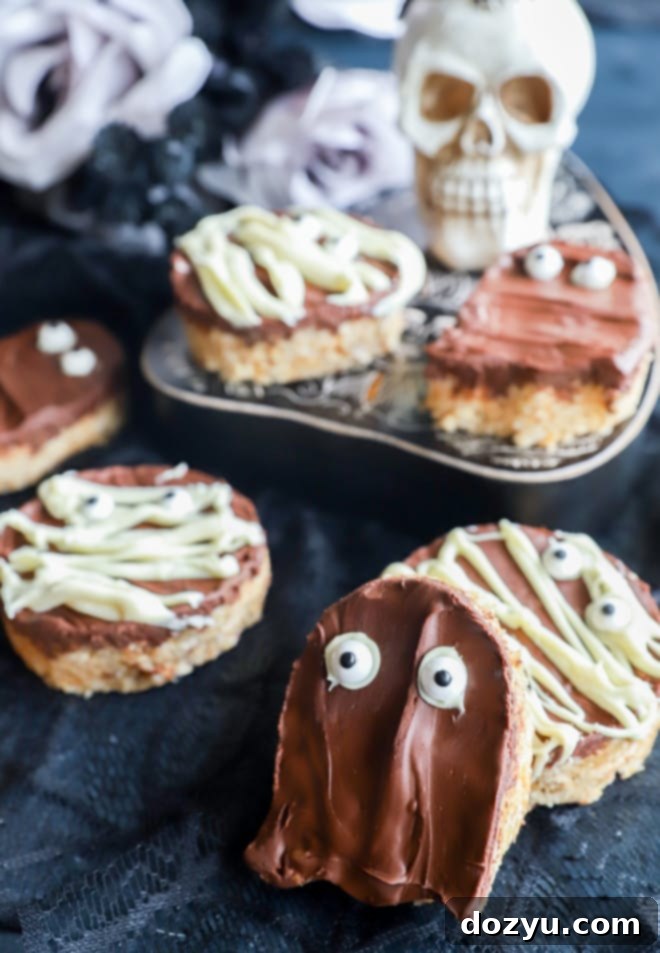
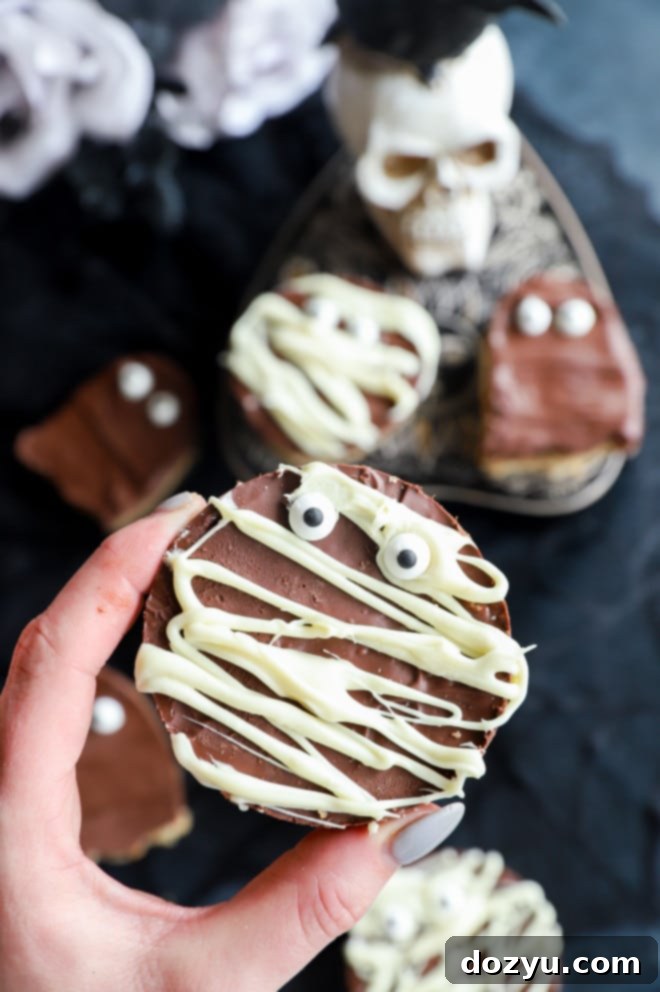
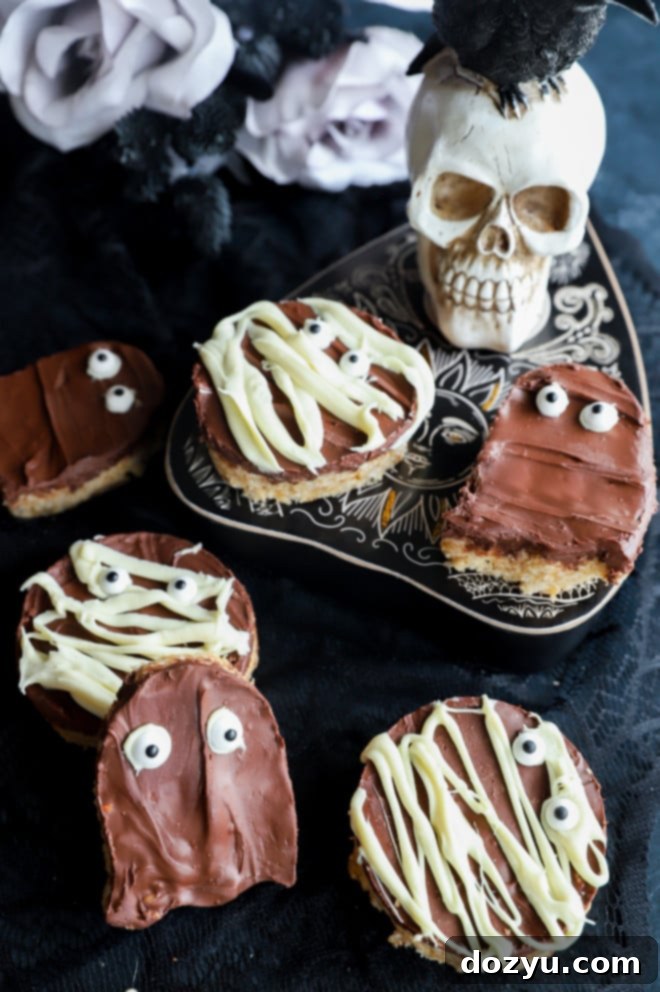
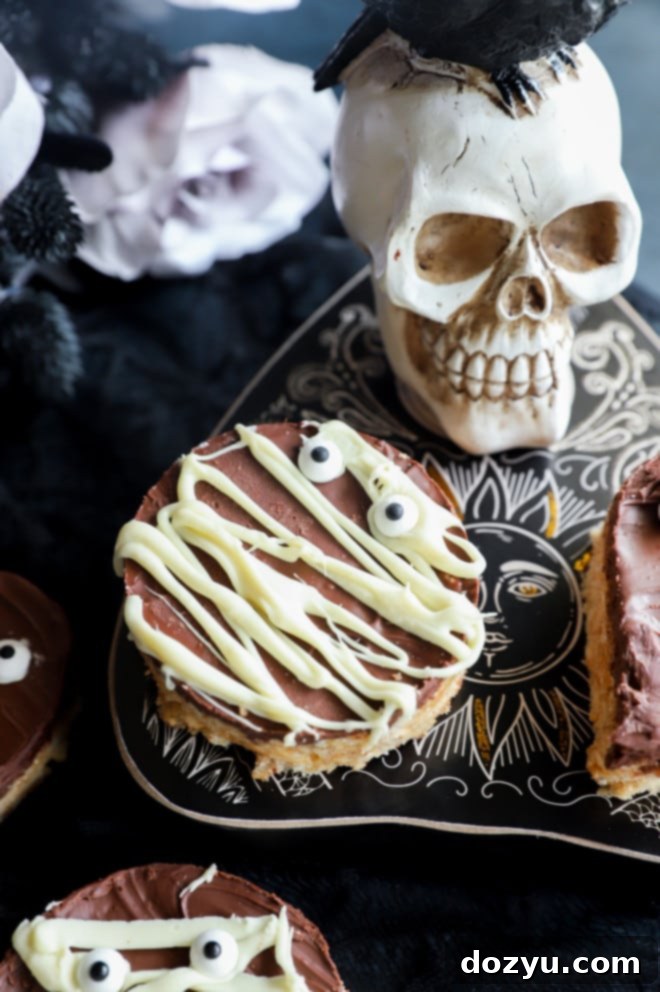
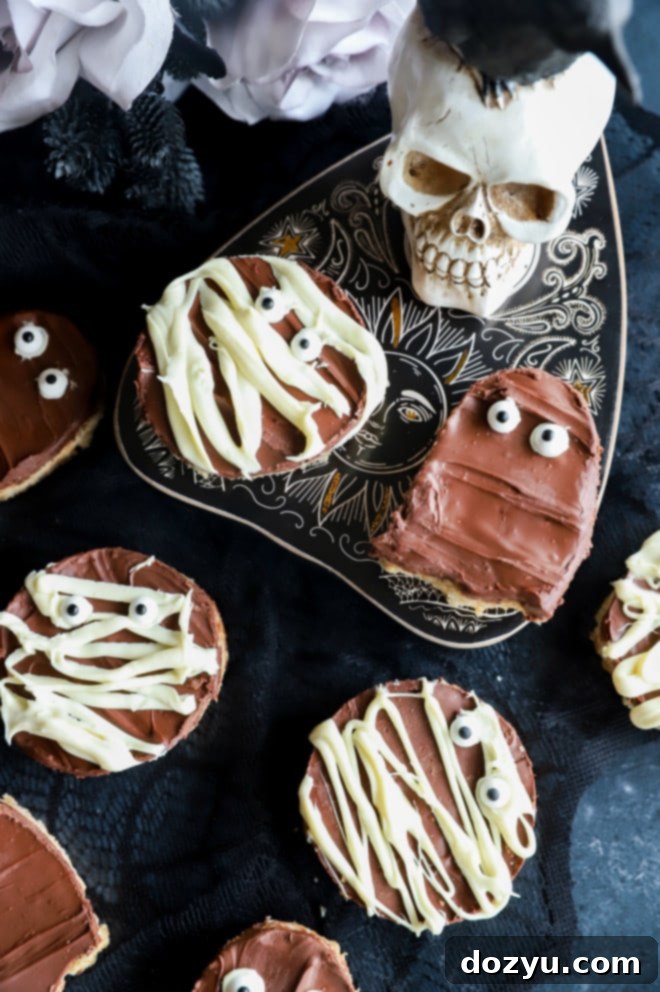
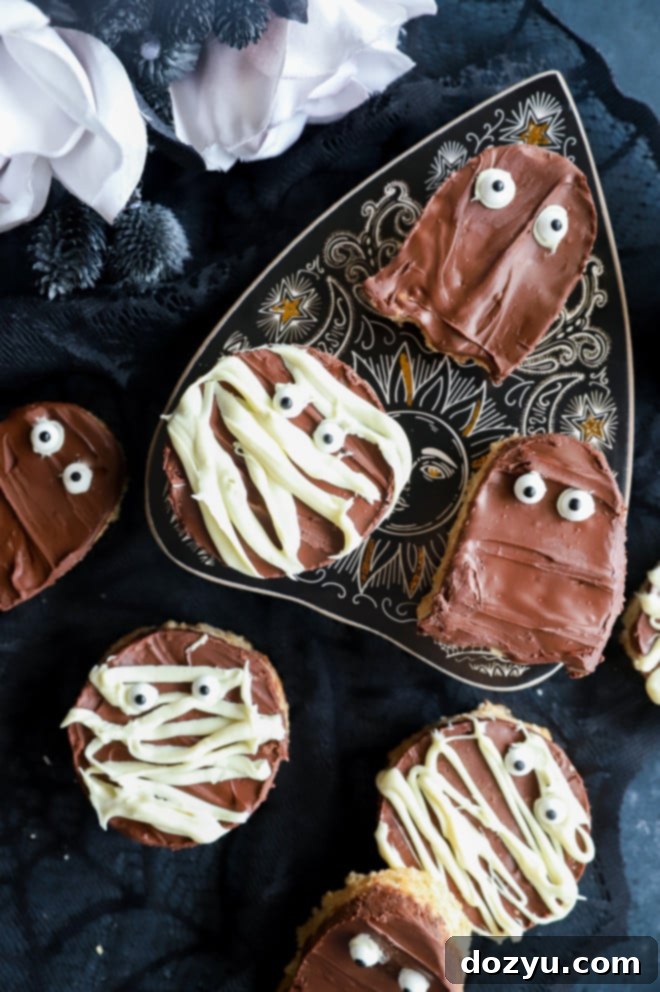
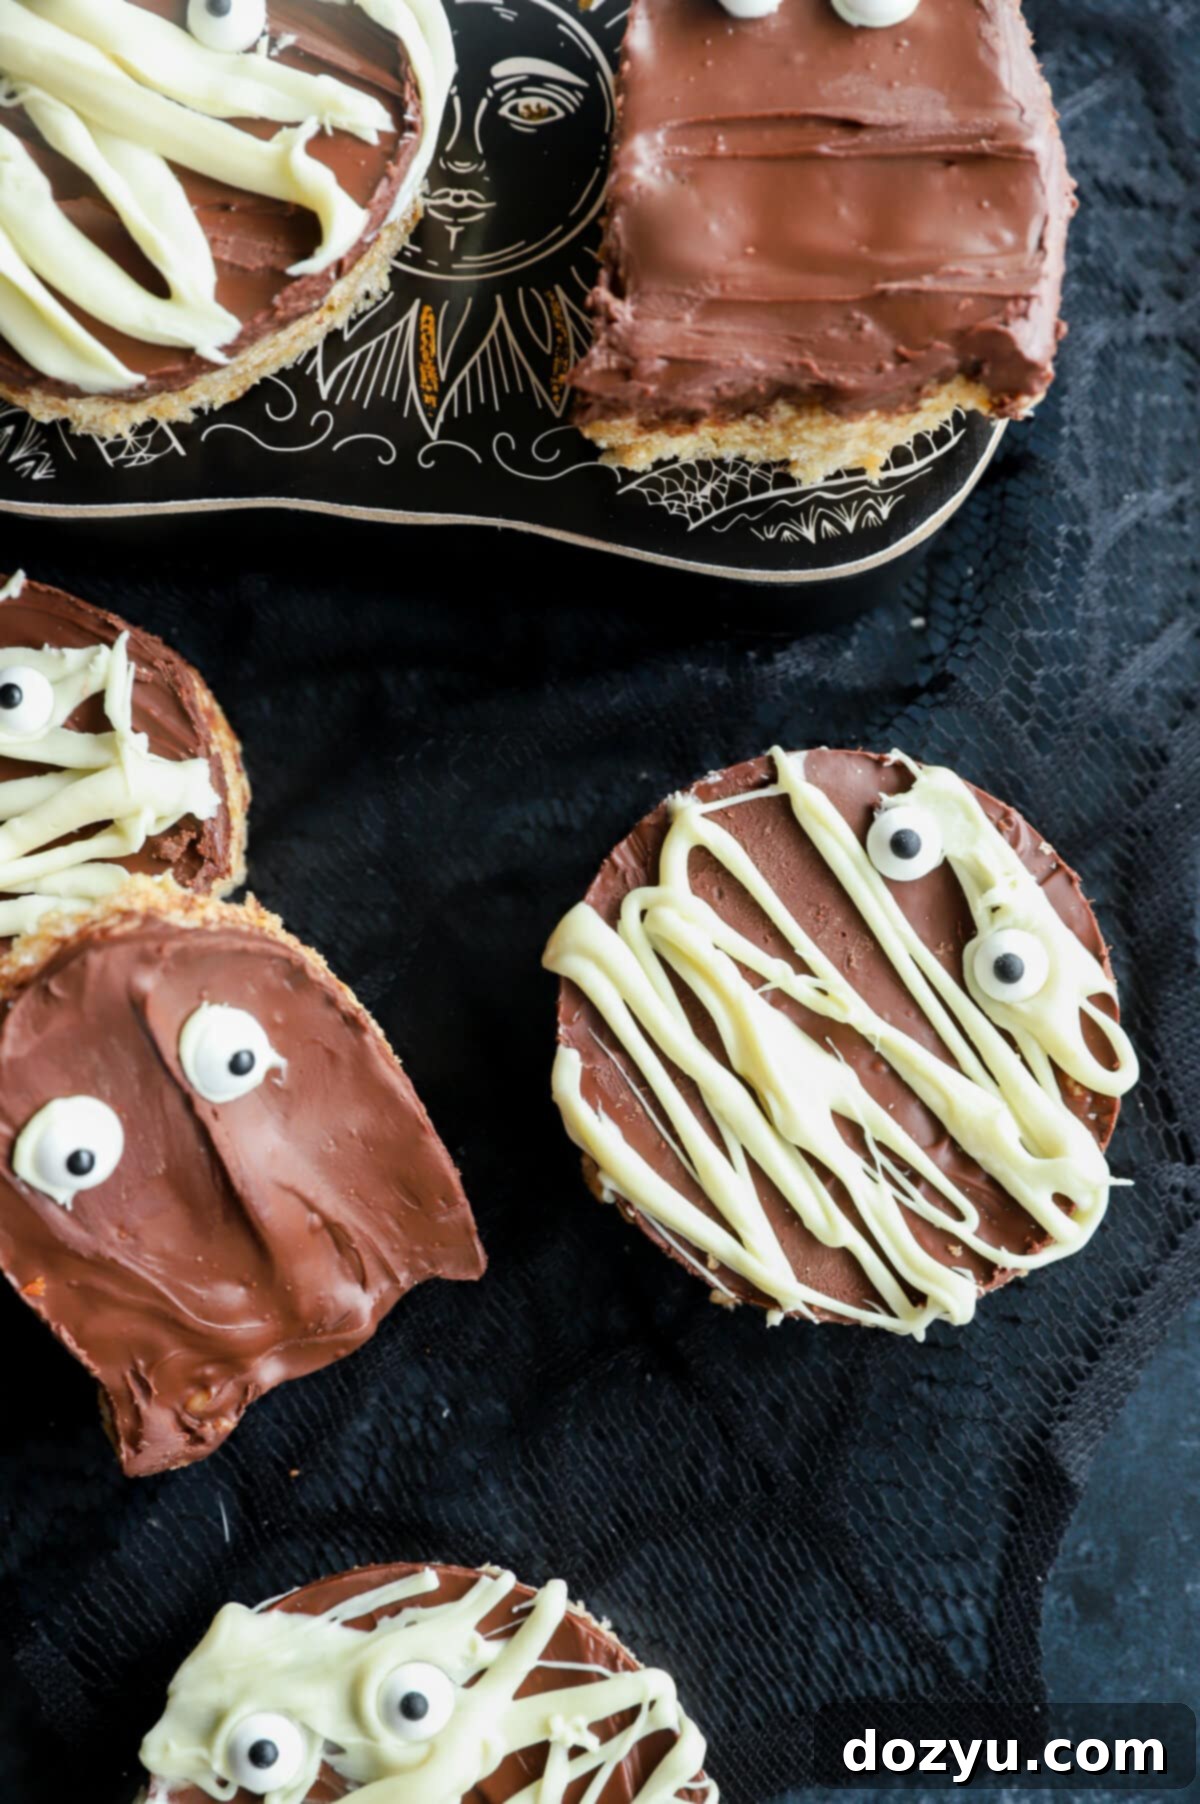
- Mummy Treats: Cut your treats into rectangular or circular shapes. Melt some white chocolate (or use a white icing pen). Drizzle the white chocolate in random, crisscrossing strips over the treats, resembling bandages. While the chocolate is still wet, carefully place two candy eyes at the top of each treat to give your mummies a playful, peeking appearance.
- Ghostly Figures: For adorable ghosts, cut the treats using a ghost-shaped cookie cutter (or simply cut large circles and shape them slightly). Melt a small amount of white chocolate. Use a toothpick or small spoon to create two small dots for eyes, and perhaps a larger dot for a mouth, on each ghost. For an easier method, simply press candy eyes onto the white chocolate-covered treats.
- Monster Eyeball Treats: If you’re short on time or want a simpler, yet still spooky, design, cut your bars into squares or triangles. Drizzle them generously with melted white chocolate (or even a contrasting color like green or orange candy melts). While the drizzle is still soft, scatter various sizes of candy eyes all over the top. Each treat becomes a whimsical, many-eyed monster!
- Pumpkin Patch Bars: Use pumpkin-shaped cookie cutters. Once set, instead of chocolate, you can create a thin orange frosting or dip the shapes in orange candy melts. Add a small green candy or licorice piece at the top for the stem.
- Spiderweb Designs: After pouring the dark chocolate layer, while it’s still wet, pipe concentric circles of melted white chocolate onto the surface. Then, use a toothpick to drag lines from the center outwards, creating a classic spiderweb effect. You can add a small candy spider for extra flair!
Don’t be afraid to experiment with different colored candy melts, sprinkles, or even edible markers to bring your spooky visions to life. This is a fantastic opportunity for kids and adults alike to get creative in the kitchen!
How Long Do These Chocolate Peanut Butter Rice Krispie Treats Last?
These delightful chocolate peanut butter Rice Krispie treats are best enjoyed fresh, but they do store well for a few days if kept properly. For optimal freshness, texture, and flavor, they should be stored at room temperature in an airtight container. When stored this way, these homemade treats will remain wonderfully chewy and delicious for up to 3 days. Beyond that, the cereal can start to lose its crispness, and the treats might become a bit harder. Make sure the container is truly airtight to prevent them from drying out or absorbing unwanted odors from your pantry.
Need some more inspiration for Halloween? Check out my
Halloween recipes page!
What to Serve with Your Spooky Treats
These Spooky Chocolate Peanut Butter Rice Krispie Treats are fantastic on their own, but if you’re hosting a Halloween party or simply want to create a wider spread of festive delights, here are some complementary spooky treats and sips to serve alongside these easy, no-bake bars:
- Appetizers: Kick off your party with something savory and equally festive! Try these Chorizo Jalapeño Mummy Poppers. They offer a delicious spicy kick wrapped in a fun, Halloween-themed package, making them a perfect contrast to the sweet treats.
- Spooky Cocktails/Mocktails: For the adults, a refreshing and eerie drink is a must. The Bloody Sangria Halloween Punch is an effortless last-minute recipe that adds a dramatic flair to your beverage station. For a stronger, more spirited option, break out some fun Vampire Bite Shots. For a kid-friendly or non-alcoholic option, green or purple sodas with gummy worms are always a hit!
- Simple Snacks: For a snack that guests can munch on throughout the night, nothing beats The Best Roasted Pumpkin Seeds. They’re a healthy, seasonal snack that utilizes the leftover seeds from your jack-o’-lanterns and offers a satisfying salty crunch.
- Additional Desserts: Complement these no-bake treats with other Halloween-themed desserts like pumpkin pie bars, ghost cupcakes, or a platter of decorated sugar cookies. A variety of textures and flavors will keep your guests delighted.
Creating a diverse spread of spooky snacks and drinks ensures there’s something for everyone to enjoy, making your Halloween celebration truly memorable.
Storing Your Chocolate Peanut Butter Rice Krispie Treats
Proper storage is essential to maintain the delicious taste and perfect texture of your Spooky Chocolate Peanut Butter Rice Krispie Treats. Here’s how to keep them fresh:
- Room Temperature Storage: As mentioned, these treats are best stored at room temperature. Place them in an airtight container to protect them from air exposure, which can cause them to dry out and become hard. This method will keep them fresh, soft, and chewy for up to 3 days. Avoid direct sunlight or very warm spots in your kitchen.
- Freezing for Longer Shelf Life: Yes, these treats can absolutely be frozen! This is a great option if you’ve made a large batch or want to prepare them in advance. To freeze, first ensure the treats are completely set and cooled. Then, cut them into individual portions. Arrange the treats in an airtight freezer-safe container, placing a sheet of wax paper or parchment paper between each layer to prevent them from sticking together. Freeze them for up to 2 months. When you’re ready to enjoy them, thaw the treats in the refrigerator overnight, then bring them to room temperature before serving. This gradual thawing helps maintain their texture.
By following these storage tips, you can extend the enjoyment of your homemade Halloween crispy treats!
Finally, if you make these incredible Spooky Chocolate Peanut Butter Rice Krispie Treats, I would absolutely love to hear from you! Please take a moment to give this recipe a rating or leave a comment below. Your feedback means the world to me, and I genuinely enjoy hearing about your experiences in the kitchen. I make an effort to respond to every single comment, so don’t hesitate to drop any questions you might have!
Oh, and for an extra special treat, be sure to tag me on Instagram with photos of your creations! Seeing these recipes come to life in your homes is truly my favorite thing, and I love looking through all those wonderful pictures. Thank you for being a part of this culinary journey!
Craving More Cereal Treats?
If you’re a fan of easy, no-bake cereal treats, you’re in luck! There are so many delicious variations to explore beyond these spooky Halloween delights. Be sure to check out my other popular recipes:
- Golden Grahams Cereal Treats: A delightful twist on the classic, offering a sweet, graham cracker-like flavor that’s utterly comforting.
- Lucky Charms Cereal Treats: Magical and colorful, these treats are perfect for adding a touch of whimsy to any occasion, not just St. Patrick’s Day!
These recipes offer more opportunities to enjoy the simple pleasure of gooey, crispy cereal bars with unique flavor profiles!
Spooky Chocolate Peanut Butter Rice Krispie Treats Recipe Card
15 minutes
10 minutes
30 minutes
55 minutes
12
Equipment Needed
-
Stainless Steel Sauce Pan
-
Stainless Steel Mixing Bowls
-
Silicone Spatula
-
9 x 13 inch Cake Pan
Ingredients for Spooky Treats
- 1/4 cup unsalted butter
- One 10 oz bag mini marshmallows about 5 cups
- 2/3 cup creamy peanut butter
- 6 cups Rice Krispie cereal
- 8 oz chocolate chips approx. 1 ⅓ cups, semi-sweet recommended
- 2 tsp vegetable oil
- Decorations: mini marshmallows, candy eyes, melted white chocolate
Easy Instructions
-
Grease a 9×13-inch pan with cooking spray or line with parchment paper. Set aside.
-
In a large saucepan over low heat, add butter, creamy peanut butter, and mini marshmallows. Stir gently and continuously until the mixture is completely melted and smooth. Be careful not to burn the mixture, as this can make the treats hard.
-
Grease a large bowl with cooking spray and add the Rice Krispie cereal. Pour the melted marshmallow mixture over the cereal and stir together with a greased spatula until the cereal is evenly coated. Quickly press the mixture firmly into the bottom of the prepared 9×13-inch pan. Set aside to cool slightly.
-
Add the chocolate chips to a medium-sized microwave-safe bowl. Microwave in 45-second intervals, stirring well in between each burst, until the chocolate is fully melted and smooth. Stir in the vegetable oil until combined. Pour this glossy chocolate mixture over the bars and smooth with a spatula to create an even layer.
-
Place the pan in the refrigerator for about 30 minutes to allow the chocolate topping to set, but not fully harden. Once set, cut into desired spooky shapes using cookie cutters or a sharp knife, and decorate with mini marshmallows, candy eyes, or additional melted white chocolate as desired. Store the finished treats in an airtight container at room temperature.
Nutrition Information
Carbohydrates: 46g |
Protein: 5g |
Fat: 18g |
Saturated Fat: 7g |
Polyunsaturated Fat: 2g |
Monounsaturated Fat: 5g |
Trans Fat: 0.2g |
Cholesterol: 10mg |
Sodium: 155mg |
Potassium: 155mg |
Fiber: 1g |
Sugar: 27g |
Vitamin A: 1049IU |
Vitamin C: 9mg |
Calcium: 23mg |
Iron: 5mg
349kcal
