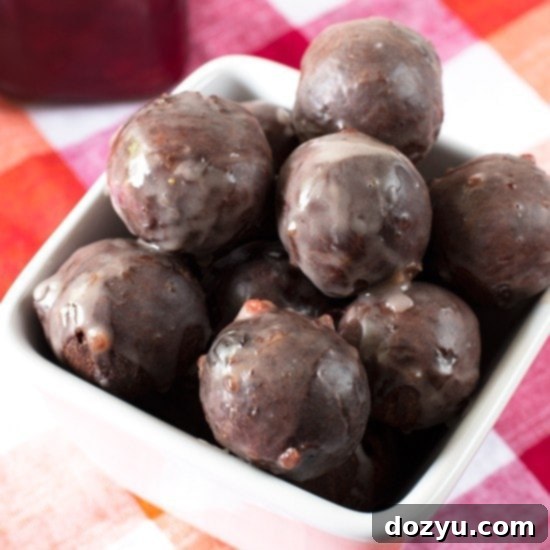
Homemade Cherry Glazed Chocolate Donut Holes: The Ultimate Sweet Treat Recipe
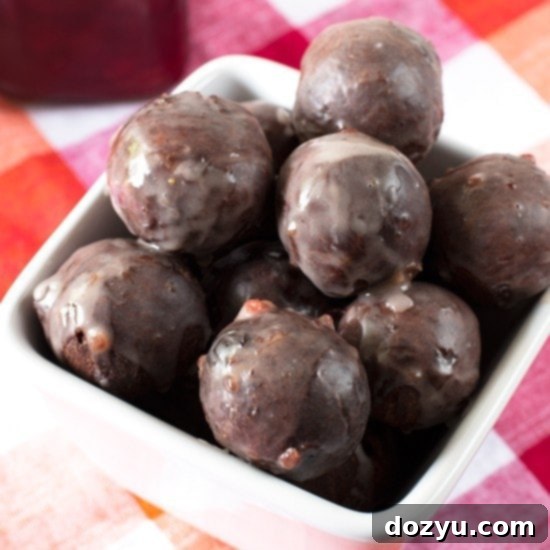
Imagine waking up to the aroma of freshly made donuts, ready to greet your morning with a burst of flavor and a touch of sweetness. These Cherry Glazed Chocolate Donut Holes are precisely what you need to elevate your breakfast or brunch experience. They offer an exquisite contrast: wonderfully crispy on the outside, yet incredibly moist and dense within. Each bite is further enhanced by a vibrant cherry glaze that delivers a delightful balance of subtle sweetness and a refreshing tangy kick, cutting beautifully through the rich chocolate cake-like texture.
The Irresistible Allure of Homemade Donut Holes
Good morning, sweet tooths! Who wouldn’t want a batch of warm, poppable donut holes to kickstart their day? For those of us with an insatiable craving for something sweet in the morning, these cherry glazed chocolate donut holes are a game-changer. Forget the same old savory breakfasts; a touch of sugar in the morning can truly set your day on the right, joyful path. There’s something uniquely satisfying about a homemade treat, especially when it’s as decadent yet manageable as these little bites of heaven.
Unlike larger donuts, donut holes are the perfect single-serving indulgence. They’re less messy, easier to share (or not!), and wonderfully versatile for any gathering. Whether it’s a casual weekend breakfast, a special Mother’s Day brunch, or simply a treat to brighten an ordinary weekday, these donut holes fit the bill perfectly. Their small size makes them incredibly fun to eat, encouraging you to savor each bite, enjoying the crispy exterior giving way to a soft, rich interior, all enveloped in that bright, fruity glaze.
Please note that some of the links below are affiliate links. If you make a purchase through one of these links, I will receive a small commission.
Crafting the Perfect Texture and Flavor Profile
The magic of these donut holes lies in their textural complexity and balanced flavors. The initial crunch from the perfectly fried exterior gives way to an incredibly moist and dense chocolate interior, reminiscent of a rich cake. This delightful contrast ensures that every bite is an experience. But what truly sets them apart is the luscious cherry glaze. It’s not just an afterthought; it’s an integral component that introduces a subtle yet distinct sweetness and a vibrant tangy flavor. This tanginess is crucial, as it beautifully cuts through the richness of the chocolate donut, preventing it from being overly heavy and leaving your palate refreshed and eager for the next bite.
These aren’t just any donut holes; they are a celebration of flavor and texture. The deep, bittersweet notes of quality cocoa powder infuse the dough, creating a robust chocolate base that pairs wonderfully with the bright, fruity notes of the cherry glaze. The glaze itself is crafted to be smooth and glossy, adhering perfectly to the donut holes, ensuring every surface is coated in that delightful cherry goodness. It’s a symphony of flavors that will have you reaching for just “one more.”
A Timeless Treat for Special Moments
It’s hard to believe how quickly time flies! With May here and Mother’s Day just around the corner, these donut holes offer the perfect opportunity to slow down and create something truly special. Whether you’re celebrating a mother figure in your life, enjoying a lazy Sunday with family, or simply treating yourself to a moment of peace, a batch of homemade donut holes makes the occasion feel more significant. Take a moment this weekend to gather your ingredients, enjoy the process of baking, and savor a leisurely morning breakfast or brunch. And don’t forget the mimosas – they pair perfectly with these sweet treats!
Table of Contents
Toggle
Essential Tools for Donut Hole Perfection
Having the right kitchen tools can make a significant difference in your baking and frying experience. Here are a few “must-haves” that will streamline the process of making these delicious donut holes:
- Stainless Steel Mixing Bowls: Essential for combining your wet and dry ingredients without fuss.
- Cuisipro 12-Inch Stainless Steel Duo Whisk: A good whisk ensures your dry ingredients are well combined and your batter is smooth.
- Le Creuset Signature Enameled Cast-Iron 5-1/2-Quart Round Dutch Oven: Ideal for deep frying, maintaining consistent oil temperature.
- Helen Chen’s Asian Kitchen Stainless Steel Spider Strainer: Perfect for safely adding and removing donut holes from hot oil.
- Candy/Deep Fry Thermometer: Absolutely crucial for monitoring oil temperature for perfect frying.
- Biscuit or Cookie Cutters: For uniform donut hole shapes.
- Wire Rack and Baking Sheet: For draining excess oil and catching glaze drips.
Pin this Cherry Glazed Chocolate Donut Holes recipe for later!


Cherry Glazed Chocolate Donut Holes
Ingredients for Cherry Glazed Chocolate Donut Holes
- 2 1/2 cups all-purpose flour
- 3/4 cup cocoa powder (Dutch-processed for richer color and flavor)
- 1/3 cup granulated sugar
- 1 Tbsp baking powder
- 1/8 tsp salt
- 1 1/2 cups milk (whole milk recommended for richness)
- 2 Tbsp heavy cream
- 1 large egg lightly beaten, at room temperature
- 5 Tbsp unsalted butter melted and cooled slightly
- 1 1/2 tsp vanilla extract
- Oil for frying (vegetable, canola, or peanut oil are good choices)
- 1 1/4 cups confectioners’ sugar (sifted for a smoother glaze)
- 3 Tbsp cherry jam (a good quality jam will make a difference)
- 4 to 5 tablespoons whole milk (or half-and-half for a richer glaze)
- 2 1/2 teaspoons vanilla extract
Instructions
-
Prepare Dry Ingredients: In a large mixing bowl, whisk together the all-purpose flour, cocoa powder, granulated sugar, baking powder, and salt until thoroughly combined. This ensures even distribution of leavening agents and flavor.
-
Combine Wet Ingredients & Form Dough: In a separate medium bowl, whisk together the milk, heavy cream, lightly beaten egg, melted and cooled butter, and vanilla extract. Pour this wet mixture into the dry ingredients. Stir gently with a spoon or spatula until just combined. Be careful not to overmix, as this can lead to tough donut holes. The dough will be thick. Cover the bowl with plastic wrap and refrigerate for at least 1 hour. Chilling the dough makes it easier to handle and contributes to a better texture when fried.
-
Roll and Cut Dough: Once chilled, turn the dough out onto a lightly floured surface. Gently roll it out using a rolling pin until it’s approximately 1/2 inch thick. Using a 1-inch to 1 1/2-inch biscuit cutter or cookie cutter, cut small circles from the dough. Gather any dough scraps, gently re-roll them, and cut additional donut holes until all the dough has been used.
-
Fry the Donut Holes: In a large, heavy-bottomed saucepan or Dutch oven (like a Le Creuset), heat approximately 2 to 3 inches deep of frying oil (vegetable, canola, or peanut oil) over medium heat. Use a candy/deep fry thermometer to monitor the oil temperature, aiming for a steady 375°F (190°C). Carefully place 4 to 5 donut holes into the hot oil at a time to avoid overcrowding, which can lower the oil temperature. Fry for approximately 2 to 3 minutes, turning them occasionally, until they are puffed up and golden brown on all sides. Using a spider strainer, remove the fried donut holes and transfer them to a plate lined with paper towels to drain excess oil. Repeat with the remaining dough, ensuring the oil temperature stays consistent between batches.
-
Prepare the Cherry Glaze: While the donut holes are cooling slightly, prepare the glaze. In a medium bowl, whisk together the sifted confectioners’ sugar, cherry jam, 4 tablespoons of milk, and vanilla extract until completely smooth and free of lumps. The consistency should be thick enough to coat the donut holes but thin enough to drip. If the glaze is too thick, add more milk (1/2 teaspoon at a time) until the desired consistency is reached. If it’s too thin, add a tiny bit more confectioners’ sugar.
-
Glaze and Serve: Line a baking rack and set it over a rimmed baking sheet that has been lined with parchment paper. This setup will catch any excess glaze and make cleanup easier. Arrange the warm donut holes on the wire rack. Slowly pour the cherry glaze over the donut holes, ensuring they are all thoroughly covered. You may need to use a spoon to coat the sides of the holes evenly. Allow the glaze to set for a few minutes. Serve immediately for the best texture and flavor, or store any leftovers in an airtight container at room temperature for up to 2-3 days.
Tips for Frying and Glazing Like a Pro
Perfect Frying Every Time:
- Oil Temperature is Key: Invest in a good deep-fry thermometer. Maintaining a consistent 375°F (190°C) is crucial. Too cool, and the donuts will absorb too much oil, becoming greasy. Too hot, and they’ll brown too quickly on the outside while remaining raw inside.
- Don’t Overcrowd the Pot: Fry donut holes in small batches (4-5 at a time) to prevent the oil temperature from dropping drastically. Patience here yields the best results.
- Proper Drainage: Always transfer fried donut holes to a wire rack set over paper towels. This allows air to circulate and excess oil to drip away, preventing sogginess.
Achieving a Beautiful Glaze:
- Sift Your Confectioners’ Sugar: This step is often overlooked but prevents lumps in your glaze, resulting in a super smooth finish.
- Adjust Consistency Gradually: When adding milk to the glaze, do so slowly, one teaspoon at a time. It’s much easier to thin a glaze than to thicken it. You’re looking for a consistency that coats the back of a spoon and drips slowly.
- Glaze While Warm: Glazing the donut holes while they are still warm (but not hot) allows the glaze to adhere better and create a thin, even coating.
- Use a Rack for Even Coating: Placing your donut holes on a wire rack over a baking sheet ensures even glazing and allows any excess to drip off, preventing a thick, sugary bottom.
Serving and Storage Suggestions
These Cherry Glazed Chocolate Donut Holes are best enjoyed fresh, ideally while still slightly warm. Their crispy exterior and tender interior are at their peak right after glazing. Serve them with a hot cup of coffee, a glass of cold milk, or for a festive brunch, alongside a sparkling mimosa. The chocolate and cherry flavors make them versatile enough for a sweet breakfast, a delightful dessert, or an afternoon snack.
If you happen to have any leftovers (a rare occurrence with these!), store them in an airtight container at room temperature for up to 2-3 days. While they won’t be as crispy as fresh, they will still be wonderfully moist and flavorful. You can gently warm them in a microwave for a few seconds to soften them slightly before enjoying.
Make These Cherry Glazed Chocolate Donut Holes Today!
There’s truly nothing quite like the satisfaction of homemade baked goods, and these Cherry Glazed Chocolate Donut Holes are no exception. They bring joy to any table, offering a gourmet taste experience with the comforting charm of a classic treat. Whether you’re an experienced baker or trying your hand at donuts for the first time, this recipe is designed for success. So, roll up your sleeves, gather your ingredients, and prepare to delight your taste buds and those of your loved ones. These poppable, delicious donut holes are waiting to become your new favorite sweet indulgence!
