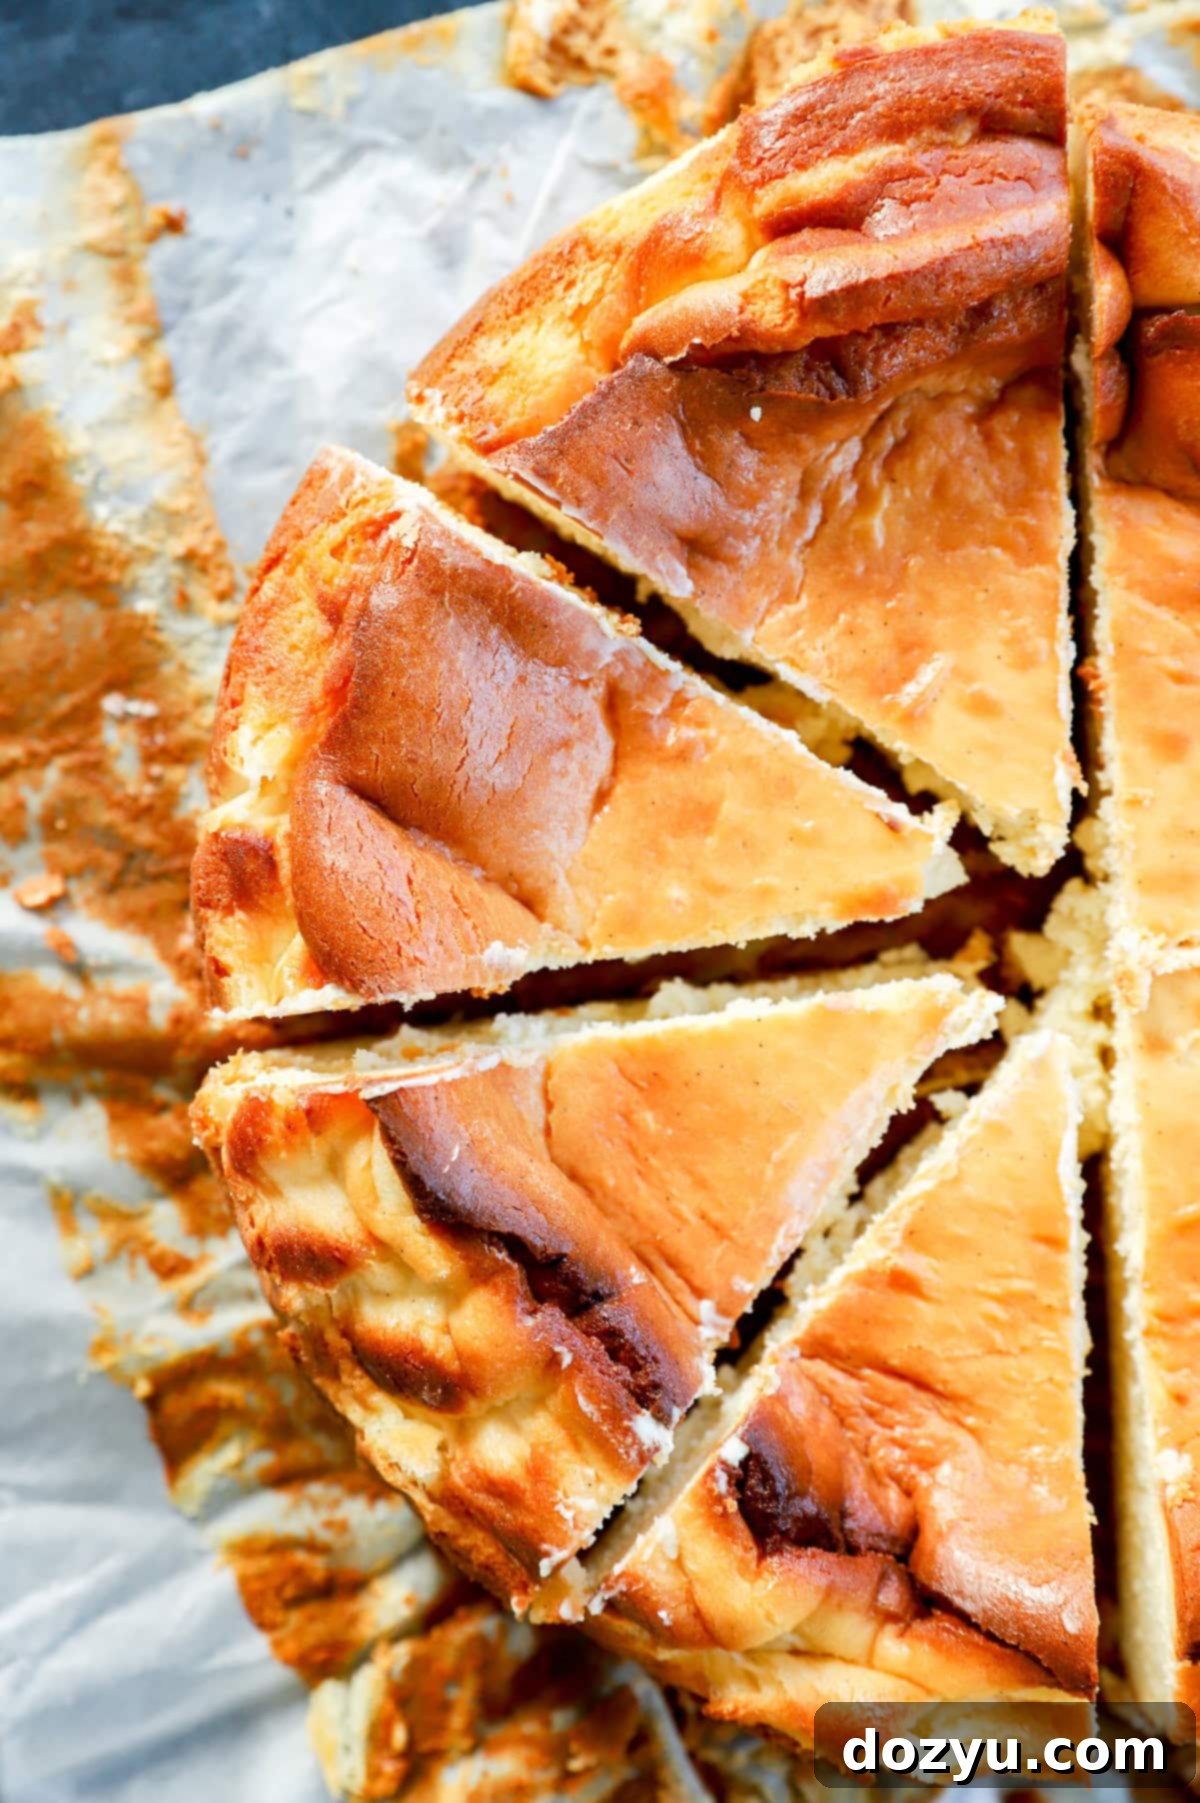
Perfect Vanilla Bean San Sebastian Cheesecake: The Ultimate Burnt Basque Recipe
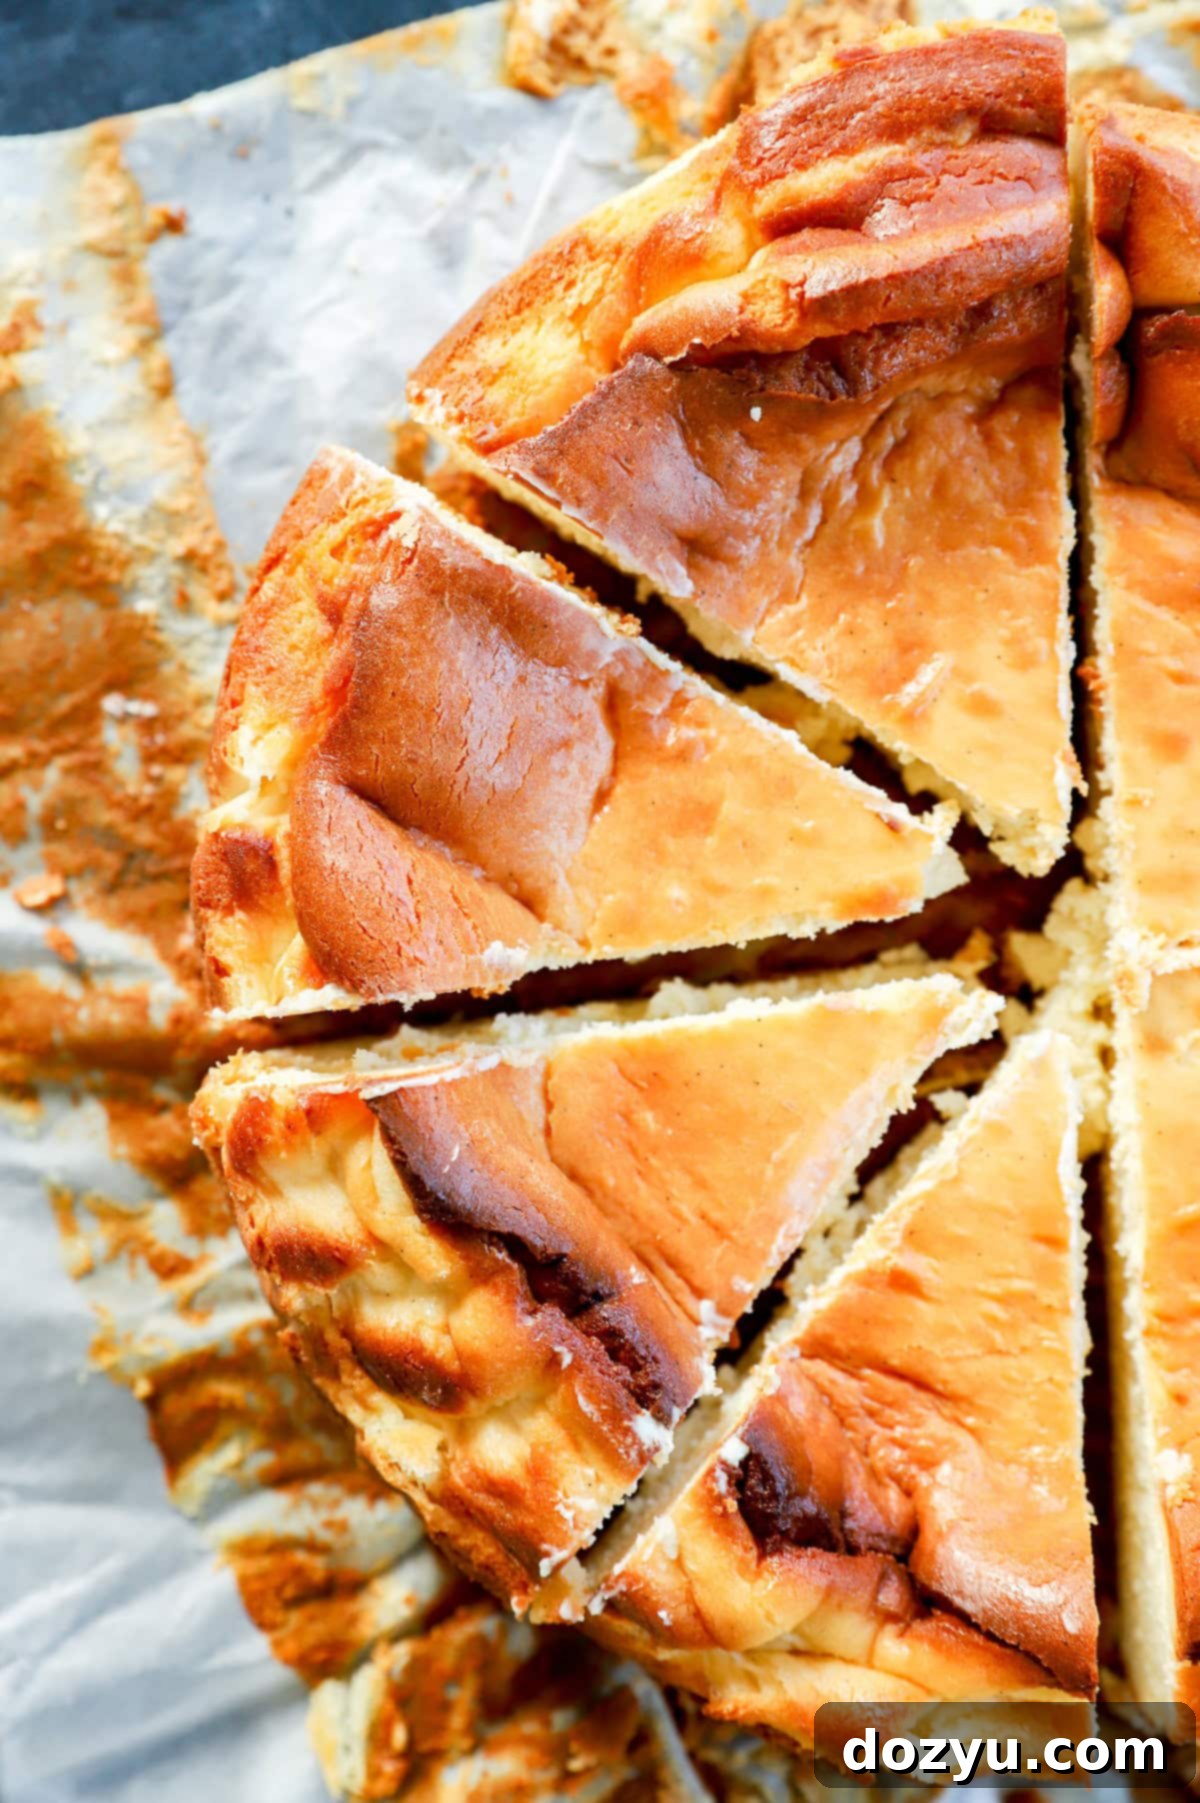
Get ready to indulge in the most effortlessly elegant dessert you’ll ever bake: the Vanilla Bean San Sebastian Cheesecake. Also known as the Basque Burnt Cheesecake, this delightful treat is renowned for its strikingly caramelized, almost “burnt” top and its incredibly tender, creamy, and custard-like interior. Forget the complexities of traditional cheesecakes – no need for a fussy crust or tedious water baths here! This recipe embraces simplicity while delivering a show-stopping dessert that promises a rich, genuine vanilla flavor in every bite. It looks absolutely stunning on any table, making it perfect for special occasions or simply elevating your everyday dessert experience.
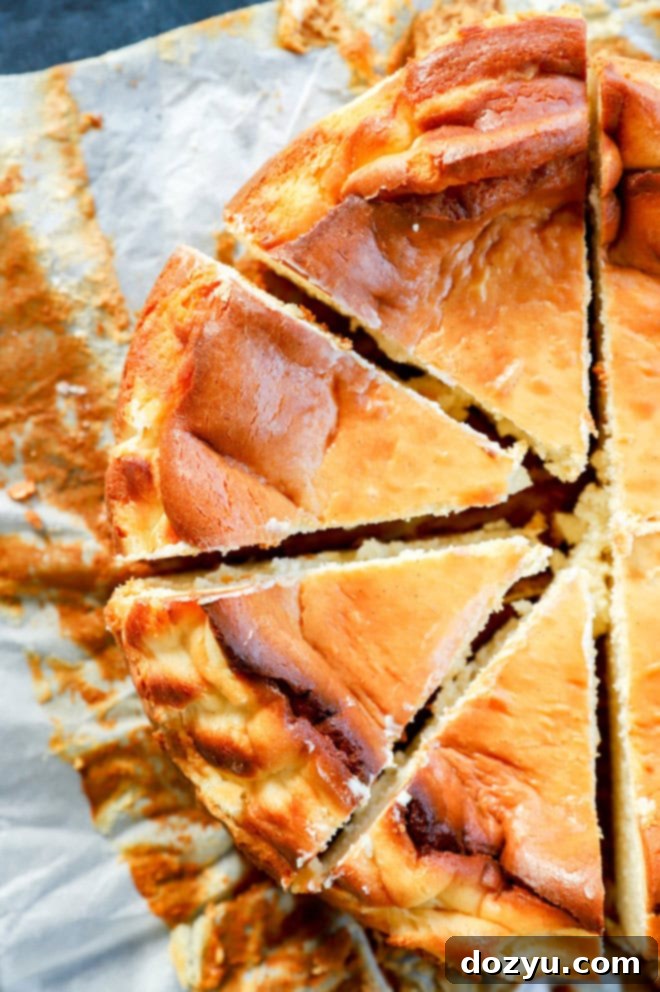
Table of Contents
Toggle
About This Exquisite Vanilla Bean San Sebastian Cheesecake
If you’ve ever had the pleasure of tasting a San Sebastian cheesecake, you’ll understand why it has captivated dessert lovers worldwide. This traditional Spanish delicacy, also affectionately known as a Basque burnt cheesecake, is given a luxurious upgrade in our rendition with the addition of aromatic vanilla bean. The result is a dessert that boasts a sumptuously rich and creamy center, perfectly complemented by its signature deeply caramelized, almost bittersweet top.
What sets this cheesecake apart from its conventional cousins is its forgiving nature. There’s absolutely no need to fret over a fragile crust or the dreaded water bath that often accompanies cheesecake baking. In fact, this cheesecake eagerly *wants* to develop a deeply golden-brown, even charred surface. This unique “burnt” characteristic isn’t a flaw but a feature, contributing a wonderfully complex toasted and caramel-like flavor that harmonizes impeccably with the smooth, silky vanilla bean filling.
Our recipe takes this classic to new heights by infusing it with genuine vanilla bean paste. You’ll notice beautiful specks of real vanilla throughout the filling, guaranteeing an authentic and intense vanilla flavor that simply can’t be replicated with standard vanilla extract. Each decadent bite is an experience of pure, unadulterated vanilla bliss. Moreover, this recipe is remarkably straightforward: a few simple steps of mixing, pouring, and baking will yield a dessert that’s both elegant and utterly delicious.
For those new to the world of Basque cheesecake, prepare to have your perceptions of cheesecake transformed. This style boldly defies the conventions of traditional cheesecakes, offering a delightful contrast between its robust, caramelized exterior and its impossibly delicate, almost molten interior. Trust us – once you experience this magical combination, you’ll be completely smitten.
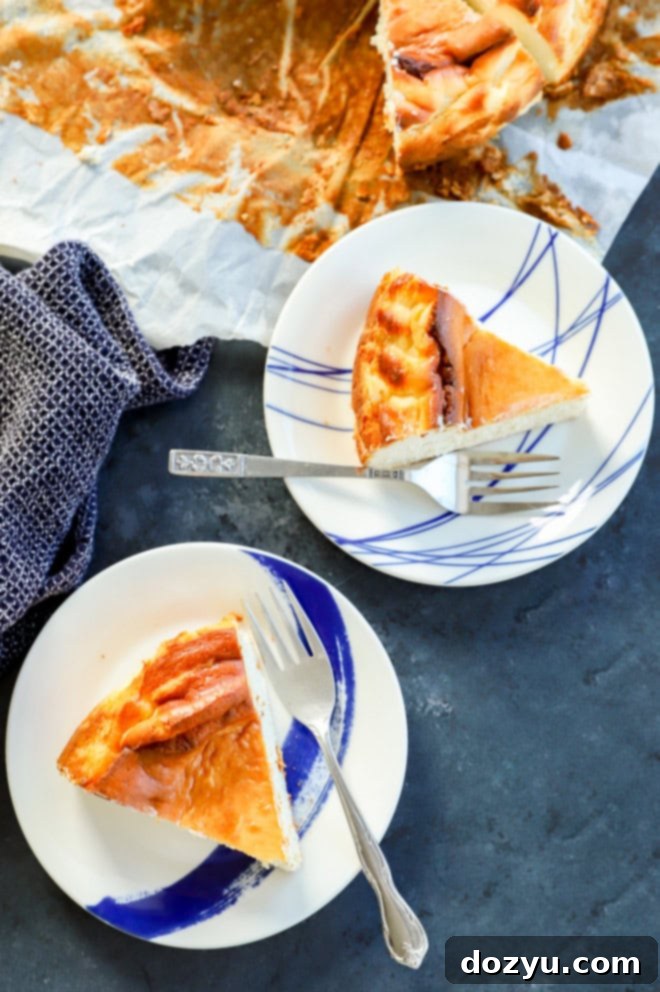
What Defines a Basque Burnt Cheesecake?
The San Sebastian cheesecake, more widely recognized as Basque burnt cheesecake, is a culinary marvel that originated in the Basque region of Spain. This particular style of cheesecake boldly deviates from the norm, making it a unique and sought-after dessert. Unlike its dense and firm American counterparts, a Basque cheesecake is characterized by its exquisitely creamy, almost custard-like texture in the center. It has no crust, embracing a delightfully minimalist approach that lets its rich, flavorful filling shine.
The most distinctive feature of this cheesecake is its deliberately “burnt” and deeply caramelized top. This isn’t an accident but a result of baking the cheesecake at a high temperature, which rapidly caramelizes the sugars on the surface. This intense browning creates a beautiful, rustic appearance and imparts a complex flavor profile – a delicious blend of bitterness, sweetness, and a toasted, almost smoky undertone that perfectly balances the creamy interior.
Its rustic charm is further enhanced by its preparation method. Typically baked in a springform pan lined with crumpled parchment paper. The paper extends high above the rim of the pan, creating natural wrinkles in the cheesecake’s edges as it bakes. This gives the finished dessert an organic, imperfect, yet utterly appealing look that speaks to its artisanal origins.
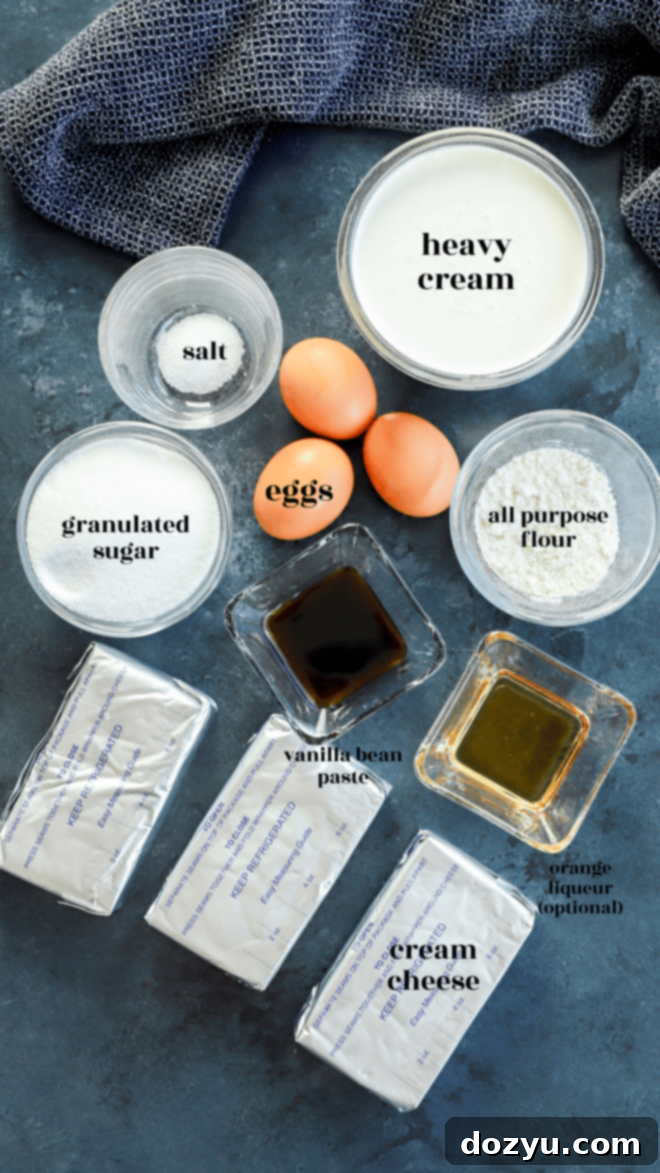
Essential Ingredients for Your Basque Cheesecake
Crafting this divine vanilla bean San Sebastian cheesecake requires a handful of simple yet high-quality ingredients. Here’s what you’ll need and why each component is crucial:
- Cream Cheese: The backbone of any good cheesecake. Always opt for full-fat cream cheese to achieve the signature richness and incredibly smooth texture. It’s imperative that your cream cheese is at room temperature; this ensures it blends seamlessly without lumps, creating a perfectly silky batter.
- Granulated Sugar: Provides the essential sweetness and contributes to the beautiful caramelization of the cheesecake’s top layer. Regular granulated sugar is all you need for this recipe.
- Vanilla Bean Paste: This is where the magic happens! Unlike vanilla extract, vanilla bean paste contains real vanilla bean specks, delivering a more intense, authentic, and visually appealing vanilla flavor. Use your favorite high-quality brand to truly elevate this dessert.
- Eggs: Large eggs are crucial for structure and richness. Just like the cream cheese, ensure your eggs are at room temperature. This helps them emulsify properly with the other ingredients, leading to a smooth, uniform batter and a consistent bake.
- Heavy Cream: This ingredient is key to achieving the unbelievably creamy, almost molten consistency that distinguishes a Basque cheesecake. Use heavy whipping cream for the best results.
- Orange Liqueur (Optional): A subtle touch of orange liqueur (such as Grand Marnier or Cointreau) can add a bright, fragrant note that beautifully complements the vanilla. If you prefer not to use alcohol, you can substitute with about 1/2 tablespoon of fresh orange zest or even lemon zest for a similar citrusy lift.
- All-Purpose Flour: A small amount of all-purpose flour provides just enough structure to the cheesecake, preventing it from becoming too liquidy while maintaining its tender, custardy texture.
- Kosher Salt: A pinch of fine kosher salt enhances all the other flavors, balancing the sweetness and bringing out the depth of the vanilla. Don’t skip this essential flavor enhancer in your baking!
Must-Have Tools for This Recipe
While the San Sebastian cheesecake is wonderfully unfussy, having the right equipment will make your baking process smooth and enjoyable:
- Mixer: For achieving that perfectly smooth batter, a stand mixer with a paddle attachment is ideal. It provides consistent mixing power and frees up your hands. Alternatively, a large mixing bowl with an electric hand mixer will work just as well. The key is to thoroughly combine the ingredients without overmixing, which can introduce too much air.
- Sifter or Fine Mesh Sieve: Essential for incorporating the flour and salt into your batter. Sifting ensures there are no lumps of dry ingredients, leading to a silky-smooth cheesecake texture.
- 8 to 9-inch Springform Pan: This is the standard pan for cheesecakes, allowing for easy removal once chilled. The removable sides make it simple to unmold your beautiful burnt Basque cheesecake without damaging its delicate structure.
- Parchment Paper: Crucial for lining the springform pan. You’ll need enough to extend several inches above the rim of the pan, creating those characteristic rustic, crinkled edges as the cheesecake bakes and rises. This also helps prevent sticking and makes cleanup a breeze.
Having these tools ready will ensure your baking experience is as stress-free as the recipe itself!
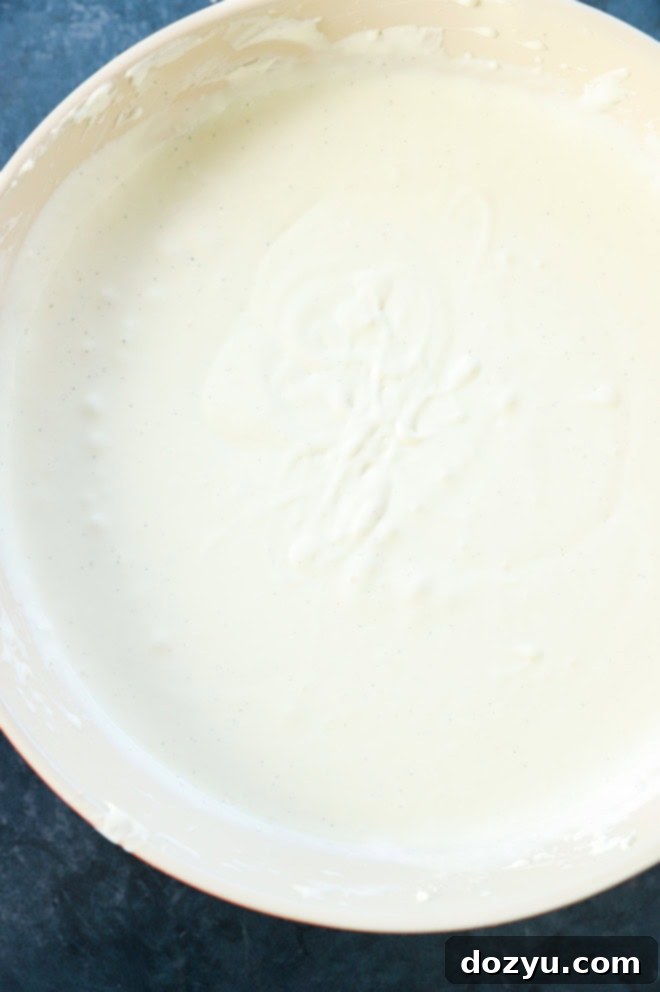
How to Bake the Perfect San Sebastian Cheesecake
Making this incredible vanilla bean San Sebastian cheesecake is surprisingly straightforward. Follow these steps for a dessert that’s guaranteed to impress:
Preparing the Creamy Wet Ingredients
- Start by ensuring your oven is preheated to 400˚F (200˚C). Line an 8 to 9-inch springform pan with parchment paper, allowing the paper to extend significantly above the rim of the pan. This will give your cheesecake its characteristic rustic, crinkled edges.
- In the bowl of a stand mixer fitted with the paddle attachment (or using a large bowl and an electric hand mixer), combine your room temperature cream cheese, granulated sugar, and vanilla bean paste. Beat these ingredients together on medium speed for about 2 minutes, until the mixture is completely smooth, light, and creamy. Remember to stop and scrape down the sides and bottom of the bowl frequently with a rubber spatula to ensure everything is thoroughly incorporated and no lumps remain.
- Next, add the large room temperature eggs, one at a time. Beat on low speed after each addition just until the egg is fully incorporated into the batter. Avoid overmixing at this stage, as too much air can alter the final texture.
- Finally, pour in the heavy cream and orange liqueur (if you’re using it). Continue to beat on low speed for about 30 seconds, just until everything is combined and the batter is smooth.
Incorporating the Dry Elements
- Sift the all-purpose flour and kosher salt directly into the cheesecake batter. Sifting is crucial here to prevent any flour lumps and to ensure a silky-smooth consistency. Beat on the lowest speed until the flour is just combined. Overmixing after adding flour can develop gluten, leading to a tougher texture, which we want to avoid for this tender cheesecake.
- Gently pour the prepared cheesecake filling into your parchment-lined springform pan. Give the pan a few gentle taps on the counter to release any large air bubbles.
Baking to Perfection
- Bake the cheesecake in your preheated 400˚F (200˚C) oven for 50 to 55 minutes. You’re looking for a specific appearance: the top should be a deep golden brown, almost charred in some spots, and the edges will appear puffed up. Critically, the center of the cheesecake will still be quite jiggly – this is exactly what you want for that signature creamy, custardy interior. Do not be tempted to bake it until it is firm!
- Once baked, remove the cheesecake from the oven and let it cool completely in the pan on a wire cooling rack at room temperature for about 1 to 2 hours. This gradual cooling is important for the cheesecake to set properly.
- After it has cooled at room temperature, carefully remove it from the springform mold (the parchment paper will help immensely). Transfer the cheesecake to the refrigerator and chill for a minimum of 4 to 6 hours, or ideally, overnight. This chilling period is essential for the cheesecake to fully set and for its flavors to meld.
- Serve your chilled vanilla bean San Sebastian cheesecake and prepare for an unforgettable dessert experience!
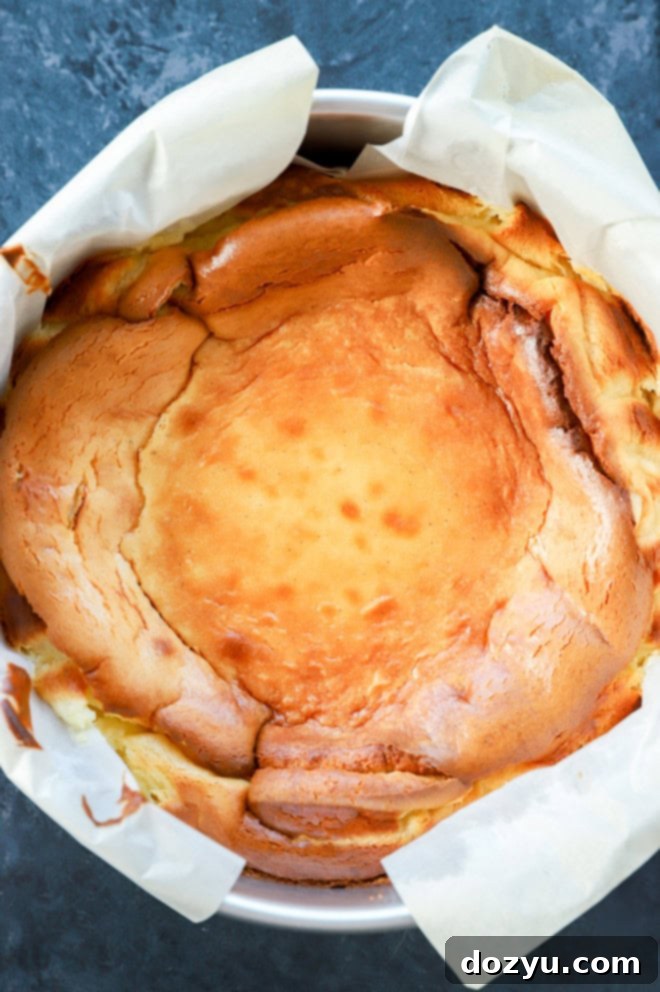
Pro Tips and Tricks for Success
While this cheesecake is incredibly forgiving, a few key tips will ensure your Vanilla Bean San Sebastian Cheesecake turns out absolutely perfect every time:
- Achieve the Perfect Room Temperature Ingredients: This is arguably the most crucial tip! Ensure your cream cheese and eggs are at true room temperature. Cold ingredients will lead to a lumpy batter and a less smooth cheesecake texture. Take them out of the refrigerator at least 1-2 hours before you plan to bake. This allows them to blend easily and create a homogenous, silky batter.
- Don’t Rush the Cooling Process: After baking, resist the urge to immediately transfer the hot cheesecake to the refrigerator. Allow it to cool gradually in the pan at room temperature for 1 to 2 hours. This slow cooling helps the cheesecake set properly and prevents cracking or a rubbery texture. Once cooled, then it’s time for the refrigerator to firm it up completely.
- Verify Your Oven Temperature: Ovens can be notoriously inaccurate. Using an oven thermometer is a small investment that can make a huge difference in your baking. If your oven runs too hot, the cheesecake will bake too quickly, potentially curdling the eggs and causing the batter to seep out or the texture to become uneven. If it runs too cool, it won’t achieve that characteristic burnt top. Adjust your oven temperature accordingly based on your thermometer’s reading.
- Master the Parchment Paper Technique: Don’t just line the bottom of your springform pan. Crumple a large piece of parchment paper (this makes it more pliable), then press it into the pan, ensuring it extends several inches (at least 2-3 inches) above the rim. The rustic wrinkles created by the crumpled paper are part of the Basque cheesecake’s charm and prevent the high-rising cheesecake from overflowing.
- Avoid Overmixing (Especially After Flour): While you want a smooth batter, overmixing, especially after the flour has been added, can develop too much gluten. This can result in a tougher, less creamy cheesecake. Mix only until ingredients are just combined.
- Trust the Jiggle: It might feel counterintuitive, but a significant jiggle in the center is exactly what you’re looking for when the cheesecake comes out of the oven. This indicates the center is still custardy and will set perfectly as it cools. Don’t bake it until it’s completely firm!
Delicious Variations to Explore
While the classic Vanilla Bean San Sebastian Cheesecake is undeniably perfect on its own, its simple base makes it an excellent canvas for creative flavor variations. Don’t be afraid to experiment!
- Citrusy Zest: Enhance the brightness of the cheesecake by adding fresh lemon zest or additional orange zest. About 1 tablespoon of finely grated zest can be incorporated with the wet ingredients for a lovely aromatic lift. Lemon juice (around 1-2 tablespoons) can also be added for a tangy twist, but be mindful of the liquid content.
- Chocolate Indulgence: For chocolate lovers, turn this into a decadent chocolate Basque cheesecake! You can swirl in melted dark chocolate into a portion of the batter or, for an easier approach, once the cheesecake is chilled, generously spread a layer of homemade or store-bought chocolate ganache over the top. A sprinkle of sea salt on top of the ganache creates a fantastic sweet-and-salty balance.
- Coffee Kick: Infuse your cheesecake with a sophisticated coffee flavor. Dissolve 1-2 tablespoons of instant espresso powder or finely ground coffee into the heavy cream before adding it to the batter. This creates a rich mocha-like depth.
- Spiced Versions: During the fall or winter months, warm spices can add a comforting touch. Incorporate 1 teaspoon of ground cinnamon, a pinch of nutmeg, or even a touch of cardamom (which pairs beautifully with vanilla) along with the flour for a spiced Basque cheesecake.
- Matcha Green Tea: For an earthy, vibrant flavor, whisk 1-2 tablespoons of ceremonial grade matcha powder with a small amount of warm heavy cream to form a paste, then incorporate it into the batter with the rest of the cream.
- Berry Swirl: Gently swirl in a few spoonfuls of your favorite berry jam or compote (like raspberry or blueberry) into the batter just before baking. This will create beautiful pockets of fruit flavor throughout the creamy cheesecake.
More cheesecake recipes to try out: Pecan Pie Cheesecake | Triple Berry Cheesecake | Raspberry Lemon Ricotta Cheesecake | Brûléed Instant Pot Eggnog Cheesecake | Baileys Cheesecake
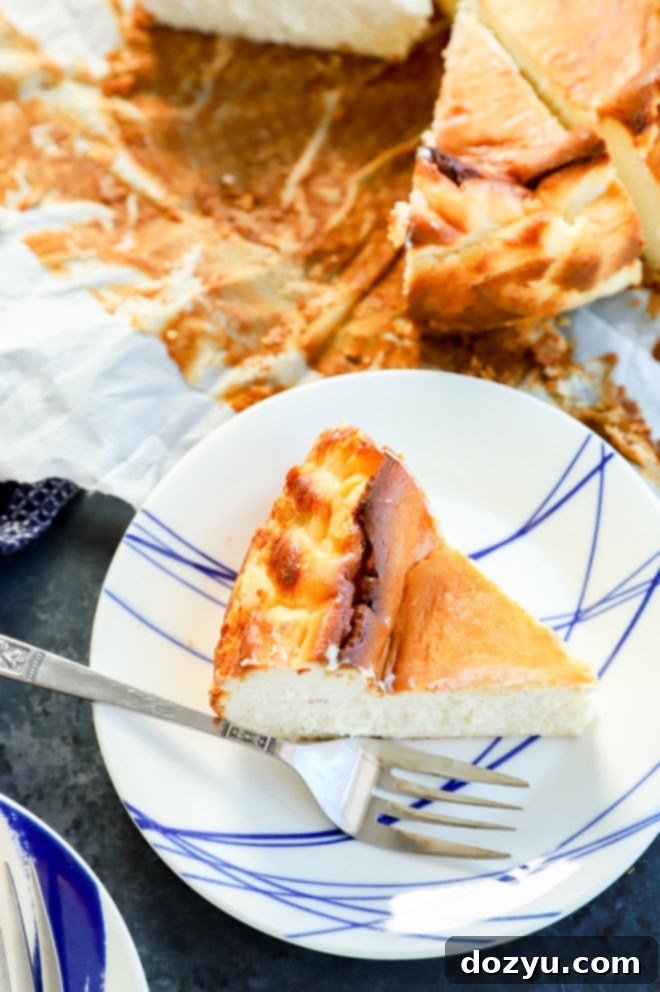
FAQ: San Sebastian vs. Regular Cheesecake – What Sets Them Apart?
The San Sebastian cheesecake, or Basque burnt cheesecake, is a distinct departure from the dense, often crumbly texture of a traditional American-style cheesecake. Here are the key differences:
- Texture: Regular cheesecakes aim for a firm, dense, and smooth texture. San Sebastian cheesecakes, on the other hand, are celebrated for their incredibly light, almost ethereal, and wonderfully creamy center that has a texture akin to a rich custard or crème brûlée.
- Crust: Traditional cheesecakes typically feature a graham cracker or cookie crust. Basque cheesecakes are famously crustless, allowing the focus to remain entirely on the rich, custardy filling.
- Baking Method & Appearance: Conventional cheesecakes are often baked in a water bath at lower temperatures to prevent cracks and achieve a uniform, pale top. The Basque cheesecake is baked at a much higher temperature (like 400°F / 200°C) with the explicit goal of achieving a deeply caramelized, often blackened or “burnt” top. This creates a striking visual contrast and imparts unique smoky and bittersweet notes that enhance the overall flavor profile. Cracks are also embraced, adding to its rustic charm.
- Rustic vs. Refined: Basque cheesecakes are known for their rustic, imperfect appearance, often with crinkled parchment paper edges. Traditional cheesecakes often strive for a perfectly smooth, unblemished surface.
FAQ: Can You Freeze This Cheesecake for Later?
Absolutely! This Vanilla Bean San Sebastian Cheesecake freezes beautifully, making it an excellent make-ahead dessert. To freeze it:
- First, ensure the cheesecake has been fully baked and has gone through the complete chilling process in the refrigerator as instructed. It needs to be firm before freezing.
- Once thoroughly chilled, remove it from the parchment paper.
- Wrap the entire cheesecake tightly in a layer of plastic wrap, ensuring no air can get in.
- Follow with a second layer of aluminum foil for added protection against freezer burn. Alternatively, you can place it in an airtight freezer-safe container.
- Store in the freezer for up to 3 months.
- When you’re ready to enjoy it, simply thaw the frozen cheesecake in the refrigerator overnight. Slice and serve cold.
FAQ: How Long Does a San Sebastian Cheesecake Last?
When stored correctly, your delicious Vanilla Bean San Sebastian Cheesecake will maintain its freshness and delightful flavor for a good amount of time. Once baked and fully chilled, cover the cheesecake tightly with plastic wrap or aluminum foil to prevent it from absorbing refrigerator odors and drying out. Stored this way in the refrigerator, it will last for up to 1 week. For more detailed storage instructions, refer to the “How to Store Your Basque Cheesecake” section below.
FAQ: How Do I Know When the Cheesecake Is Perfectly Baked?
Knowing exactly when to pull your Basque cheesecake from the oven is key to achieving its signature texture. This is often the trickiest part for new bakers, as it’s quite different from a conventional cheesecake. Here’s what to look for:
- Visual Cues: The top of the cheesecake should be a deep golden brown, approaching a dark caramel or even charred appearance in some spots. The edges will be visibly puffed up.
- The Jiggle Test: This is the most important indicator! Gently nudge the pan. The center of the cheesecake should still be quite jiggly, almost like a very thick liquid or soft custard. It will not have a slight wobble like a New York-style cheesecake; it will be a more pronounced jiggle. Do not wait for the center to set completely in the oven, as it will continue to cook and set as it cools.
If you bake it for too long, the eggs might curdle, leading to a grainy texture. If removed too soon, it won’t set properly and will be too runny. Once you see the deep brown top and observe that distinct jiggle in the center, it’s time to take it out!
After removing it from the oven, let it cool completely at room temperature for 1 to 2 hours. This crucial step allows the residual heat to finish cooking the cheesecake and helps it set. Only after this initial cooling should you transfer it to the refrigerator to chill for at least 6 hours, or preferably overnight, to fully firm up and develop its deep flavors.
FAQ: What If the Top Isn’t Dark Enough?
The “burnt” top is a defining characteristic of a San Sebastian cheesecake, contributing significantly to its unique flavor and aesthetic. If your cheesecake bakes through and the center sets, but the top hasn’t achieved that desired deep, dark caramelization, don’t worry – it’s an easy fix! You can simply use your oven’s broiler to finish the job.
- Broiler Method: Carefully place the cheesecake back into your oven, positioned on a rack roughly 6-8 inches below the broiler element. Keep a very close eye on it! Broilers work quickly, and you don’t want to actually burn it beyond caramelization. Broil for just 1-3 minutes, rotating the pan if necessary, until it reaches your preferred level of darkness. The goal is a deep golden brown with some charring around the edges. Remember, a little darker is better for this style of cheesecake, adding to its complex flavor.
There’s no wrong way to enjoy this delicious dessert, so customize the darkness of the top to your personal preference!
Need more inspiration for a sweet treat? Check out my dessert recipes page!
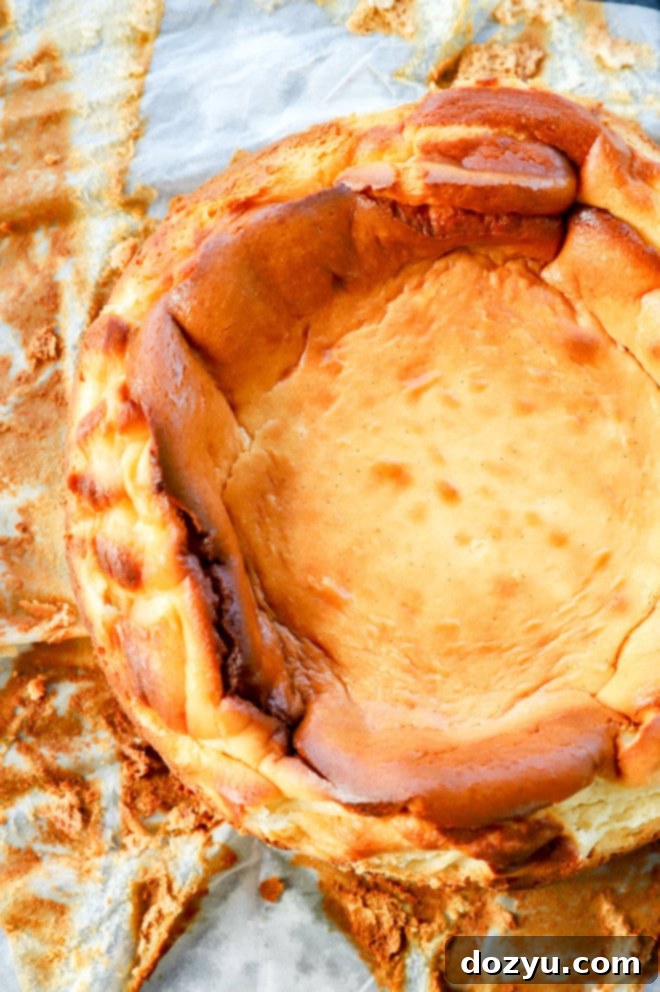
Serving Suggestions for Vanilla Bean Basque Burnt Cheesecake
The beauty of this Vanilla Bean San Sebastian Cheesecake is that it’s absolutely exquisite on its own, needing no embellishment. However, its rich, creamy texture and subtle vanilla notes make it a versatile base for various accompaniments. Here are some delightful ideas to elevate your serving experience:
- Classic Beverage Pairings: A slice of this luxurious cheesecake pairs wonderfully with a warm beverage. Consider serving it with a freshly brewed mug of hot chocolate, a comforting cup of tea, or a robust coffee. The warmth and slight bitterness of these drinks beautifully contrast the cheesecake’s sweetness and creaminess.
- Fresh Berries: A scattering of fresh berries like raspberries, blueberries, or sliced strawberries adds a burst of freshness, natural sweetness, and a lovely pop of color. Their slight tartness cuts through the richness of the cheesecake.
- Fruit Compotes or Jams: Spooning a vibrant fruit compote or a spoonful of your favorite jam or preserves over a slice can introduce another layer of flavor and texture.
- Raspberry compote: Its tart-sweetness is a classic pairing.
- Cranberry jam: Perfect for a festive touch or a tangier option.
- Rich Sauces: For an extra decadent treat, drizzle your cheesecake with a luscious sauce:
- Bailey’s hot fudge sauce: A boozy, chocolatey dream. Or simply use your favorite store-bought hot fudge sauce.
- Salted Caramel Sauce: The sweet and salty notes of caramel are a fantastic match for vanilla and the burnt top.
- Chocolate Ganache: A thin layer or drizzle of rich chocolate ganache will add another dimension of indulgence.
- Whipped Cream or Crème Fraîche: A dollop of lightly sweetened whipped cream or a spoonful of tangy crème fraîche can provide a delightful creamy counterpoint without overpowering the cheesecake’s flavor.
Experiment with these options to find your favorite way to enjoy this exquisite dessert!
How to Store Your Basque Cheesecake
Proper storage is essential to maintain the delicious taste and creamy texture of your Vanilla Bean San Sebastian Cheesecake.
- Refrigerating (Short-Term):
- Ensure the cheesecake has completely cooled to room temperature and then chilled in the refrigerator for at least 6 hours, or overnight, before storing.
- To store, cover the cheesecake tightly with several layers of plastic wrap, or place it in an airtight container. This will prevent it from drying out and absorbing odors from other foods in your refrigerator.
- It will keep well in the refrigerator for up to 1 week. Always serve it chilled for the best experience.
- Freezing (Long-Term):
- This cheesecake freezes exceptionally well. Once it has been fully baked, cooled, and thoroughly chilled in the refrigerator, it’s ready for the freezer.
- You can freeze the entire cheesecake or individual slices. For a whole cheesecake, remove it from the parchment paper. Wrap it first in a layer of plastic wrap, making sure it’s completely sealed, and then in a layer of heavy-duty aluminum foil. For individual slices, wrap each slice similarly.
- Place the wrapped cheesecake (or slices) into an airtight freezer-safe container or a heavy-duty freezer bag to protect it further from freezer burn.
- It can be stored in the freezer for up to 3 months.
- Thawing:
- When you’re ready to enjoy a frozen cheesecake, transfer it from the freezer to the refrigerator.
- Allow it to thaw slowly overnight in the fridge. This gentle thawing process helps maintain its creamy texture.
- Once thawed, it’s ready to be served chilled.
More Delightful Vanilla Recipes to Try at Home
If you’ve fallen in love with the rich, aromatic flavor of vanilla in this cheesecake, you’ll be thrilled to explore more vanilla-centric recipes that bring warmth and comfort to your kitchen:
- Elevate your baking with your own homemade vanilla extract! It’s surprisingly simple to make, requiring just two ingredients and a little patience. Plus, a beautifully bottled homemade vanilla extract makes for a thoughtful and fantastic gift for any fellow bakers or food enthusiasts in your life.
- For a perfect balance of sweet and spice, try vanilla bean cardamom cookies. These chewy cut-out cookies are ideal for any occasion, offering a unique and comforting flavor profile from the harmonious combination of vanilla bean and aromatic cardamom.
- A slice of mixed berry vanilla bean cake is an absolutely lovely and refreshing addition to any summer celebration. The vibrant berries complement the delicate vanilla bean, creating a light and flavorful dessert.
- Love cheesecake but prefer them in mini form? These adorable Oreo cheesecake bites are perfectly portioned for parties and gatherings, offering all the decadent flavor in a convenient, bite-sized package.
Finally, if you make this exquisite vanilla bean Basque burnt cheesecake recipe, please be sure to give this recipe a star rating on the recipe card and/or leave a comment! Your feedback is incredibly valuable, and I genuinely love to hear when you all create my recipes. I always take the time to respond to every single comment.
Feel free to drop any questions you have below, and I’ll be happy to help!
Oh, and be sure to tag me on Instagram, Facebook, or Pinterest if you make the recipe! It truly means the world to me to see these recipes come to life in your homes – looking through those photos is my absolute favorite thing. Thank you for sharing your culinary adventures!
Want to be the first to know when I release a new recipe or share the latest news? Sign up for my newsletter and stay updated!
Vanilla Bean San Sebastian Cheesecake
Ingredients
- 3 8 oz packages cream cheese, room temperature
- 3/4 cup granulated sugar
- 1 1/2 Tbsp vanilla bean paste
- 3 large eggs room temperature
- 1 1/2 cups heavy cream
- 1 Tbsp orange liqueur optional, or 1/2 Tbsp orange zest
- 1/4 cup all-purpose flour
- 1/2 tsp kosher salt
Instructions
-
Prepare the Oven and Pan: Preheat your oven to 400˚F (200˚C). Line an 8 to 9-inch springform pan with parchment paper, ensuring the paper extends at least 2-3 inches above the rim of the pan to create rustic, crinkled edges.
-
Cream Ingredients: In the bowl of a stand mixer fitted with the paddle attachment (or using a large bowl with an electric hand mixer), beat together the room temperature cream cheese, granulated sugar, and vanilla bean paste until the mixture is smooth and creamy. This typically takes about 2 minutes. Remember to scrape down the sides and bottom of the bowl as needed to ensure even mixing.
-
Incorporate Eggs: Add the large room temperature eggs one at a time, beating on low speed until each egg is fully incorporated before adding the next. Avoid overmixing once eggs are added.
-
Add Liquids: Pour in the heavy cream and orange liqueur (if using) into the mixture. Beat on low speed for about 30 seconds, just until well combined and the batter is smooth.
-
Sift in Dry Ingredients: Sift the all-purpose flour and kosher salt directly into the batter. Beat on the lowest speed until the dry ingredients are just combined. Be careful not to overmix at this stage.
-
Pour and Prepare for Bake: Pour the cheesecake batter into the prepared springform pan. Give the pan a few gentle taps on the counter to release any large air bubbles.
-
Bake: Bake for 50 to 55 minutes. The cheesecake should develop a deep golden brown, almost charred top. The edges will be puffed up, and the center will still be notably jiggly when gently nudged.
-
Cool and Chill: Let the cheesecake cool completely in the pan at room temperature on a cooling rack for about 1 to 2 hours. This gradual cooling allows it to set. Once cooled, carefully remove it from the mold and transfer it to the refrigerator. Chill for at least 4 to 6 hours, or preferably overnight, to fully set and enhance its flavors.
-
Serve: Slice and serve your delicious vanilla bean San Sebastian cheesecake chilled. Enjoy!
Video
Nutrition
