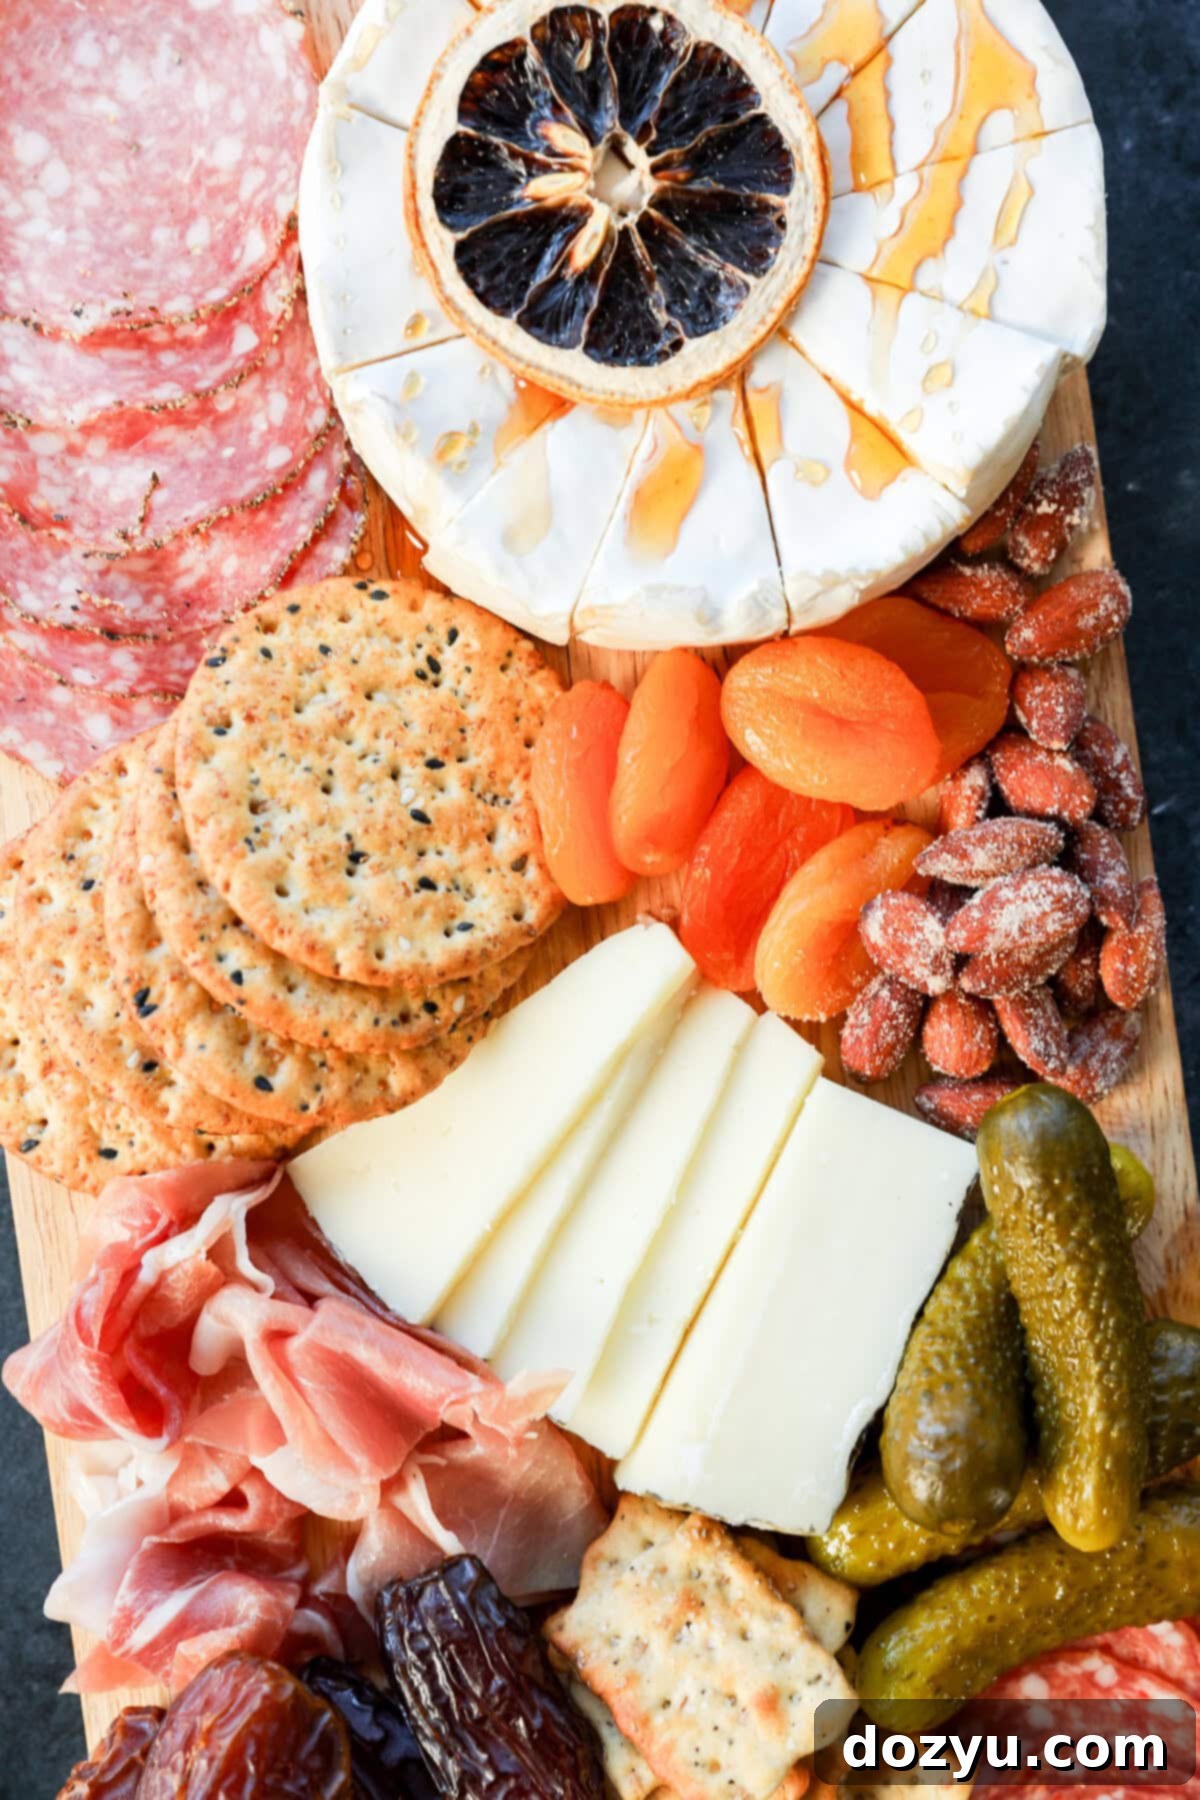
The Ultimate Guide to Easy Weeknight Charcuterie Boards: Impress with Minimal Effort
An Easy Charcuterie Board for any random weeknight? We say YES. Cheese boards don’t just have to be for fancy occasions. A little spread of meat and cheese plus a glass of wine at the end of any day is well-deserved! Elevate your evenings with minimal effort and maximum flavor.
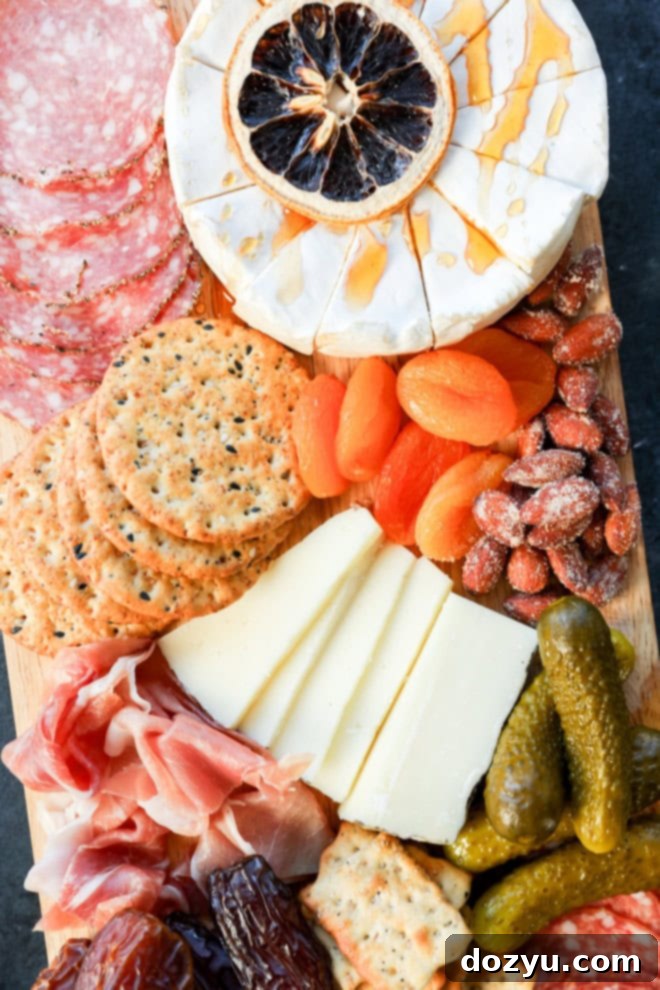
Table of Contents
About This Easy Charcuterie Board
Imagine this: the workday is done, the house is quiet, and you settle down with a beautiful, effortless spread of delectable cheeses, savory meats, and vibrant accompaniments. Paired with a glass of your favorite wine, it’s an instant calm, a moment of well-deserved indulgence. This isn’t just for special occasions; this is for *you*, any night of the week.
There’s an undeniable magic in grazing. The freedom to explore different flavors, mix textures, and create new culinary combinations with every bite is incredibly satisfying. A charcuterie board transforms a simple meal into an experience, turning a regular weeknight into something truly memorable. And yes, that glass of wine certainly plays its part in enhancing the serene ambiance!
Creating an impressive charcuterie board doesn’t require gourmet skills or expensive ingredients. The true secret lies in understanding how different elements complement each other, ensuring optimal serving temperatures, and knowing how to arrange everything visually. This comprehensive guide will walk you through everything you need to know, from selecting the perfect cheeses and meats to adding those delightful finishing touches and presentation hacks. Get ready to build a board that looks sophisticated but is surprisingly simple to put together.
Note: This article has been thoroughly updated and expanded from its original publication on January 31, 2017, to provide you with the most current tips, tricks, and recommendations for crafting your best charcuterie board yet.
What is the 3-3-3 Rule for Charcuterie Boards?
The 3-3-3 rule is a fantastic, foolproof method for creating a balanced and appealing charcuterie board, especially if you’re new to the art of grazing platters. It provides a simple framework that ensures variety without overwhelming you with choices. Essentially, it recommends selecting:
- 3 types of meat: Choose a variety of cured meats that offer different textures and flavor profiles.
- 3 types of cheese: Aim for a mix of hard, soft, and perhaps a familiar or common cheese to cater to all preferences.
- 3 types of accompaniments: These can include anything from fruits and nuts to spreads and crackers, adding contrast and interest.
The beauty of this rule lies in its simplicity. It guides you to create a dynamic board that offers plenty of delicious pairing options for your guests or just for yourself. By varying textures (creamy, crumbly, firm) and flavors (savory, sweet, tangy, spicy) within each category, your board will look more vibrant and taste more exciting.
Types of Cheese for an Easy Charcuterie Board
Selecting the right cheeses is crucial for any charcuterie board. For an easy weeknight version, focus on a mix of textures and flavors that complement each other. Aim for at least three distinct types:
- Hard Cheese: These cheeses are aged, offering rich, intense flavors and often a crumbly or firm texture. They are perfect for slicing and provide a robust base for your board.
- Examples: Aged Parmigiano-Reggiano (parmesan), Pecorino Romano, Asiago, Gruyère, Comté, or Manchego. These bring a delightful saltiness and depth that makes your taste buds sing.
- Semi-Hard or Common Cheese: These are often crowd-pleasers with a milder flavor profile and a firmer but still pliable texture. They serve as familiar and friendly anchors on your board.
- Examples: Sharp Cheddar, aged Gouda, Provolone, or creamy Jack cheese. These reliable picks play well with almost any accompaniment and are universally loved.
- Soft Cheese: Offering a luxurious, melt-in-your-mouth experience, soft cheeses are perfect for spreading and pairing with sweeter elements like jams or honey.
- Examples: Creamy Brie, tangy Goat Cheese (chèvre), Blue Cheese (such as Gorgonzola or Roquefort), or luxurious Burrata. These add a delightful contrast and a rich, decadent feel to your spread.
Don’t be afraid to mix and match to find your favorite combinations! The goal is to offer a range that excites the palate and invites exploration.
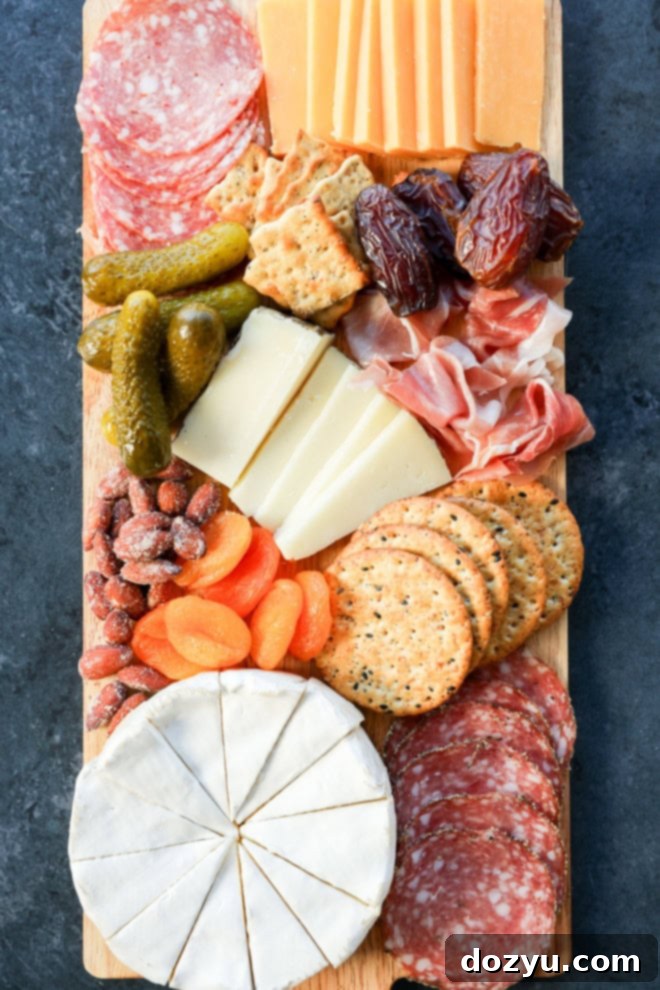
Here’s What You’ll Need for Your Simple Charcuterie Board
The golden rule for an *easy* charcuterie board is to keep things *simple* and focused on quality ingredients you genuinely enjoy. You don’t need a huge budget or rare items to create something spectacular. Here’s a breakdown of the core components:
Cheeses (2-3 types): Following the 3-3-3 rule, select a minimum of two, ideally three, cheeses that offer variety. A good balance usually includes one hard, one soft, and one semi-hard or common cheese. Feel free to explore different combinations based on your preferences and what’s available at your local store. The key is contrast in both flavor and texture.
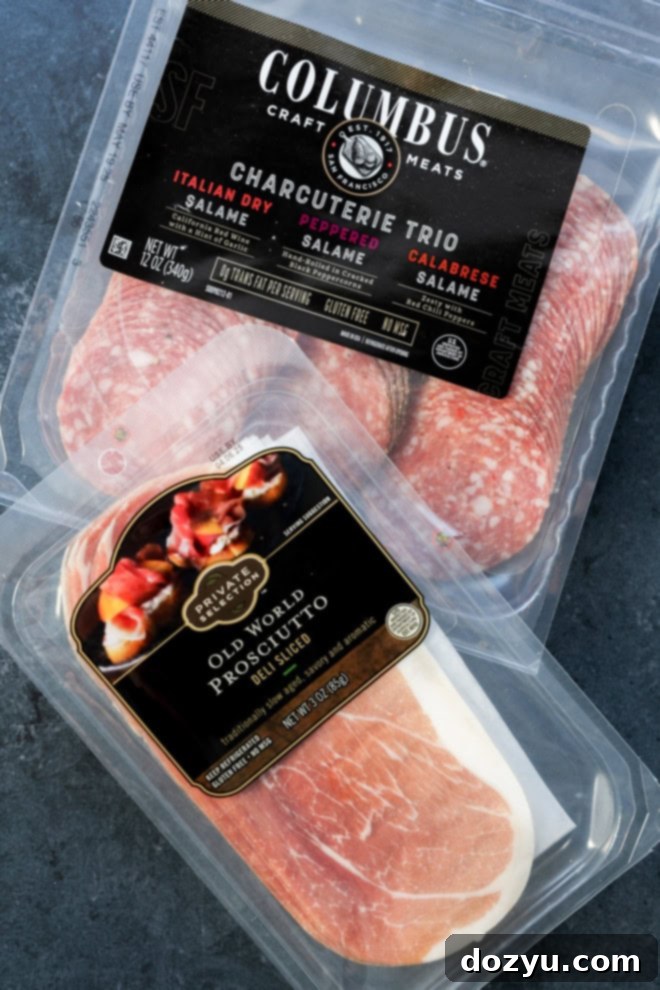
Meats (2-3 types): Cured meats add a savory, often salty, element that perfectly complements the cheeses. Choose a few that offer different textures and spice levels.
- Delicate & Salty: Thinly sliced prosciutto is always a winner.
- Spicy & Robust: Options like spicy salami, sopressata, or Calabrese provide a kick.
- Rich & Flavorful: Consider mortadella or speck for unique tastes. Coppa also offers a great balance of lean meat and fat.
Present them in different ways—folded, fanned, or rolled—to add visual appeal.
Crackers/Bread (2-3 options): These are the vehicles for your delicious pairings. Offer a selection that caters to different preferences and textures.
- Crusty: A sliced baguette or rustic Italian bread is essential for hearty bites.
- Crispy: A variety of crackers, from plain water crackers to artisanal options with seeds or herbs, adds a satisfying crunch.
- Flavorful: Consider breadsticks or a lightly toasted artisan bread for added depth.
Extras (Mix & Match): This is where you can really personalize your board and add bursts of flavor and color. Think about creating a balance of sweet, tangy, crunchy, and savory.
- Dried Fruits: Dates, apricots, raisins, figs, and cranberries add natural sweetness and chewy texture.
- Pickled & Tangy Elements: These cut through the richness of cheeses and meats. Think gherkins, cornichons, pickled red onions, olives (Kalamata, Castelvetrano), marinated artichoke hearts, or roasted red bell peppers.
- Nuts: Provide a satisfying crunch. Cashews, almonds, pistachios, pecans, or walnuts are excellent choices.
- Spreads & Dips: A touch of honey (especially hot honey!), fig jam, apricot preserves, or a savory olive tapenade can elevate any pairing.
- Fresh Fruit: Depending on the season, fresh fruit adds vibrancy and a refreshing contrast. Grapes, apple slices, strawberries, blueberries, raspberries, or pear slices are all fantastic options.
- Herbs (for garnish): Fresh sprigs of rosemary, thyme, or basil can fill in gaps and add an aromatic touch.
Essential Tools for Your Charcuterie Board
One of the best parts about an easy charcuterie board is how little equipment you need. The star of the show is your serving surface!
- Large Serving Platter or Board: A beautiful wooden cutting board (like a large acacia or bamboo board) is a classic choice, but a slate cheese tray, a ceramic platter, or even a large baking sheet can work wonderfully. Choose a surface that gives you plenty of room to spread out your ingredients without them feeling cramped.
- Sharp Chef’s Knife & Separate Cutting Board: Always slice your cheeses and meats on a separate cutting board before arranging them on your main serving platter. This keeps your presentation board clean and allows for precise cuts.
- Small Bowls or Ramekins: These are indispensable for holding jams, honey, olives, nuts, or any other smaller, potentially messy items. They help to contain liquids and add varying heights to your board, making it more visually appealing.
- Cheese Knives: Provide a few small knives or spreaders for different types of cheese (a soft cheese spreader, a firm cheese knife, etc.) so guests can easily serve themselves.
- Small Spoons or Tongs: Useful for serving pickled items, nuts, or jams.
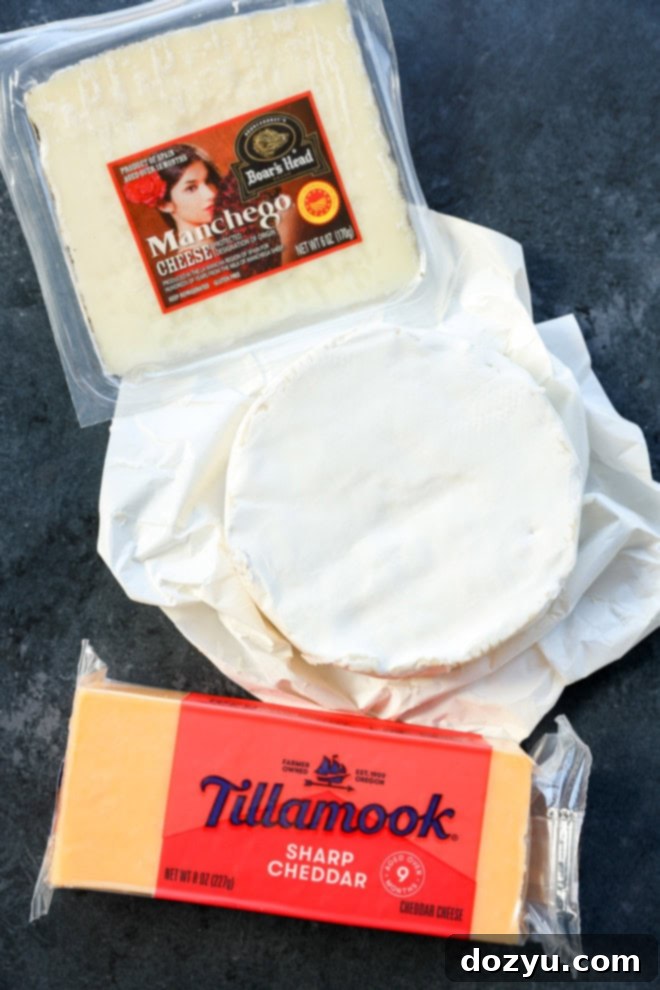
How to Assemble a Last-Minute Charcuterie Board: Step-by-Step
Assembling a charcuterie board is more art than science, but following a few simple steps can make the process smooth and enjoyable, even when you’re short on time. Remember, the goal is to make it look abundant and inviting!
Start with Bowls
Begin by placing any small bowls or ramekins on your serving board. These will hold items like jams, honey, olives, or nuts. Think of them as anchors for your design. It’s much easier to arrange larger items around these fixed points than to try and squeeze them in later. Distribute them strategically across the board to create visual interest and break up large sections.
Add the Meats
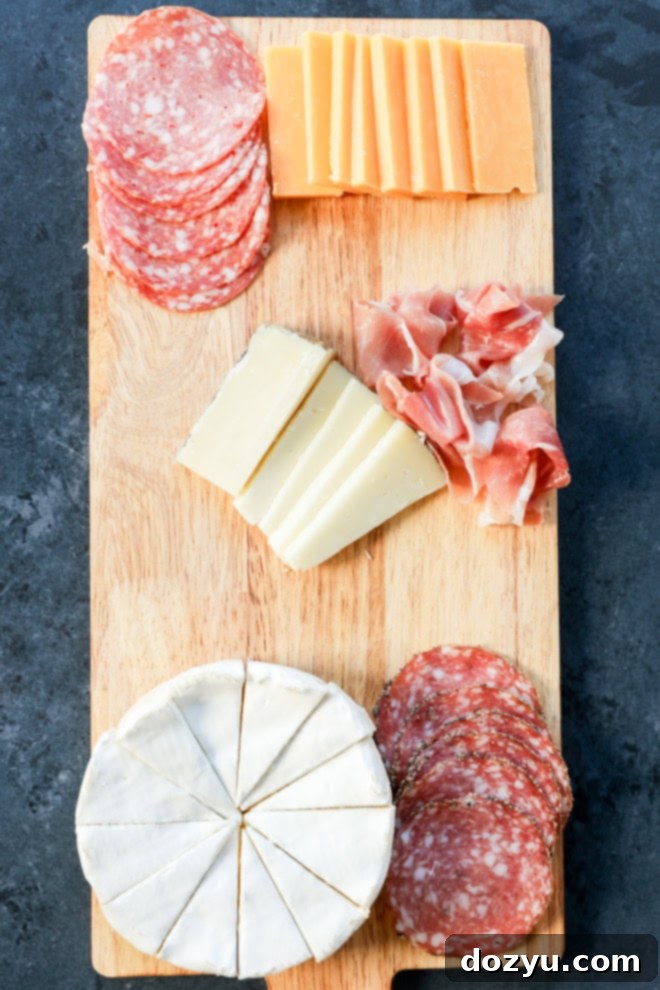
Next, arrange your cured meats. Presentation is key here! Instead of just laying slices flat, try to add volume and texture.
- Prosciutto: Fold it loosely into little piles or create elegant “roses” by gathering a slice and gently twisting it.
- Salami & Soppressata: Fan out slices, layer them in rows, or even fold larger slices into quarters.
Space the different types of meat evenly across the board. This not only creates a beautiful visual but also ensures that guests can easily access a variety of options without having to reach too far.
Place the Cheeses
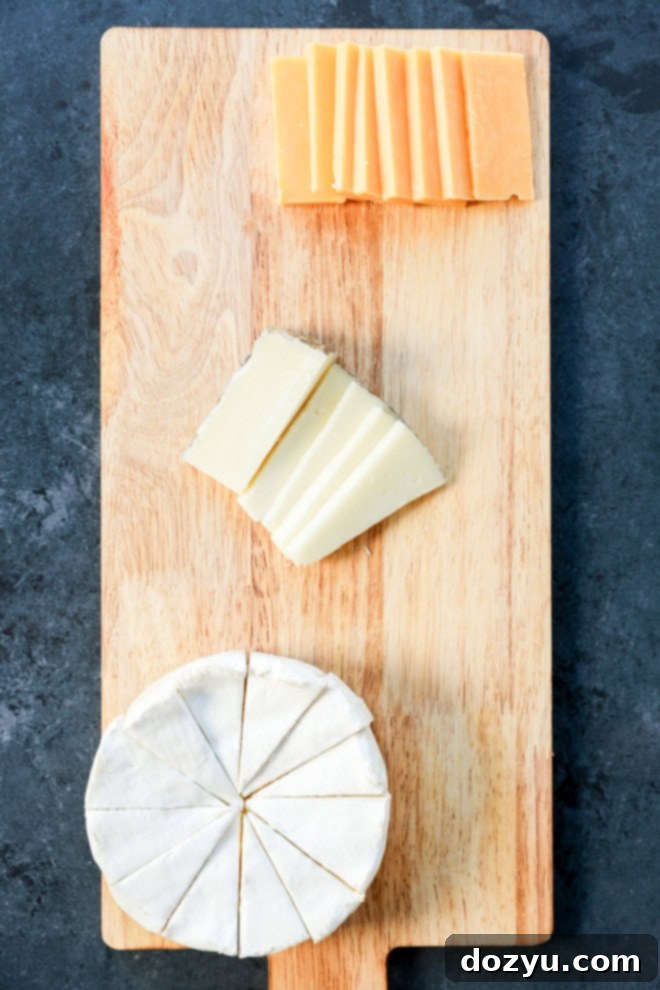
Once your meats are in place, it’s time for the cheeses. Remember to prep them first!
- Hard Cheeses: Slice blocks of cheddar or Parmesan into cubes, wedges, or thin shards. Arrange them in small piles.
- Soft Cheeses: Cut brie into neat wedges or leave it whole with a small knife nearby for spreading. Crumble blue cheese or Gorgonzola into a small section or bowl. If using goat cheese, consider rolling it in herbs or crushed nuts for added flavor and visual appeal.
Vary the placement of your cheeses, ensuring that soft and hard varieties are distributed across the board for easy access and pairing.
Fill with Extras
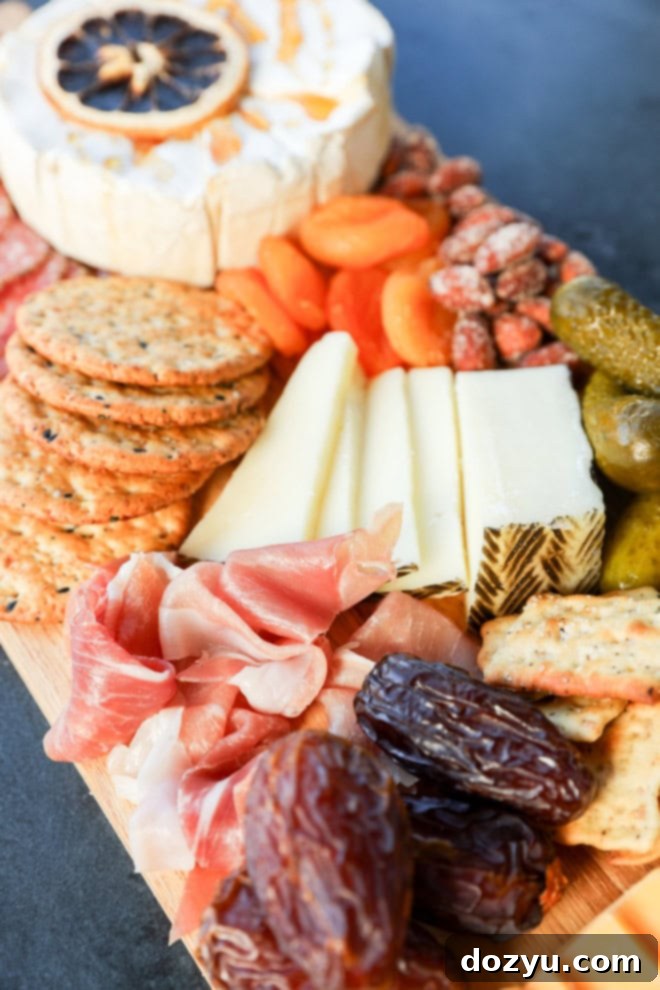
Now for the fun part: filling in all the empty spaces! This is where your board truly comes alive and looks abundant.
- Crackers & Bread: Tuck in piles of crackers and slices of baguette around the cheeses and meats. Fan them out for an inviting look.
- Fruits & Nuts: Strategically place clusters of grapes, slices of apple, dried fruits, and nuts in any remaining gaps. Use these to add pops of color and texture.
- Pickled Elements: Place gherkins, olives, and pickled vegetables directly into the bowls you positioned earlier, or artfully arrange them in small clusters on the board.
If you still have small empty spots, fresh herbs like sprigs of rosemary or thyme are perfect for garnishing. They add a fresh aroma and a touch of greenery that makes the board look even more professional and appealing. The goal is to create a vibrant, overflowing landscape of deliciousness!
More easy board ideas to try: Fruit Charcuterie Board | Italian Charcuterie Board | Breakfast Charcuterie Board | Halloween Dessert Charcuterie Board

How Long Can a Charcuterie Board Sit Out?
To ensure your charcuterie board offers the best flavors and textures, it’s generally recommended to take your cheeses and cured meats out of the refrigerator about 30-60 minutes before serving. This allows them to come to room temperature, which truly enhances their aroma and taste profile. A cold cheese or meat won’t be as flavorful or have the ideal texture.
However, once assembled, keep a close eye on the clock! The general rule of thumb for food safety is that perishable items, like most cheeses and meats, should not be left at room temperature for longer than two hours. If your gathering extends beyond this time, especially in a warm environment, it’s best to wrap up any remaining goodies and pop them back into the fridge. While some hard, aged cheeses might be more forgiving, it’s always better to err on the side of caution to prevent spoilage and ensure everyone’s enjoyment.
What to Avoid on Your Charcuterie Board: 5 Key Tips
While charcuterie boards are all about variety and personal preference, some items are best left off, especially for an easy, fuss-free board. Avoiding these common pitfalls will ensure your board stays fresh, appetizing, and doesn’t overpower other flavors:
- Raw Garlic or Onions: The strong, pungent flavor and aroma of raw garlic and onions can quickly dominate the entire board, overwhelming the delicate tastes of cheeses and meats. Save these for cooked dishes or where their intense flavor is the star.
- Soft, Easily Browning Fruits (like Bananas): Fruits that quickly oxidize and turn brown, or become mushy when cut (like bananas, some peeled apples if not treated), should be avoided. They can make your board look unappetizing and become quite messy. Stick to sturdier fruits like grapes, berries, or citrus segments.
- Strong-Smelling Fish (e.g., Anchovies, Sardines): While delicious in their own right, highly aromatic fish can impart their strong scent and flavor to other items on the board. This can be off-putting for many and detract from the intended balance of flavors.
- Mayo-Based Dips or Spreads: If you plan for your board to sit out for more than a short period, avoid dips or spreads that contain mayonnaise. They are highly perishable and tend to spoil quickly at room temperature, posing a food safety risk. Opt for jams, honey, or olive tapenade instead.
- Super Spicy Peppers (e.g., Habanero, Scotch Bonnet): Extreme heat can easily transfer to other components on the board, leading to unexpected and overwhelming spice for unsuspecting guests. It’s difficult to prevent cross-contamination, so it’s safer to omit them or serve them completely separately if you must include them.
How Much Meat and Cheese Per Person?
Planning the right quantity of ingredients is essential for a successful charcuterie board. You want it to look abundant without creating excessive waste. Here’s a straightforward guide to help you portion correctly:
Serving as an Appetizer or Pre-Dinner Snack? If your charcuterie board is meant to whet appetites before a main meal, aim for approximately 3 ounces of total meat and cheese per person. This amount allows everyone to enjoy a good variety of nibbles without filling up too much before the main course.
Making it the Main Event (Light Meal)? If the charcuterie board is the star of the show – perhaps for a casual dinner or a relaxed evening with friends – then you’ll want to increase the portions significantly. Plan for about 6 ounces of total meat and cheese per person. This ensures everyone feels satisfied and happy, making the board a fulfilling and enjoyable meal.
For all the extras (fruits, nuts, crackers, jams, and spreads), you can be a bit more flexible. Use your best judgment based on the number of people and the amount of meat and cheese you’re providing. The beauty of a grazing board is its versatility – you can always add more of what catches your eye as you go!
✨ Pro Tip: When in doubt, round up when buying your ingredients. A generously stocked board not only looks more inviting and impressive but also guarantees that everyone gets their fill of their favorite items. Plus, who ever complained about having leftover delicious cheese?
Quick Shopping Math Examples:
- 8 guests for appetizers: 8 people x 3 oz/person = 24 oz (or 1.5 lbs) total meat and cheese.
- 8 guests for a light dinner: 8 people x 6 oz/person = 48 oz (or 3 lbs) total meat and cheese.
This simple math helps you shop efficiently and ensures your board is perfectly tailored to your gathering.
Need more inspiration for appetizers? Check out my appetizer recipes page for delicious ideas!
What to Serve with Your Easy Charcuterie Board
The true beauty of an easy charcuterie board is its self-sufficiency. It’s a complete culinary experience all on its own, functioning perfectly as a stand-alone appetizer, a light lunch, or even a casual dinner. You don’t *need* anything else to make it a fantastic spread!
However, if you’re looking to elevate the experience or pair it with a refreshing beverage, consider these simple and approachable cocktail recommendations:
- Wine: A charcuterie board practically begs for wine. A versatile red like a Pinot Noir, a light-bodied Merlot, or a crisp white such as Sauvignon Blanc or Pinot Grigio would be excellent choices, complementing various cheeses and meats. For a festive touch, a dry sparkling wine like Prosecco or Cava also pairs beautifully.
- Classic Red Sangria: If you’re entertaining a group, a big batch of classic red sangria is an excellent choice. Its fruity and refreshing notes provide a wonderful contrast to the rich flavors of the board.
- Flavorful Margarita: For something with a bit more zest, a well-crafted Patron margarita offers a smooth and flavorful accompaniment that cuts through the richness and adds a vibrant twist to your evening.
- Limoncello Spritz: For those who prefer something light and bubbly, a Limoncello Spritz is an ideal refresher. Its bright, citrusy notes complement almost any flavor profile on your charcuterie board, adding a touch of Italian elegance.
No matter your choice, ensure the drink complements rather than competes with the diverse flavors of your easy charcuterie board.
Explore Seasonal Charcuterie Board Ideas
Charcuterie boards are incredibly versatile and can be adapted to perfectly capture the essence of any season. By incorporating seasonal produce and thematic elements, you can create a unique and memorable grazing experience throughout the year.
- Springtime Gatherings: For fresh and vibrant springtime celebrations, try an Easter charcuterie board! You can include delightful Easter-themed candies and pastel accents, or simply focus on crisp, new-season vegetables, lighter cheeses, and fresh berries for a purely springtime-focused celebration.
- Summer Refreshment: Our summer charcuterie board is designed to burst with fresh produce, juicy fruits, and refreshing dips. It’s perfect for picnics, barbecues, or any warm-weather gathering, offering a light and cooling spread that truly celebrates the season.
- Autumn Harvest: This fall charcuterie board serves as a simple yet stunning centerpiece, highlighting the rich, earthy flavors and warm colors of autumn. It’s ideal for cozy evenings, harvest festivals, and is particularly fantastic as an appetizer for Thanksgiving gatherings.
- Winter Holiday Festivities: During the bustling winter holiday season, a very merry Christmas cheese board brings festive cheer to any table. It’s easy to customize with seasonal treats, rich cheeses, and vibrant reds and greens, no matter the size of your gathering.
Seasonal Ingredient Tip
When adding fresh produce to your charcuterie board, always prioritize ripe, in-season fruits and vegetables. They will offer the best flavor, texture, and visual appeal. For guidance on what’s currently in season, refer to our helpful seasonal cooking quick start guide. This ensures your board is always as fresh and delicious as possible!
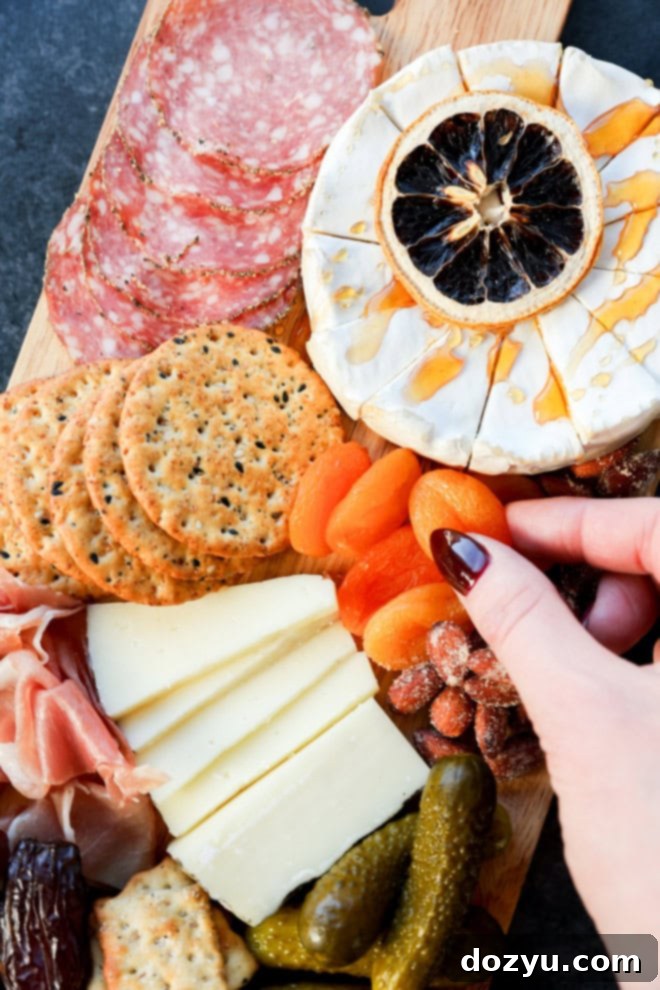
Finally, if you create this easy charcuterie board, please be sure to give this recipe a rating and/or leave a comment! I absolutely love hearing about your culinary adventures and take the time to respond to every single comment. Your feedback is truly invaluable!
Feel free to drop any questions you might have in the comments section below – I’m here to help.
Oh, and make sure to tag me on Instagram, Facebook, or Pinterest if you make the recipe! It brings me immense joy to see these recipes come to life in your homes and kitchens. Seeing your photos genuinely means the world to me!
Want to stay updated with my latest recipes and news? Don’t forget to sign up for my newsletter!
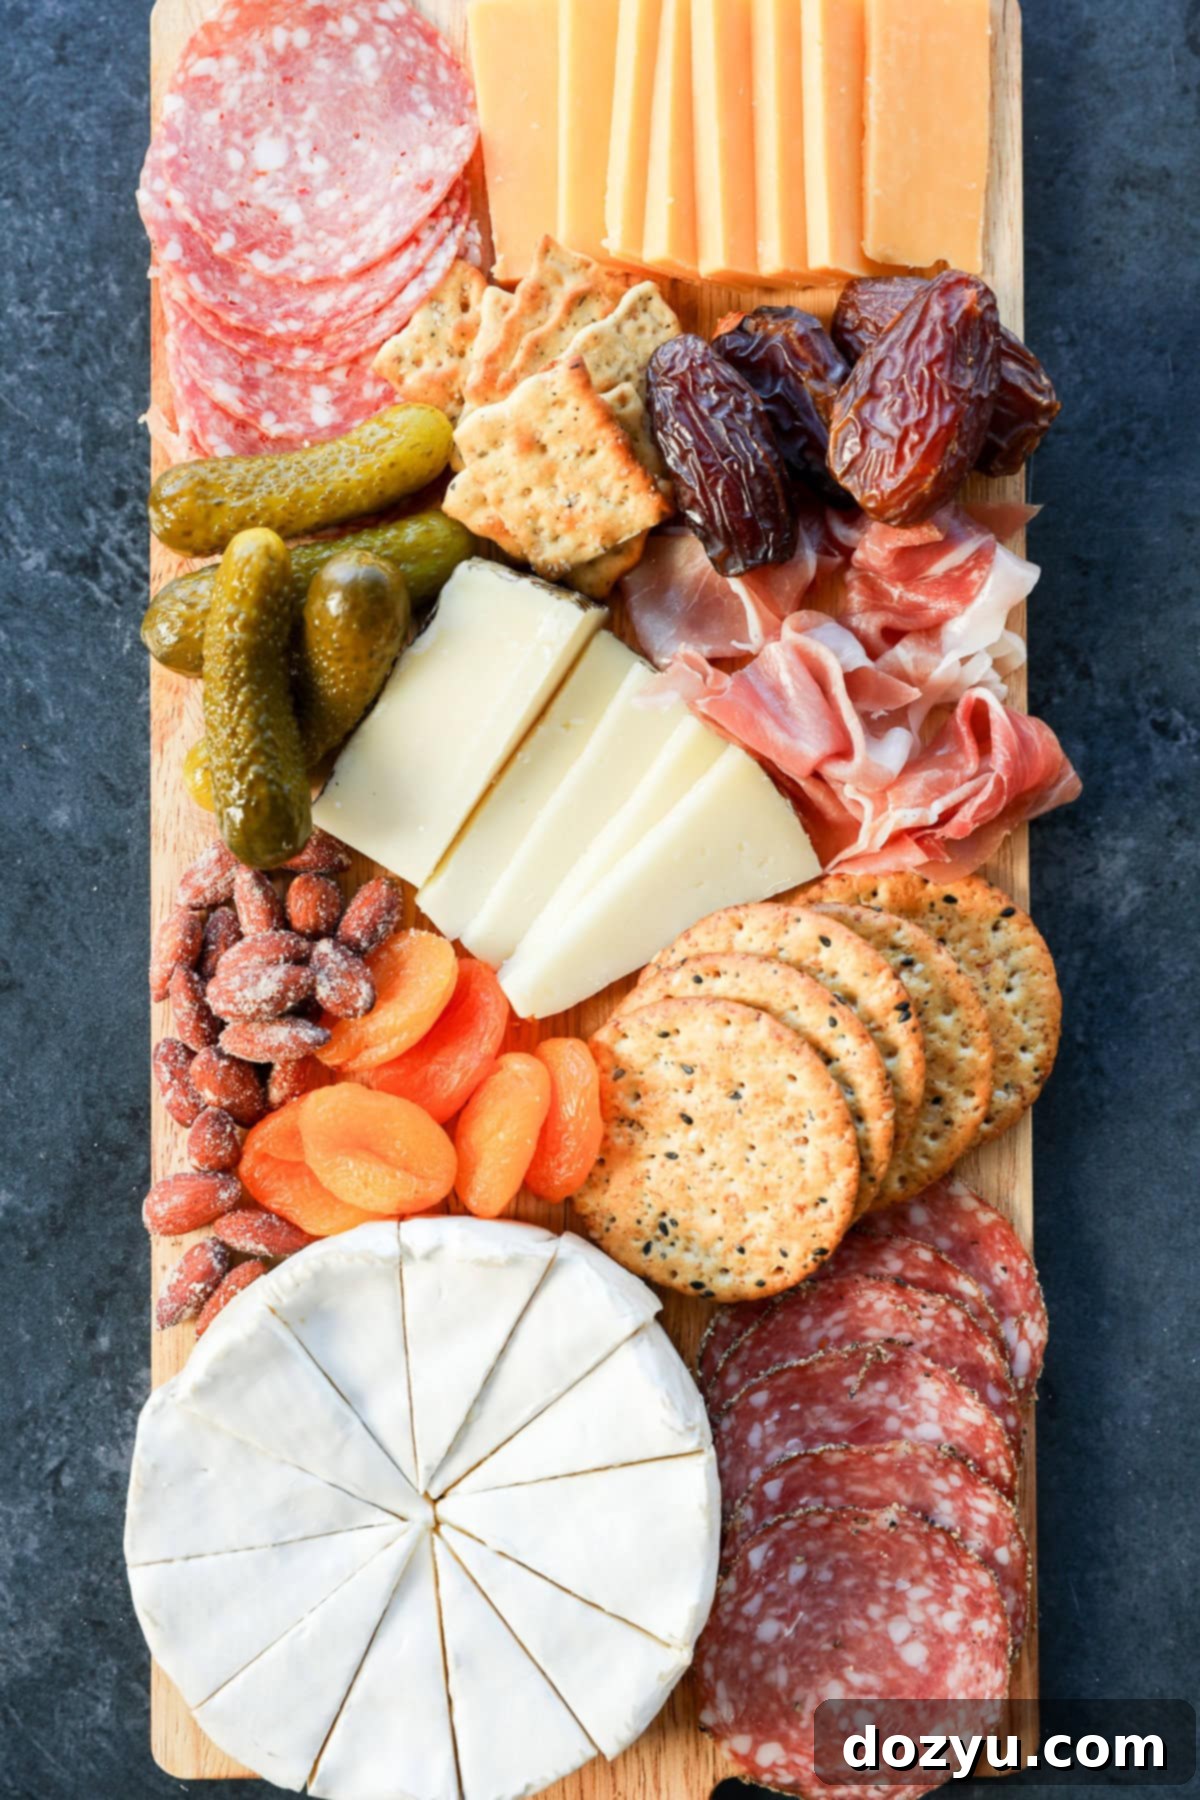
Easy Weeknight Charcuterie Board
10
10
4
Ingredients
- Hard Cheese: Parmigiano Reggiano or Manchego
- Semi-Hard Cheese: Sharp Cheddar or Aged Gouda
- Soft Cheese: Brie, Goat Cheese, or Blue Cheese
- Prosciutto
- Salami (e.g., Genoa, Calabrese)
- Sopressata or Mortadella
- Dried fruits: dates, apricots, raisins, figs, cranberries, etc.
- Pickled or tangy elements: gherkins, pickled red onion, various pickled vegetables, olives (green or black), marinated artichoke hearts, roasted red bell peppers
- Nuts: cashews, almonds, pistachios, pecans, walnuts
- Jams & Spreads: fig jam, cranberry jam, honey (or hot honey)
- Carriers: assorted crackers, sliced baguette or crusty bread
- Fresh Fruit (optional): grapes, berries, apple or pear slices
- Fresh Herbs (optional garnish): rosemary, thyme, basil
Instructions
-
Prepare Ingredients: Slice or cube hard cheeses, crumble blue cheese, and cut soft cheeses into manageable pieces. Fold or fan out cured meats for visual appeal.
-
Start with Bowls: Place any small bowls or ramekins for jams, honey, or olives onto your large serving tray, wooden board, or slate. Distribute them strategically.
-
Add Meats: Arrange the prepared cured meats in various sections around the bowls, ensuring different types are spaced out to build texture and easy access.
-
Place Cheeses: Add the prepped cheeses to the board, making sure to spread them out and pair them near complementary meats or crackers.
-
Fill with Extras: Fill in all remaining empty spaces with your chosen extras: crackers, sliced bread, dried fruits, fresh fruits, nuts, and pickled elements. Use fresh herbs like thyme or rosemary to garnish any lingering gaps for a polished look.
-
Serve: Provide cheese knives for easy serving. Allow the board to sit at room temperature for 15-30 minutes before serving to enhance flavors. Enjoy with your favorite wine or beverage!
Video Guide
This video provides a helpful visual walkthrough of the assembly process for your easy charcuterie board.
Appetizer, Snack, Light Meal
