Mastering Freezer Meal Prep: Your Ultimate Guide to Easy & Delicious Make-Ahead Meals
Welcome to the definitive guide on how to efficiently and effectively manage your freezer meal prep! This comprehensive post will walk you through every step of the process, from initial planning to expertly packing and freezing a variety of meals and baked goodies for convenient future use. Whether you’re anticipating a significant life event, such as the arrival of a new baby, or simply aiming to integrate monthly meal prep into your routine, this guide is your go-to resource for making freezer meals a seamless part of your life.
Following overwhelming interest and numerous responses on Instagram about my freezer meal prep routines, I realized the value in consolidating my entire process into one accessible guide. My vision for this year and beyond includes sharing more behind-the-scenes insights into how I manage meal prep, especially as life evolves and new challenges, like caring for a baby, emerge. Starting with freezer meals felt like the perfect foundation.
In essence, there are two primary approaches to freezer meal prep. One involves preparing a substantial stash of meals for a specific period when cooking will be difficult or undesirable – perhaps for welcoming a new baby, recovering from an illness, or supporting a friend in need. The second approach is to seamlessly integrate freezer meal prep into your ongoing lifestyle, ensuring a consistent supply of convenient dinners throughout the week or month.
Regardless of your motivation, the fundamental process remains largely the same, differing mainly in the intensity and timeline of your prep sessions. Freezer meal prep is a surprisingly simple habit to cultivate, often proving less demanding than conventional weekly meal prep, which typically involves cooking individual components and portioning meals for immediate consumption. With freezer meals, you’re investing time upfront for significant returns later.
By focusing on straightforward, freezer-friendly options like sheet pan meals, Instant Pot recipes, or a variety of baked goods, you can quickly and effortlessly stock your freezer. This proactive approach not only saves you precious time and mental energy on busy days but also helps reduce food waste and ensures healthy, homemade meals are always within reach. Let’s dive into the details of creating your personalized freezer meal strategy!
table of contents
Toggle
Your Step-by-Step Freezer Meal Prep Process
Embarking on your freezer meal prep journey is a fantastic way to take control of your kitchen and your time. I’m excited to guide you through my proven process, from the initial brainstorming phase to the final organized freeze. By following these steps, you’ll be able to create a freezer full of ready-to-cook meals and treats that will simplify your life, especially during demanding periods.
Determine Your Meal Prep Strategy
The very first step to successful freezer meal prep is to clarify your purpose. Are you preparing for a specific, intense period where daily cooking will be impossible or highly inconvenient (e.g., preparing for the arrival of a new baby, providing meals for a sick friend or family member, or recovering from surgery)? Or are you aiming to integrate freezer meal prep as a regular habit to make a couple of weeknight dinners effortless and ready to cook?
For my personal freezer meal prep before my baby’s arrival, my objective was clear: to have at least two weeks’ worth of dinners, along with a selection of breakfasts that could also serve as quick, nutritious snacks. This foresight allowed us to navigate those initial, sleep-deprived weeks with our newborn without the added stress of deciding what to cook, ensuring we still enjoyed healthy, homemade meals. This kind of “event-based” prepping requires a strategic timeline.
If you’re prepping for a specific period, advanced planning is paramount. Consider how many meals you can realistically prepare each week without feeling overwhelmed. For instance, I aimed for 4 to 5 meals per week, starting at least a month before my 37-week mark. This gradual approach prevents burnout and ensures you accumulate a substantial freezer stash without sacrificing your sanity. Give yourself ample time to complete the task effectively and enjoy the process.
Alternatively, if your goal is to incorporate freezer meals into your weekly routine, I highly recommend dedicating one or two days each month to batch prepping. This is far more efficient than doing it weekly, as most freezer meals maintain their quality for several months. By committing a larger block of time once a month, you can stock up on a variety of meals, significantly reducing your weekly cooking obligations and providing immense flexibility.
Recipe Selection and Grocery Shopping
Choosing the right recipes is perhaps the most crucial element of successful freezer meal prep. The key is to select meals that genuinely appeal to you (or your recipients) and align with your available cooking equipment and preferred cooking style. Ask yourself:
- Do you primarily use a slow cooker, Instant Pot, or your oven for most meals?
- Are you looking for recipes that can go straight from the freezer to the cooker, or are you comfortable with overnight thawing in the refrigerator?
- Do you prefer simple, “dump and go” meals, or are you okay with a few extra steps during the cooking process?
- What are your family’s tried-and-true favorites, the comfort foods everyone loves regardless of mood? Think lasagna, hearty stews, casseroles, breakfast sandwiches, or simple marinated chicken breasts. The options are vast, so focusing on crowd-pleasers will ensure your freezer meals are eagerly consumed.
For my personal prep, I prioritized recipes that could be cooked directly from frozen in my Instant Pot or on a sheet pan in the oven. This approach eliminated the need to remember thawing food daily, which I knew would be a mental hurdle during the newborn phase.
I found excellent inspiration from Pinch of Yum’s collection of healthy freezer meals, which offered fantastic variety. Additionally, I adapted these chicken marinades from Sweet Peas and Saffron as a starting point, then experimented to create my own signature blends. You can easily apply this method with any of your favorite homemade or store-bought marinades for delicious, adaptable meals.
Freezer-Friendly Baked Goods and Snacks
Beyond dinners, I recognized the immense value of having baked goods readily available. These served not only as quick breakfasts but also as essential snacks, particularly during breastfeeding, which often brings an “insanely hungry” appetite. Sally’s Baking Addiction is a reliable source for consistently perfect recipes. From her site, I prepared:
- Blueberry Oatmeal Muffins
- Pumpkin Chocolate Chip Bread
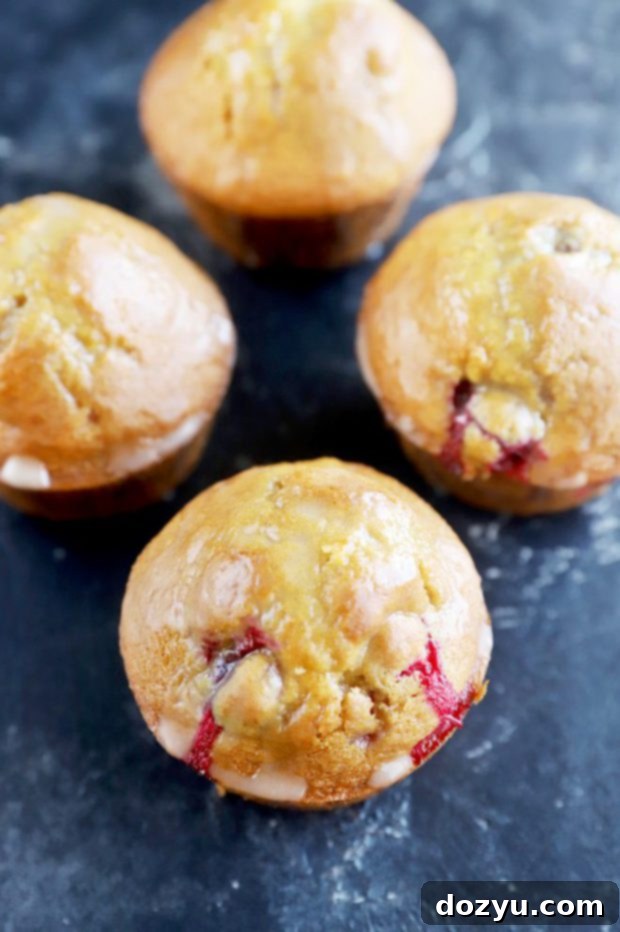
- Cranberry Orange Muffins (I glazed them before freezing for added convenience and flavor)
- Orange Lemon Poppy Seed Muffins
Many Instant Pot recipes are also ideal for preparing in advance and freezing. From my own site, I made double batches of:
- Carnitas
- Chicken Tortilla Soup
- Chicken Tinga
Once you’ve finalized your recipe selection, the next step is to create a detailed grocery list. Be specific with quantities to avoid multiple trips to the store. Check your pantry for staples you already have to prevent overbuying.
Pro Tip: Batch Cooking for Efficiency
When you’re embarking on a large-scale prep session, strategic batching can save you significant time and money. Focus on making similar items at the same time. For instance, if several recipes call for chopped carrots, onions, and celery (the “holy trinity” of cooking), chop them all at once. Similarly, if you’re making multiple stews or chilis, these often share common ingredients like canned tomatoes and beans, allowing you to buy in bulk and streamline your prep.
If you’re creating a variety of chicken marinades, dedicate a single session to preparing all of them. This allows you to purchase a large package of chicken poultry, minimizing waste and maximizing efficiency. Thinking about ingredients in terms of commonalities across your chosen recipes will drastically cut down on prep time and cleanup.
Label Everything Before You Begin
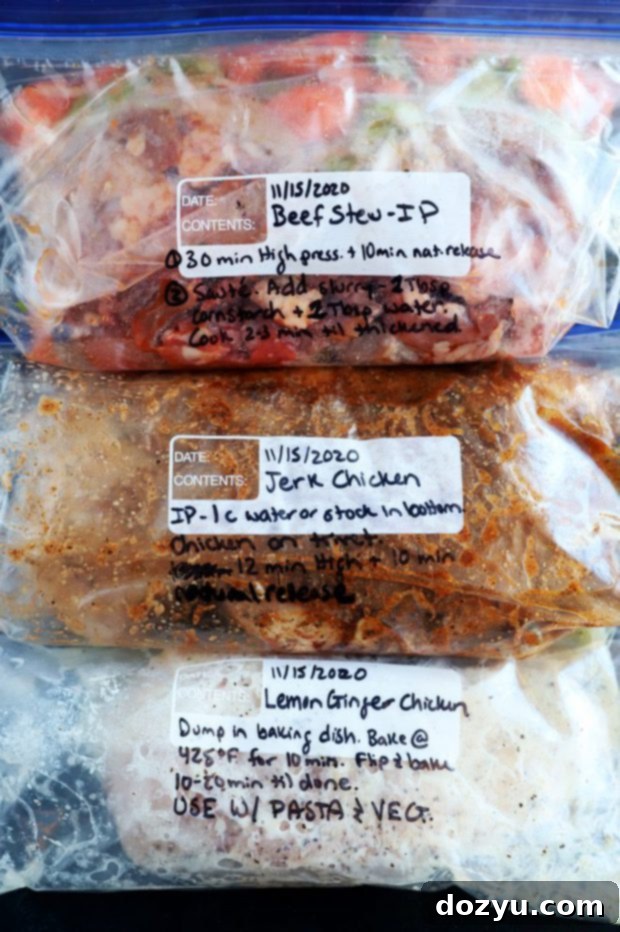
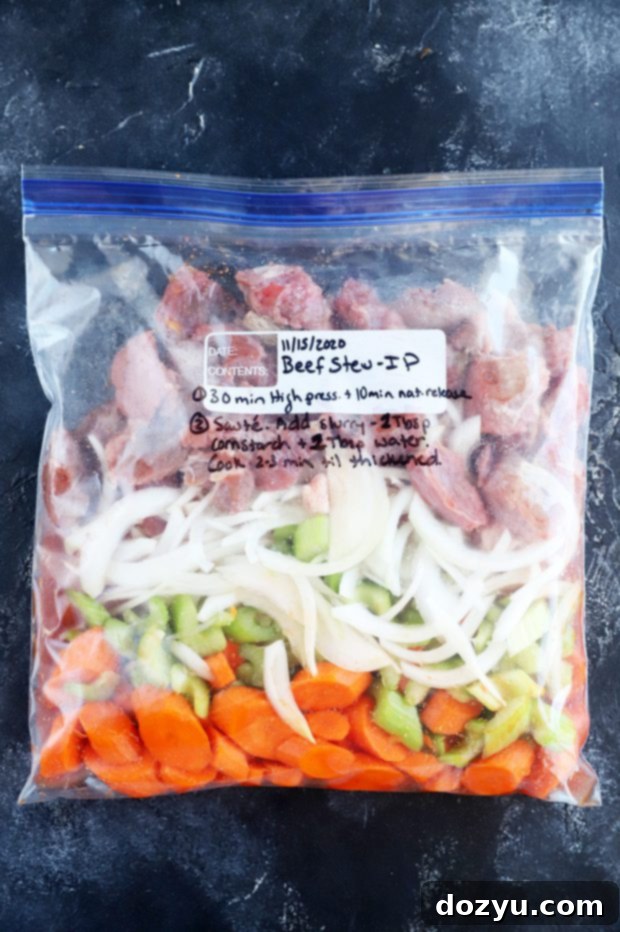
Labeling is not just a suggestion; it’s an absolute MUST for successful freezer meal prep. Having a large permanent marker ready, alongside your chosen storage containers or bags, is crucial. If you’re opting for reusable containers, masking tape or duct tape works wonderfully for external labels, allowing for easy removal later.
First and most important tip: Label all your bags and containers BEFORE you start filling them with food. It’s immensely easier to write clearly on a flat, empty surface than on a lumpy, food-filled bag or container. This simple step prevents smudged ink, illegible notes, and general frustration.
Second tip: Be incredibly thorough with the information you include on your labels. The more detail, the better. Here’s what I recommend including on every single label:
- Date Made: This is vital for food safety and tracking how long the meal has been frozen.
- How Long It’ll Last / Expiration Date: Either list a general guideline (e.g., “Good for up to 3 months”) or a specific “use by” date based on best practices for that type of food.
- Name of the Recipe: Ensure it’s clear and unambiguous. No one wants to play a guessing game with frozen mystery meat.
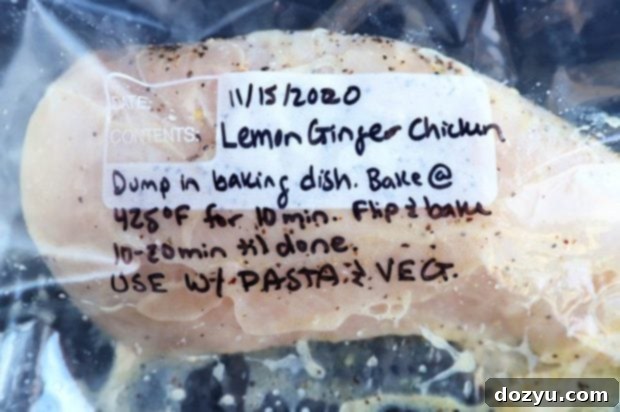
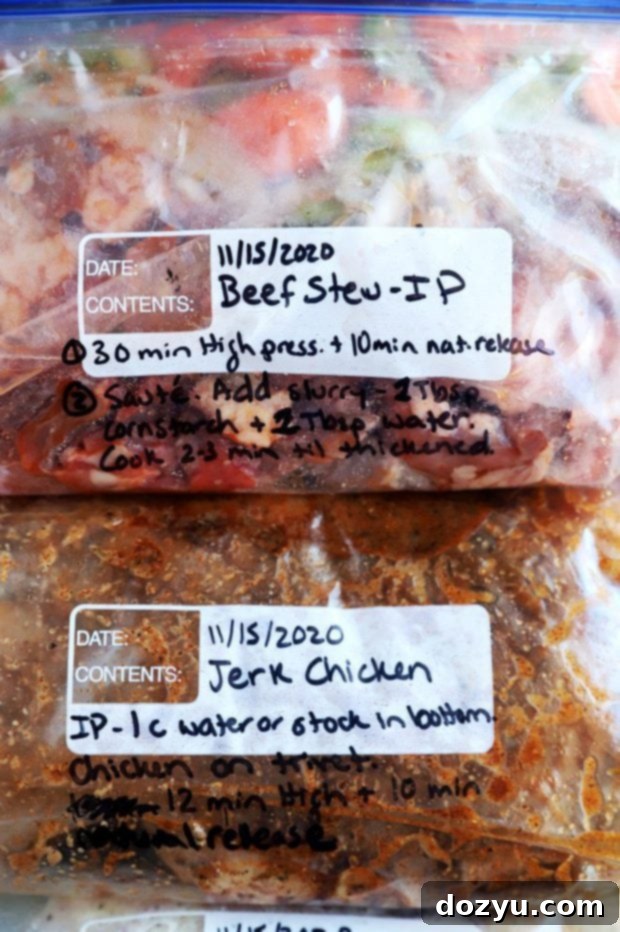
- Cooking Instructions: This is a game-changer for busy nights. Include precise instructions on how to cook the meal (e.g., “Bake at 375°F for 45 minutes,” “Instant Pot: 20 mins high pressure, natural release,” “Thaw overnight, then sauté for 10 minutes”). For baked goods, note how to thaw or reheat. This eliminates the need to remember which recipe you originally referred to or to search for it again.
- List of Other Food Items You Will Need: This helps you create your weekly grocery list effortlessly. For example, if you’re making Instant Pot Chicken Tinga, note down necessary toppings like sour cream, salsa, avocado, cilantro, and tortillas. If it’s a marinated chicken dish, remind yourself to grab rice and vegetables for side dishes. This ensures you have a complete meal ready to go without last-minute scrambling.
Consider using different colored markers for different categories of meals (e.g., red for chicken, green for vegetarian) to make identification even faster once everything is frozen solid. Organized labeling is your secret weapon for making freezer meal prep truly stress-free and effective.
Properly Wrapping and Freezing Baked Goods
While most savory freezer meals can be simply combined in a bag or container and frozen, baked goods require a bit more attention to ensure they retain their delicious taste and texture. Proper wrapping is crucial to prevent freezer burn, which can lead to dry, flavorless results. Following these guidelines will ensure your breakfast goodies and snacks taste as wonderful as they did the day they were baked.
How to Freeze Muffins and Cupcakes
Muffins and cupcakes are perfect candidates for freezer meal prep, offering quick breakfast or snack options. Here’s how to freeze them effectively:
- Cool Completely: This is the most critical step. Ensure your muffins are 100% cool to the touch. Any residual warmth will create condensation inside the wrapping, leading to soggy baked goods and potential freezer burn.
- Individual Wrapping: Wrap each muffin individually. You can use plastic wrap, foil, or even small freezer-safe bags. Individual wrapping provides an extra layer of protection against freezer burn and allows you to grab and thaw just one at a time.
- Bag Them Up: Once individually wrapped, place the muffins into a larger freezer-safe bag (a one-gallon bag typically holds a dozen standard-sized muffins) or an airtight freezer container.
- Labeling: Label the bag or container with the date it was made and a note that they can be stored in the freezer for up to 3 months for best quality.
- Thawing and Reheating:
- Countertop Thaw: For a gradual thaw, simply place them on the countertop overnight.
- Oven Reheat (from frozen): Preheat your oven to 350°F (175°C). Place unwrapped muffins directly on a baking sheet and heat for 10 to 15 minutes, or until warmed through. This method helps crisp up the exterior.
- Microwave Reheat (from frozen): For a quick thaw, microwave individual unwrapped muffins for about 30 seconds. Adjust time based on your microwave and the size of the muffin.
How to Freeze Baked Loaves and Quick Breads (Pumpkin, Banana, etc.)
Baked loaves like pumpkin, banana, or zucchini bread are wonderful to have on hand for breakfasts or tea time. Proper freezing preserves their moist texture:
- Cool Completely: Just like muffins, your baked bread must be entirely cool before wrapping. This can take several hours, or even overnight, depending on the loaf’s density.
- Double Wrap for Protection:
- First, wrap the cooled loaf as tightly as possible in plastic wrap. Ensure no air pockets remain.
- Next, wrap the plastic-wrapped loaf in a layer of heavy-duty aluminum foil. This double layer provides superior protection against freezer burn and external odors.
- Bagging: Place the double-wrapped loaf into a large freezer-safe bag or airtight container.
- Labeling: Label with the date made and that it can be stored for up to three months for optimal freshness.
- Optional: Slice Before Freezing: For added convenience, you can slice the cooled loaf before wrapping and freezing. This allows you to pull out individual slices as needed, rather than thawing the entire loaf. If slicing, stack slices back into loaf shape, then wrap tightly as described above.
- Thawing: To thaw, remove the loaf from the freezer bag. Loosely open the plastic wrap and foil (or keep it completely on if you prefer to retain more moisture) and let it thaw at room temperature for several hours (4-6 hours, or overnight). Once thawed, you can rewrap it more securely and store it at room temperature or slice and lightly toast individual pieces.
By following these specific wrapping and freezing instructions for baked goods, you’ll ensure that every bite is as delightful as if it were fresh from the oven, providing delicious treats whenever you need them most.
 Maximize Space: Freeze Meals Flat
One of the most valuable lessons I learned early in my freezer meal prep journey was the importance of freezing meals flat. Initially, I would haphazardly toss filled bags into the freezer, resulting in oddly shaped, lumpy packages that took up an exorbitant amount of space and made it incredibly difficult to find anything. My freezer quickly became a disorganized mess, driving me absolutely nuts!
Don’t make my mistake! Instead, strategically create space in your freezer to lay your meal bags down flat. This simple technique allows them to freeze into uniform, flat blocks, which can then be stacked neatly on top of one another. This tip is particularly beneficial for flexible items like soups, stews, marinades, and chili, as baked goods typically retain their shape.
To achieve flat freezing:
- Clear a Section: Dedicate a clear, flat surface in your freezer (or even a shelf in your fridge initially if space is tight).
- Use a Baking Sheet: Place filled freezer bags flat onto a baking sheet. The baking sheet provides a rigid surface, ensuring the bags freeze evenly without conforming to the shapes of other items.
- Stack Once Solid: Once the meals are completely frozen solid (this usually takes several hours or overnight), you can remove the baking sheet. The flat, brick-like packages can then be stacked vertically like file folders, or horizontally in neat piles.
This method not only maximizes every inch of your precious freezer real estate but also makes retrieval much easier. You’ll be able to quickly see and access what you need without having to dig through a mountain of irregularly shaped items. Once everything is frozen solid and neatly organized, navigating your freezer becomes a breeze. This thoughtful organization transforms your freezer from a chaotic void into an efficient, ready-to-use pantry, greatly enhancing the overall convenience of freezer meal prepping.
Essential Freezer Meal Prep Tools
To embark on your freezer meal prep adventure successfully, having the right tools on hand can make all the difference in efficiency and enjoyment. Here are the must-haves I rely on:
- Freezer-Safe Storage:
- Gallon Freezer Ziploc Bags: These are indispensable for marinades, chopped ingredients, and many Instant Pot or slow cooker meals. Their flexibility allows for flat freezing, optimizing space.
- Freezer-Safe Containers for Soups: For liquid-based meals like soups, stews, and chilis, sturdy, airtight containers are ideal. Look for ones specifically designed for freezing to prevent cracking.
- Stackable Freezer Containers: Great for casseroles, pasta bakes, or individual meal portions. Stackable designs help maintain organization and maximize vertical space.
- Reusable Silicone Bags: An eco-friendly alternative to plastic bags, these are durable, washable, and perfect for various meal types.
- Labeling Supplies:
- Sharpies (Permanent Markers): Essential for clearly labeling bags and containers with recipe names, dates, and cooking instructions.
- Masking Tape or Freezer Labels: If you’re using reusable containers, tape allows for easy labeling and removal without leaving sticky residue.
- Wrapping Materials for Baked Goods:
- Plastic Wrap: Crucial for tightly wrapping individual baked items to prevent air exposure and freezer burn.
- Aluminum Foil (Heavy Duty): Provides an additional protective layer over plastic wrap for extended freezer storage of baked goods and acts as a shield against odors.
- Cooking Equipment:
- Instant Pot or Slow Cooker: Many freezer meals are designed for these hands-off appliances, making cooking incredibly convenient once you’re ready to eat. My Instant Pot Ultra is a constant companion.
- Half Sheet Baking Pan: Perfect for sheet pan meals that go straight from freezer to oven, or for flash-freezing individual items before bagging.
- High-Quality Knives and Cutting Boards: For efficient and safe chopping of vegetables and proteins during your prep session.
- Measuring Cups and Spoons: Accurate measurements are key for consistent results in your recipes.
Equipping yourself with these essential items will streamline your freezer meal prep process, making it less daunting and far more rewarding. Investing in good quality storage solutions, in particular, will protect your culinary efforts and ensure your meals taste fantastic when it’s time to enjoy them.
Your Freezer Meal Prep Questions Answered
I hope this comprehensive guide has shed light on the simplicity and immense benefits of incorporating freezer meal prep into your life. It truly can transform your approach to weeknight dinners, special occasions, or just those times when you need a little extra support in the kitchen. The joy of simply reaching into the freezer, pulling out a prepped meal, and cooking it with minimal fuss is incredibly satisfying.
Remember, you don’t have to tackle everything at once. Start small, perhaps with a couple of your favorite marinades or a batch of muffins. Once you experience the convenience and delicious results, you’ll naturally want to expand your repertoire.
If you have any lingering questions about freezer meal prep – whether it’s about specific recipes, storage tips, thawing techniques, or anything else that comes to mind – please don’t hesitate to drop them in the comments below. I’m here to help and eager to share more insights and tips with our growing community of freezer meal enthusiasts!
 Maximize Space: Freeze Meals Flat